


If you’ve ever pulled a cake out of the oven only to find it flat, dense, or sunken in the middle, you’re not alone. I’ve been there too. You follow the recipe carefully, measure everything right, yet the cake just doesn’t rise. It’s frustrating, especially when you’ve put in so much effort. The truth is, baking is not just about mixing ingredients and hoping for the best. It’s science. Each element—flour, eggs, sugar, butter, and especially leavening agents—plays a specific role. Even small changes in temperature, timing, or mixing methods can make a big difference.
In this article, we’ll explore the most common reasons your cake might not be rising as expected. From using expired baking powder to overmixing your batter, we’ll break down how these small issues affect your final result. We’ll also explain the science behind rising—what’s happening inside your cake when it’s in the oven—and give you practical tips to help improve every bake. So whether you’re new to baking or just want more consistent results, this guide will help you rise to the occasion—literally.
Read more: Mastering the Art of Roasting: Techniques Every Restaurant Chef Should
5 Restaurants to Explore in South India This Monsoon & Bakrid Weekend
What Is Baking, Really?
Baking is a dry heat cooking method that uses the heat of an oven to turn soft batter or dough into light, fluffy, and flavorful treats. It’s more than just combining ingredients—it’s a process where science plays a key role. As your batter bakes, ingredients like baking powder, eggs, and flour react with each other and the heat to create structure, rise, and texture.
Unlike stovetop cooking, baking relies heavily on precision. The right temperature, timing, and exact measurements all matter. Even a small mistake—like using too much flour or opening the oven too early—can affect your final result. That’s why baking can feel challenging, especially if you’re new to it. But once you understand the basics, it becomes much easier—and a lot more fun.
Why Your Cake Isn’t Rising
Here are the main reasons why your cake might stay flat:
- Old Baking Powder or Baking Soda: These ingredients are key leavening agents. They help your cake rise. But if they’re old, they won’t work. Always check the expiry date. You can test baking soda by adding vinegar to it. If it fizzes, it’s still good.
- You Overmixed the Batter: When you mix too much, the batter becomes tough. The air needed for rising escapes. Mix only until ingredients are combined.
- You Didn’t Preheat the Oven: This is a very common mistake. A cold oven means your cake won’t get the instant heat it needs to rise. Always preheat your oven for at least 10 minutes.
- Wrong Pan Size: If your pan is too large, the batter spreads too thin. That makes the cake cook too fast and stay flat. Use the pan size mentioned in the recipe.
- You Opened the Oven Too Soon: Peeking in too early can cause the cake to sink. Opening the oven door lets out hot air. Wait at least 20–25 minutes before checking.
Know more: 8 Types of Vegetarian Pizza to Try This Weekend (With Extra Cheese, Please)
6 Unexpected Benefits of Eating Jackfruit (Kathal) – Nature’s Spiky Surprise!
Understanding Baking Agents

The rise of a cake depends on something called leavening. Here’s how it works:
- Baking Soda: Needs an acid (like lemon juice or yogurt) to work.
- Baking Powder: Has both acid and base. It only needs moisture and heat.
- Yeast: Used in bread. It produces gas through fermentation.
- Whipped Eggs: Add air for lightness. Great for sponge cakes.
- Creaming Butter and Sugar: Traps air pockets to help rising.
Each type has its role. You must use the right one for the dish you’re making.
Types of Baking Techniques
Let’s explore the most common techniques bakers use:
- Creaming Method: This means beating butter and sugar until fluffy. It adds air. Best for pound cakes and cookies.
- All-in-One Method: Mix everything at once. It’s fast and easy. Works for simple cakes.
- Whisking Method: Use whipped eggs to create volume. Great for sponge cakes.
- Rubbing-In Method: Rub butter into flour using your fingers. Makes crumbly textures like in scones or pie crusts.
- Folding Method: Gently mix light ingredients into heavy ones. Used for soufflés and airy cakes.
Knowing which method to use makes a big difference in your results.
Also check: What Is Caesar Salad, and Why Is It Named After the Roman Emperor?
What Foods Use Baking Science?
Baking isn’t just about cakes. Here are other dishes that rely on the science of baking:
- Bread: Needs yeast and kneading to build gluten.
- Cookies: Spread or stay soft based on butter and sugar ratio.
- Pastries: Use layers of butter to create flakes.
- Muffins: Like cake, but denser and more moist.
- Cupcakes: Small cakes, often lighter in texture.
Each recipe uses its own mix of ingredients, time, and temperature.
Know more: How to Pair Beer with Indian Food: A Desi Guide to Perfect Pints
Texture Troubles and What They Mean
Let’s say your cake rose—but something still feels off. Here’s what your cake is trying to tell you:
- Dry Cake: You used too much flour or baked too long.
- Dense Cake: Batter was overmixed or you used too little leavening.
- Soggy Center: Cake was underbaked or had too much liquid.
- Cracked Top: Oven temperature was too high.
Small tweaks can solve most of these problems.
Smart Baking Substitutes
Sometimes you run out of an ingredient. Here are a few baking swaps that often work:
- Buttermilk: Mix milk with lemon juice.
- Eggs: Use mashed banana or applesauce (1/4 cup = 1 egg).
- Yogurt: Adds moisture and works in place of sour cream.
- Self-Rising Flour: Mix 1 cup all-purpose flour with 1.5 tsp baking powder + 1/4 tsp salt.
Not all substitutes give the same results, but they work in a pinch.
Baking Tools That Matter
Investing in the right tools can take your baking from average to amazing:
- Oven Thermometer: Oven dials are often inaccurate.
- Digital Scale: More accurate than cups and spoons.
- Mixing Bowls: Use glass or metal for better mixing.
- Measuring Spoons and Cups: Essential for consistency.
- Sifter: Helps remove lumps and aerate flour.
Even the best recipe won’t work without proper tools.
Tips From My Kitchen to Yours
Before you put your batter in the oven, ask yourself:
- Did I measure everything correctly?
- Did I preheat the oven?
- Is the pan size correct?
- Did I mix just enough—but not too much?
Following these small checks can prevent major baking fails. I used to skip these steps and wonder why my cake looked like a pancake. Now I know better, and so do you.
In Conclusion
Baking is more than following a recipe—it's about knowing how ingredients react and how heat transforms them. Every cake you bake is a small science experiment. Understanding the role of baking powder, oven temperature, and mixing methods can completely change your results. Whether you’re baking for the first time or the hundredth, learning why things go wrong is the key to getting better. A cake that doesn’t rise isn’t a failure—it’s a clue. It’s a sign to check your basics: fresh ingredients, proper mixing, accurate temperature. Don’t get discouraged. Baking takes practice, patience, and a bit of trial and error. Use each mistake to learn something new. With time, you’ll master the science behind the perfect rise.

With the sun soaring through the skies and people being tortured by its heat, they have started craving their favorite summer treat: ice cream. But this frozen treat, which is loved by all and has a global market size estimated to be around $79.3 billion as of 2023, is becoming increasingly expensive this summer. And the people are confused as to why this treat, which was so affordable in the past, is now more costly than before. There are many reasons for this change. Like the cost for raw materials has increased in recent years, and there is also a shortage of coconut oil, which is one of the most important ingredients in the production of ice cream.
However, the demand for ice cream only keeps increasing year by year. So there is also a disruption in the supply chain. In this article, we’ll be discussing the key reasons behind the surge in ice cream prices and exploring what this situation will mean for both consumers and the ice cream industry.
Why are the prices going up?
Coconut oil, which is the key ingredient in the production of ice cream due to its high melting point, has reached a high price in the market. That is due to the scarcity of coconut oil in the market. Coconut oil is a product made from coconuts, and they are mostly grown in tropical regions near the equator. Indonesia is the largest producer of coconuts in the world. After that comes the Philippines, which is the largest exporter of coconut oil and other coconut products. Some other countries where coconuts are produced are India, Sri Lanka, Vietnam, Thailand, Brazil, and the Caribbean Islands. So, why is there such a short supply of coconuts from these countries?
Indonesia and the Philippines are the largest suppliers of coconuts in the world. They supply around three-quarters of the world’s coconut oil. However, climate changes across these regions caused a smaller harvest of coconuts this time. Due to the El Niño phenomenon, there were drier conditions across Southeast Asia from June to October last year. Coconuts require a warm and humid climate to grow properly. Since it takes about one year for a coconut tree to bear fruit, there was no possibility of getting more coconuts in the small amount of time. This situation is believed to stay in the upcoming years, and there might not be a good harvest for coconuts.
But this reason alone is not responsible for the limited supply and high price of coconut oil in the market. The second main reason is the production of biofuels from coconuts. In the Philippines, the government made it mandatory to blend larger amounts of cocomethyl ester, which is a product derived from coconut oil, into diesel to produce biodiesel. The percentage of blending target was around 2 percent as per last year. So it didn’t have any big impact on the overall supply of coconut oil. However, this percentage was raised to 3% as of October 2024, with the goal to increase the percentage by 4% by the end of 2025 and 6% in 2026. As said by the Philippines’ Energy Secretary Raphael Lotilla: “Implementing the higher biofuels blend is a win-win solution as we promote economic growth, uphold environmental growth, uphold environmental stewardship, and strive for cleaner energy utilization.”
Read more: How Cloud Kitchens are Transforming India’s Food Delivery Revolution
Another reason that is adding to the already unfortunate situation is Chocolate. In the chocolate industry, many manufacturers have started using coconut oil as a substitute for cocoa butter, which is a necessary ingredient for chocolates. The reason is the high price of cocoa butter. Despite the high price of coconut oil, it is still way much cheaper than that of cocoa butter. As the crops of cocoa are also having a short harvest due to climate change, manufacturers started switching to coconut oil to start the production of chocolates. Also, coconut oil is not just a cheap alternative to cocoa butter; it is also a better ingredient in vegan or dairy-free chocolate products.
Also, some other reasons that are affecting the surging price of ice cream may be dairy prices increasing, a shortage of labor, increased demand due to high temperatures, or energy costs.
Read more: 5 Best Restaurants in Delhi/NCR for Birthday Party Celebration
Will this situation continue next year?
As per the situation now, there is a question that arises: “Will this situation continue next year?” Because right now, it seems the main problem is coconut oil. And as per the stats, the climate of the coconut-producing countries is going to remain the same for the upcoming years. Which means less quantity of coconut oil. And the government’s plan to use coconut oil for biofuels is a large-scale plan that will also continue for a long time. And many manufacturers are already substituting cocoa butter for coconut oil. So, what can ice cream-making industries do in such a situation? Because if the market is going to remain the same for a long time, then there is something industries should do, because the manufacturing of ice cream cannot be halted until there is enough supply of coconuts. Also, they’ll have to keep increasing the price of ice cream if there is higher demand and less supply of ice cream.
Know more: From Kitchen to Table: Celebrating Safety Standards in Every bite
What can industries do?
Despite such a situation, where industries do not have a choice but to increase the market price of ice cream due to different factors affecting the production process, there are some changes that the industries can make to not halt the supply of ice cream and also keep the price consistent.
- Use Alternative Fats/Oils: As there is a shortage and increased price of coconut oil in the market, the industries should switch to other alternatives like palm oil, cocoa butter, vegetable shortening, dairy fats, nut-based oils or butter, avocado oil, or olive oil. Each of these oils will give a different texture or flavor to the ice cream, so the substitutes should be tested before using them in the production process.
- Diversify Supply Chains: Instead of relying on one or two specific countries for the supply of coconuts, the industries should also try to make connections with the smaller suppliers of coconuts, like India, Sri Lanka, or Vietnam, to reduce disruption risk.
- Innovation in Product Lines: The ice cream manufacturers should launch new products like coconut-free or vegan product lines in the market. Such premium products will attract the eye of consumers, and who knows, this problem can even become a new strategy to dominate the market by launching a unique product.
Marketing Strategy: After developing a new product, the company needs to properly advertise it so that it can replace previous products and stay in the market. For example, creating a vegan ice cream and advertising it as healthy and a product with fewer calories, so that it gains more attention from people.
Read more: 10 Fiber-rich foods for Diabetics
Are consumers okay with higher prices?

In spite of all the reasons, ice cream lovers are ready to buy ice cream even at a higher cost than before. That is because the lovers of ice cream do not care about the price of their favorite dessert. There is also a vast majority of ice cream lovers who like to eat different varieties of ice cream, so they might just choose options that do not need coconut oil to be made. Even scientists believe that eating ice cream increases the dopamine levels of the brain, so it automatically makes us happy. However, from an industry’s perspective, there should be something done because this situation might not continue forever. Someday, if the cost of ice cream increases too much, the demand for ice cream might decrease.
Read more: EatSure Launches Rajkot’s First Veg-Only Smart Foodcourt at Crystal Mall
What can consumers do?
- People who want to eat ice cream but do not want to pay a high price for it, there are some options out there for you, too.
- Buy ice cream packages in bulk or buy large boxes of ice cream, as they tend to be either on discount or offer better value.
- Making ice cream at home with your friends and family is both a good way to spend time with them and also to make this sweet dessert with others. You can also add healthy ingredients while making the ice cream.
- Supporting local shops can also be a good idea, as they tend to have cheaper ice cream options, and doing this can also help the shop to gain more potential customers and brand value.
- Watch for sales times when the prices of products are low so that you can get a discount on ice cream.
Conclusion
As the cost of ice cream becomes hot this summer, it might be difficult for its lovers to enjoy this sweet delight. But the factors leading to the high price are also to be considered seriously, as they have a very big impact on the ice cream market. Ice cream is not just a treat; it is the essence of summer. It is what people look forward to while waiting for summer. So, there are some steps to be taken so that people can enjoy their favorite treat. Otherwise, eating an ice cream will just become a luxury for people.

The Odisha government is set to impose a ban on the sale and consumption of alcohol and non-vegetarian food within a 500-meter radius of the Jagannath Temple in Puri. This move is aimed at maintaining the sanctity of one of India’s most revered pilgrimage sites while promoting Puri as a spiritual tourism destination. The temple, dedicated to Lord Jagannath, attracts millions of devotees each year, and the surrounding area has long been a hub of religious activity. By implementing this restriction, the government hopes to create a more sacred and peaceful environment around the temple. However, this decision is also expected to bring significant changes to the local economy and lifestyle. Many small restaurants, food vendors, and liquor shops operating nearby may be affected. As this cultural shift unfolds, it raises important questions about religious tradition, local livelihood, and how modern tourism can balance both faith and commerce in a heritage-rich city.
Read more: Rapido Food Delivery Strategy: A New Game Plan to Beat Zomato & Swiggy
What Is the Ban About?
The Odisha government is moving forward with a proposal to ban the sale and consumption of alcohol and non-vegetarian food near the Jagannath Temple. The area under discussion is a 500-meter zone around the temple. This includes local markets, eateries, and shops that cater to thousands of pilgrims every day. The move is part of a broader vision to make Puri a global spiritual destination. The temple is one of the Char Dham pilgrimage sites in India. Keeping the surroundings clean and spiritually pure is a top priority.
The proposed zone covers a large part of Puri’s old town area. This includes popular food joints, seafood stalls, bars, and local shops. Tourists often enjoy coastal delicacies such as prawn curry, fish fry, and chicken thalis in this area. Liquor shops and small bars also operate here, especially catering to beach-goers. Once the ban is enforced, these establishments will have to shut down or shift to areas outside the 500-meter limit.
Know more: The Science of Baking: Why Your Cake Isn’t Rising (And How to Fix It)
6 Unexpected Benefits of Eating Jackfruit (Kathal) – Nature’s Spiky Surprise!
Why Is This Ban Being Proposed?
There are multiple reasons behind the decision.
- First, the Jagannath Temple is a deeply spiritual place. Consuming meat or alcohol goes against the beliefs of many devotees. The temple’s strict vegetarian tradition is rooted in centuries of religious practice. Keeping the area meat- and alcohol-free helps maintain that sacred atmosphere.
- Second, the government wants to improve the image of Puri as a pure pilgrimage site. It is trying to replicate the clean, peaceful atmosphere seen at places like Tirupati and Vrindavan.
- Third, this is part of the larger Srikshetra Heritage Corridor development project. The goal is to make the temple surroundings more tourist-friendly, well-managed, and culturally appropriate.
Many locals support the move, especially those connected to temple services and tourism. They believe a clean and holy environment will bring more pilgrims and boost religious tourism. But others are worried. Some small restaurant owners who sell non-veg food say their earnings will drop. They feel that tourists come to Puri for both the beach and the local food, including seafood. Tourists too, have varied opinions. Some agree that the area near the temple should remain pure and spiritual. Others feel they should have the freedom to enjoy local cuisine and drinks during their stay.
Are There Similar Bans in Other Places?
Yes. Similar restrictions exist in many holy cities across India. For example:
- Varanasi has restrictions near the Kashi Vishwanath Temple.
- Amritsar doesn’t allow alcohol or meat within a certain distance of the Golden Temple.
- Tirupati follows a strict vegetarian zone policy near its temples.
These rules have often helped increase spiritual tourism and keep the temple areas clean and peaceful.
Also check: 5 Ways to Use Garden Cress Seeds (Halim) for Stronger Hair and Bones
Importance of Ambience: How Interior Design Impacts Customer Retention
Impact on Local Economy
The ban may affect businesses that rely on non-veg food and alcohol sales. Small restaurants, beachside food stalls, and liquor shops may have to shut or shift elsewhere. However, the government believes that in the long run, this move will benefit the local economy. As the number of pilgrims increases, demand for vegetarian food, handicrafts, souvenirs, and lodging will grow. Locals may find new business opportunities in areas aligned with temple tourism. Many believe that if properly planned, the ban could lead to the rise of heritage cafes, Ayurvedic restaurants, and wellness shops in place of bars and meat stalls.
If you’ve visited Puri before, you might have enjoyed grilled fish at Swargadwar or sipped on local beer near the beach. That experience is likely to change. Puri is moving from being a mixed tourist destination to a more spiritually focused place. For some, it may mean letting go of the casual beach-town vibe. But for many, it’s a step toward reviving Puri’s original identity — the home of Lord Jagannath.
What Foods Are Going Off the Menu?
Popular items that may disappear from the temple area include:
- Fish curry with rice
- Crab masala
- Prawn pakoras
- Chicken biryani
- Alcoholic beverages
These may still be available outside the restricted zone. But tourists will have to walk further or dine outside the 500-meter area.
Will Shops and Restaurants Adapt?
Yes, many may change their menus and business models. Some restaurants are planning to switch to vegetarian thalis, traditional Odia cuisine, and temple prasadam-style meals. Others may open new shops offering sweets like chhena poda, khaja, or dry snacks for pilgrims. Handicraft stores, ayurvedic shops, and souvenir outlets may also grow in number.
Who Will Enforce the Ban?
The local administration and police will work together to enforce the rules. Violations may lead to fines, closure notices, or loss of licenses. Clear boundaries will be drawn around the temple area. Public signs will inform visitors about the dos and don'ts.
The ban is not just a rule — it is part of a broader cultural shift. It reflects Odisha’s intention to protect the spiritual value of Puri and offer a unique pilgrimage experience. For many, it’s not about what’s banned — it’s about what is being preserved. The Jagannath Temple is not just a religious site. It is a symbol of Odia pride, heritage, and devotion. Keeping its surroundings pure is seen as a step toward honoring that legacy.
The Bottom Line!
The Odisha government’s plan to ban alcohol and non-vegetarian food near the Jagannath Temple in Puri is a bold step that carries deep symbolic meaning. While it may pose short-term challenges for local eateries and liquor vendors, the move is aimed at preserving the temple’s sanctity and promoting spiritual tourism. The ban is expected to enhance the cultural and religious atmosphere, making the area around the temple more peaceful and respectful for pilgrims. For visitors, this means experiencing a quieter, more sacred environment when near the temple. However, Puri’s vibrant coastal life, including seafood and beachside experiences, will still be accessible, just beyond the 500-meter sacred zone surrounding one of India’s most revered spiritual landmarks.

Rapido, one of India’s leading bike taxi platforms, is now entering the food delivery space with a pilot project called Rapido Ownly in Bengaluru. This marks a bold and strategic move for the company, which has already built a strong presence in the mobility sector across more than 100 cities. Known for offering affordable and quick rides on two-wheelers, Rapido now aims to challenge major food delivery giants like Zomato and Swiggy by leveraging its massive fleet and hyperlocal expertise.
Rapido was founded in 2015 by Aravind Sanka, Pavan Guntupalli, and Rishikesh SR. Among them, Aravind Sanka plays a key leadership role as one of the primary faces of the brand. A graduate from IIT-BHU, Aravind started his career in finance and analytics before turning into an entrepreneur. His vision has been focused on solving real-world transportation and delivery issues in India, especially for the masses in Tier 2 and Tier 3 cities. Under his leadership, Rapido has not only grown rapidly but also received strong backing from investors like WestBridge Capital and Prosus. Now, the brand is ready to take on the food delivery market.
Why Rapido Entered the Food Delivery Space
The Indian food delivery market is huge. For years, Zomato and Swiggy have been the top players. But many people feel they overcharge—through high delivery fees, platform charges, and inflated menu prices.
Rapido sees an opportunity. It already has a large fleet of riders across 500 cities. Many of these riders are active during peak hours for ride bookings. The rest of the time, they are free. Rapido plans to use this idle time for food delivery. This helps cut costs and increases rider income. Restaurants also struggle with high commissions from Swiggy and Zomato. Rapido promises a better deal.
Read more: How to Pair Beer with Indian Food: A Desi Guide to Perfect Pints
Top 6 Indian States Where Women Drink the Most: The Rise of the Female Drinker
What Makes Rapido’s Food Delivery Different?

The three orders through Rapido only showed clear differences from traditional apps.
- Flat Fees: There are no surprises here. You pay Rs 25 for orders above Rs 100. For orders above Rs 400, the fee is Rs 50. That’s it. No packaging fee. No surge fee. Even during rain in Bengaluru, the delivery fee stayed flat. That’s a rare thing in Indian food delivery.
- Lower Commissions for Restaurants: Restaurants are loving it. With Zomato or Swiggy, commissions can go up to 30%. Rapido charges only 8–15%. That means restaurants make more profit. It also allows them to keep the prices on Rapido the same as what you pay at their store.
- Same Menu Prices: One major problem with other apps is price inflation. The same dish costs Rs 50 more when ordered online. Rapido changes this with its “offline = online” pricing promise.
Know more: 5 Restaurants to Explore in South India This Monsoon & Bakrid Weekend
Can Rapido Deliver at Scale?

This is a fair question. Running a food delivery business is hard. Fast delivery, accuracy, support—all of this matters. But Rapido already has a solid base. It has over 3–4 million riders in India and operates in 500+ cities. Many riders already understand hyperlocal navigation because of their experience with bike taxis.
If Rapido can build a good app and logistics backend, it can compete with the big players. Our experience with three deliveries showed the app is stable, and real-time tracking works well. The only area where it needs improvement is packaging updates from restaurants and live customer support. But that’s expected in the early stage.
Rapido vs Zomato vs Swiggy: Who Wins on Pricing?
Here’s a simple breakdown from our hands-on usage:
| Feature | Rapido | Zomato | Swiggy |
|---|---|---|---|
| Delivery Fee | Rs 25–Rs 50 (Flat) | Rs 30–Rs 80 (Dynamic) | Rs 30–Rs 85 (Dynamic) |
| Menu Prices | Same as restaurant | Often marked up | Often marked up |
| Commission Charged to Restaurants | 8–15% | 25–30% | 25–30% |
| Platform Charges | None | Rs 5–Rs 20 | Rs 5–Rs 25 |
| Availability | Bengaluru (pilot) | Nationwide | Nationwide |
From a customer’s side, the pricing on Rapido is clearly more transparent. For restaurants, it’s cheaper too.
Also check: 12 Delicious High-Protein Foods to Eat Daily for a Healthier You
Funding and Future Plans
Rapido, the two-wheeler ride-hailing giant operating across 100+ Indian cities, is now venturing into the competitive food delivery market. Backed by a recent $30 million investment from Prosus and following a larger $200 million funding round led by WestBridge Capital, the company is gearing up for major expansion. With strong financial support and a vast logistics network, Rapido plans to take its new food delivery vertical nationwide. The goal? To reach 500 cities in 2025. This bold move signals Rapido’s ambition to become a key player in yet another sector of India’s fast-growing digital services market.
Check more: How Cloud Kitchens are Disrupting the Indian Restaurant Industry
Is Rapido’s Disruption Real or Just a Temporary Buzz?
That depends on three things:
- Speed of expansion: Can Rapido launch in 20–30 cities quickly and maintain quality?
- Restaurant support: Will enough restaurants join the platform to give customers more choice?
- Customer trust: Can Rapido offer great support, fast delivery, and smooth refunds like its competitors?
The early signs are promising. Rapido is not just chasing growth—it’s changing how food delivery pricing works. It’s solving real pain points for both restaurants and customers. But the road ahead is not easy. Zomato and Swiggy have deep pockets and years of learning. They will respond. They may lower their commissions or reduce fees to hold ground.
The Road Ahead!
Rapido is stepping into one of India’s most competitive spaces—food delivery. With its flat delivery fees, low restaurant commissions, and a strong fleet of riders already in place, the company is taking a fresh approach. Its pilot program, Rapido Ownly, is now live in Bengaluru, offering meals at real restaurant prices with no hidden charges. If you’re in Bengaluru, it’s worth trying to compare the experience. For those in other cities, the rollout could be coming soon. The big question is: can Rapido maintain this model at scale and compete with giants like Zomato and Swiggy? The coming months will be crucial in determining whether Rapido becomes India’s next big delivery player or just a passing attempt.

Mangoes are called the “king of fruits” in India. Their juicy, sweet, and vibrant flavors signal the arrival of summer. As markets and homes brim with these golden delights, a common ritual unfolds in many Indian households: the soaking of mangoes in water before they're enjoyed.
For those unfamiliar, this might appear to be a mere habit passed down through generations. However, this seemingly small step holds significant reasoning beyond just tradition. The practice of soaking mangoes isn't simply an old custom; it's deeply rooted in health benefits. This age-old wisdom, often passed down by mothers and grandmothers, highlights a mindful approach to consuming this beloved fruit, ensuring that every bite is not only delicious but also contributes positively to one's well-being. It’s a testament to how traditional practices often carry profound, practical advantages. Let’s explore why this practice matters and how it can make a difference in your summer diet.
Read more: Top 4 Ways to Use Betel Leaves for Daily Detox
6 Common Fruits That Have the Highest Amount of Fibre: Your Tasty and Simple
The Traditional Secret: Why Your Grandma Always Soaked Mangoes
As a child, I would ask my nani why she always put mangoes in a bowl of water before giving them to us. Her answer was Beta, they are garmi wale phal.” In India, there’s a common belief that mangoes increase body heat. Ayurveda, the ancient Indian science of healing, supports this too.
Mangoes are known to be “heat-producing” or “taasir garam” in nature. This means they can raise your body temperature when eaten in large amounts. Soaking them in water helps reduce this effect. It’s believed to balance the heat and make mangoes safer and cooler for the body.
The Science Behind Soaking: Not Just a Ritual

Apart from tradition, there is science behind soaking mangoes. Here are a few reasons why it’s good for you:
- Removes chemical residue: Soaking helps wash away pesticides and ripening chemicals like calcium carbide from the mango's skin. This reduces your exposure to potentially harmful toxins, ensuring a cleaner fruit.
- Reduces phytic acid: Mangoes can contain phytic acid, an anti-nutrient that hinders mineral absorption. Soaking helps diminish its levels, allowing your body to better absorb essential nutrients from the fruit.
- Lowers internal heat: Mangoes are believed to generate body heat, which can cause acne or rashes. Soaking them before eating helps neutralize this effect, preventing heat-related discomfort.
- Improves digestion: Soaked mangoes become gentler on your stomach. This practice aids digestion, reducing the likelihood of issues like acidity, bloating, and gas after enjoying the fruit.
This small step makes mangoes not only tastier but also gentler on your body.
Know more: What Happens When You Consume 1 Avocado Daily?
Nutrition Facts: What’s Inside a Mango?
Mangoes are packed with nutrition. Here’s what you get from one medium-sized mango:
- Vitamin A: Great for eyes and skin.
- Vitamin C: Boosts immunity.
- Folate: Important for cell growth.
- Fiber: Helps digestion.
- Antioxidants: Like beta-carotene, which protect your cells from damage.
Soaking mangoes doesn’t remove or reduce these nutrients. It simply helps your body use them better.
Say Goodbye to Bloating & Breakouts
If you’re someone who often gets bloated or breaks out during mango season, soaking might help. Mangoes, especially when unsoaked, can cause:
- Heat boils
- Acne or oily skin
- Gas and bloating
- Acidity
Soaking mangoes in water helps cool down their effect on the body. I used to get acne every summer, and ever since I started soaking mangoes, I noticed fewer breakouts. It’s a small trick with a big impact.
Myth vs. Fact: Do Mangoes Really Cause Pimples?
Many people believe that mangoes cause pimples. This isn’t fully true. Pimples happen due to excess oil production and clogged pores. But mangoes can increase body heat, which might trigger oiliness or inflammation for some people.
- Fact: Soaking mangoes reduces this heating effect.
- Myth: Eating mangoes alone causes pimples for everyone.
If you’re prone to acne, soaking can make mangoes safer for your skin.
Also check: 15 Incredible Ways Beetroot Boosts Your Health & Wellness
Six Benefits of Starting Your Day with Okra Water
How to Soak Mangoes the Right Way
It’s simple. Here’s what you should do:
- Take a large bowl or tub
- Fill it with room temperature water
- Place the mangoes fully submerged
- Leave them for 30 minutes to 2 hours
- Drain and wipe before cutting
Pro Tip: Some people also add a pinch of salt or turmeric to the water. This can help clean the fruit further and remove more residue.
Soaked vs. Unsoaked Mangoes: What’s the Real Difference?
Let’s compare the two:
| Feature | Soaked Mangoes | Unsoaked Mangoes |
|---|---|---|
| Body heat | Lowered | Higher |
| Pesticide residue | Reduced | Possible residue remains |
| Digestion | Easier | May cause bloating |
| Acne/skin issues | Less likely | More likely |
| Taste | Slightly milder | Naturally intense |
Soaking doesn’t change the flavor much. It just makes it safer and cleaner to eat.
Check more: 6 Unexpected Benefits of Eating Jackfruit (Kathal) – Nature’s Spiky Surprise!
Use Soaked Mangoes for These Yummy Recipes
Soaked mangoes can be used just like normal mangoes. They blend better, too! Try these recipes:
- Mango Smoothie – Blend soaked mango with yogurt, honey, and chia seeds
- Mango Lassi – A cooling drink made with curd and cardamom
- Aam Panna – A tangy raw mango cooler perfect for heat relief
- Mango Salsa – Diced mango with onion, chili, lime, and coriander
- Mango Chia Pudding – A great breakfast or snack option
You’ll get the taste you love without the worry of skin or digestion issues.
The Bottom Line!
Soaking mangoes before you dive into their juicy sweetness might seem like a small thing, but it's a tradition that truly pays off. It's not just about a habit; it's about connecting with a timeless practice that brings real benefits. Think of it: this simple soak can actually help your body better absorb the mango's goodness, and for many, it brings a sense of calm and peace of mind knowing they're enjoying their fruit in the best way. Whether you're savoring just one or indulging in a whole batch, taking that moment to let them soak in water is a little ritual that still makes perfect sense in our busy world today. It’s a small step that leads to a much more delightful and wholesome mango experience.

Grilling transcends mere cooking; it's an immersive experience. From searing succulent steaks on a leisurely weekend to charring vibrant vegetables for a wholesome dinner, a foundational understanding of grilling basics is key to achieving perfection. This comprehensive guide is designed to transform you into a true grill master, regardless of your current skill level.
We'll meticulously walk you through every essential aspect, ensuring you gain the confidence and expertise to conquer any grilling challenge. Whether you're taking your first tentative steps into the world of open-flame cuisine or seeking to refine existing techniques, this resource offers invaluable insights. Prepare to unlock the secrets to perfectly cooked food, enhanced flavors, and unforgettable culinary moments right in your own backyard. Get ready to elevate your grilling game and impress friends and family with your newfound mastery.
Read more: The Science of Baking: Why Your Cake Isn’t Rising (And How to Fix It)
Mastering the Art of Roasting: Techniques Every Restaurant Chef Should
What is Grilling?
Grilling involves cooking food over direct heat, typically from a flame or hot coals. This method cooks food rapidly, imparting a distinct smoky flavor. The characteristic grill marks often seen on food not only enhance its visual appeal but also contribute to its taste.
Grilling's popularity stems from its ability to lock in flavors while requiring minimal oil. It excels at bringing out the best in both meats and vegetables. Furthermore, it's an excellent choice for outdoor cooking and social gatherings, adding a fun and interactive element to meals. This simple yet effective technique offers a delicious and often healthier way to enjoy a wide variety of dishes.
Grill vs Barbecue: What’s the Difference?
Many people confuse grilling and barbecuing. But they are not the same.
- Grilling is fast. It uses high heat and is good for small cuts of meat like burgers or chicken breasts. You cook directly over the flame.
- Barbecuing is slow. It uses low heat over a longer time. It’s better for big cuts of meat like ribs or brisket. Barbecue is usually done with a smoker or covered grill.
So remember: grilling is hot and fast, barbecuing is slow and smoky.
Know more: 6 Unexpected Benefits of Eating Jackfruit (Kathal) – Nature’s Spiky Surprise!
Types of Grilling Techniques

Different grilling methods work for different foods. Here are the main types:
- Direct Grilling: You place food right over the heat. This is best for quick-cooking foods like hot dogs, burgers, and seafood.
- Indirect Grilling: You keep the heat on one side and place the food on the other. This is perfect for whole chickens or roasts. It’s slower but cooks more evenly.
- Reverse Searing: This starts with indirect heat and finishes with direct heat. It gives meat a nice crust while keeping it juicy inside.
- Smoking: Food is cooked slowly using smoke. This adds a deep, rich flavor. Great for ribs, brisket, and even cheese.
- Rotisserie Grilling: Food is cooked while turning slowly. Best for whole chickens, lamb legs, or even pineapples.
What Foods Work Best with Grilling?
Almost anything can go on the grill. Here’s what works best:
- Meats: steaks, burgers, sausages, lamb chops
- Chicken: breasts, thighs, wings, whole chicken
- Seafood: prawns, fish fillets, lobsters
- Vegetables: bell peppers, zucchini, corn, mushrooms
- Fruits: pineapple, peaches, watermelon slices
Don’t forget to oil the food, not the grill. This helps prevent sticking.
Also check: 7 Healthy Chicken Dishes to Maintain Your Diet
High Protein Indian Meals You Should Try
When to Use Which Grilling Method
- If you’re short on time, use direct grilling.
- If you’re cooking a large piece of meat or want slow cooking, go for indirect grilling.
- Want that perfect steak? Try reverse searing.
- Planning a Sunday cookout with friends? Add smoking or rotisserie for flavor and fun.
Grilling Equipment You’ll Need
You don’t need fancy tools, but the right ones make it easier:
- Tongs – for flipping food
- Spatula – for burgers and fish
- Grill brush – for cleaning
- Meat thermometer – for perfect doneness
- Aluminum foil – for wrapping or indirect cooking
Types of Grills:
- Gas Grill – easy and fast
- Charcoal Grill – smoky flavor
- Electric Grill – great for indoors
- Pellet Grill – adds wood-fired taste
Choose based on your space, budget, and taste.
Marinades, Rubs, and Sauces
- Marinades: These soak into the food and add flavor. Use oil, acid (like lemon juice), and herbs. Marinate chicken for at least 30 minutes, beef for up to 4 hours.
- Dry Rubs: These are spice mixes rubbed directly on the meat. They give a nice crust when grilled.
- Sauces: Use BBQ sauce, garlic butter, or yogurt-based dips. But add sauces at the end. If added too early, they can burn.
Smart Grilling Tips for Beginners
- Preheat your grill – it ensures better sear
- Clean the grates – prevents old food from sticking
- Use the hand test – hold your hand 5 inches above the heat. If you can’t keep it there for more than 2-3 seconds, it’s hot enough
- Don’t press the meat – it loses juices
- Let meat rest after grilling – keeps it juicy
Grill Science: Why Does It Taste So Good?
Grilling creates the Maillard reaction. This is when heat changes the proteins and sugars in food, giving it that brown, crispy crust.
Char marks are not just pretty. They add a smoky, savory flavor. Use a thermometer to check doneness.
Here’s a quick meat temperature guide:
- Chicken: 75°C
- Beef (medium): 63°C
- Fish: 60°C
- Pork: 71°C
Common Grilling Mistakes to Avoid
- Flipping too often
- Not preheating the grill
- Using cold meat straight from the fridge
- Adding sauce too early
- Overcrowding the grill (leads to uneven cooking)
Simple Grilling Menu Ideas
Hosting a party or weekend lunch? Try these:
- Meat lovers: steaks, chicken wings, lamb skewers
- Veggie menu: grilled mushrooms, corn, paneer, and stuffed peppers
- Tropical touch: grilled pineapple or peaches with honey
- Seafood special: lemon-herb prawns or fish tikka
Make sides like grilled garlic bread or salad for a complete meal.
Final Thoughts
Grilling is surprisingly straightforward once you grasp the fundamentals. Equipped with the right tools, proper technique, and a little patience, you'll soon be preparing grilled masterpieces like a seasoned pro. Don't shy away from experimenting with diverse flavors and culinary styles; that's where the real fun begins! Whether you're whipping up a quick meal for yourself or hosting a lively gathering, grilling elevates the entire food experience, making it more enjoyable and memorable for everyone. So, seize the opportunity this weekend—fire up your grill and embark on a delicious adventure. Your taste buds will undoubtedly thank you for the incredible flavors and the fantastic time spent mastering this rewarding cooking method.

Betel leaves, widely seen in traditional Indian homes, are much more than a symbol of culture or an ingredient in paan. These heart-shaped green leaves are loaded with powerful natural properties that can do wonders for your health. Known for their detoxifying effects, betel leaves have been used in Ayurveda for centuries to support digestion, boost metabolism, and flush out toxins from the body. They are rich in antioxidants and have anti-inflammatory and antibacterial benefits, making them a great natural tool for daily wellness. The best part is that you don’t need complicated recipes or expensive ingredients to include them in your routine. Betel leaves can be used in simple ways that easily fit into your lifestyle.
Whether it’s through a detox drink, a light meal, a refreshing smoothie, or a gentle steam, these leaves can help cleanse your system and leave you feeling lighter and more energized. In this article, we’ll walk you through the top 4 ways to use betel leaves for daily detox. Each method is easy, practical, and designed for everyday use. Let’s get started.

1. Morning Elixir: Betel Leaf Detox Water
One of the easiest ways to enjoy the benefits of betel leaves is by making detox water. It’s a perfect drink to start your day with. This water helps clean your system, supports liver function, and improves digestion. Betel leaves have anti-bacterial and anti-inflammatory properties. They help your body get rid of toxins naturally. When combined with warm water or soaked overnight, they act as a gentle internal cleanser.
How to Make It:
- Take 2 fresh betel leaves. Wash them well.
- Tear the leaves into small pieces.
- Add them to a glass or copper jug filled with 1 glass of water.
- Let it sit overnight.
- Drink it first thing in the morning, before breakfast.
Optional Add-ins:
- A few tulsi (holy basil) leaves for added immunity
- A slice of ginger to fight bloating
- A spoon of ajwain (carom seeds) for gas and acidity
- Lemon juice for a little extra vitamin C
Read more: 5 Indian Spices You Should Never Skip in Daily Cooking
2. Raw & Real: Betel Leaf Salad Wraps
Looking for a healthy lunch or mid-day snack? Betel leaf wraps are a fresh and crunchy way to add greens to your meal. They work just like lettuce wraps but have their own herbal flavor and benefits. These wraps are rich in fiber and antioxidants. Betel leaves support gut health, improve digestion, and freshen your breath at the same time. The raw veggies add vitamins and hydration to your diet. Make a quick dip with curd, mint, and a dash of black salt. It goes perfectly with the herbal taste of betel.
How to Make It:
- Take fresh, medium-sized betel leaves. Wash and dry them.
- Prepare a filling with sliced cucumbers, grated carrots, sprouts, and a pinch of rock salt.
- Place the filling in the center of each leaf and roll it up like a wrap.
- You can also add hung curd or hummus for extra creaminess.
Know more: 6 Common Fruits That Have the Highest Amount of Fibre: Your Tasty and Simple
What Happens When You Consume 1 Avocado Daily?
3. Betel Green Smoothie Shot (With a Tropical Kick)
If you’re someone who loves smoothies, this quick green shot is a must-try. It’s a fast way to consume raw betel leaves without chewing them. The fruit balances the strong taste of the leaf and adds natural sweetness. This smoothie helps cool the body, clear up the skin, and support liver function. The vitamin C in pineapple and amla boosts immunity, while betel leaves aid digestion. You can have it as a mid-morning drink or post-workout refreshment.
How to Make It:
- Take 1-2 betel leaves.
- Add 3-4 cubes of pineapple or half an apple.
- Add a few mint leaves and a small piece of amla (Indian gooseberry).
- Blend everything with half a glass of cold water.
- Optional: Add chia seeds or flax seeds for extra fiber.
4. Steam Therapy: Betel Leaf for Skin and Sinus Detox
You don’t always have to eat betel leaves to enjoy their benefits. You can also use them in a simple steam therapy to clear your skin and sinuses. It’s especially helpful during weather changes or after a long day outside in pollution. This therapy opens up your pores and cleans out dirt, pollution, and toxins. It’s also great for clearing blocked noses or mild headaches caused by sinus issues. The anti-bacterial properties of betel leaves help your skin feel fresh and clean.
How to Do It:
- Boil 4-5 betel leaves in 1 litre of water.
- Once the water is boiling and steaming well, turn off the heat.
- Place your face above the steam. Cover your head with a towel to trap the steam.
- Inhale deeply for 5-7 minutes.
Optional Add-ons:
- Add a few cloves to the water to kill bacteria.
- Use eucalyptus oil or neem leaves for a stronger detox.
Also check: What Is Caesar Salad, and Why Is It Named After the Roman Emperor?
These 7 Foods Can Help You Cool Your Stomach in Summer
From Paan to Power Detox
For years, betel leaves have been associated mainly with paan or traditional rituals, often overlooked as a powerful health ingredient. But if you peek into your grandmother’s kitchen remedies, betel leaves were more than just a post-meal mouth freshener—they were a trusted go-to for digestion, cough, and body cleansing. In ancient Ayurvedic practices, these leaves were valued for their antibacterial, anti-inflammatory, and detoxifying properties. Today, we are rediscovering this humble leaf as a natural detoxifier that can fit effortlessly into modern lifestyles. Whether infused in water, wrapped around raw veggies, or blended into a smoothie, betel leaves are making a comeback—as a daily wellness hero straight from your grandma’s healing handbook.
Green Gold on a Plat
Betel leaves may look simple, but they carry the power of what many now call "green gold." Loaded with antioxidants and essential oils, they support digestion, clear toxins, and refresh the body from within. While trendy detox drinks and powders flood the wellness market, this traditional leaf quietly holds its ground with centuries of proven benefits. Betel leaves are natural, affordable, and incredibly versatile—you can drink them, eat them raw, or even inhale their steam. Most people overlook their potential because they’re used to seeing them in paan. But once you discover how these leaves can boost your daily detox, they quickly become a part of your healthy routine—earning their rightful place as the green gold of Ayurveda.
Ready to Leaf Your Toxins Behind?
Nature has always had simple solutions for complex problems. Betel leaves are one such gift—affordable, accessible, and full of healing power. Whether you drink them, eat them, or steam with them, they offer an easy way to detox and feel lighter from the inside out. You don’t need to try all four methods at once. Pick the one that suits your lifestyle. Even small changes can lead to big results over time. Give it a week, stay consistent, and notice how your body feels. These are not just health hacks; they’re part of a larger lifestyle shift—towards natural, mindful living.

Running a restaurant is not just about serving delicious meals, it’s about creating a safe and trustworthy environment for your guests. While flavour and presentation matter, food safety is what keeps customers coming back with confidence. One small hygiene slip can lead to serious consequences, from foodborne illnesses to bad reviews, or even legal trouble. Whether you own a cozy café, a cloud kitchen, or a premium dining space, food safety should always be a top priority. It affects every part of your operation—from how ingredients are stored and handled to how dishes are served. Clean kitchens, trained staff, and safe cooking practices are essential, not just for passing inspections but for building a brand people can rely on.
Food safety is more than a set of rules; it’s a daily commitment and a responsibility. Every customer who walks through your door trusts you with their health, and that trust begins in the kitchen. When hygiene and safety become part of your restaurant’s core culture, you create a solid foundation for success. In this guide, we’ll cover seven essential food safety practices that every restaurant must follow to protect its customers, improve operations, and uphold its brand’s reputation.
Read more: Outdoor vs. Indoor Dining: Which Experience Stands Out?

1. Train Your Team Like Pros
Food safety starts with your people. If your team doesn’t know the right way to handle food, mistakes will happen. Every staff member—from kitchen helpers to servers—must be trained in food hygiene. You should hold training sessions every few months. Make sure your team understands proper handwashing, food storage, cooking temperatures, and cleaning routines. If possible, get your staff certified in basic food handling courses. In India, the FSSAI offers training modules that are easy to access.
2. Temperature Checks
Most bacteria grow when food is kept at the wrong temperature. This can turn a good dish into a health risk. Cold foods should be kept below 5°C. Hot foods should be above 63°C. This prevents harmful bacteria from growing. Keep a daily temperature log for your refrigerators and freezers. Invest in digital thermometers and check the core temperature of cooked dishes before serving.
Pro Insight: Some modern kitchens use Bluetooth-enabled temperature tools. They send alerts when food goes above the safe limit. It helps catch problems before they become serious.
3. Cleanliness Isn’t Optional—It’s Branding
If your kitchen is dirty, your brand suffers. Even if your food is delicious, a dirty space leaves a bad impression. Clean every surface before and after each shift. Mop floors daily. Sanitize sinks, prep counters, storage areas, and equipment. Wash cloths and aprons daily. Use separate cleaning cloths for the kitchen and dining area. Don’t forget your bathrooms and entryways. Many customers judge hygiene by how clean the restrooms are.
Real Experience: A restaurant in Bengaluru got a bad Google review just because the toilet area was messy. That one review hurt their ratings for a month.
4. Cross-Contamination = Crossed Lines
Cross-contamination is one of the most common food safety mistakes in restaurants. It happens when bacteria from raw food touch cooked food or surfaces. The best way to stop this is by using color-coded chopping boards and knives. For example, red for raw meat, green for vegetables, and blue for seafood. Always wash your hands after handling raw meat or eggs. Clean surfaces between prep jobs. Store raw and cooked items separately in the fridge.
Kitchen Hack: Create a “Raw Only” prep station in your kitchen. This avoids confusion, especially during busy hours.
5. Label Everything—Even the Obvious
In a busy kitchen, unlabeled food can cause big problems. You might serve expired ingredients or waste fresh stock. Use the FIFO method—First In, First Out. Always use older stock first. Label every container with the date it was opened or prepared. Have a fixed system for dry goods, dairy, and frozen items. You can even use simple QR codes or stickers to keep track.
Know more: 6 Unexpected Benefits of Eating Jackfruit (Kathal) – Nature’s Spiky Surprise!
6. Pest Control Isn’t a One-Time Job
A single rodent or cockroach sighting can damage your reputation. Pest control is not something you do once a year—it’s ongoing. Get your restaurant checked every month by a professional. Keep your trash bins covered. Don’t leave food scraps lying around. Fix water leaks fast, as damp areas attract pests. Seal cracks and install mesh on windows if possible. Store dry items in sealed containers.
Did You Know? Some cities in India now require proof of pest control to renew your food license.
7. Audits Are Your Best Friends
You might think your restaurant is clean. But a proper audit will always catch things you miss. Hold internal hygiene audits every month. Use checklists for each zone—kitchen, storage, service area, restrooms, etc. You can also hire a food safety consultant to review your operations once a year. Keep records of all your audits and cleaning logs. They’re helpful during inspections and build a culture of accountability.
Smart Strategy: Some brands keep a “Food Safety Scoreboard” in the staff area. It motivates everyone to maintain standards.
See Your Space Like a Customer
One of the easiest ways to judge your restaurant’s hygiene is to step into it like a guest. Walk through the entrance, sit at a table, and look at everything from the customer’s point of view. Does the place smell fresh? Are the floors clean or sticky? Is the tableware spotless? These small but important details can shape a customer’s opinion even before the food arrives. Sometimes, we miss things because we see them every day. That’s why it helps to ask trusted friends, regulars, or even your staff to give honest feedback. A fresh perspective can highlight overlooked areas and give you valuable insights to improve cleanliness and service. Small changes can make a big difference in customer trust.
Also check: Top 10 Health Benefits of Eating Dry Fruits Daily
7 Light Breakfast Ideas to Enjoy in Summer
When in Doubt, Throw It Out
One golden rule in the food business is simple: When in doubt, throw it out. If something smells off, looks unusual, or you’re unsure about how long it’s been stored, don’t take a chance. Expired or questionable ingredients can lead to serious foodborne illnesses. Trying to save a small amount of money by using such items is never worth the risk. One bad dish is all it takes to damage your reputation, lose loyal customers, and face heavy penalties—or even legal action. Your responsibility is to serve safe food every single time. Always choose safety over savings. It’s not just about protecting your restaurant—it’s about protecting the people who trust you with their health every day.
Check more: How to Apply for an FSSAI License for Your Cloud Kitchen in India
7 Chinese Dishes That Can Be a Healthy Option for Your Diet
Gloves Don’t Equal Clean Hands
There is a common myth that wearing gloves automatically means clean hands. However, if staff don’t change gloves between tasks, it can actually spread more germs than bare hands. To maintain proper hygiene, it’s important to:
- Train your team to wash their hands regularly, even when wearing gloves
- Change gloves frequently, especially when switching between different tasks or food types
- Avoid touching non-food surfaces while wearing gloves to prevent contamination
- Use clear posters and reminders in the kitchen to reinforce these practices
- Encourage staff to understand that gloves are a tool, not a substitute for handwashing
By following these steps, you ensure that gloves help improve food safety rather than create new risks. Proper hand hygiene remains one of the most effective ways to prevent cross-contamination.
The Bottom Line!
Food safety is more than just following rules—it’s a sign of respect. Respect for your customers’ health, your team’s hard work, and the future of your restaurant. When food safety becomes a daily habit, many positive things follow naturally. You’ll see better reviews as customers feel confident dining with you. Loyal customers will return because they trust your standards. Complaints and health risks will drop significantly. Your staff will also take pride in working in a clean, safe environment. This creates a positive atmosphere for everyone. By making these seven essential food safety practices part of your everyday routine, you build a strong foundation for long-term success and a reputable brand that stands out in the competitive restaurant industry.

Roasting is more than just cooking food in dry heat. For professional chefs and restaurant kitchens, it's a technique that brings out deep flavors, golden textures, and rich aromas. Whether it’s a perfectly cooked chicken or crisp seasonal vegetables, roasting can elevate the simplest ingredients into something extraordinary.
In this article, we’ll break down everything you need to know about roasting — the types, techniques, tools, when to use what, and how to master it in a professional kitchen. If you're a chef looking to refine your roast game, or a restaurant owner trying to improve your kitchen's efficiency and flavor output, this guide is for you.
Read more: 5 Restaurants to Explore in South India This Monsoon & Bakrid Weekend
What is Roasting?
Roasting is a dry-heat cooking method that uses hot air, typically in an oven, to cook food. It caramelizes the outside and locks in the flavor. This method is used mostly for meats and vegetables. The key here is high temperature — it browns the surface and gives a crispy texture while keeping the inside juicy and tender.
Unlike baking, which usually uses lower temperatures and covers items like pastries or breads, roasting is for bold, savory dishes. And compared to grilling, it gives you more even cooking and better moisture control.
Know more: High Protein Indian Meals You Should Try
How to Pair Beer with Indian Food: A Desi Guide to Perfect Pints
The Science Behind Roasting
The magic of roasting lies in the Maillard reaction — a chemical process that happens when proteins and sugars react under high heat. This creates that brown, crispy surface we love in roasted meats and vegetables.
Roasting also removes moisture. But when done right, it only dries out the surface, leaving the inside juicy. For chefs, understanding temperature and timing is key. Roast at 160–220°C depending on what you’re cooking. High heat gives crispiness, while lower heat helps cook thicker cuts more evenly.
Types of Roasting Every Chef Should Know

In a restaurant kitchen, you may need to use different roasting methods based on ingredients and serving size. Here are the main types:
- Open Roasting: The classic method. The food is placed uncovered in an oven. Best for meats and vegetables.
- Closed Roasting: Food is covered with foil or a lid. This keeps in moisture. Used for tougher meats or recipes that need braising.
- Slow Roasting: Low temperature (around 120–150°C) for long hours. Perfect for large roasts like briskets and whole lamb.
- High-Heat Roasting: Fast cooking at 200–230°C. Used for crisping poultry skin or caramelizing vegetables.
- Pan Roasting: A combination of stove-top and oven. Meat is seared in a pan, then finished in the oven.
- Spit Roasting (Rotisserie): The food rotates over a heat source. Popular for whole chickens in commercial rotisserie ovens.
Each type gives a different texture and flavor. Choose based on the dish you want to serve.
Differences Between Roasting Methods
Understanding the differences between roasting methods can make or break a dish in a restaurant setting.
- Moisture: Open roasting gives a crisp texture, while closed roasting keeps the food moist.
- Time: Slow roasting takes hours but gives soft, tender meat. High-heat roasting is quicker but risks drying out if overdone.
- Flavor depth: Slow roasting develops deep flavor. High-heat roasting is good for caramelization.
- Texture: Want a crunchy outer crust? Use high heat. Want fall-apart texture? Go slow and low.
Also check: 10 Superfoods That Will Supercharge Your Diet & Make You Feel Like a
10 Must-Try Gujarati Dishes That Will Delight Your Taste Buds
Best Dishes to Roast
Some dishes just shine when roasted. Here’s what chefs commonly roast in restaurants:
- Whole roast chicken or turkey
- Prime rib or lamb leg
- Pork belly or shoulder
- Cauliflower or broccoli florets
- Baby carrots, beets, and sweet potatoes
- Spiced nuts (in dry roasting)
- Coffee beans (specialty cafes and roasteries)
Each of these responds beautifully to heat and brings out deep, satisfying flavors.
When to Use Which Roasting Technique
- Use open roasting for dishes where crispness is key — like roast chicken or vegetables.
- Use closed roasting when cooking large or tough cuts like lamb shank or pork shoulder that need more time to soften.
- Use slow roasting when preparing in bulk or pre-cooking meats for service later.
- Use pan roasting when you want control — like when searing duck breasts before finishing in the oven.
- Use high-heat roasting for sides like potatoes and bell peppers for that charred finish.
Understanding the ingredient and desired outcome is what helps chefs decide.
Tools and Equipment You’ll Need
You can’t master roasting without the right gear. Here’s what a professional kitchen should have:
- Commercial convection oven: For even heat circulation
- Thermometers and probes: To check internal temperatures precisely
- Roasting racks and pans: Helps heat surround the food for uniform cooking
- Cast iron skillets: Great for pan roasting
- Rotisserie ovens: For spit-roasting large quantities
- Basting tools: To keep the food moist during roasting
Each piece of equipment supports better results and efficiency in a busy kitchen.
Check more: Restaurant vs. Café: What Truly Sets Them Apart?
Outdoor vs. Indoor Dining: Which Experience Stands Out?
Tips for Perfect Roasting
- Preheat your oven. Always. A cold oven leads to uneven cooking.
- Room temperature food. Don’t roast straight from the fridge. Let it rest for 20–30 minutes first.
- Season generously. Roasting intensifies flavors, so make sure your rubs or marinades are bold.
- Use a meat thermometer. Avoid cutting to check doneness. It lets the juices escape.
- Let it rest. After roasting, rest your meat for 10–20 minutes before slicing. This helps redistribute juices.
Pairing Roasted Dishes with Sides and Sauces
A good roast needs a great support act. Some suggestions:
- Sides: Herb-roasted potatoes, sautéed greens, roasted garlic mash, buttered rice
- Sauces: Classic jus, peppercorn gravy, red wine reduction, chimichurri
- Wines: Red meats go well with bold reds like Shiraz or Cabernet. Roasted chicken pairs beautifully with Chardonnay.
Pairing enhances the full dining experience and boosts the perceived value of the dish.
Why Roasting is a Restaurant Chef’s Best Tool
Roasting is one of the most efficient techniques in a restaurant kitchen. It allows chefs to prepare large batches with minimal hands-on effort, making it perfect for high-volume service. Its versatility is unmatched — from meats and vegetables to nuts and even coffee beans, nearly anything can be roasted. This method brings out deep, rich flavors and enhances the natural taste of ingredients. It also helps reduce food waste by turning leftover produce into flavorful sides or garnishes. Visually, roasted dishes offer golden browns, crisp edges, and an appealing, rustic look that stands out on the plate. More than just a technique, roasting brings warmth and homestyle charm that resonates with diners and keeps them coming back.
Final Thoughts
Roasting is more than just applying heat — it’s a careful balance of timing, texture, and transformation. For restaurant chefs, it’s one of the most dependable techniques to bring out bold flavors and rich aromas in meats, vegetables, and even nuts. Whether it’s a quick, high-heat roast for crispy skin or a slow, low-temperature method for tender cuts, each roasting style has its place on a professional menu. Mastering this art means understanding which technique suits which ingredient, using the right tools, and maintaining consistency in every batch. When done right, roasted dishes become crowd favorites — comforting, flavorful, and deeply satisfying. Make roasting a signature element of your kitchen and let your next roast steal the show.

Indian food is more than just a mix of flavours. It’s a reflection of tradition, health, and everyday comfort. What makes it truly special is the spices we use. These aren’t just for taste—they carry stories, memories, and healing powers. We’ve learned that there are a few spices I simply can’t do without.
There are five spices, in particular, that we reach for almost every day: turmeric, cumin, mustard seeds, coriander, and red chili powder. Each one brings something unique to the dish—whether it’s colour, aroma, depth, or warmth. But more than that, they bring a sense of home. The crackle of mustard seeds in oil, the golden glow of turmeric, or the earthy scent of cumin can take me back to my mother’s kitchen in seconds. These spices not only elevate taste but also support your health, from improving digestion to boosting immunity. They’re proof that food can heal, comfort, and connect. And once you start using them regularly, you’ll wonder how you ever cooked without them.
Read more: 12 Delicious High-Protein Foods to Eat Daily for a Healthier You
Why These 5 Spices Rule the Indian Kitchen
These five spices are simple, affordable, and always available. But their power is unmatched. Whether you're making dal, curry, khichdi, or even fusion dishes, these are your foundation spices. In this article, I’ll walk you through the five Indian spices every kitchen should have, why they matter, how to use them, and what makes them so powerful.
1. Turmeric – The Golden Healer in Your Kitchen

Turmeric, or haldi, is often the first spice added to Indian dishes. It gives food a warm yellow color and a slightly bitter, earthy taste. But its real value goes beyond flavour. Turmeric has a compound called curcumin. It helps reduce inflammation and supports the immune system. During winters or when someone in the family has a cold, I always add a pinch more to my curries or make haldi doodh (turmeric milk). It does work. Turmeric is more than just a spice. It’s a medicine passed down through generations. One pinch a day can do wonders for your body.
How to use:
- Add half tsp to curries, lentils, or sautéed vegetables.
- Use with a bit of black pepper to help your body absorb curcumin better.
- It can also be used in tea or warm milk for daily health.
2. Cumin – The Earthy Hero of Indian Tadkas

Cumin, or jeera, is one of the most used spices in my kitchen. Just add it to hot oil and its nutty aroma fills the room. That smell alone brings back childhood memories of mom cooking dal. Cumin is great for digestion. It helps with bloating and improves your appetite. If you ever feel heavy after a meal, a cumin-based dish can balance your stomach. It’s a simple spice but powerful. Cumin doesn’t shout, but it always makes a difference.
How to use:
- Use whole cumin seeds in hot oil to start a dish.
- Use roasted and ground cumin in curd or raita for extra taste.
- Add cumin powder to chaat or curries for a deeper flavour.
Know more: High Protein Indian Meals You Should Try
3. Mustard Seeds – The Popping Powerhouse

Mustard seeds, or rai, are small but strong. They are mostly used in South Indian and Bengali cooking, but I use them in many recipes. When you heat mustard seeds in oil, they pop and release a nutty, sharp flavour. They are good for metabolism and also help keep the skin healthy. I also use them in pickles and tempering for dals or chutneys. The sound of mustard seeds popping in oil is pure therapy. It signals the beginning of a tasty dish.
How to use:
- Add to hot oil before putting in other ingredients.
- Great in coconut-based curries, stir-fries, or khichdi.
- Use in pickles to improve shelf life and taste.
4. Coriander – The Mild, Magical Balancer

Coriander, or dhania, is used in seed and powder form. It has a fresh, lemony aroma that cools the dish and balances stronger spices like chili or garam masala. Coriander is rich in antioxidants and helps in digestion. I often use it to finish gravies, sabzis, or marinades. It also helps control blood sugar and cholesterol. This spice does not overpower. It gently enhances other ingredients and ties everything together.
How to use:
- Roast seeds and grind them into powder for better flavour.
- Add coriander powder mid-way during cooking to blend flavours.
- Use with cumin powder for a classic masala base.
5. Red Chili Powder – Fire That Warms the Soul

No Indian kitchen is complete without red chili powder. It brings the heat but also the depth of flavour. There are different types available—some are spicy, others are more for color. Chili powder not only adds a kick to the food but also speeds up metabolism. When used right, it can enhance taste without being too hot. I use Kashmiri chili for a rich red color and Guntur chili when I want more heat. Remember, spice isn’t just about burning your tongue. It’s about awakening your senses and adding emotion to your food.
How to use:
- Add while cooking for balanced heat.
- Use Kashmiri chili powder for colour without too much spice.
- Mix with oil or ghee for a spicy topping on parathas or dals.
Also check: 10 Superfoods That Will Supercharge Your Diet & Make You Feel Like a
6 Indian Superfoods for a Happy Gut You Need to Try Today!
Health Benefits You Didn’t Know
- Turmeric: Reduces inflammation, helps fight infections
- Cumin: Boosts digestion, improves gut health
- Mustard Seeds: Stimulates appetite, helps in detox
- Coriander: Controls blood sugar, is a cooling agent
- Red Chili: Improves metabolism, rich in vitamins A & C
These spices are not just about taste—they're about wellness in every bite.
Why Indian Food Feels Like Home – It’s the Spices
Indian cooking goes beyond recipes—it’s deeply tied to emotions and memories. Whenever I’m away from home, the simple act of making a tadka with cumin and mustard seeds brings me comfort and a sense of belonging. The aroma that fills the kitchen, the sound of spices sizzling in hot oil, and the vibrant colors all come together to create an experience that connects me to my roots. These sensory moments tell a story of family, tradition, and warmth—one that only those familiar with Indian cooking truly understand and cherish.
Check more: 6 Common Fruits That Have the Highest Amount of Fibre: Your Tasty and Simple
6 Unexpected Benefits of Eating Jackfruit (Kathal) – Nature’s Spiky Surprise!
What Happens When You Skip These?
Skip turmeric, and you lose healing. Forget cumin, and the tadka falls flat. No mustard? Your dish lacks that nutty zing. No coriander? You’ll miss balance. No chili? No punch. These are not optional—they are essential. Cooking with spices is a form of self-care. The sounds and smells of spices hitting hot oil calm your nerves. Their health benefits nourish your body. And the final dish? It comforts your soul.
The Bottom Line!
In Indian kitchens, they hold centuries of tradition, everyday health benefits, and deep emotional value. Among them, turmeric, cumin, mustard seeds, coriander, and red chili are absolute essentials. These five form the foundation of countless Indian dishes, each adding its own flavour, aroma, and purpose. Whether it’s turmeric’s healing touch or the bold kick of chili, every spice plays a role beyond taste. If you’re new to Indian cooking, start with these basics. You’ll find your food richer, your kitchen more vibrant, and your connection to tradition a little stronger with every meal. Cooking with these spices keeps the culture alive—one dish at a time.

Fibre plays a key role in maintaining overall health and well-being. It keeps your digestive system running smoothly, helps manage blood sugar levels, supports weight control, and even reduces cholesterol. Yet, many people don’t get enough of it in their daily diet. If you often feel bloated, sluggish, or suffer from irregular bowel movements, it could be due to a lack of fibre. One easy and natural way to fix this is by adding more fibre-rich fruits to your meals. Many people believe healthy eating is difficult or dull, but that’s a myth. Nature offers plenty of delicious, affordable options that are good for you—starting with fruits.
Fruits are not just sweet and satisfying; they’re also loaded with dietary fibre, vitamins, and antioxidants. You don’t need fancy foods or expensive health products. Just simple, everyday fruits can help you feel better and boost your gut health. In this article, we’ll explore six common fruits that are rich in fibre. These are fruits you’ll find easily in local markets or maybe already in your kitchen. Let’s take a closer look.
Read more: 6 Unexpected Benefits of Eating Jackfruit (Kathal) – Nature’s Spiky Surprise!
12 Delicious High-Protein Foods to Eat Daily for a Healthier You
1. Apple – Crunchy, Sweet, and Full of Fibre

"An apple a day keeps the doctor away" is not just an old saying—it’s true. Apples are one of the best fruits for fibre. A medium-sized apple has about 4 grams of fibre, and most of it is in the skin. So don’t peel your apple if you want the full benefit. Apples contain both soluble fibre (which helps control cholesterol and sugar levels) and insoluble fibre (which adds bulk to your stool and keeps things moving). They are perfect for mid-day hunger, easy to carry, and need no preparation. Personally, I keep one in my bag every day. It’s a smart choice whether you're at home, at work, or on the go.
2. Banana – Nature’s Prebiotic Powerhouse

Bananas are among the most loved fruits worldwide, and for good reason. They’re soft, sweet, and rich in resistant starch, especially when slightly green. Resistant starch works like fibre and feeds the good bacteria in your gut. A medium banana has around 3 grams of fibre, which supports digestion and helps you stay full longer. It’s also a great prebiotic, meaning it improves gut health over time. I usually blend it into a smoothie with oats and milk. It’s quick, filling, and easy on the stomach.
3. Mango – The Juicy Way to Digestive Bliss
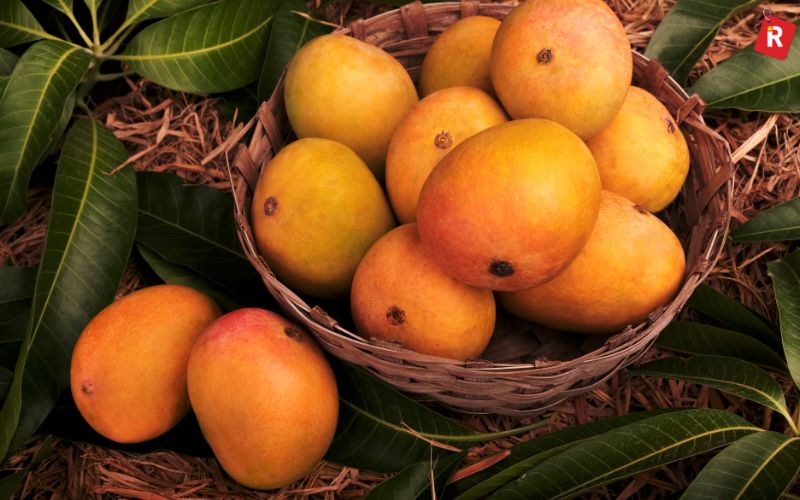
Mangoes are not only delicious—they’re also a great source of fibre. One cup of sliced mango offers about 3 grams of fibre. Mangoes also contain enzymes that help break down proteins and improve digestion. What makes mango special is that it has both dietary fibre and antioxidants. This combination supports not just your gut but your skin, immunity, and energy levels too. During summer, I like to have chilled mango slices after lunch. It’s a sweet way to stay healthy.
Know more: High Protein Indian Meals You Should Try
4. Pear – Soft, Sweet & Fibre-Packed

Pears are an underrated fruit when it comes to fibre. A medium pear contains around 5.5 to 6 grams of fibre, which makes it one of the highest-fibre fruits on this list. Most of the fibre is found in the skin, so it’s best not to peel it. Pears contain pectin, a soluble fibre that helps ease constipation and keeps you fuller for longer. What I love about pears is how gentle they are on the stomach. When I’m feeling heavy or bloated, one pear in the evening helps me feel light again.
5. Orange – More Than Just Vitamin C

Oranges are best known for their Vitamin C, but they’re also great for fibre—as long as you eat the fruit, not just drink the juice. One medium orange contains about 3 grams of fibre. The white layer under the orange peel, called the pith, is rich in fibre and should not be removed. Oranges also add water content to your diet, which works with fibre to prevent constipation. I enjoy oranges between meetings—they refresh and fill you without making you sleepy.
6. Kiwi – The Tiny Fruit with Big Digestive Power

Kiwi may be small, but it’s a fibre giant. One kiwi gives you about 2 grams of fibre, and eating two can meet a good part of your daily fibre needs. Kiwi contains actinidin, a special enzyme that helps digest proteins. It’s known to relieve bloating, improve bowel movement, and ease IBS (irritable bowel syndrome). When I have a heavy dinner, I eat kiwi for dessert. It tastes good and helps digest the meal faster.
Also check: A Guide to Different Breads and Their Nutritional Value
5 Ways to Use Garden Cress Seeds (Halim) for Stronger Hair and Bones
Why Fibre Deserves a Spot on Your Plate
Fibre does more than just help with digestion. It also:
- Balances blood sugar
- Lowers bad cholesterol
- Keeps your heart healthy
- Supports healthy weight loss
- Improves gut bacteria
There are two types of fibre:
- Soluble fibre dissolves in water and slows digestion
- Insoluble fibre adds bulk to your stool and speeds up waste removal
Fruits usually have both types, which makes them perfect for your gut.
Check more: These 7 Foods Can Help You Cool Your Stomach in Summer
Are You Fibre Deficient? Look Out for These Signs
Not eating enough fibre can lead to:
- Constipation or irregular bowel movement
- Bloating and stomach discomfort
- Feeling full but not satisfied
- Low energy and poor gut health
Most adults need 25 to 38 grams of fibre daily. But many people only get half of that. Adding these fruits to your diet can help fill the gap easily.
Juice or Whole? What’s the Healthier Fibre Choice?
Always choose whole fruits over juice. Juicing removes almost all the fibre and leaves only sugar and liquid behind. Blending is slightly better, but still not as good as eating fruits raw and whole.
When you eat the full fruit, especially with the skin, you get the fibre, vitamins, minerals, and water—everything your body needs to digest well.
Best Ways to Eat These Fruits for Maximum Fibre
Here are some easy ideas:
- Apple with peanut butter
- Banana and oats smoothie
- Sliced mango with a pinch of black salt
- Pear in a green salad
- Orange wedges with chia seeds
- Kiwi on Greek yogurt
Try mixing them in a fruit bowl. Add some seeds or a spoon of curd to make it even better.
How Much Fibre Do You Really Need?
According to health experts:
- Women need 25 grams of fibre per day
- Men need 38 grams per day
Eating just 2-3 fruits daily from this list can give you 10–15 grams of fibre without much effort.
The Bottom Line!
Adding fibre to your meals doesn’t need to be boring or hard. These six fruits are simple, tasty, and easy to find in any market. You don’t need expensive health drinks or diet plans—just fresh fruits that support your gut naturally. I personally started having at least two of these fruits every day, and the results have been real. I feel less bloated, my digestion is smoother, and I have more energy throughout the day. Whether it’s an apple in the morning or a banana smoothie at night, small changes can make a big difference. Give it a try for just one week. Your stomach will feel lighter, and you’ll notice a boost in your overall well-being.

Pizza is one of the most loved comfort foods worldwide. Its warm, cheesy goodness and rich flavors make it a go-to choice for many. However, some people believe vegetarian pizzas lack excitement or depth in taste. This article aims to change that perception. Whether you prefer making pizza at home, ordering from your favourite place, or simply want fresh ideas, these eight vegetarian pizza varieties offer a perfect mix of taste, texture, and creativity.
From classic Margherita to bold Spicy Veggie Supreme, each pizza features unique combinations of fresh vegetables, cheeses, and sauces. You’ll find options that are light and healthy, as well as indulgent and rich. We’ve included detailed descriptions along with personal touches to help you choose the right pizza for your mood or occasion. These pizzas prove that you don’t need meat to enjoy a flavourful, satisfying meal. With these vegetarian options, you can plan a delicious and fulfilling weekend, whether it’s a family dinner, a casual get-together, or solo treat. Get ready to enjoy the best of plant-based pizza without compromise.
Read more: 6 Benefits of Drinking Black Coffee
7 Healthy Chicken Dishes to Maintain Your Diet
1. Classic Margherita – The Timeless Favourite

Sometimes, simplicity is the key to great taste, and the Margherita pizza proves just that. Made with a tomato sauce base, fresh tomato slices, creamy mozzarella cheese, and fragrant basil leaves, this pizza highlights classic flavors without overwhelming your palate. A light drizzle of olive oil before baking enhances the aroma and adds a subtle richness. It’s an ideal choice when you want something comforting and delicious without any fuss. Baking it on a thin crust allows the toppings to shine and ensures a crispy bite. Best enjoyed hot and fresh from the oven, the Margherita pizza is a timeless favorite that satisfies cravings with its perfect balance of freshness and cheese.
2. Spicy Veggie Supreme – For the Bold Taste Buds

If you enjoy bold flavors and a bit of heat, the Spicy Veggie Supreme is a perfect choice. This pizza is loaded with vibrant toppings like bell peppers, red onions, black olives, and jalapeños, sprinkled generously with red chili flakes. For those who love extra spice, adding green chilies amps up the heat even more. A thick or pan crust works best to hold all the rich toppings and sauce without getting soggy. You can choose a spicy tomato base or try peri-peri sauce for an extra punch of flavor. This pizza is a favorite for game nights or house parties, pairing perfectly with a cold cola or refreshing lemon soda to balance the spice.
3. Mushroom Truffle Pizza – The Fancy One

For weekends when you want something classy but easy to prepare, the Mushroom Truffle pizza is an excellent choice. It features a mix of button mushrooms, portobello, and if available, oyster mushrooms for a variety of textures and flavors. Instead of the usual tomato sauce, this pizza uses a rich garlic cream sauce that complements the mushrooms perfectly. After baking, a light drizzle of truffle oil or garlic-infused olive oil adds a luxurious, earthy aroma. The deep, rich taste makes it feel gourmet without the fuss. Serving it on a thin sourdough or hand-tossed crust ensures a crisp base that balances the creamy toppings. This pizza is ideal for a sophisticated yet simple meal at home.
Know more: 7 Protein-Rich Vegan Foods That Pack a Punch – No Meat, No Problem!
What Is Caesar Salad, and Why Is It Named After the Roman Emperor?
4. Spinach & Ricotta – Creamy and Light

If you want a pizza that feels both healthy and indulgent, the Spinach & Ricotta pizza is a great choice. It features sautéed spinach and creamy ricotta cheese, combined with a hint of garlic for added flavour. For an extra burst of taste, you can include sun-dried tomatoes or fresh cherry tomatoes. This pizza is best enjoyed on a thin, crispy crust that balances the creamy toppings perfectly. You can use a white sauce base or simply drizzle olive oil with herbs for a lighter option. It’s not heavy but still satisfying, making it an ideal option for brunch, a light dinner, or anytime you want a nutritious yet delicious meal.
5. Pineapple & Jalapeño – Sweet Meets Spicy

This pizza is perfect for those who love bold and unusual flavor combinations. The natural sweetness of pineapple pairs beautifully with the spicy kick of jalapeños, creating a vibrant and exciting taste experience. Start with a classic tomato sauce base and layer on mozzarella cheese along with some smoked cheese for added depth and richness. This combination gives the pizza a smoky, cheesy finish that complements the sweet and spicy toppings perfectly. It works best on a thin or hand-tossed crust, which crisps up nicely and lets the flavors shine. Whether you’re hosting friends or simply want to try something different, this pineapple and jalapeño pizza is a fun and flavorful choice that will impress everyone.
6. Caramelized Onion & Feta – Sweet, Salty and Tangy

This elegant pizza blends the sweet richness of caramelized onions with the sharpness of feta and the tang of black olives. Start by slowly cooking onions until they’re soft, golden, and sweet—this step builds the flavour. Spread the onions over your pizza base, sprinkle crumbled feta, and add a few sliced black olives. A pinch of thyme or oregano brings in a herby balance. Use a sourdough crust to enhance the overall taste with a light tang. This pizza isn’t heavy but still feels indulgent, making it perfect for relaxed dinners or casual wine nights. It’s a grown-up take on vegetarian pizza that’s both simple and sophisticated. Pair it with wine or chilled lemonade for a complete experience.
7. Mediterranean Veggie Pizza – A Taste of the Coast

The Mediterranean veggie pizza is a colourful and flavourful option that brings a fresh, coastal vibe to your table. It’s topped with zucchini, bell peppers, artichokes, black olives, and crumbled feta cheese. You can go with a classic tomato sauce or switch it up with a pesto base for a herby twist. A drizzle of olive oil and a touch of lemon zest on top brighten the overall flavour. This pizza works best on a light, thin crust that crisps up nicely in the oven, letting the veggies stay tender yet slightly golden on the edges. Ideal for warm afternoons, summer dinners, or even garden brunches, this pizza is a refreshing break from heavier options—light, tangy, and incredibly satisfying.
Also check: 12 Delicious High-Protein Foods to Eat Daily for a Healthier You
8. Corn & Cheese Overload – A Family Favourite

The corn and cheese pizza is a classic favourite among both kids and adults. It’s simple, creamy, and packed with flavour. The base is loaded with sweet corn and a generous blend of mozzarella and cheddar cheese, making each bite rich and satisfying. For an extra layer of taste, you can add paneer cubes or crunchy capsicum slices to give it an Indian twist. This pizza is perfect for lazy Sunday evenings when you want something warm, quick, and comforting without too much prep. A thick crust works best as it holds the creamy toppings without getting soggy. Pair it with ketchup or a cheesy dip, and you’ve got a weekend meal that’s both fun and fulfilling.
Why Vegetarian Pizzas Can Be More Fun Than Meat Pizzas
Many people think pizzas are incomplete without meat. But vegetarian pizzas offer a wider variety of toppings, textures, and flavours. You can mix sweet, salty, spicy, and tangy all in one bite. Plus, they’re usually lighter, healthier, and more creative. You don’t just stick to mushrooms and capsicum. You get to use fresh herbs, different cheeses, exotic veggies, and a range of sauces.
Homemade vs Delivery: What Should You Choose?
Homemade pizzas allow full control. You can pick your toppings, adjust the spice level, and use fresh ingredients. They’re also more affordable in the long run. Delivery pizzas are convenient. They save time, especially when you're hosting or just want to relax. With so many good brands offering quality veg pizzas, it’s easy to get a great slice at your doorstep. The choice depends on your weekend mood. Want to cook? Go DIY. Want to chill? Order in.
Sauce It Right: 5 Pizza Sauces That Make a Difference
- Tomato Sauce: A classic. Tangy and rich.
- White Garlic Sauce: Creamy and perfect for mushroom or spinach pizzas.
- Pesto Sauce: Fresh and herby. Works great for Mediterranean pizzas.
- Barbecue Sauce: Smoky and bold. Pairs well with caramelized onions and paneer.
- Peri-Peri Sauce: Spicy and sharp. Ideal for those who like extra heat.
You can either buy these sauces or make quick versions at home.
Check more: Top 10 Popular Pizza Brands in India [2024]
Cheeses That Work Best for Veg Pizzas
- Mozzarella: The most used cheese for its stretch and melt.
- Feta: Salty and crumbly. Adds texture.
- Ricotta: Soft and creamy. Great for light pizzas.
- Cheddar: Sharp and strong. Blends well with corn or onions.
- Gouda or Smoked Cheese: Adds depth and smoky flavour.
Combining two or more cheeses often gives the best results.
Final Thoughts
Vegetarian pizzas aren’t just for vegetarians—they’re for anyone who loves bold flavours, colourful toppings, and creative combinations. These pizzas are easy to customise, making them perfect for every taste and mood. Whether it’s a relaxed movie night, a fun family dinner, or a solo weekend treat, vegetarian pizzas offer endless ways to enjoy comfort food with a healthy twist. From creamy ricotta to spicy jalapeños and sweet caramelised onions, the variety of textures and tastes is unbeatable. You can keep it simple with a classic Margherita or go bold with a loaded veggie supreme. So this weekend, skip the usual and try a plant-based pizza. Pick your crust, choose your sauce, and let your toppings steal the show.

Jackfruit, or kathal as it's lovingly known in India, is more than just a fruit—it’s a piece of nostalgia. Many of us have grown up watching our mothers cook spicy kathal curry during Sunday lunches or seeing our grandmothers sun-drying jackfruit chips on the terrace. It’s been a part of traditional Indian kitchens for decades, especially in summer months when the fruit is in full season.
But there’s more to jackfruit than just its delicious taste and strong aroma. While it may seem like just another tropical fruit, it comes packed with a range of surprising health benefits that often go unnoticed. From boosting energy and aiding digestion to improving skin health and supporting your bones, this spiky fruit deserves a lot more attention than it usually gets. Whether you enjoy it raw, cooked in a curry, or even as crunchy chips, jackfruit can do wonders for your body. So, if you haven’t considered adding kathal to your regular diet yet, now might be the perfect time to discover its hidden goodness.
Read more: What Happens When You Consume 1 Avocado Daily?

1. Boosts Natural Energy Levels – No Caffeine Needed
If you often feel tired or low on energy, try adding jackfruit to your diet. Jackfruit contains natural sugars like fructose and sucrose. These give your body a quick energy boost without the crash that comes from caffeine or energy drinks. I personally found that having a small bowl of ripe jackfruit in the afternoon helped me stay focused without reaching for another cup of tea. It’s a natural way to beat fatigue. Plus, it's rich in calories but not empty ones—it gives your body energy and nutrients at the same time.
2. Aids in Skin Glow – Your Grandma Was Right
Do you remember your grandmother telling you that eating local fruits makes your skin glow? She was right. Jackfruit is rich in Vitamin C and antioxidants. These two elements help protect your skin from free radicals and pollution. Vitamin C also helps your body produce collagen. Collagen is what keeps your skin firm and youthful. Eating jackfruit regularly can help your skin look healthier and brighter over time. Try blending it into a smoothie with some curd and honey. It makes a refreshing and skin-friendly drink.
3. May Improve Bone Health – Move Over Milk!
You may think milk is the only source of calcium, but jackfruit gives you more than just calcium. It also contains magnesium and Vitamin K. These are essential nutrients that work together to improve your bone strength. Magnesium helps your body absorb calcium better. Vitamin K helps prevent bone loss. Together, they form a great team for long-term bone health. This is especially helpful if you’re vegetarian or lactose-intolerant. Jackfruit can be a delicious plant-based support for your bones.
4. Supports Eye Health – Because Kathal is Watching Out for You
Jackfruit contains Vitamin A, which is crucial for good eyesight. If you work on screens all day or stay up late scrolling through your phone, your eyes take a hit. Vitamin A helps maintain healthy vision and may reduce your risk of night blindness. I started including jackfruit in my weekend breakfast and noticed a reduction in eye strain, especially after long work hours. Ripe jackfruit slices also make a sweet snack alternative for kids. It’s better than processed sugar and supports eye development too.
5. Helps Regulate Blood Sugar – Sweet but Safe
Here’s something interesting: jackfruit is sweet, but it doesn’t spike your blood sugar the way you’d expect. That’s because it has a low glycemic index and high fiber content. Fiber slows down the absorption of sugar in your body. This helps regulate blood sugar levels. Jackfruit also contains flavonoids, which may improve insulin sensitivity. It’s a good fruit option for those managing their sugar levels. But if you are diabetic, always check with your doctor before making changes to your diet.
6. May Help With Digestion – Kathal to the Rescue!
Many of us face digestion problems due to poor diets or lack of water. Jackfruit is high in dietary fiber, which acts as a natural laxative. Eating jackfruit can help improve bowel movements and prevent constipation. It also promotes good gut bacteria, which is key for overall digestion. Roast a few seeds or add boiled jackfruit to your lunch. It’s not just tasty—it’s good for your stomach too.
Know more: 5 Ways to Use Garden Cress Seeds (Halim) for Stronger Hair and Bones
These 7 Foods Can Help You Cool Your Stomach in Summer
Kathal or Meat? The Great Veggie Debate
Did you know jackfruit is becoming a go-to meat substitute around the world? Its fibrous, meaty texture makes it perfect for vegan and vegetarian recipes. Many people now use raw kathal to make dishes like kathal biryani, jackfruit tacos, or even vegan pulled "pork" sandwiches. Once it’s cooked with the right spices, it closely mimics the taste and texture of shredded meat. That’s why it’s loved by both vegans and non-vegans alike. If you’re trying to cut down on meat without missing out on flavor, jackfruit is a smart, healthy, and surprisingly delicious plant-based alternative.
Also check: Health Benefits of Quinoa: A Superfood for Every Diet
Six Benefits of Starting Your Day with Okra Water
Ancient Fruit, Modern Love: Why Millennials Are Falling for Kathal

Jackfruit is making waves across cafes and health food stores—not just in India, but worldwide. What’s driving its popularity? It’s nutritious, eco-friendly, and incredibly versatile. Millennials, in particular, are embracing it as it fits well with today’s dietary preferences: vegan, high-fiber, low-fat, and sustainable. For many Indians, jackfruit also carries a strong sense of nostalgia—reminding them of family meals, traditional recipes, and summer afternoons spent in the kitchen. Its ability to blend modern health trends with deep-rooted cultural memories makes jackfruit more than just a fruit—it’s a lifestyle choice that connects the past with the present in a flavorful way.
Check more: 21 Different Types of Indian Breads and Their Benefits
A Guide to Different Breads and Their Nutritional Value
Did You Know Jackfruit Seeds Are Edible Too?
Most people throw away jackfruit seeds, but they’re actually packed with protein, iron, and healthy starch. Boil or roast them with a pinch of salt. They taste nutty and can be a great evening snack. They can also be added to curries or ground into flour for gluten-free recipes. So next time, don’t waste those seeds—use them!
Kathal in Ayurveda – The Forgotten Superfruit
In Ayurveda, jackfruit is considered a sattvic food. It is believed to balance the three doshas: Vata, Pitta, and Kapha. It’s also said to improve digestion, strengthen immunity, and boost overall vitality.
Ancient Indian wisdom has long known what modern science is now confirming—jackfruit is a superfruit worth including in your diet.
The Bottom Line!
Jackfruit is much more than the spiky fruit you might eat once in a while—it’s a nutritional powerhouse. Packed with natural energy, antioxidants, fiber, and essential nutrients, jackfruit offers unique health benefits that go beyond taste. Whether you enjoy it raw, cooked into a hearty curry, sun-dried into chips, or added to modern recipes like tacos and biryani, kathal is both versatile and nourishing. Including it in your weekly meals can add a healthy, flavorful twist to your diet. Plus, for many of us, it holds memories of home-cooked meals and summer traditions. Have a special kathal recipe or a fond memory tied to this fruit? Share your story—we’d love to hear how jackfruit plays a role in your life.

Beer and Indian food may seem like an unusual match at first glance. But when paired thoughtfully, they can elevate each other in surprising ways. The bold spices and rich textures of Indian cuisine, when balanced with the right beer, create a flavour experience that's hard to beat. With India’s growing love for craft beers, more people are exploring how hops and malts can work with everything from street food to royal curries. A light wheat beer can tone down the creaminess of butter chicken, while a bitter IPA can stand up to the heat of a tandoori platter. Even a humble fish fry finds a refreshing friend in a crisp lager. This guide brings you easy tips and relatable examples to help you pair your favourite Indian dishes with the right brew. Whether you’re planning a dinner party or just want to enhance your weekend meal, these beer pairings will make your experience more flavourful and fun — no expert knowledge needed.
Read more: The Most Overrated Beer Styles: Are They Really Worth the Hype?
Why Beer Works with Indian Food
Indian food is full of strong flavours, bold spices, and rich textures. From creamy curries to deep-fried snacks, every dish has a story. Beer, with its wide range of taste profiles, balances the heat, richness, and spice.
Carbonation: Beer’s fizz cuts through oil and richness.
Bitterness: The hops in beer balance strong spices.
Sweetness: Some beers have a slight sweetness that cools spicy food.
Cold temperature: A chilled beer soothes the palate after spicy bites.
In short, beer cleans your palate and prepares it for the next bite. This is why it works so well with Indian dishes.
Know more: How to Pair Indian Food with the Right Alcohol: A Desi Guide to Perfect
Know Your Beer Types First
Before pairing, it's good to know a little about different beer types. Each one has its own taste, colour, and strength.
Lager: Light, crisp, and refreshing. Good with snacks and light meals.
Wheat Beer: Smooth, slightly fruity, and cloudy. Great with creamy dishes.
Pilsner: Bitter and crisp. Balances oily and spicy food.
Pale Ale: Hoppy and aromatic. Good with grilled or tandoori food.
IPA (India Pale Ale): Bold and bitter. Matches well with strong-flavoured dishes.
Stout: Dark, rich, and sweet. Pairs well with desserts or spicy meat dishes.
Pairing Indian Dishes with the Right Beer
Let’s break down which beer goes well with common Indian favourites:
1. Butter Chicken + Wheat Beer
Butter chicken is rich, creamy, and mildly spiced with a tomato base. Its smooth texture and slight sweetness call for a beer that won’t overpower its delicate flavours. A wheat beer is the perfect match here. It’s light, slightly fruity, and has a smooth mouthfeel that complements the curry’s creaminess. The carbonation in wheat beer also cuts through the richness, refreshing your palate with every sip. This pairing is ideal for those who love mild yet flavourful dishes with balanced drinks.
2. Rogan Josh + Amber Ale
Rogan Josh is a spicy, aromatic Kashmiri mutton curry with bold flavours from cloves, cardamom, and Kashmiri red chillies. The slow-cooked meat and rich gravy demand a beer with a strong character. Amber ale fits perfectly here. With its roasted malt base, caramel notes, and medium body, it complements the intensity of Rogan Josh without overwhelming it. The slightly sweet yet bitter taste of amber ale balances the curry’s spices, enhancing the overall depth of flavour in every bite and sip.
3. Paneer Tikka + Pale Ale
Paneer tikka is a classic tandoori appetiser made with marinated paneer cubes grilled to smoky perfection. Its bold flavours, spiced yoghurt coating, and charred edges pair beautifully with a pale ale. Pale ales are known for their hop-forward taste with citrusy and herbal notes. This hoppy bitterness balances the spice and enhances the grilled, smoky profile of the paneer. The moderate strength of pale ale ensures it doesn’t dominate the dish, making it a well-rounded and satisfying pairing for vegetarian food lovers.
4. Tandoori Chicken + IPA
Tandoori chicken is smoky, spicy, and marinated in yoghurt with robust Indian spices before being cooked in a clay oven. Its charred skin and juicy meat are full of flavour. An India Pale Ale (IPA) works wonderfully with this. Its hoppy bitterness and citrus notes cut through the spices and smoke, balancing the dish while highlighting its punch. The boldness of IPA keeps up with the richness and spice of tandoori chicken, making this pairing exciting and intensely satisfying.
5. Fish Fry + Lager
Fish fry is a crispy, spiced snack popular across coastal regions of India. Typically marinated with turmeric, red chilli, and lemon, then shallow-fried to golden perfection, it's crunchy outside and juicy inside. A lager’s light, clean profile pairs perfectly here. Its subtle bitterness and refreshing finish cool the spices and cleanse your palate. Since fish has delicate flavours, a lager won’t overwhelm the dish. This pairing is great for evenings when you want something crisp, spicy, and easy to enjoy with friends.
6. Chole Bhature + Pilsner
Chole Bhature is a North Indian favourite, combining spicy chickpea curry with fluffy deep-fried bread. It’s heavy, rich, and packed with bold masala flavours. A pilsner, known for its crisp bitterness and light body, provides the perfect contrast. The pilsner’s sharpness cuts through the heaviness and oil, cleansing your palate and balancing the spice. Its dry finish ensures the dish doesn’t feel overly greasy, making the meal feel lighter while still retaining all the indulgent charm of this street-food staple.
Also check: Top 6 Indian States Where Women Drink the Most: The Rise of the Female Drinker
Desi Snacks & Beer: Chakhna Made Better
In India, snacks (or chakhna) are often served with alcohol. Pairing them with the right beer can enhance your snacking session.
Samosas + Lager: The crispness of the lager complements the crunchy exterior and spicy filling.
Masala Peanuts + IPA: The strong spice goes well with a bitter beer like IPA.
Aloo Tikki + Wheat Beer: The soft and spicy patty works well with the light fruity notes of wheat beer.
Bhujia + Pale Ale: The salt and spice balance beautifully with a hop-forward pale ale.
Indian Craft Beer Brands to Try
Support local brands while pairing! Here are a few Indian craft beers you can easily find:
Bira 91: Known for its wheat and blonde beers.
Simba: Offers stout, wheat, and light lagers.
White Owl: Their Spark wheat beer is great for beginners.
Kati Patang: Known for bold, flavourful ales and lagers.
Gateway Brewing Co. (Mumbai): Offers small-batch, fresh brews.
These brands are widely available in cities like Mumbai, Delhi, Bangalore, Pune, and Hyderabad.
Pour, Pair & Enjoy
Pairing beer with Indian food is about balance. It’s not just about cooling down the spice, but also highlighting the flavour of each dish. Whether you’re at a pub or planning a night in with friends, try different combinations. Don’t be afraid to mix and match. Every Indian household has its own food traditions. Use this guide to discover what works best for you. From Sunday biryanis to festive samosas, there’s always a beer that fits. Cheers to flavourful sips and unforgettable bites.

India has a rich food culture. From spicy curries to comforting dals, there’s a dish for every mood. But when it comes to high protein Indian meals, many people believe that our cuisine lacks good options. That’s not true.
In fact, Indian food offers plenty of protein-rich meals, whether you're a vegetarian or a non-vegetarian. If you're working out, trying to lose weight, or simply want to eat better, these meals can help you reach your health goals. Let’s explore some of the best high protein Indian meals you should try. These are easy to make, taste amazing, and are packed with nutrients your body needs.
Read more: 12 Delicious High-Protein Foods to Eat Daily for a Healthier You
Why Indians Need More Protein in Their Diet
Many people in India are not getting enough protein in their diet. A study by the Indian Market Research Bureau revealed that 9 out of 10 Indians do not consume enough protein daily.
The reasons are simple. We eat more carbs than proteins. Rice, roti, potatoes, and sweets are common in our meals, but protein-rich foods are not as regular. Also, many think that protein is only for bodybuilders. But the truth is, protein is essential for everyone. It helps repair cells, build muscles, and keeps you full for longer.
Know more: How to Pair Indian Food with the Right Alcohol: A Desi Guide to Perfect
Explore Top High Protein Indian Meals
Here are some tasty Indian meals that are rich in protein:
1. Rajma Chawal with Brown Rice
Rajma, or kidney beans, is one of the most loved comfort foods in Indian households. Rich in plant-based protein, it also provides essential nutrients like fiber, iron, and potassium. When combined with brown rice, a whole grain, the dish becomes a complete protein, offering all essential amino acids. A single cup of cooked rajma contains around 15 grams of protein. It's wholesome, hearty, and perfect for lunch or dinner, especially for vegetarians looking to meet their protein needs.
2. Moong Dal Chilla with Paneer Stuffing
Moong dal chilla is a savory Indian pancake made from ground moong dal (split green gram). It's light, easy to digest, and rich in protein. Adding a paneer (cottage cheese) filling boosts its protein content significantly, making it a nutritious meal option for breakfast or dinner. One stuffed chilla can offer up to 18–20 grams of protein. This meal is great for vegetarians, supports muscle health, and keeps you full for longer. Serve it with green chutney or curd.
3. Chicken Tikka with Whole Wheat Roti
Chicken tikka is a popular tandoori-style dish made by marinating boneless chicken in spices and yogurt, then grilling it to perfection. It's low in fat and high in lean protein. When paired with whole wheat roti, it becomes a balanced Indian meal rich in fiber and complex carbs. A serving of chicken tikka can offer up to 30 grams of protein. Ideal for post-workout dinners or weight watchers, it’s delicious, satisfying, and helps build lean muscle mass.
4. Egg Bhurji with Multigrain Toast
Egg bhurji, the Indian version of scrambled eggs, is a quick, spicy, and satisfying meal. Eggs are one of the most complete protein sources, offering all essential amino acids. Cooked with onions, tomatoes, and spices, this dish becomes a flavorful protein powerhouse. Pair it with multigrain toast to add fiber and additional nutrients to your meal. A serving can give you about 12–14 grams of protein. It's perfect for breakfast or a light dinner that’s both tasty and healthy.
5. Soya Chunk Pulao
Soya chunks, also known as nutri nuggets, are often called the vegetarian's answer to meat. With about 52 grams of protein per 100 grams, they're incredibly dense in nutrition. When cooked into a simple pulao with rice, vegetables, and mild spices, soya chunks offer a delicious and high-protein vegetarian meal. This dish is ideal for lunchboxes, gym-goers, or anyone looking to include more plant-based protein in their diet. It’s filling, easy to make, and extremely budget-friendly too.
6. Chole with Quinoa or Bajra Roti
Chole, or spicy chickpea curry, is a North Indian staple that’s not just delicious but also packed with protein and fiber. A cup of cooked chickpeas contains around 15 grams of protein. Pairing chole with quinoa, a complete plant protein, or bajra roti (millet bread) makes it a nutritionally dense and gluten-free meal. This combination is great for improving digestion, maintaining energy, and supporting muscle growth. It’s a smart vegetarian meal choice that doesn’t compromise on taste or health.
7. Fish Curry with Red Rice
Fish like rohu, surmai (kingfish), or salmon are excellent sources of lean protein and omega-3 fatty acids, which are great for heart and brain health. A 100g serving of fish can provide 20–25 grams of high-quality protein. When cooked into a light Indian-style curry and paired with red rice, which has more fiber than white rice, it makes for a wholesome and nutritious meal. It’s ideal for dinner and supports weight loss, muscle recovery, and better metabolism.
8. Methi Thepla with Greek Yogurt
Methi thepla is a flavorful flatbread made with whole wheat flour, fenugreek leaves, and spices, popular in Gujarati cuisine. When served with Greek yogurt, which has nearly double the protein of regular curd, the meal becomes both balanced and protein-rich. A serving of Greek yogurt adds around 10g of protein. Thepla provides fiber, iron, and healthy carbs. Together, they make a great breakfast or lunch, offering satiety, digestive support, and muscle-friendly nutrition in a tasty, traditional format.
Veg vs Non-Veg: Which Has More Protein?
Non-vegetarian options like chicken, eggs, and fish usually have more protein per gram compared to plant-based items. However, vegetarians can still meet their protein goals by combining lentils, dairy, pulses, and whole grains.
For example:
100g chicken breast = 31g protein
100g paneer = 18g protein
1 boiled egg = 6g protein
1 cup cooked dal = 12g protein
With careful planning, both veg and non-veg diets can offer enough protein.
Also check: Is Frozen Food a Health Hero or Hidden Villain? The Shocking Truth Revealed!
Post-Workout Indian Meals That Fuel Gains
After a workout, your muscles need protein to recover. Try these simple Indian meals that are easy to digest and high in protein:
Sprouted Moong Salad – Sprouts are easy to prepare and packed with amino acids.
Paneer Bhurji Wrap – Quick and filling, perfect for a post-gym snack.
Chicken Keema with Ragi Roti – Great balance of protein and fiber.
Oats and Dal Khichdi – Comfort food with an added protein punch.
Protein-Loaded Indian Breakfasts
Start your day with a protein-rich breakfast to stay full and energetic:
Besan Chilla – Made with gram flour and vegetables, protein-rich and low-fat.
Egg Dosa – Traditional dosa with a twist, includes a fried egg inside.
Paneer Paratha – Stuffed with protein and calcium.
Poha with Peanuts and Sprouts – Add crunch and protein to your regular poha.
The Bottom Line!
Whether you're a gym enthusiast, busy professional, or college student, protein is a must for your daily diet. The good news? You don’t need to rely on boring boiled chicken or expensive protein powders. Indian kitchens already offer a variety of high-protein foods that are delicious, filling, and easy to cook. From dals and pulses to paneer, eggs, chicken, and fish — there's something for every lifestyle and taste. Pair them with whole grains like brown rice, quinoa, or multigrain rotis for a complete meal. With the right choices, your everyday desi meals can fuel your fitness, support your energy, and keep you healthy. So, make your plate colourful, protein-rich, and deeply satisfying — your body will thank you for it.

Dry fruits have been an integral part of Indian culinary traditions for centuries. From being a royal snack in Mughal kitchens to a staple gift during Diwali, dry fruits hold a special place in Indian households. But beyond tradition, they are also packed with nutrients, making them a superfood that you can enjoy daily.
Whether you're managing diabetes, heart health, or simply looking for an energy boost, dry fruits are suitable for nearly everyone. Let's dive into the origin, nutritional profile, and top 10 health benefits of eating dry fruits daily—along with tips on how to store and reuse them effectively. Dry fruits are naturally dried fruits with minimal water content, either sun-dried or dehydrated using machines. Popular ones include almonds, walnuts, raisins, figs, cashews, dates, pistachios, and apricots.
Read more: 12 Delicious High-Protein Foods to Eat Daily for a Healthier You
Legacy and Importance
The tradition of consuming dry fruits in India dates back to the Harappan civilization, where people commonly used sun-dried dates and raisins as part of their daily diet. These naturally preserved fruits served as a reliable source of energy and nutrition. Over time, dry fruits became an integral part of Indian culture, cuisine, and rituals. Ancient Ayurvedic texts highly regard dry fruits as powerful natural tonics that boost strength, vitality, and immunity. Rich in essential nutrients, they were recommended for enhancing stamina and promoting overall well-being. This historical significance continues today, making dry fruits a valued part of modern diets.
Almonds – Grown majorly in Kashmir and Himachal Pradesh
Pistachios – Commonly imported, but small-scale cultivation in Rajasthan
Raisins – Popular in Maharashtra (Nashik belt)
Cashews – Widely grown in Kerala and Goa
Walnuts – Mainly cultivated in Jammu & Kashmir
Nutritional Facts of Dry Fruits (Per 100g Average)
Calories- 450–650 kcal
Protein- 8–20 g
Fats- 20–60 g
Carbohydrates- 20–40 g
Fiber- 3–10 g
Vitamins- A, E, B6, K
Minerals- Iron, Magnesium, Calcium, Zinc
Most dry fruits have a low to moderate glycemic index (GI 15–50), making them safe for diabetic patients when consumed in moderation.
Know more: A Guide to Different Breads and Their Nutritional Value
Top 10 Health Benefits of Eating Dry Fruits Daily
Boosts Immunity: Dry fruits such as almonds and walnuts are packed with antioxidants and essential vitamins like B6 and E. These nutrients help strengthen the immune system, boost the body’s natural defenses, and offer protection against common infections and illnesses.
Improves Heart Health: Walnuts, cashews, and pistachios are rich in omega-3 fatty acids and healthy unsaturated fats. These nutrients help lower bad cholesterol levels, support healthy blood circulation, and significantly reduce the risk of heart disease, promoting overall cardiovascular wellness.
Aids in Weight Management: Although dry fruits are calorie-dense, their high fiber and protein content help you feel full for longer. This promotes satiety, reduces cravings, and aids in weight loss by curbing overeating and preventing unnecessary snacking throughout the day.
Enhances Brain Function: Almonds and walnuts are considered brain food due to their high content of omega-3 fatty acids, vitamin E, and antioxidants. These nutrients support cognitive function, enhancing memory, concentration, and overall brain health for improved mental clarity and focus.
Regulates Blood Sugar: Prunes and figs have a low glycemic index and are rich in fiber, making them ideal for diabetics and those with insulin sensitivity. These dry fruits help regulate blood sugar levels while promoting healthy digestion and overall well-being.
Improves Digestion: Figs and raisins, with their high fiber content, function as natural laxatives. They promote healthy digestion, alleviate constipation, and support regular bowel movements, making them a beneficial addition to your diet for maintaining digestive health.
Strengthens Bones: Dates and dried apricots are rich in calcium, potassium, and magnesium, essential minerals that help improve bone density and support joint health. Regular consumption can aid in preventing bone-related issues and promote overall skeletal strength and flexibility.
Improves Skin & Hair Health: Almonds, pistachios, and walnuts are packed with vitamin E and antioxidants, which help combat acne, delay the appearance of wrinkles, and promote healthy hair growth. These nutrients nourish the skin and scalp, supporting a youthful and radiant appearance.
Increases Energy Levels: Dry fruits are packed with natural sugars and iron, providing a quick energy boost and enhancing stamina. They are especially beneficial for athletes and fitness enthusiasts, helping to replenish energy levels and support prolonged physical activity and performance.
Supports Pregnancy Health: Dates and almonds are rich in folic acid, iron, and calcium, crucial nutrients for supporting fetal development during pregnancy. These nutrients help reduce the risk of birth defects, promoting healthy growth and development of the baby.
Also check: Which State Is the Highest Producer of Coffee in India?
Who Can Consume Dry Fruits?
Dry fruits are a nutritious and versatile snack suitable for individuals of all age groups, from children to the elderly. They provide essential vitamins, minerals, antioxidants, and healthy fats, benefiting various health conditions when consumed in moderation. Whether you are looking to improve heart health, boost immunity, or manage weight, dry fruits can be a valuable addition to your diet. However, it is important to consult a doctor before making significant dietary changes, particularly for individuals with kidney issues, allergies, or specific health concerns, as some dry fruits may require careful consumption depending on individual health conditions.
Diabetics – Safe if portion-controlled
Pregnant women – Recommended for added nutrients
Heart patients – Help reduce LDL cholesterol
Kids & elderly – Great for brain development and bone strength
How to Store and Reuse Dry Fruits
Storage Tips
Store in airtight containers in a cool, dark place to retain freshness.
For long-term use, refrigerate or freeze in zip-lock bags.
Avoid exposure to humidity or direct sunlight.
Reuse Ideas
Add to smoothies, salads, and breakfast cereals.
Grind into powder to mix in milk for kids.
Use soaked dry fruits in desserts, biryanis, and laddoos.
Blend dates or figs for natural sweeteners in baking.
Read more: 7 Protein-Rich Vegan Foods That Pack a Punch – No Meat, No Problem!
6 Fermented Drinks Known To Support Digestive Health
10 Health Benefits of Adding Pistachios to Your Daily Diet
The Bottom Line!
Dry fruits are nutritional powerhouses packed with essential vitamins, minerals, antioxidants, and healthy fats. Eating them daily can boost immunity, improve heart health, support digestion, and enhance brain function. They're not just convenient snacks but long-term investments in your overall well-being. Whether you’re managing a health condition or simply striving for a healthier lifestyle, incorporating a small handful of dry fruits into your daily diet can make a big difference. They are suitable for people of all age groups and health backgrounds when consumed in moderation. For better nutrient absorption and easy digestion, soak almonds, raisins, and figs overnight before consuming. This simple habit can maximize their health benefits and help you stay energized, focused, and active throughout the day.

If your stomach often feels bloated, uneasy, or just “off,” your gut may be trying to tell you something. In India, gut health has always been a priority, long before probiotics became popular. Our grandmothers had secret kitchen remedies that worked wonders for digestion. Today, science backs what we’ve always known—your gut is your second brain. It controls not just digestion, but also your mood, skin health, and immunity.
Here’s a list of 6 powerful Indian superfoods that promote a healthy gut. These foods are easy to find, affordable, and have been part of Indian kitchens for generations.
Read more: 12 Delicious High-Protein Foods to Eat Daily for a Healthier You
Why Gut Health Matters More Than You Think
Most of us ignore gut issues until they become serious. But your gut does more than just digest food. It houses billions of bacteria that affect your immune system, weight, mental health, and more. When your gut is happy, you feel lighter, more energetic, and less anxious. A bad gut, on the other hand, can lead to acidity, constipation, fatigue, and even depression. So how do you fix it? The answer lies in your plate—especially if it includes these desi superfoods.
1. Buttermilk (Chaas): The Original Probiotic Drink

Buttermilk, commonly known as chaas in India, is a traditional and refreshing drink made by blending curd with water and adding spices like roasted cumin, coriander, or mint. It’s a natural probiotic, rich in good bacteria that support gut health, aid digestion, and boost immunity. Chaas is light on the stomach, helps reduce acidity, and soothes inflammation in the digestive tract. Drinking a glass after meals can ease bloating, improve nutrient absorption, and help break down fats and proteins effectively. It’s especially beneficial during hot Indian summers, keeping the body cool and hydrated while promoting overall digestive wellness naturally.
How to consume: Drink a glass of chaas after lunch. Add a pinch of black salt and roasted cumin for added flavour and gut-soothing benefits.
Personal tip: At my home in Mumbai, my grandmother always made buttermilk in a clay pot. She said it kept the drink cool and balanced the acids in the stomach. It still works like magic.
Know more: 6 Benefits of Drinking Black Coffee
2. Cooked Rice with Ghee: The Comfort Combo

When your stomach feels uneasy, your body naturally looks for comfort foods. In many Indian households, a warm plate of rice topped with a spoonful of desi ghee is the ultimate remedy. This simple meal is not only easy to digest but also soothing for the gut. Ghee is known for its anti-inflammatory properties and helps in healing the intestinal lining. It contains butyrate, a fatty acid that supports gut health. Rice, being low in fibre and gentle on the stomach, works well when digestion is weak. Together, they provide warmth, nourishment, and quick relief during digestive discomfort.
How to consume: Eat this combo warm with a pinch of salt or pair it with plain moong dal for extra fibre and protein.
Bonus fact: Ghee contains butyrate, a fatty acid that helps strengthen the gut lining and prevents leaky gut issues.
3. Methi Seeds (Fenugreek): Tiny Seeds, Big Impact

Methi seeds, or fenugreek seeds, may be tiny, but they offer powerful digestive benefits. Rich in soluble fibre, they help improve bowel movements and ease constipation by adding bulk to the stool. Their natural anti-inflammatory properties soothe the digestive tract, reducing bloating, gas, and acidity. Methi seeds also support healthy gut bacteria and improve metabolism. When soaked overnight and consumed on an empty stomach, they can cleanse the system and promote regular digestion. In many Indian homes, methi water is a trusted morning ritual, especially for those struggling with digestive issues. It’s a natural, affordable, and effective gut-friendly solution.
How to consume: Soak a teaspoon of methi seeds overnight in water and drink it the next morning on an empty stomach. You can also chew the seeds for better results.
Interesting fact: Methi water is also helpful for managing blood sugar levels.
Check more: 10 Superfoods That Will Supercharge Your Diet & Make You Feel Like a
7 Chinese Dishes That Can Be a Healthy Option for Your Diet
4. Coconut: The Natural Gut Soother

In coastal regions of India like Kerala and Tamil Nadu, coconut is a daily staple found in curries, chutneys, and drinks. It’s loaded with healthy fats, especially medium-chain triglycerides (MCTs), which are easy to digest and give quick energy. Coconut also provides dietary fibre that supports smooth digestion and regular bowel movements. Its natural antimicrobial properties help fight harmful bacteria and promote the growth of good gut microbes. Whether consumed as raw coconut, coconut oil, or coconut water, it nourishes the digestive tract and keeps it clean. This tropical superfood is both healing and refreshing, especially in hot, humid climates.
How to consume: Eat fresh coconut pieces as a snack or add grated coconut to your curries and chutneys.
Interesting insight: Coconut oil can also kill harmful bacteria in the gut. Try adding a teaspoon to your meals.
5. Raw Banana (Kacha Kela): A Resistant Starch Wonder

Raw banana, also known as green banana, is a powerful gut-friendly superfood often used in traditional Indian cooking. It’s packed with resistant starch, a type of carbohydrate that behaves like fibre and helps feed the good bacteria in your gut. This supports a balanced gut microbiome and improves digestion. Raw banana is also low in sugar, easy to digest, and especially beneficial for people suffering from loose motions or irritable bowel syndrome (IBS). It helps firm up stool and soothes the digestive system. Cooked as a curry, stir-fry, or even made into flour, it’s a gentle and nutritious choice for gut health.
How to consume: Boil raw banana, mash it with a little rock salt and ghee, and eat it as a side dish. You can also make raw banana kebabs or cutlets.
Personal tip: This was a staple at my aunt’s house in Chennai. Whenever someone had an upset stomach, a raw banana dish was always served for lunch.
Also read: 10 Different Types of South Indian Rice Dishes
10 Must-Try Gujarati Dishes That Will Delight Your Taste Buds
6. Amla (Indian Gooseberry): Fibre-Packed and Rich in Vitamin C

Amla, also known as Indian gooseberry, is a traditional superfood packed with health benefits. It’s rich in Vitamin C, which boosts immunity and supports overall gut health. Amla is also high in dietary fibre, helping to regulate bowel movements and ease digestion. It acts as a natural detoxifier, flushing out toxins from the liver and keeping the digestive tract clean. Regular consumption of amla, whether raw, in juice form, or as part of chutneys and pickles, helps improve metabolism and reduces acidity. In Indian households, amla is often included in daily diets to build strength from within and support long-term health.
How to consume: Eat it raw, drink it as juice, or take it as a powder with honey. Many Ayurvedic medicines for gut health include amla as a core ingredient.
Traditional wisdom: In Ayurveda, amla is known to balance all three doshas—Vata, Pitta, and Kapha.
Two Gut-Healing Add-ons from Nani’s Kitchen
Ajwain Water: Boil a teaspoon of ajwain (carom seeds) in a cup of water. Strain and drink it warm. It reduces gas and indigestion instantly.
Ginger + Rock Salt Shot: Crush a small piece of ginger and mix it with rock salt. Eat it before meals to activate digestive enzymes.
Research now shows that your gut directly affects your brain. A healthy gut reduces anxiety, improves mood, and even boosts focus. This is known as the gut-brain axis. When you eat gut-friendly foods, your brain functions better too.
The Bottom Line
In today’s world of expensive health supplements and imported wellness products, we often overlook the simple, time-tested remedies sitting right in our own kitchens. Indian households, especially those guided by our dadi or nani, have always relied on local, seasonal, and wholesome ingredients to maintain digestive health. From a glass of chaas to a spoon of ghee on rice, these humble foods do more than just fill your stomach—they heal it. You don’t need fancy gut detox kits or trendy diets to feel better. The answers lie in our traditional recipes, rooted in Ayurveda and everyday wisdom. Trust your kitchen staples—they’re affordable, effective, and naturally nourishing for a happy, healthy gut. Sometimes, grandma really does know best.

Carrots, the vibrant orange root vegetable commonly found in Indian kitchens, are much more than a crunchy snack. Packed with essential nutrients, carrots offer a wide range of health benefits and have a rich historical and cultural significance. Originally cultivated in Persia over a thousand years ago, carrots were first grown in hues of purple, red, and white. The familiar orange variety was later developed in the Netherlands and became popular worldwide.
In India, carrots are consumed across states, especially in North India during winters, where red carrots are used for dishes like gajar ka halwa. They are enjoyed raw, cooked, juiced, or blended into curries and salads. What makes carrots special is their versatility and universal health benefits. They’re safe for almost everyone, including children, the elderly, and people with conditions like diabetes or heart disease, thanks to their low glycemic index and rich antioxidant profile. High in beta-carotene, fiber, vitamin A, and potassium, carrots support vision, heart health, immunity, and more. Adding them regularly to your diet is an easy step toward better health.
Read more: 12 Delicious High-Protein Foods to Eat Daily for a Healthier You
Health Benefits of Quinoa: A Superfood for Every Diet
What is a Carrot? A Brief History
Carrots (Daucus carota) are root vegetables that were first cultivated in Persia (modern-day Iran and Afghanistan) over 1,000 years ago. Initially, carrots weren’t orange—they came in shades of purple, red, and white. The familiar orange variety was developed in the Netherlands during the 17th century. Today, carrots are one of the most commonly grown vegetables worldwide.
In India, carrots are cultivated in several states, but the most prominent producers include:
- Uttar Pradesh
- Punjab
- Haryana
- Karnataka
- Andhra Pradesh
Delhi’s red carrots (popularly used for gajar ka halwa) are especially famous during winter months for their sweet flavor and juiciness.
Nutritional Facts of Carrots (Per 100g)
Carrots are packed with essential vitamins and minerals that contribute to various aspects of health. Here's a snapshot of their nutritional composition:
- Calories: 41 kcal
- Carbohydrates: 9.6 g
- Protein: 0.9 g
- Fat: 0.2 g
- Fiber: 2.8 g
- Vitamin A (from beta-carotene): 835 μg (93% DV)
- Vitamin K1: 13.2 μg
- Vitamin C: 5.9 mg
- Potassium: 320 mg
- Glycemic Index: 35 (Low)
Know more: 10 Superfoods That Will Supercharge Your Diet & Make You Feel Like a
11 Powerful Health Benefits of Carrots
- Supports Eye Health: Carrots are rich in beta-carotene, which the body converts into Vitamin A—essential for healthy vision and preventing night blindness.
- Improves Skin Quality: The antioxidants and Vitamin C in carrots help fight free radicals, keeping your skin youthful and glowing.
- Boosts Immunity: With a high dose of Vitamin A and C, carrots help strengthen the immune system, making the body more resistant to infections.
- Promotes Heart Health: Potassium in carrots helps regulate blood pressure, while dietary fiber reduces LDL (bad cholesterol) levels.
- Aids in Digestion: The fiber in carrots supports healthy digestion and helps prevent constipation.
- Supports Weight Management: Low in calories and high in fiber, carrots help keep you full, making them ideal for weight loss diets.
- Regulates Blood Sugar Levels: Despite their slight sweetness, carrots have a low glycemic index, making them suitable for people with diabetes.
- Enhances Liver Function: Carrots detoxify the liver by flushing out toxins and reducing fat deposits, thanks to their antioxidant content.
- Good for Oral Health: Chewing raw carrots stimulates saliva production and reduces the risk of cavities by controlling oral bacteria.
- Prevents Cancer: Antioxidants like beta-carotene and falcarinol in carrots have been shown to reduce the risk of certain cancers, including colon and lung cancer.
- Improves Brain Health: The nutrients in carrots help protect the brain from oxidative stress and improve memory and cognitive function.
Also check: 15 Incredible Ways Beetroot Boosts Your Health & Wellness
Who Can Eat Carrots?
Carrots are safe and beneficial for nearly everyone—including people with:
- Diabetes (due to their low glycemic index)
- Heart disease
- Digestive disorders
- High blood pressure
- Skin issues
Even infants can be introduced to mashed or steamed carrots early on, making them one of the most universally consumable vegetables.
Protein Content and Glycemic Index
Though not high in protein (about 0.9g per 100g), carrots complement other protein-rich foods well. Their low Glycemic Index (35) makes them ideal for people aiming to manage blood sugar.
How to Store Carrots
Proper storage is key to preserving the freshness and nutrients of carrots:
- Remove the green tops, as they draw moisture from the root.
- Store carrots in the refrigerator in perforated plastic bags or containers with a damp cloth.
- Keep them away from ethylene-producing fruits like apples and bananas to avoid spoilage.
Carrots can last for up to 2-3 weeks when stored correctly.
How to Reuse Carrots
- Use leftover carrot peels in broths or as compost.
- Grate extra carrots into parathas, salads, or desserts like gajar ka halwa.
- Blend slightly old carrots into smoothies or soups.
The Bottom Line
Carrots aren’t just brightening up your plate—they’re quietly working wonders for your health. This vibrant root vegetable offers far more than crunch and color. Rich in essential nutrients like beta-carotene, fiber, and antioxidants, carrots support everything from eye health and immunity to heart function and blood sugar balance. Whether you're dealing with a chronic condition or simply aiming for a healthier lifestyle, carrots fit right into any diet. Their natural sweetness makes them a tasty addition to salads, juices, stir-fries, or traditional Indian dishes. Easy to prepare and even easier to love, carrots are one of the simplest, most accessible superfoods you can add to your routine. A small habit with big health benefits—carrots truly deliver on all fronts..

If you're looking for a simple and natural way to boost your health, okra water might be just what you need. Known as bhindi in India, okra is a common vegetable in Indian households. But not many people know that soaking okra overnight and drinking the water in the morning has many health benefits.
From helping with blood sugar to improving skin health, okra water is gaining popularity as a part of daily morning routines. Whether you're managing diabetes or trying to lose weight, adding this to your diet might help you stay healthy naturally. Let’s explore the six key benefits of drinking okra water every morning—and a few extra facts that will surprise you.
Read more: 6 Fermented Drinks Known To Support Digestive Health
1. A Natural Detox for Your Gut
Okra is rich in soluble fiber. When you soak it overnight, the slimy texture that forms in the water is called mucilage. This mucilage works like a gentle cleanser for your stomach and intestines.
Drinking okra water on an empty stomach helps in:
- Flushing out toxins
- Improving digestion
- Easing constipation and bloating
For people who often struggle with acidity or irregular bowel movements, this natural remedy can make a difference. It's also gentle on the stomach, unlike chemical-based detox drinks.
Know more: 12 Delicious High-Protein Foods to Eat Daily for a Healthier You
2. Helps Control Blood Sugar
One of the biggest reasons people turn to okra water is for blood sugar control. This is especially useful for those who have prediabetes or Type 2 diabetes.
The fiber and mucilage in okra slow down the absorption of sugar in the intestines. This helps prevent sudden spikes in blood sugar levels after meals. Many Ayurvedic practitioners in India have recommended okra water as part of a diabetic-friendly lifestyle for years. Now, modern science is beginning to study this traditional tip as well. If you're taking medication for diabetes, speak to your doctor before starting, just to be sure.
3. Makes Your Skin Glow
Okra is full of antioxidants like Vitamin C, flavonoids, and other plant compounds that fight free radicals. These free radicals are one of the main reasons for dull skin, fine lines, and early ageing.
Drinking okra water in the morning helps your skin:
- Stay hydrated
- Look fresh and healthy
- Fight acne and pigmentation
Instead of spending a lot on skincare products, try including okra water in your routine for a natural glow. You may notice the difference in just a few weeks.
Also Check: How Cloud Kitchens are Disrupting the Indian Restaurant Industry
4. Boosts Natural Energy
Tired of waking up sluggish? Swap your morning chai or coffee with okra water. It is packed with magnesium, folate, and Vitamin B6. These nutrients help your body stay active and reduce fatigue. Unlike sugary drinks, okra water provides steady energy throughout the day. It supports your metabolism and helps your body absorb other nutrients better. If you're a student, a working professional, or a busy parent, starting your day with this natural drink could keep you going longer.
5. Supports Weight Loss Goals
Trying to lose weight? Okra water can be your secret weapon. It’s low in calories and high in dietary fiber. That means it keeps you full for longer and reduces your urge to snack in between meals. It also helps balance metabolism, supports fat burning, and reduces cravings for unhealthy foods. Pair this with a light breakfast and some morning exercise, and you’ll start seeing results faster. It’s a simple, homemade drink that costs almost nothing but can help you stay on track with your health goals.
Check more: Health Benefits of Quinoa: A Superfood for Every Diet
6. Keeps Your Heart Healthy
Okra water is good for your heart too. The fiber in okra helps reduce bad cholesterol levels. It also improves blood flow and supports healthy blood pressure. If you have a family history of heart problems or high cholesterol, this drink is worth trying. It’s a natural way to take care of your heart every morning. Heart disease is rising fast in India, especially among people under 40. Adding okra water to your daily routine is a small step that can lead to big benefits over time.
From Bhindi to Brilliance: What’s in Okra Water?
Let’s take a quick look at what makes okra such a powerful vegetable.
Nutritional value of okra (per 100 grams):
- Vitamin C – 23 mg
- Magnesium – 57 mg
- Folate – 60 mcg
- Fiber – 3.2 g
- Low in calories – just 33 kcal
All of these nutrients are good for your digestion, immunity, and overall health.
Why That Gooey Texture Is Actually Good
Many people feel uncomfortable with the slimy texture of okra water. But that gel-like substance is where most of the nutrients are. The mucilage acts like a sponge in your gut. It absorbs toxins, supports gut bacteria, and keeps your stomach calm. It might feel strange at first, but it's worth the benefits. To make it easier to drink, you can add lemon juice, a pinch of rock salt, or even mint leaves.
How to Make Okra Water at Home
Making okra water is simple. Here's how you can prepare it:
Ingredients:
- 2–3 fresh okras
- 1 glass of water (room temperature)
Method:
- Wash the okras and cut off the ends.
- Slice them in half lengthwise.
- Put them in a glass of water.
- Cover and leave overnight at room temperature.
- In the morning, remove the okras and drink the water on an empty stomach.
You can drink this 4–5 times a week for the best results.
The Bottom Line
Okra water is a simple and safe health drink that offers several benefits. It’s easy to prepare, budget-friendly, and doesn’t require any fancy ingredients. Drinking it regularly may help improve digestion, boost skin health, and support weight loss and blood sugar control. If you're looking to adopt a natural remedy into your daily routine, consider starting a 7-day okra water challenge. All you need to do is soak 2–3 okras in water overnight and drink it on an empty stomach the next morning. Keep a journal to track your energy levels, digestion, and skin condition. Just remember—natural solutions take time. For best results, combine this habit with a nutritious diet, regular exercise, and good sleep. Results will follow.

Craving chicken but trying to stay fit? You're not alone. Many people want to enjoy their favourite foods without messing up their diet. Good news: chicken is one of the best sources of lean protein. It is low in fat, easy to cook, and can be turned into many tasty dishes that still support your health goals.
Whether you're a gym-goer, a working professional trying to eat clean, or just someone who wants to stay healthy without giving up on flavour, this article is for you. Here are 7 healthy chicken dishes that can help you maintain your diet. All are packed with protein, low in calories, and full of flavour.
Read more: Power-Packed Mornings: 8 Protein-Rich Vegetarian Indian Breakfast Ideas to
12 Delicious High-Protein Foods to Eat Daily for a Healthier You
1. Grilled Chicken Breast with Garlic and Herbs

Grilled chicken breast is perfect for clean eating. It has very little fat and high protein. You can make it in a pan or on an outdoor grill. Use fresh garlic for better flavour and digestion. Herbs like thyme and parsley give a nice aroma. This dish is best eaten hot, just after grilling. You don’t need any heavy sauces. A light squeeze of lime can bring out the taste. You can store leftover grilled chicken in the fridge for 2–3 days. It’s also a great meal prep option. Have it with a side of roasted sweet potatoes or sautéed spinach. Grilled chicken helps build muscle, and it’s very filling, so you don’t feel hungry soon after.
Why it’s healthy:
- Lean protein
- No added sugar
- Very low in fat
Pro tip: Marinate overnight for more flavour. You can also pair it with air-fried vegetables or a quinoa salad.
Also check: 12 Delicious High-Protein Foods to Eat Daily for a Healthier You
2. Chicken Stir-Fry with Broccoli and Bell Peppers

Chicken stir-fry is one of the easiest one-pan meals. It cooks quickly and is full of colour. Bell peppers give sweetness, while broccoli adds crunch and vitamins. You can use boneless chicken thigh for more moisture. Stir-frying means cooking fast at high heat, so the veggies stay crisp. You can toss in some baby corn or snap peas for variety. Use light oil like sunflower or groundnut. Stir-fry dishes don’t need any cream or butter, so they stay light. This meal is perfect for busy people who want something healthy. You can have it with brown rice or just eat it as is. It gives you protein, fibre, and energy without making you feel heavy.
Why it’s healthy:
- Rich in vitamins and antioxidants
- High in protein
- No heavy sauces or cream
Pro tip: Add ginger for better digestion. This dish is perfect for lunch or dinner.
3. Tandoori Chicken with Greek Yogurt Marinade
Tandoori chicken is a popular Indian dish known for its smoky flavour. But you don’t need a tandoor to make it at home. An oven or air fryer works well. Greek yogurt makes the chicken soft and juicy. It also adds a light tangy taste. You can mix in spices like chaat masala and coriander powder for more flavour. The red colour usually comes from Kashmiri chilli, which adds colour but not heat. Tandoori chicken is great for parties, fitness diets, and even picnics. It’s best served with lemon wedges and onion rings. Eating it once a week gives your body lean protein without adding fat. You can also shred the cooked tandoori chicken and use it in sandwiches or wraps.
Why it’s healthy:
- Yogurt adds protein and probiotics
- No oil or ghee
- Oven-baked or grilled, not fried
Pro tip: Bake it at 200°C for 30–35 minutes. Serve with green chutney made with mint, coriander, and lemon juice.
4. Chicken Lettuce Wraps

Chicken lettuce wraps are a low-carb, high-flavour snack. They are popular in Asian-style diets. Instead of bread, use fresh lettuce as a wrap. The chicken can be minced or finely chopped. You can cook it with a dash of soy, vinegar, and chili flakes. Lettuce gives crunch and freshness to every bite. These wraps are ideal for people who want to avoid roti or rice. You can also add sliced water chestnuts or bamboo shoots for texture. These wraps are great for weight loss diets. They are light but keep you full. You can pack them for lunch too. For more flavour, add a peanut or tamarind dip on the side. Kids also enjoy them if you keep the spice low.
Why it’s healthy:
- Low in calories
- High in protein
- No bread or rice
Pro tip: Use iceberg or butter lettuce for the crunch. Great for evening snacks or light dinners.
Also read: 7 Protein-Rich Vegan Foods That Pack a Punch – No Meat, No Problem!
5. Chicken Quinoa Bowl

Chicken quinoa bowls are power-packed meals. They give you protein, fibre, and nutrients in one plate. Quinoa is a seed that cooks like a grain. It has all nine essential amino acids. When combined with grilled chicken, it becomes a complete meal. You can add raw veggies like cucumber, cherry tomatoes, or spinach. Roasted chickpeas are also a good add-on. Dress it with olive oil and lemon or a light vinaigrette. These bowls are colourful, filling, and perfect for meal prep. They don’t make you sleepy after eating. You stay energetic for hours. They are perfect for people with gluten intolerance too. You can prep everything in containers and mix it fresh every day.
Why it’s healthy:
- High in protein and fiber
- Full of nutrients
- Keeps you full for long
Pro tip: Cook quinoa in vegetable broth for extra taste. You can also add a boiled egg for more protein.
6. Chicken Clear Soup with Ginger and Turmeric

Chicken clear soup is light and healing. It’s a comfort food for sick days or detox diets. It uses very few ingredients. Boiled chicken gives the base flavour. Ginger helps with digestion, and turmeric is great for immunity. You can add bits of carrot, cabbage, or mushrooms for texture. Use pepper and lemon instead of heavy spices. This soup keeps your body hydrated. It’s best taken warm, especially in winter or during cold weather. You can drink it before meals to reduce hunger. It works well for people on a liquid diet too. You can also sip it in the evening instead of tea. It’s low in calories but still gives you the goodness of chicken protein.
Why it’s healthy:
- Good for digestion and immunity
- No fat or heavy carbs
- Warm and soothing
Pro tip: Add a dash of lemon juice before serving. Drink it as a meal starter or during sick days.
7. Baked Chicken Tikka with Mint Dip

This is another Indian favourite turned healthy. Baked chicken tikka is a dry, flavour-packed snack. Unlike restaurant versions, the homemade one has no butter or cream. Marinate chicken cubes in thick curd with Indian spices. Bake them in the oven until slightly charred. This gives the smoky, roasted flavour. The mint dip is made with fresh pudina, coriander, curd, and lemon juice. You can make mini skewers for parties or wrap them in whole wheat roti for a healthy roll. Chicken tikka is high in protein and satisfies Indian spice cravings. It doesn’t need any rice or gravy. It’s a good evening snack or a side dish for dinner. Keep some lemon slices on the side to make it more refreshing.
Why it’s healthy:
- No cream or butter
- Uses hung curd, which is rich in protein
- Baked, not deep-fried
Pro tip: Use skewers to bake them like kebabs. Serve with cucumber salad on the side.
Cluckin’ Good Facts: Chicken and Your Diet Goals
Chicken is the most widely eaten lean meat in India. It’s cheaper than mutton and has less fat. A 100g piece of chicken breast has about 165 calories and 31g of protein. That's why it’s perfect for anyone trying to lose weight, gain muscle, or just eat better.
Many fitness lovers in India eat chicken every day. It helps build muscle and keeps you full. Boiled or grilled chicken is common in Indian meal plans. It also helps burn fat when eaten with the right spices and veggies.
Mindful Eating: How to Avoid Overeating Chicken
Even healthy food can cause weight gain if you overeat. Follow these tips:
- Use a smaller plate
- Eat slowly and chew properly
- Don’t eat while watching TV
- Always pair chicken with greens or veggies
Global Bites: How the World Eats Healthy Chicken
Want to try new flavours? Here are three global chicken dishes that are healthy too:
- Thai Chicken Salad: Shredded chicken with lime, chilli, and peanuts
- Mediterranean Souvlaki: Grilled chicken with cucumber-yoghurt dip
- Korean Lettuce Wraps: Spicy chicken with gochujang and sesame seeds
The Bottom Line
Eating healthy doesn’t mean giving up on taste. You can enjoy chicken and still maintain your diet with the right recipes. These 7 dishes are easy, light, and perfect for daily meals. They’re also great if you’re trying to build muscle or lose fat. So go ahead and try one chicken dish every day this week. Let your meals be clean, healthy, and delicious. Which one will you try first? Share your thoughts or your own version of these dishes on social media.

Breakfast is the most important meal of the day. But if your usual morning meal is just tea and toast, it may not give you the energy you need. For Indian vegetarians, getting enough protein in the morning can seem tricky. But with the right ingredients, you can enjoy a delicious and filling breakfast that also fuels your day. This article covers 8 high-protein vegetarian Indian breakfast options that are both tasty and energizing. These dishes are rooted in Indian kitchens but come with a modern, healthy twist. Whether you’re a student, a working professional, a fitness enthusiast, or someone who simply wants to eat better—this list is made for you.
Read more: 12 Delicious High-Protein Foods to Eat Daily for a Healthier You
Why Is Protei n Important in the Morning?
Protein helps repair your muscles, keeps you full for longer, and gives you stable energy throughout the day. A protein-rich breakfast can help you avoid mid-morning cravings, stay focused, and feel more active.
For vegetarians, good sources of protein include lentils, pulses, paneer, tofu, quinoa, nuts, and seeds. These ingredients can easily be added to desi breakfast recipes. Many believe you need eggs or meat for protein, but that’s not true. You can get enough protein through Indian vegetarian food too. These recipes are completely egg-free and perfect for vegetarians.
Know more: How Cloud Kitchens are Disrupting the Indian Restaurant Industry
8 Protein-Rich Vegetarian Indian Breakfast Ideas
Here are 8 dishes that are high in protein and easy to make:
1. Moong Dal Chilla with Paneer Stuffing
Moong Dal Chilla is a nutritious, savory pancake made from soaked and ground yellow moong dal. This protein-packed batter is spiced with ginger, green chilies, cumin, and coriander, then cooked on a non-stick pan like a dosa. To increase the protein content, stuff it with grated paneer mixed with a bit of salt, pepper, and chopped coriander. Paneer not only enhances the taste but also adds calcium and essential amino acids. You can pair it with green chutney or yogurt. It’s ideal for weight watchers, diabetics, and fitness enthusiasts who need sustained energy in the morning. Easy to make and customizable with veggies like spinach or capsicum, this chilla makes a fulfilling start to your day.
Also check: 10 Superfoods That Will Supercharge Your Diet & Make You Feel Like a
2. Mixed Lentil Dosa (Adai)
Adai is a thick, protein-rich dosa made using a combination of lentils like urad dal, chana dal, toor dal, and moong dal. Soaked and blended with spices, ginger, and dried red chilies, the batter is left to rest and then spread on a hot tawa. Adai is heartier than the usual dosa and has a grainier texture. It is naturally high in plant-based protein and dietary fiber, making it perfect for those seeking a wholesome vegetarian breakfast. Add chopped onions, curry leaves, or grated carrots to the batter for added flavor and nutrition. Serve it with coconut chutney or jaggery for a perfect balance of taste and health. It’s a South Indian treasure worth trying.
3. Quinoa Upma with Veggies and Peanuts
Give your traditional upma a protein makeover with quinoa. This supergrain is gluten-free and contains all nine essential amino acids, making it a complete protein source for vegetarians. Cook quinoa just like rava, and sauté it with mustard seeds, curry leaves, green chilies, onions, and colorful vegetables like carrots, beans, and peas. Add roasted peanuts for crunch and extra protein. Finish with a dash of lemon juice and coriander. Quinoa upma is light yet filling, making it a great option for busy mornings when you want something tasty and nourishing. This fusion dish brings together Indian spices with an international superfood and is perfect for fitness-conscious people or those trying to cut carbs.
4. Sprouted Moong Salad Chaat
Sprouted moong beans are a powerhouse of protein, iron, and vitamins. When sprouted, the nutritional value of moong increases significantly. This breakfast option requires no cooking—just toss the sprouts with finely chopped onions, tomatoes, cucumber, coriander, green chilies, lemon juice, and a pinch of chaat masala. Add some pomegranate seeds for sweetness or crushed peanuts for crunch. It's refreshing, hydrating, and extremely light on the stomach. You can even prepare the sprouts in advance and refrigerate them for quick assembly. Ideal for summers, this breakfast works well for those looking for a raw, plant-based, and easy-to-digest meal to start their day. It’s also great for weight management and boosting metabolism naturally.
5. Paneer Bhurji with Multigrain Toast
Paneer Bhurji is a classic North Indian dish made by crumbling fresh paneer and cooking it with onions, tomatoes, green chilies, and spices like turmeric and cumin. It’s quick to make and rich in protein, especially when served with multigrain toast or whole wheat rotis. This dish provides sustained energy, making it ideal for professionals and students who have long mornings ahead. Multigrain bread adds extra fiber and keeps you fuller longer. For a healthier twist, you can use low-fat paneer or tofu. Paneer bhurji is highly versatile—you can even add spinach, capsicum, or green peas for added nutrition. Serve with a cup of masala chai or fresh juice for a complete breakfast.
6. Masoor Dal Idli with Coconut Chutney
Masoor dal, or red lentils, are not only easy to digest but also packed with plant-based protein. Replacing rice with masoor dal in idli batter is a smart choice if you're looking to cut carbs without sacrificing taste. These soft, slightly pink idlis are made by fermenting ground masoor dal with urad dal, giving them a light and fluffy texture. Steam them and serve with fresh coconut chutney or hot sambar for a comforting and high-protein breakfast. These idlis are also great for diabetics and people watching their weight. They digest slowly and release energy over time, keeping you full and active. A must-try South Indian twist for protein lovers.
Also read: 7 Chinese Dishes That Can Be a Healthy Option for Your Diet
7. Tofu Paratha with Mint Yogurt Dip
Tofu is an excellent source of plant-based protein and calcium, making it a perfect filling for your morning paratha. Grate tofu and mix it with finely chopped onions, green chilies, ajwain, and fresh coriander. Stuff this into whole wheat dough and roll out soft parathas. Cook on a tawa with minimal oil or ghee. Serve with mint-flavored yogurt or plain curd to add probiotics and a cooling effect. This breakfast is ideal for vegans or those who want to avoid dairy but still meet their protein goals. You can even batch-prepare the tofu filling and refrigerate it for a few days. It's a flavorful and hearty way to kickstart your morning.
8. Sattu Smoothie with Banana & Dates
Sattu is roasted Bengal gram flour, and it's a traditional Indian superfood loaded with protein, fiber, and iron. This smoothie combines the nuttiness of sattu with the natural sweetness of bananas and dates. Blend 2 tablespoons of sattu with a banana, 2-3 pitted dates, and a glass of chilled milk or water. Add a pinch of cardamom or cinnamon for flavor. It’s perfect for people in a rush who want something filling yet quick. This drink keeps you full for hours, aids digestion, and provides a steady release of energy. Ideal for summer mornings, it cools the body while nourishing it. Great for those who prefer drinking their breakfast!
Add-ons to Boost Your Protein
Want more protein in the same dish? Try these:
- Add a spoon of hemp or chia seeds to smoothies or salads
- Use Greek yogurt instead of curd
- Mix nut butters into your oats or toast
- Sprinkle flaxseed powder in uttapam or paratha dough
- Add tofu or paneer cubes to poha or dosa batter
The Bottom Line
You don’t need fancy protein powders or expensive superfoods to stay energized. Your Indian kitchen already has everything you need for a strong and healthy start. Ingredients like moong dal, paneer, quinoa, sprouts, and lentils are packed with natural protein and are easy to cook. With just a bit of planning, you can create delicious and wholesome breakfasts that keep you full for hours. Whether it’s a hearty tofu paratha, a refreshing sprout chaat, or a warm bowl of quinoa upma, these meals offer both taste and nutrition. Indian flavors, when combined with smart choices, can easily meet your daily protein needs. Start your morning with these power-packed meals and fuel your day the right way—naturally and deliciously.

In today’s health-conscious dining culture, restaurants are reimagining their menus with nutritious, flavor-rich ingredients. Among these superfoods, pistachios stand out for their incredible health benefits, versatility, and rich heritage. Whether added to salads, desserts, main dishes, or as a crunchy garnish, pistachios elevate both taste and nutritional value.
Pistachios are the edible seeds of the Pistacia vera tree, native to the Middle East and Central Asia. Cultivated for thousands of years, pistachios were considered a delicacy among royalty in ancient Persia. Over time, they’ve gained global popularity for their unique flavor, vibrant green color, and impressive nutrient profile.
In this article, we explore the 10 health benefits of adding pistachios to your daily diet, their history, nutritional facts, calories, protein content, glycemic index, and tips on how to store and reuse them in restaurant kitchens.
Read more: 12 Delicious High-Protein Foods to Eat Daily for a Healthier You
Pistachios in India – Where Are They Popular?
In India, pistachios are widely consumed across the country and are especially popular during festivals and in premium culinary dishes. They are a staple ingredient in traditional sweets like baklava, barfi, and kulfi, as well as in modern gourmet creations. Among Indian states, pistachios are most famously used and consumed in Maharashtra, Delhi, and Punjab—regions known for their vibrant food culture, love for rich flavors, and high-end dining experiences.
These states also have a significant demand for dry fruits, including pistachios, in both retail and restaurant segments. Since India does not produce pistachios in large quantities, it relies heavily on imports from countries like Iran and the USA (particularly California), which are known globally for their superior quality and flavor. This ensures a steady supply for commercial and culinary use.
Also read: Health Benefits of Quinoa: A Superfood for Every Diet
10 Superfoods That Will Supercharge Your Diet & Make You Feel Like a
Nutrition Facts (per 28g or 1 oz, approx. 49 kernels)
- Calories: 159 kcal
- Protein: 5.7 grams
- Carbohydrates: 7.7 grams
- Fats: 12.9 grams (mostly healthy fats)
- Fiber: 3 grams
- Potassium: 290 mg
- Vitamin B6: 25% of RDI
- Magnesium: 8% of RDI
- Antioxidants: Lutein, zeaxanthin, polyphenols
Know more: Dosa: The Perfect Crispy & Nutritious South Indian Breakfast!
10 Health Benefits of Pistachios for Your Daily Diet
1. Heart Health: Pistachios are loaded with heart-friendly monounsaturated and polyunsaturated fats that help lower bad LDL cholesterol while raising good HDL cholesterol levels. Regular consumption can significantly reduce the risk of cardiovascular diseases, making pistachios a smart choice for a heart-healthy diet recommended for diners focused on wellness and longevity.
2. Rich in Protein: With about 5.7 grams of protein per ounce, pistachios are an excellent plant-based protein source. They are ideal for vegetarians, vegans, and anyone looking to add more non-meat proteins to their meals. Restaurants can use pistachios to create high-protein, satisfying dishes that appeal to health-conscious customers.
3. Low Glycemic Index: Pistachios have a low glycemic index of approximately 15, meaning they cause a slow, steady rise in blood sugar levels. This makes them an ideal food choice for diabetics and anyone managing blood glucose. Including pistachios in meals helps balance energy without spikes or crashes, promoting sustained satiety.
4. Weight Management: Rich in protein and dietary fiber, pistachios help create a lasting feeling of fullness, which can reduce overall calorie intake throughout the day. Their satisfying crunch also encourages mindful eating. Including pistachios on restaurant menus offers weight-conscious patrons a wholesome, tasty option without sacrificing flavor or satiety.
5. Good for Eye Health: Pistachios are a rich source of the antioxidants lutein and zeaxanthin, which are essential for maintaining good vision. These nutrients protect the eyes from harmful blue light and may reduce the risk of age-related macular degeneration, making pistachios a functional food for promoting long-term eye health.
6. Supports Gut Health: Thanks to their natural fiber content, pistachios aid in promoting healthy digestion and bowel regularity. They also act as prebiotics, nourishing beneficial gut bacteria. A strong, balanced gut microbiome is key to overall health, immune resilience, and nutrient absorption, making pistachios a gut-friendly ingredient for any menu.
7. Antioxidant Powerhouse: Pistachios are loaded with antioxidants such as polyphenols and tocopherols, which fight oxidative stress and inflammation. Antioxidants are crucial in protecting cells against damage caused by free radicals. Incorporating pistachios into meals supports overall wellness and can contribute to reducing the risk of chronic diseases like cancer and diabetes.
8. Regulates Blood Pressure: High in potassium, pistachios naturally support healthy blood pressure regulation. Potassium helps balance sodium levels in the body, thus improving cardiovascular function. Regular intake of potassium-rich foods like pistachios may lower the risk of hypertension, stroke, and other heart-related issues, promoting a healthier circulatory system for diners.
9. Safe for Most Health Conditions: Pistachios are safe for individuals with common health concerns such as diabetes, high blood pressure, high cholesterol, and even celiac disease, as they are gluten-free. Their balanced nutritional profile makes them a versatile and inclusive menu option, offering health benefits without dietary restrictions for most customers.
10. Boosts Immunity: Rich in Vitamin B6, pistachios play an essential role in supporting immune function by enhancing the production of white blood cells. Vitamin B6 also aids in the formation of hemoglobin and regulates blood sugar. A pistachio-rich diet strengthens the body’s natural defenses, helping diners stay healthy year-round.
Check more: 10 Benefits of Having One Teaspoon of Honey in the Morning
Popular Restaurant Dishes That Use Pistachios
Pistachios are making their way into a wide range of restaurant menus, adding a unique twist to traditional and contemporary dishes. Their nutty flavor and vibrant color make them ideal for both savory and sweet creations. Here are some popular restaurant dishes that hero pistachios:
- Pistachio Kulfi or Ice Cream – A rich, creamy dessert infused with ground pistachios, offering indulgence with a crunch.
- Baklava with Crushed Pistachios – This Middle Eastern pastry is layered with pistachios and soaked in honey syrup, making it a bestseller.
- Pistachio Pesto Pasta – A modern twist on the Italian classic, using pistachios instead of pine nuts for a nutty depth.
- Pistachio-Infused Mughlai Gravies – Adds richness and aroma to royal Indian gravies.
- Granola with Pistachios & Honey – A nutritious breakfast or dessert option topped with crushed pistachios for texture
How to Store Pistachios
To ensure pistachios remain fresh, crunchy, and flavorful, follow these storage tips:
- Airtight Containers: Store in airtight containers to prevent moisture absorption.
- Cool, Dry Place: Keep in a cool, dry, and dark space—ideally in the refrigerator or walk-in freezer for long-term storage.
- Avoid Odors: Keep away from strong-smelling foods (like onions or garlic) as pistachios can absorb odors.
The Bottom Line
With a rich culinary legacy and a global appeal, these nutrient-dense nuts fit seamlessly into gourmet, fusion, and wellness-focused menus. Their vibrant green color, satisfying crunch, and subtly sweet flavor enhance both sweet and savory dishes—be it a creamy kulfi, a nut-crusted entrée, or a refreshing salad topping. Backed by science for their heart, gut, and immune health benefits, pistachios appeal to modern diners seeking nutritious indulgence. Easy to store and versatile in use, they elevate the dining experience while promoting wellness. Add pistachios to your restaurant’s daily prep and serve more than just meals—serve good health in every dish.

When summer arrives in India, the heat can feel exhausting. Starting your day with a heavy breakfast often feels too much. That’s why a light, refreshing breakfast is a great way to feel energetic and cool throughout the day. Whether you’re working from home, heading to the office, or managing home duties, these easy breakfast ideas will help you stay full without feeling heavy. Plus, they are packed with seasonal ingredients, are quick to prepare, and taste delicious.
In summer, your body needs hydration, cooling foods, and quick energy. Heavy or oily food can make you feel sluggish and sleepy. Light breakfasts help your body stay active and fresh during hot days. Here are 7 light breakfast ideas to enjoy in summer, along with some extra tips and personal suggestions.
Read more: 7 Protein-Rich Vegan Foods That Pack a Punch – No Meat, No Problem!
1. Chilled Overnight Oats with Mango & Chia

Overnight oats are great for busy mornings. You prepare them the night before. Use rolled oats, not instant oats. They stay firm and chewy. Soak them in milk or almond milk. Mango adds natural sweetness. Chia seeds add fibre and protein. They also keep you full. This breakfast helps with digestion. It gives energy without making you feel heavy. You can also add a pinch of cardamom for flavour. Keep it in a glass jar for easy storage. It lasts up to 2 days in the fridge. Add a few crushed almonds for crunch. This meal is also great for children. It’s colourful, creamy, and healthy. You can carry it to work or eat it on the go.
How to make it:
- Mix oats, milk, chia seeds, and honey in a jar.
- Let it soak in the fridge overnight.
- Top it with fresh mango slices in the morning.
Know more: 10 Benefits of Having One Teaspoon of Honey in the Morning
2. Cucumber & Mint Sandwiches with Greek Yogurt Spread

Greek yogurt is thicker than regular curd. It has more protein. It’s also lower in sugar. This makes it a good base for spreads. Adding mint gives a cool and fresh taste. Cucumber has high water content. It helps your body stay hydrated. You can use whole wheat or multigrain bread. These have more fibre than white bread. This sandwich is good for digestion. It’s also very light. If you don’t like raw cucumber, chill it before slicing. It tastes better. You can prepare the yogurt spread the night before. Store it in the fridge. It also works well as a dip. Add black pepper or crushed garlic for more flavour. This sandwich keeps well for tiffin too.
How to make it:
- Mix Greek yogurt, salt, pepper, and chopped mint leaves.
- Spread it on brown bread or multigrain bread.
- Add thin cucumber slices and make a sandwich.
Check more: These Top Indian Dishes Made Their Place in the World's Best Street Food List
3. Poha with a Twist – Add Raw Mango and Peanuts

Poha is made from flattened rice. It’s easy to cook and light on the stomach. In summer, raw mango adds a tangy taste. This also improves digestion. Peanuts add crunch and protein. You can also add green peas for colour. This version is rich in iron and good carbs. Use kachi ghani mustard oil for an earthy flavour. It tastes best when served fresh. Add chopped coriander and grated coconut for garnish. Squeeze some lemon juice before serving. Poha doesn’t need soaking like rice. Just rinse it and keep it aside. It cooks fast and is ideal for rushed mornings. In Maharashtra, this style is called ‘Kairiche Pohe.’ It is often served with tea or buttermilk.
How to make it:
- Wash poha and keep it aside.
- In a pan, heat oil, mustard seeds, green chilli, curry leaves, and onions.
- Add poha, salt, turmeric, and grated raw mango.
- Garnish with roasted peanuts and coriander.
Also check: 12 Delicious High-Protein Foods to Eat Daily for a Healthier You
4. Smoothie Bowls – Try a Berry Banana or Lassi Bowl

Smoothie bowls are like thick fruit shakes in a bowl. They are thicker than normal smoothies. You eat them with a spoon, not drink them. Banana makes the base creamy. Berries add colour and antioxidants. Use frozen berries for best texture. Add honey or dates for sweetness. For toppings, try granola, pumpkin seeds, or sliced kiwi. These add crunch and nutrition. Blend in some flax seeds for Omega-3. A smoothie bowl cools the body in hot weather. It also makes you feel full. Use a wide bowl for easy toppings. Kids love the colours and sweet taste. It’s also a great way to eat fruits in the morning. Keep it dairy-free by using plant milk.
How to make it:
- Blend banana, curd, and honey for a smoothie base.
- Pour into a bowl and top with cut fruits, nuts, and seeds.
5. Cold Idlis Tossed in Coconut Oil and Curry Leaves

This is a smart way to reuse leftover idlis. Cold idlis stay firm and absorb flavours well. Coconut oil adds a South Indian aroma. You can add mustard seeds and chopped green chilli. Curry leaves bring a fresh, earthy note. Cut the idlis into small cubes. This helps them toast better. Serve them with coconut chutney or curd. It’s a no-mess breakfast. Perfect for hot days when you don’t want to cook much. You can also use mini idlis for kids. Add grated carrots or peas for colour. This dish is naturally gluten-free. You can pack it in a lunchbox too. It tastes even better after 30 minutes of resting. It’s light, tasty, and gut-friendly.
How to make it:
- Use leftover idlis from the previous day.
- Chop into pieces.
- Toss in coconut oil, mustard seeds, curry leaves, and a pinch of salt.
6. Seasonal Fruit Salad with Chat Masala

Fruit salad is quick and colourful. Use fruits like watermelon, papaya, kiwi, and grapes. Each fruit brings different nutrients. Watermelon hydrates. Papaya helps digestion. Kiwi adds vitamin C. Grapes give instant energy. Cut the fruits into equal sizes. This makes it easier to eat. Sprinkle chat masala for a tangy Indian twist. Add mint leaves for a cool flavour. For extra protein, add some soaked almonds. You can also drizzle honey or lime juice. Avoid mixing citrus fruits with milk-based foods. Eat the salad fresh. Don’t store it too long. Fruits lose taste after cutting. Make it right before eating. This salad is perfect for kids and adults. It’s colourful, refreshing, and full of flavour.
How to make it:
- Cut watermelon, papaya, mango, banana, and muskmelon.
- Add a pinch of chaat masala and lemon juice.
7. Moong Dal Chilla with Coriander Chutney

Moong dal chilla is a healthy Indian pancake. It’s made with soaked green gram. You grind it with ginger and spices. The batter is smooth and thick. You don’t need any fermentation. Cook on a non-stick pan with very little oil. Add veggies like spinach or carrots. These boost vitamins and colour. Chilla is rich in plant protein. It’s good for the stomach and easy to digest. Pair it with mint or tomato chutney. You can also roll it and pack it for later. Serve with curd for extra cooling. It suits all age groups. You can even make mini versions for kids. Chilla is a smart way to eat lentils without much effort.
How to make it:
- Soak moong dal overnight. Blend with ginger, chilli, salt.
- Pour onto a hot pan and cook both sides.
- Serve with coriander chutney.
Summer Superfoods to Add to Your Breakfast
Here are some ingredients you can mix and match into your meals:
- Watermelon: For hydration
- Cucumber: To cool down the body
- Curd or yogurt: For gut health
- Mint leaves: For a refreshing taste
- Sabja seeds (basil seeds): To reduce body heat
- Raw mango: For tangy taste and digestion
These foods not only taste good but also help manage summer heat.
Pair It Up:
Here are some cooling drinks you can pair with your light breakfasts:
- Aam panna
- Coconut water
- Mint lemonade
- Chaas (buttermilk)
- Cold brew coffee or iced tea
These help with digestion and keep your body cool.
The Bottom Line!
Summer mornings don’t have to start with a boring meal or something too heavy. With just a little planning and the right ingredients, you can make breakfasts that are light, tasty, and healthy. These 7 breakfast ideas are quick, need no fancy ingredients, and work well with Indian kitchens. Try mixing and matching them throughout the week. Your body will thank you—and your taste buds will too.

Honey, often referred to as “liquid gold,” is a natural sweetener made by honeybees from the nectar of blooming flowers. Beyond its delightful taste, honey carries a rich cultural and medicinal history that spans across civilisations. Ancient Egyptians used honey not just as a food, but also for embalming and preserving their dead, recognising its antibacterial properties. In India, Ayurveda has long regarded honey as a powerful healing agent, used in everything from cough syrups to wound treatments. Greek athletes consumed honey to boost stamina and performance, while traditional Chinese medicine integrated it into tonics to promote vitality.
This golden elixir is one of the oldest known food substances, yet it continues to be relevant in modern wellness practices. Its natural composition of sugars, antioxidants, enzymes, and trace minerals makes it far superior to refined sugar. Today, honey is widely consumed across the globe not only for its flavor but also for its numerous health benefits. Whether used in tea, skincare, or as a morning ritual, honey truly is nature’s gift to health.
Read more: 7 Protein-Rich Vegan Foods That Pack a Punch – No Meat, No Problem!
Famous Honey-Producing States in India
India ranks among the top honey-producing countries globally. The most renowned honey-producing states include:
- Himachal Pradesh – Known for its pure, floral, and Himalayan honey.
- Punjab & Haryana – Rich in mustard and eucalyptus honey.
- West Bengal & Bihar – Famous for forest and litchi honey.
- Tamil Nadu & Kerala – Known for their tribal forest honey.
Among these, Himachal Pradesh stands out for its high-altitude, raw, and organic honey—widely acclaimed for its medicinal and anti-bacterial properties.
Check more: Health Benefits of Quinoa: A Superfood for Every Diet
Nutritional Facts (Per Teaspoon – 5g)
- Calories: 15–20 kcal
- Carbohydrates: 4–5g (natural sugars: glucose & fructose)
- Protein: Trace amounts (-0.05g)
- Fat: 0g
- Glycemic Index (GI): 35–58 (moderate GI; lower than refined sugar)
- Vitamins & Minerals: Contains B vitamins, calcium, magnesium, iron, potassium, zinc (in small quantities)
- Antioxidants: Includes flavonoids and phenolic acids
Know more: 12 Delicious High-Protein Foods to Eat Daily for a Healthier You
10 Surprising Benefits of One Teaspoon of Honey in the Morning
1. Boosts Digestion Naturally: Honey acts as a mild laxative and promotes better digestion by stimulating the production of gastric juices. It also helps reduce bloating and acidity.
2. Strengthens Immunity: Packed with antioxidants and anti-bacterial agents, honey helps your body fight off infections—perfect for cold, flu, and seasonal allergies.
3. Balances Blood Sugar Levels (in Moderation): Despite being sweet, honey has a lower glycemic index than sugar and doesn’t spike blood sugar levels sharply, making it suitable (in moderation) for diabetics.
4. Improves Heart Health: The polyphenols in honey help reduce LDL (bad) cholesterol and increase HDL (good) cholesterol. This improves blood flow and reduces the risk of heart disease.
5. Provides a Natural Energy Boost: Its natural sugars give an instant energy kick without the crash you get from artificial sweeteners or processed sugar.
6. Supports Weight Management: Honey, when taken with warm water and lemon, aids in fat metabolism and detoxifies the body—an ideal morning ritual for weight watchers.
7. Promotes Better Sleep at Night: It helps release melatonin in the brain by creating a small spike in insulin levels that facilitates tryptophan entry into the brain—a precursor to melatonin.
8. Heals the Body from Within: From ulcers to inflammation, honey's anti-inflammatory and wound-healing properties work internally and externally for faster recovery.
9. Safe for Most Health Conditions: Whether you're diabetic, suffer from PCOS, have thyroid issues, or even cardiovascular conditions—raw, unprocessed honey in moderation is generally considered safe. However, always consult a doctor for personalized advice.
10. Improves Skin & Hair Health: Regular intake improves skin texture and brings a glow. It also promotes hair health when used internally or externally as a mask.
Also read: Is Frozen Food a Health Hero or Hidden Villain? The Shocking Truth Revealed!
Top 7 Honey Brands in India: The Sweetest Picks for Health and Taste
How to Store and Reuse Honey Properly
Storage Tips:
- Keep honey in an airtight glass jar.
- Store it at room temperature away from direct sunlight.
- Do not refrigerate—it may crystallize (which is natural and reversible).
Reusing Tips:
- If honey crystallizes, place the jar in warm water to bring it back to its original form.
- Use it in teas, toast toppings, salad dressings, smoothies, or even DIY skincare routines.
Start Your Day Right with Honey
A single teaspoon of honey every morning is more than just a sweet start to the day—it’s a natural, time-tested health elixir. Rich in antioxidants, enzymes, and essential nutrients, honey offers a wide range of benefits, from boosting immunity and improving digestion to enhancing metabolism and promoting heart health. It provides a gentle energy boost without the crash associated with processed sugars and supports overall wellness with regular use. Whether you’re managing a health condition or simply aiming for better vitality, honey fits seamlessly into any lifestyle. More than a kitchen staple, it’s a daily dose of nature’s goodness. Add it to your morning routine and experience its subtle yet powerful impact on your health—naturally and effectively.

Protein is an essential nutrient that your body needs daily. It helps build and repair muscles, supports a strong immune system, and keeps you feeling full for longer. Many people believe that protein only comes from animal-based foods like chicken, eggs, or fish. However, this is a common myth. You can get enough protein from plant-based sources as well — especially if you follow a vegan lifestyle or are looking to reduce meat intake.
India, in particular, has a rich variety of traditional plant-based foods that are naturally high in protein. From dals and legumes to tofu and seeds, these foods are not only nutritious but also easy to prepare and delicious. Whether it’s a simple bowl of rajma chawal, a serving of sprouted moong salad, or a smoothie with peanut butter and chia seeds, you can add protein to every meal. What’s more, many of these foods are already part of our everyday meals, making it easier to adopt a high-protein vegan diet without changing your eating habits drastically. Whether you're a fitness enthusiast, someone watching your weight, or simply aiming to eat healthier, protein-rich vegan foods can help you meet your goals naturally. Here’s a detailed look at 7 protein-rich vegan foods that are perfect for your Indian kitchen.
Check more: 12 Delicious High-Protein Foods to Eat Daily for a Healthier You
1. Chickpeas – The OG of Plant Power

Chickpeas are used in many traditional and modern recipes. They are popular in Indian, Middle Eastern, and Mediterranean dishes. In India, black chickpeas (kala chana) are also a good source of protein. They are often eaten during Navratri fasting or boiled and mixed with lemon and salt for a light snack. Chickpeas are also great for heart health due to their low glycemic index. You can make chickpea flour (besan), which is used in pakoras, cheelas, and dhoklas. Besan is a good way to add protein to your diet without extra cooking. Chickpeas also support bone health as they contain magnesium and phosphorus. Soaking chickpeas before cooking helps in digestion and improves nutrient absorption. Chickpeas are also budget-friendly and easily available in Indian markets.
How to use them:
- Make classic chhole with roti
- Add boiled chickpeas to salads or chaats
- Blend into creamy hummus with garlic and lemon
- Roast with spices for a crunchy snack
Also read: A Guide to Different Breads and Their Nutritional Value
2. Lentils – Dal-icious Protein Bomb

Lentils have been part of Indian meals for centuries. They are easy to cook and available in many types like urad, chana, masoor, and moong. Each lentil has a slightly different taste and texture. Moong dal is light and good for digestion, while urad dal is often used in dosas and idlis. Lentils are also good for people managing diabetes as they have complex carbs and fiber. You can sprout lentils and eat them raw or in salads. Sprouted lentils have more nutrients and are easier to digest. Lentils can also be turned into flour, which is used in making parathas or pancakes. They are a smart way to add protein to any Indian dish. Eating dal with rice gives you all nine essential amino acids, making it a complete protein.
How to use them:
- Cook regular dal tadka or dal fry
- Prepare sambhar with vegetables
- Use in soups and stews
- Combine with rice for a balanced meal
Know more: Health Benefits of Quinoa: A Superfood for Every Diet
3. Tofu – The ‘Paneer’ for Plant Lovers

Tofu is a soft and spongy food made from soy milk. It is very popular in Asian cooking, especially in Chinese and Thai recipes. Tofu comes in different textures – soft, firm, and extra firm. Soft tofu is great for smoothies and desserts, while firm tofu works well in stir-fries. Tofu is naturally low in calories but high in protein and iron. It’s a great option for people trying to lose weight or avoid dairy. Many vegan restaurants in India now offer tofu-based dishes. Homemade tofu is also easy to prepare if you have soybeans and lemon juice. Tofu can also be grilled or baked for a smoky flavor. It’s a versatile meat substitute in vegan diets. If you freeze and then thaw tofu before cooking, it becomes firmer and chewier—similar to meat.
How to use it:
- Stir-fry with bell peppers and sauces
- Make tofu tikka or tofu bhurji
- Add to curries instead of paneer
- Use in sandwiches or wraps
Also check: Is Frozen Food a Health Hero or Hidden Villain? The Shocking Truth Revealed!
4. Quinoa – The Fancy Seed with Superpowers

Quinoa is often called a “super grain,” though it’s actually a seed. It is grown mostly in South America, especially in Peru and Bolivia. In recent years, India has started growing quinoa in states like Rajasthan and Andhra Pradesh. It cooks fast and has a light, nutty flavor. Quinoa is naturally gluten-free, which makes it great for people with wheat allergies. It is rich in iron and magnesium, which help fight tiredness and improve sleep. You can use quinoa instead of rice for a protein-rich twist. It can also be used in upma, pongal, or even quinoa kheer. Because it is light on the stomach, quinoa is good for post-workout meals. Wash it well to remove its bitter coating. Though quinoa is not grown widely in India, you can now find it in many grocery stores and online.
How to use it:
- Make quinoa pulao or khichdi
- Use in Buddha bowls with veggies
- Add to salads with lemon dressing
- Mix with dal for extra protein
5. Tempeh – Fermented, Funky, and Full of Gains

Tempeh is not very common in Indian homes yet but is gaining popularity in urban cities. It has a firm texture and is often used as a meat alternative in burgers, wraps, and bowls. Unlike tofu, tempeh is fermented, which means it supports gut health and digestion. It also has a richer, earthier flavor compared to tofu. Tempeh is usually made in blocks and can be sliced, cubed, or crumbled. It is now available in India through vegan brands and specialty food stores. You can marinate it in Indian spices and grill or fry it. Tempeh is also rich in B vitamins and calcium, making it a good addition to a vegan diet. Store it in the fridge for longer shelf life. Tempeh is slowly gaining popularity in India. You can find it in vegan and organic food stores.
How to use it:
- Grill it and add to sandwiches or wraps
- Add to stir-fries and noodle dishes
- Use in place of meat for biryani or curry
- Crumble it into paratha stuffing
6. Green Peas – The Underdog of Vegan Protein

Green peas are a staple in Indian homes and are used in many dishes like matar paneer, aloo matar, and fried rice. They are also added to soups, cutlets, and snacks. Frozen peas are available all year and are just as nutritious as fresh ones. Green peas are low in fat but high in plant protein and fiber. They also contain vitamin K and folate, which help in maintaining strong bones. For a fun twist, you can blend peas into spreads and dips. Green peas are also used in making street food like matar kulcha. They help in reducing inflammation and support eye health. Since they’re sweet and soft, even kids enjoy eating them. Green peas are easily available, low-cost, and can be stored in the freezer year-round.
How to use them:
- Add to pulao, curries, and aloo matar
- Mix in soups or vegetable stir-fries
- Stuff in parathas with spices
- Blend into pea and mint soup
7. Nuts & Seeds – Small But Strong

Nuts and seeds are power-packed foods that can be eaten raw, roasted, or ground into butter. They are great as snacks or toppings on smoothies and salads. In India, peanuts and sesame seeds are very common and affordable. You can make chutneys, ladoos, or energy bars using them. Flaxseeds and chia seeds are good for heart and skin health. They contain omega-3 fatty acids, which help reduce cholesterol. Almonds and walnuts are also rich in protein and memory-boosting nutrients. Roasted pumpkin and sunflower seeds are great crunchy toppings. You can even make dairy-free milk from almonds or cashews. Keep a small mix of nuts and seeds in your bag for a protein-rich snack on the go. They are also full of healthy fats and good for heart and brain health.
Top vegan options include:
- Hemp seeds: 10g protein in 3 tbsp
- Pumpkin seeds: 7g per ounce
- Chia seeds: 5g per 2 tbsp
- Peanut butter: 8g per 2 tbsp
- Almonds: 6g in 28g
How to use them:
- Sprinkle on smoothies and oatmeal
- Blend into chutneys or dips
- Spread peanut butter on toast
- Add to ladoos and granola
Can You Build Muscle on a Vegan Diet?
Yes, absolutely. You can build strong muscles and maintain energy by combining different plant-based foods. To get all essential amino acids, try mixing cereals and pulses. For example, eat dal with rice or hummus with whole wheat bread.
Whey protein is dairy-based and not suitable for vegans. Plant protein powders like pea, rice, and hemp are good alternatives. They are easier to digest and better for people with lactose intolerance or allergies. Plant-based protein is also better for the environment.
The Bottom Line
You don’t need meat, eggs, or dairy to meet your protein needs. With the right mix of foods, you can get plenty of protein from plants. Whether you’re trying to gain muscle, eat healthier, or reduce your carbon footprint, these vegan options have you covered. Try adding at least one of these to your next meal. Start with a tofu curry today or a chana salad tomorrow. Your body—and the planet—will thank you.

India’s street food is all about bold flavours, variety, and comfort. Whether it’s a buttery paratha from Punjab, a spicy vada pav from Mumbai, or a crispy dosa from Chennai, each region offers something unique and full of taste. What’s truly special is how these everyday dishes have now caught the attention of food lovers across the globe. Platforms like TasteAtlas have even ranked some of our favourites among the best street foods in the world. That’s a big deal—not just for foodies, but for everyone who’s grown up enjoying these dishes at roadside stalls or family-run carts. It shows how far Indian street food has come, and how its charm is reaching beyond borders. So, when people in New York or London bite into a chole bhature or pani puri, they’re getting a taste of something deeply rooted in our culture—and that’s worth celebrating.
Read more: 12 Delicious High-Protein Foods to Eat Daily for a Healthier You
1. Paratha – The Everyday Hero of Indian Breakfasts

Paratha is more than just food. It is an emotion, especially in North Indian homes. From Delhi to Ludhiana, parathas are a part of everyday life. Stuffed with fillings like potato, paneer, cauliflower, or even lentils, parathas are served hot with curd, butter, and pickles. In India, you will find famous paratha stalls at every corner. Some places, like Paranthe Wali Gali in Delhi, are known for making over 20 types of parathas. What’s new is that parathas have started gaining popularity abroad. Many Indian restaurants in London, Sydney, and New York serve parathas for breakfast and brunch. Why do people love it? It’s simple, wholesome, and full of flavor. Also, it can be made in many ways – plain, stuffed, deep-fried, or even baked.
Also Check: A Guide to Different Breads and Their Nutritional Value
2. Amritsari Kulcha – A Soft Bread with a Spicy Punch

Amritsari Kulcha is one of Punjab’s proudest street foods. It looks like a naan but has a totally different taste and texture. The kulcha is stuffed with spicy mashed potatoes or paneer and baked in a tandoor until golden. It’s served with chole (chickpea curry), onions, and tangy chutney. This dish comes straight from the streets of Amritsar. But now, you can find it in many Indian restaurants in countries like Canada, the UK, and the US. What makes it stand out is the crispy layer outside and the spicy, buttery stuffing inside. For anyone visiting Punjab, having a plate of Amritsari Kulcha is a must.
Know more: 21 Different Types of Indian Breads and Their Benefits
3. Chole Bhature – Delhi’s Spicy Breakfast Delight

Chole Bhature is one of Delhi’s most famous street foods. It is made with spicy chickpeas and deep-fried puffed bread. The bhature is soft and fluffy, while the chole is rich and tangy. The mix of flavors makes it a favorite for breakfast or lunch.
Chole Bhature is not only found in Delhi but also in cities like Mumbai, Bengaluru, and even abroad. In places like Toronto and Dubai, Indian restaurants have started offering it as a weekend brunch special. Some places even add a twist by serving it with paneer-stuffed bhature or using whole spices for a richer taste. This dish has now become a global favorite for those who like bold and spicy meals.
Also read: Dosa: The Perfect Crispy & Nutritious South Indian Breakfast!
4. Vada Pav – Mumbai’s Iconic Burger

Vada Pav is called Mumbai’s version of a burger. It has a deep-fried potato patty placed between a pav (bun), served with chutneys and fried green chilies. It’s cheap, fast, and filling. Street vendors across Maharashtra sell thousands of vada pavs every day. Globally, it has gained attention as a vegetarian burger option. Several Indian restaurants in the US and UK now serve gourmet versions of vada pav.
5. Pani Puri – A Burst of Flavour in Every Bite

Also known as Golgappa or Puchka, this dish is a must-have in every street food market in India. It includes small puris filled with tangy water, mashed potatoes, and chickpeas. The experience of eating pani puri is unique. You get a mix of spicy, sweet, and sour in one bite. Food lovers abroad are also trying this snack. Restaurants in Singapore, New York, and Melbourne now serve pani puri with fancy fillings and flavored water shots.
6. Pav Bhaji – Mumbai’s Butter-Lover's Dream

Pav Bhaji is a thick vegetable curry served with soft bread rolls. It’s loaded with butter, both in the curry and on the pav. The dish started as a quick meal for textile workers in Mumbai, but now it's loved worldwide. You can find it at food trucks and Indian diners globally. Some chefs have even created fusion versions like Pav Bhaji Fondue or Bhaji Pizza.
7. Dosa – South India’s Crispy Delight

Dosa is a thin, crispy crepe made from fermented rice and lentil batter. It can be plain or filled with potato curry. Dosas are mostly eaten with coconut chutney and sambhar. What makes it street food? In South India, you’ll see dosa carts on almost every corner. Now, dosa cafés and food stalls have opened in cities like London, New Jersey, and Tokyo. From plain to cheese-stuffed and even chocolate dosa, there are many variations that attract foodies around the world.
8. Kathi Roll – A Wrap Packed with Flavour

Kathi Rolls are Kolkata’s gift to Indian street food. It is a paratha rolled with fillings like chicken, paneer, egg, or vegetables, and topped with sauces and onions. It’s a perfect on-the-go snack. Today, you can find fusion versions like butter chicken rolls or vegan rolls in cities like Melbourne and Toronto. The Kathi Roll is a global hit because it’s easy to eat and full of taste.
What Makes Indian Street Food So Popular Globally?
Indian street food offers bold spices, diverse textures, and vegetarian options. It’s also very affordable, which makes it perfect for street-side dining and quick meals. Many foreign travellers in India fall in love with our street food and look for it back home. This is why Indian snacks are now trending in many parts of the world.
With the rise of social media, Indian food vloggers are taking street food to the world. Instagram reels, YouTube videos, and food blogs have helped local dishes become viral. Moreover, Indian chefs and restaurants are using local ingredients to recreate street food abroad, keeping the soul of the dish alive.
The Bottom Line!
From parathas to dosas, Indian street food is not just loved in India but also abroad. These dishes represent more than taste – they reflect our traditions, regional cultures, and passion for good food. As global love for Indian food continues to grow, it’s no surprise that our humble street dishes are now ranked among the best in the world. So next time you bite into a hot kulcha or crispy pani puri, remember – you’re enjoying one of the world’s finest street foods.

Beetroot, commonly known as beet, is a nutrient-rich vegetable that has gained popularity for its numerous health benefits. Whether you consume it raw, cooked, or in juice form, beetroot is a powerhouse of essential vitamins, minerals, and antioxidants. Let’s explore the history, nutritional facts, health benefits, and storage tips for beetroot.
Beetroot (Beta vulgaris) is a root vegetable that has been cultivated for centuries for its medicinal and culinary properties. Historically, it was first grown by the Romans and later became popular across Europe and Asia. Today, beetroot is widely consumed for its vibrant color, earthy flavor, and health benefits.
Read more: 7 Chinese Dishes That Can Be a Healthy Option for Your Diet
What Is Beetroot?
Beetroot, scientifically known as Beta vulgaris, is a nutrient-rich root vegetable belonging to the Amaranthaceae family. With its deep red hue and earthy sweetness, beetroot has been cultivated for centuries and is enjoyed worldwide in various culinary and medicinal forms.
India is among the top producers of beetroot, with states like Punjab, Haryana, Uttar Pradesh, and Maharashtra growing it extensively. Though commonly consumed as a vegetable today, beetroot was initially valued for its leafy greens before its root gained popularity. Interestingly, its natural pigments—betacyanins—are even used as food coloring! From heart health to glowing skin, this humble root is packed with goodness, making it a must-have superfood in your diet.
Know more: 12 Delicious High-Protein Foods to Eat Daily for a Healthier You
Nutritional Facts of Beetroot
Beetroot is packed with essential nutrients that contribute to overall health. Here’s a breakdown of its nutritional content per 100 grams:
- Calories: 43 kcal
- Protein: 1.6 g
- Fat: 0.2 g
- Carbs: 9.6 g
- Fiber: 2.8 g
- Folate: 109 mcg (27% of the Daily Value)
- Manganese: 0.33 mg (16% of the Daily Value)
- Copper: 0.075 mg (8% of the Daily Value)
- Potassium: 325 mg (9% of the Daily Value)
- Magnesium: 23 mg (6% of the Daily Value)
- Vitamin C: 4.9 mg (6% of the Daily Value)
- Vitamin B6: 0.067 mg (5% of the Daily Value)
- Iron: 0.8 mg (4% of the Daily Value)
Also read: 10 Superfoods That Will Supercharge Your Diet & Make You Feel Like a
15 Health Benefits of Beetroot
1. Boosts Heart Health: Beetroot is rich in nitrates, which help lower blood pressure by relaxing blood vessels and improving blood flow. This reduces the risk of heart diseases, stroke, and hypertension.
2. Enhances Athletic Performance: Athletes favor beetroot due to its high nitrate content, which improves oxygen utilization and stamina. Drinking beetroot juice before exercise can boost endurance and performance.
3. Supports Brain Health: The nitrates in beetroot enhance blood circulation to the brain, reducing cognitive decline and lowering the risk of neurodegenerative diseases like dementia and Alzheimer’s.
4. Aids Digestion: Beetroot is high in fiber, which promotes gut health, prevents constipation, and supports a healthy digestive system. It also stimulates the production of digestive enzymes.
5. Regulates Blood Sugar: Despite its natural sweetness, beetroot has a low glycemic index (GI 61), making it a good choice for diabetics. It helps regulate blood sugar levels and insulin response.
6. Boosts Immunity: The high vitamin C content in beetroot strengthens the immune system, helping the body fight infections, colds, and other illnesses effectively.
7. Promotes Weight Loss: Beetroot is low in calories and high in fiber, keeping you full for longer and reducing cravings, making it an excellent addition to a weight-loss diet.
8. Detoxifies the Liver: Beetroot contains betalains, which support liver detoxification by helping remove toxins and purifying the blood.
9. Improves Skin Health: Rich in antioxidants, beetroot fights free radicals, slows down aging, and promotes healthy, glowing skin. It also helps reduce acne and pigmentation.
10. Prevents Anemia: Beetroot is a good source of iron, which aids in red blood cell production and prevents iron deficiency anemia.
11. Fights Inflammation: The anti-inflammatory properties of betalains in beetroot help reduce chronic inflammation, preventing conditions like arthritis and heart disease.
12. Supports Healthy Pregnancy: Beetroot is rich in folate, an essential nutrient for fetal development, reducing the risk of neural tube defects in newborns.
13. Strengthens Bones: With a good amount of magnesium and manganese, beetroot helps in maintaining strong and healthy bones, reducing the risk of osteoporosis.
14. Enhances Eye Health: Lutein and zeaxanthin, two important antioxidants in beetroot, protect the eyes from age-related degeneration and cataracts.
15. Reduces Cancer Risk: Studies suggest that beetroot’s antioxidants and anti-inflammatory properties help protect against certain cancers by inhibiting cell mutations.
How to Store and Reuse Beetroot?
Storage Tips
- Store fresh beets in the refrigerator for up to two weeks.
- Keep them in a perforated plastic bag to retain moisture.
- If storing for longer, blanch and freeze beetroot slices.
Ways to Reuse
- Add leftover beetroot to smoothies for an antioxidant boost.
- Use beet greens in soups, salads, or stir-fries.
- Make beetroot hummus or dips.
- Use beetroot juice as a natural food coloring.
The Bottom Line!
Ever wondered how a simple root vegetable can do wonders for your health? Meet beetroot—the vibrant, nutrient-packed superfood that your body will thank you for! Whether you're looking to keep your heart happy, boost your immunity, or get that natural skin glow, beetroot has got you covered. Packed with essential vitamins, minerals, and antioxidants, it helps regulate blood pressure, improves digestion, and even enhances athletic performance. The best part? You can enjoy it in so many ways – fresh in salads, blended into juices, or roasted for a sweet, earthy flavor. So, why not give this powerhouse veggie a place on your plate? Add some beetroot to your meals and experience its amazing health benefits firsthand!

Chinese food is often labeled as unhealthy due to its reliance on oils, heavy sauces, and fried ingredients. However, Chinese cuisine offers a wide array of dishes that are both nutritious and flavorful. With a focus on fresh vegetables, lean proteins, and lighter cooking methods, it’s possible to enjoy a healthier version of Chinese food without compromising taste. Many dishes can be modified to be low-calorie, rich in fiber, and full of essential nutrients. Whether you're looking for high-protein meals, low-carb options, or plant-based dishes, Chinese food has something to offer that can align with your health goals. Discover these seven healthy Chinese dishes that can easily fit into a balanced diet.
Also read: 10 Superfoods That Will Supercharge Your Diet
1. Steamed Dumplings (Jiaozi)

Steamed dumplings are a great way to enjoy Chinese flavors without consuming excess fat. These dumplings are typically filled with lean proteins such as chicken, shrimp, or tofu, and a variety of vegetables like cabbage, mushrooms, and carrots. Steaming is a healthier cooking method compared to frying, as it preserves the nutrients and minimizes the use of oil. Not only are steamed dumplings low in fat, but they are also packed with protein and fiber. If you're watching your calorie intake, you can even substitute traditional fillings with lighter options like ground turkey or tofu.
- Calories: Around 50-100 calories per dumpling (depending on size and filling).
- Protein: Approximately 6-8 grams per serving (typically filled with chicken, tofu, or shrimp).
- Glycemic Index: Moderate, with the dough having a GI of around 50-55 (since it's made from wheat flour).
- Why They’re Healthy: Steamed dumplings provide a satisfying, low-fat meal that’s high in protein and fiber. Perfect for those who want to indulge without overdoing it on the calories.
Check more: Is Frozen Food a Health Hero or Hidden Villain? The Shocking Truth Revealed!
2. Hot and Sour Soup

Hot and sour soup is a classic Chinese dish that is both delicious and nutritious. Made with ingredients like mushrooms, tofu, and bamboo shoots, this soup is full of vitamins and antioxidants. The addition of vinegar, a key ingredient in this soup, is known to support digestion and help balance your body's pH levels. Hot and sour soup is also low in calories, making it a great option if you're trying to lose weight. The spicy kick from the pepper and the tangy taste from the vinegar create a flavorful combination that will leave you feeling full without feeling sluggish.
- Calories: Approximately 70-100 calories per cup.
- Protein: About 5-7 grams per serving (tofu and mushrooms provide most of the protein).
- Glycemic Index: Low, as the soup mainly consists of vegetables and broth with a GI around 20-30.
- Why It’s Healthy: Hot and sour soup is a nutrient-dense option that’s low in calories, high in antioxidants, and great for digestion. It’s the perfect soup to enjoy guilt-free.
Also check: 21 Different Types of Indian Breads and Their Benefits
3. Kung Pao Chicken (Light Version)

Kung Pao Chicken is a beloved Chinese dish known for its savory, spicy flavor. The traditional recipe calls for deep-frying the chicken, but you can make a healthier version by opting for grilled or baked chicken instead. Instead of using heavy oil, you can stir-fry the dish with a minimal amount of healthy oil like olive oil. This dish is packed with protein from the chicken and healthy fats from the peanuts, making it a great option for anyone on a high-protein diet. The chili peppers in the sauce also provide a metabolism boost and help you feel fuller for longer.
- Calories: Around 250-300 calories per serving (light version with grilled chicken).
- Protein: 30-35 grams per serving (mainly from chicken and peanuts).
- Glycemic Index: Moderate, with a GI ranging from 50-60 due to the stir-fried vegetables and minimal use of sauces.
- Why It’s Healthy: Kung Pao Chicken, when made with lean chicken and minimal oil, is a great protein-rich dish that helps boost your metabolism with its spicy kick.
Read more: 12 Delicious High-Protein Foods to Eat Daily for a Healthier You
4. Buddha’s Delight (Luohan Zhai)

Buddha’s Delight is a vegetarian dish that is popular for its health benefits. It is made with a variety of vegetables like bok choy, mushrooms, and carrots, along with tofu or other plant-based proteins. This dish is rich in vitamins, minerals, and fiber, making it an excellent choice for anyone looking to eat clean. As a vegetarian dish, Buddha’s Delight is low in calories and packed with plant-based nutrients that support a healthy lifestyle. It’s a perfect meal for vegetarians or anyone looking to eat less meat.
- Calories: 200-250 calories per serving (vegetarian with tofu and vegetables).
- Protein: 10-15 grams per serving (mainly from tofu and edamame).
- Glycemic Index: Low, with a GI around 35-45 because of its vegetable-based composition and minimal starch content.
- Why It’s Healthy: Buddha’s Delight is packed with vegetables and plant-based protein, making it a nutrient-dense and low-calorie option that is perfect for anyone looking to improve their diet.
Know more: Health Benefits of Quinoa: A Superfood for Every Diet
5. Chinese Broccoli with Garlic (Gai Lan)

Chinese broccoli, also known as Gai Lan, is a nutritious vegetable that is rich in vitamins and minerals. It is typically stir-fried with garlic in a minimal amount of oil, which helps preserve its nutrients. Gai Lan is high in vitamins A, C, and K, which are essential for maintaining healthy skin, boosting immunity, and supporting bone health. This dish is low in calories and packed with antioxidants that help fight free radicals in the body. If you're looking to add more vegetables to your diet, Chinese broccoli is an excellent choice that’s both tasty and good for you.
- Calories: Around 80-120 calories per serving.
- Protein: 5-7 grams per serving (primarily from the Chinese broccoli and garlic).
- Glycemic Index: Low, with a GI of about 15-20, as it is low in carbohydrates and rich in fiber.
- Why It’s Healthy: Gai Lan is a low-calorie, high-nutrient vegetable dish that is great for overall health, providing essential vitamins and antioxidants that promote skin health and immunity.
Also read: 8 Best Vegan Milk Brands in India: A Healthier, Dairy-Free Alternative
6. Szechuan Tofu
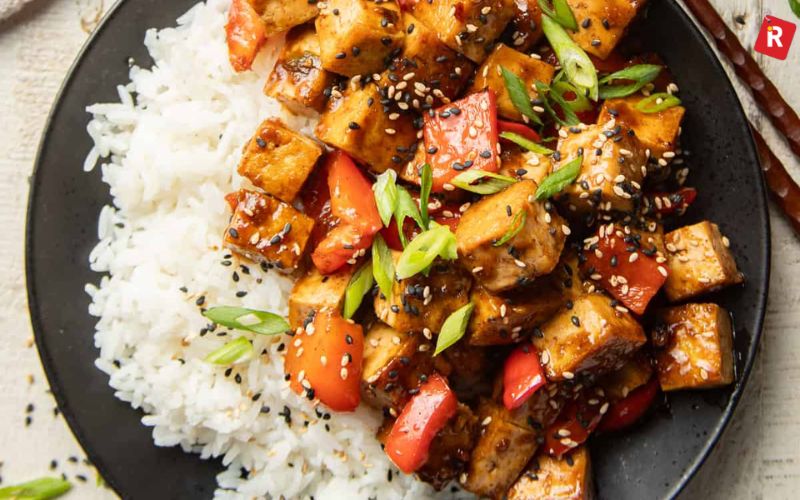
Szechuan Tofu is a spicy, flavorful dish that can be enjoyed as a low-calorie, plant-based meal. Tofu is a great source of plant-based protein, and it’s also low in fat. The Szechuan peppercorns used in the dish have been shown to boost metabolism, improve digestion, and enhance circulation. For a healthier version of this dish, you can reduce the amount of oil used in the sauce and add more vegetables like bell peppers, onions, and broccoli. The spicy Szechuan sauce not only adds a lot of flavor but also aids in digestion and promotes better circulation.
- Calories: Around 150-200 calories per serving (depending on the oil used and tofu quantity).
- Protein: 12-15 grams per serving (from tofu and vegetables).
- Glycemic Index: Low to moderate, with a GI of 40-50 due to its plant-based ingredients and limited starchy components.
- Why It’s Healthy: Szechuan tofu is a plant-based, protein-rich dish that boosts metabolism, supports digestion, and helps improve circulation—all while satisfying your craving for spice and flavor.
7. Wonton Soup (with a Healthy Twist)

Wonton Soup is a popular Chinese dish made with delicate dumplings filled with shrimp, pork, or vegetables, served in a flavorful broth. To make this dish healthier, you can use lean proteins like shrimp or chicken and opt for a lower-sodium broth to reduce your intake of salt. The clear broth in wonton soup is light and low in calories, while the wontons are typically filled with a mix of vegetables and protein, offering a balanced meal. To make it even healthier, consider substituting the traditional wontons with zucchini noodles or a gluten-free alternative.
- Calories: 150-200 calories per serving (based on lean protein fillings like shrimp or chicken).
- Protein: 10-15 grams per serving (primarily from shrimp, chicken, or tofu).
- Glycemic Index: Moderate, around 55-60, with the wontons contributing some carbs but not excessive amounts.
- Why It’s Healthy: Wonton Soup is a light, nourishing dish that is low in calories and provides a good source of protein, vitamins, and minerals.
Healthy Ingredients in Chinese Cuisine You Didn’t Know You Needed
Chinese food isn’t just delicious—it’s also filled with nutritious ingredients. Ingredients like ginger, garlic, soy sauce, and sesame oil are staples in Chinese cooking and have been shown to provide various health benefits. Ginger, for example, is known for its anti-inflammatory properties, while garlic can boost immunity and help lower cholesterol.
Incorporating these healthy ingredients into your diet can help improve digestion, promote heart health, and even help fight infections.
The Secret to Eating Chinese Food Without the Guilt
When it comes to Chinese food, there are a few tips that can help make your meal healthier. First, try choosing steamed dishes over fried ones. Steamed dishes retain more nutrients and use less oil, making them a healthier option. Secondly, try to limit the amount of soy sauce you use, as it can be high in sodium. Lastly, load up on vegetables and lean proteins to ensure you're getting a balanced meal.
Eat up!
Chinese cuisine can be both flavorful and healthy. By choosing dishes that are steamed, stir-fried with minimal oil, and loaded with vegetables and lean proteins, you can enjoy a delicious and nutritious meal without compromising your health goals. Whether you’re looking to lose weight, boost your immune system, or simply enjoy a healthy meal, these seven Chinese dishes are a great place to start. For more healthy Chinese food options, explore local menus and ask for lighter cooking methods or healthier ingredients. With a little bit of customization, you can enjoy your favorite dishes without the guilt.

Are you getting enough fibre in your daily meals? If you often feel bloated, struggle with irregular digestion, or find yourself hungry shortly after eating, you might need to boost your fibre intake. Adding high-fibre foods to your diet isn't just good for digestion – it's essential for your overall health and wellbeing.
In this comprehensive guide, we'll explore 25 delicious high-fibre foods that you can easily incorporate into your daily diet. You'll discover why fibre is so important, how much you should eat, and creative ways to enjoy these nutritional powerhouses.
Read also: 12 Delicious High-Protein Foods to Eat Daily for a Healthier You
Why Is Dietary Fibre So Important?
Before diving into our list, let's understand why fibre deserves a prominent place on your plate. Dietary fibre, the indigestible part of plant foods, does far more than just keep your digestive system running smoothly.
Fibre helps:
- Regulate blood sugar levels by slowing down sugar absorption
- Lower cholesterol levels by binding to cholesterol particles
- Maintain a healthy weight by keeping you fuller for longer
- Support gut health by feeding beneficial bacteria
- Reduce the risk of certain diseases including heart disease, diabetes, and some cancers
The average adult should aim for 25-30 grams of fibre daily, yet most people consume less than half that amount. Let's change that with these fibre-rich foods!
25 High-Fibre Foods to Include in Your Daily Diet
1. Chia Seeds – The Tiny Nutritional Powerhouse

Chia seeds may be small, but they pack an impressive fibre punch. These tiny seeds are one of the most fibre-dense foods available, providing both soluble and insoluble fibre types. They expand to form a gel-like consistency when soaked in liquid, creating a feeling of fullness that can help with appetite control throughout the day. Their mild, neutral flavor makes them incredibly versatile for adding to numerous dishes without altering taste.
Fibre Content: 10.6g per 28g (1 ounce) serving
Why You'll Love Them: Chia seeds absorb water and form a gel-like substance in your digestive tract, helping you feel full longer. They're also rich in omega-3 fatty acids and protein.
How to Eat: Add them to smoothies, overnight oats, or make chia pudding by mixing them with your favourite milk and letting them sit overnight. Sprinkle them on yogurt or salads for an extra fibre boost.
2. Avocados – The Creamy Fibre Source

Avocados aren't just trendy – they're a nutritional goldmine, offering both soluble and insoluble fibre along with healthy fats. Unlike most fruits that are primarily carbohydrates, avocados contain significant amounts of heart-healthy monounsaturated fats that help your body absorb fat-soluble vitamins from other foods. They're also packed with potassium (more than bananas), folate, and vitamins K, E, and B.
Fibre Content: 9g per medium avocado
Why You'll Love Them: Beyond fibre, avocados provide heart-healthy monounsaturated fats and potassium. They're incredibly versatile and add a creamy texture to many dishes.
How to Eat: Spread on toast, add to smoothies, mash into guacamole, or slice into salads and sandwiches. You can even use avocado as a butter substitute in some baking recipes.
3. Lentils – The Protein-Packed Fibre Champion

Lentils are a nutritional powerhouse, offering both plant protein and significant fibre content. These small but mighty legumes come in various colors including green, brown, red, and black, each with slightly different cooking times and flavor profiles. Lentils have been a dietary staple for thousands of years across many cultures, particularly in Indian, Middle Eastern, and Mediterranean cuisines.
Fibre Content: 15.6g per cup (cooked)
Why You'll Love Them: Lentils are inexpensive, easy to prepare, and incredibly filling. They're also rich in iron, folate, and magnesium.
How to Eat: Add them to soups, stews, and curries. Make lentil salads, or blend them into dips. Red lentils cook quickly and are perfect for busy weeknights.
4. Chickpeas – The Versatile Legume

Chickpeas (also known as garbanzo beans) are a staple in many cuisines and for good reason – they're nutritional superstars. With a history dating back over 7,500 years, chickpeas are one of the earliest cultivated legumes and remain a dietary cornerstone in regions like the Mediterranean, Middle East, and India. Their nutty flavor and firm texture make them suitable for countless culinary applications.
Fibre Content: 12.5g per cup (cooked)
Why You'll Love Them: Chickpeas provide a hearty dose of plant protein alongside their fibre content. They're incredibly versatile and take on flavours well.
How to Eat: Make homemade hummus, add to salads, roast with spices for a crunchy snack, or use in curries and stews. Chickpea flour can also be used for gluten-free baking.
5. Makhana (Foxnuts) – The Overlooked Fibre Gem

Makhana, or foxnuts, are gaining popularity as a nutritious snack option with impressive fibre content. These seeds come from the Euryale ferox water lily plant, primarily grown in the marshy wetlands of eastern Asia, particularly in Bihar, India. Traditionally used in Ayurvedic medicine, foxnuts are now gaining recognition worldwide as a superfood with numerous health benefits.
Fibre Content: 7.6g per 100g serving
Why You'll Love It: Makhana is low in fat yet high in carbohydrates and fibre. It's also rich in protein, magnesium, potassium, phosphorus, iron, and zinc.
How to Eat: Enjoy them roasted as a snack, add to trail mixes, or incorporate into curries and kheer. They have a neutral flavor that works well with both sweet and savory seasonings.
6. Oats – The Breakfast Fibre Hero

Start your day with a fibre-rich breakfast by incorporating oats into your morning routine. Oats are whole grains that retain their bran and germ during processing, keeping the valuable nutrients and fibre intact. Available in various forms from steel-cut to instant, oats can fit into any lifestyle regardless of how much time you have for breakfast preparation.
Fibre Content: 4g per cup (cooked)
Why You'll Love Them: Oats contain beta-glucan, a special type of soluble fibre that's particularly effective at lowering cholesterol and controlling blood sugar levels.
How to Eat: Make classic oatmeal, overnight oats, add to smoothies, use in homemade granola, or incorporate into baking recipes like cookies and muffins.
7. Quinoa – The Ancient Grain Fibre Source

Technically a seed, quinoa is often used like a grain and offers more fibre than many traditional grains. Grown primarily in the Andean region of South America, quinoa was called "the mother grain" by the Incas who considered it sacred. This nutritional powerhouse has seen a global surge in popularity in recent decades due to its impressive nutrient profile.
Fibre Content: 5.2g per cup (cooked)
Why You'll Love It: Quinoa is one of the few plant foods containing all nine essential amino acids, making it a complete protein. It's also gluten-free.
How to Eat: Use as a base for grain bowls, add to salads, make into a breakfast porridge, or use as a side dish in place of rice.
Read also: Health Benefits of Quinoa: A Superfood for Every Diet
8. Black Beans – The Heart-Healthy Fibre Option

Black beans deliver an impressive amount of fibre along with their distinct flavor and versatility. Native to the Americas, these small, shiny beans have been a staple in Latin American and Caribbean cuisines for thousands of years. Their deep black color indicates high levels of anthocyanins, powerful antioxidants that provide numerous health benefits.
Fibre Content: 15g per cup (cooked)
Why You'll Love Them: Black beans are rich in antioxidants, particularly anthocyanins, which give them their dark color and provide health benefits.
How to Eat: Add to burritos, tacos, soups, and salads. Blend into dips or mash for a side dish. They're also great in vegetarian burger patties.
9. Flaxseeds – The Omega-Rich Fibre Booster

These tiny seeds are packed with fibre, particularly the soluble kind that helps lower cholesterol. Flaxseeds have been cultivated for over 6,000 years, making them one of the world's oldest crops. They gained popularity in ancient Egypt and China for their health benefits and have remained valued throughout history for both culinary and medicinal purposes.
Fibre Content: 7.8g per 2 tablespoons (ground)
Why You'll Love Them: Flaxseeds are rich in omega-3 fatty acids and lignans, which have antioxidant properties.
How to Eat: Always eat them ground (your body can't break down whole flaxseeds). Add ground flaxseeds to smoothies, oatmeal, yogurt, or use as an egg substitute in baking.
10. Pears – The Sweet Fibre Treat

Pears are one of the highest-fibre fruits available, making them a delicious way to increase your intake. With over 3,000 varieties grown worldwide, pears have been cultivated for at least 4,000 years. These juicy fruits are particularly rich in both soluble and insoluble fibre, with much of it concentrated in their skin.
Fibre Content: 5.5g in a medium pear
Why You'll Love Them: Pears provide vitamin C, potassium, and antioxidants along with their fibre content. They're naturally sweet and juicy.
How to Eat: Enjoy them fresh, add slices to salads, bake for a dessert, or blend into smoothies. The skin contains much of the fibre, so eat it whenever possible.
Read more: 10 Superfoods That Will Supercharge Your Diet
11. Raspberries – The Fibre-Rich Berry

Among fruits, raspberries reign supreme when it comes to fibre content. These delicate berries belong to the rose family and have a complex structure of tiny drupelets, each containing fibre, seeds, and juice. Native to many parts of Europe and Northern Asia, raspberries have been gathered wild and cultivated for thousands of years.
Fibre Content: 8g per cup
Why You'll Love Them: Raspberries are low in sugar compared to many fruits, making them a great choice for those watching their blood sugar. They're also packed with antioxidants.
How to Eat: Enjoy fresh, add to yogurt, blend into smoothies, or use in desserts and baking.
12. Brussels Sprouts – The Cruciferous Fibre Vegetable

These mini cabbages pack a significant fibre punch along with their impressive nutrient profile. Named after Brussels, Belgium, where they gained popularity in the 16th century, these cruciferous vegetables are actually native to the Mediterranean region. They grow on tall stalks with sprouts forming at leaf axils, resembling tiny cabbages.
Fibre Content: 4g per cup (cooked)
Why You'll Love Them: Brussels sprouts are rich in vitamins K and C, and contain compounds that may help prevent cancer.
How to Eat: Roast with olive oil and garlic, shred raw into salads, sauté with bacon, or steam as a simple side dish.
13. Sweet Potatoes – The Starchy Fibre Source

Sweet potatoes offer more fibre than regular potatoes, especially when you eat the skin. These vibrant root vegetables have been cultivated for over 5,000 years, originating in Central and South America. Unlike regular potatoes, they belong to the morning glory family rather than the nightshade family, and their nutritional profile is significantly different.
Fibre Content: 4g in a medium sweet potato with skin
Why You'll Love Them: Sweet potatoes are rich in beta-carotene, which your body converts to vitamin A. They're also naturally sweet and versatile.
How to Eat: Bake whole, roast chunks, mash as a side dish, or make sweet potato toast by slicing and toasting.
14. Almonds – The Crunchy Fibre Snack

Among nuts, almonds offer one of the highest fibre contents per serving. These versatile tree nuts are actually stone fruits botanically related to cherries, peaches, and apricots. Almonds have been cultivated since ancient times, with references dating back to 1400 BCE. They were one of the earliest domesticated fruit trees due to their nutrient density and storage capacity.
Fibre Content: 3.5g per ounce (about 23 almonds)
Why You'll Love Them: Almonds provide healthy fats, protein, vitamin E, and magnesium alongside their fibre content.
How to Eat: Enjoy a handful as a snack, add to trail mix, sprinkle on salads, or use almond butter on toast.
15. Broccoli – The Nutrient-Dense Fibre Vegetable

Broccoli deserves its reputation as a nutritional powerhouse, offering significant fibre alongside numerous vitamins and minerals. This cruciferous vegetable is actually a man-made food, developed from careful breeding of wild cabbage plants in the northern Mediterranean starting in about the 6th century BCE. The name comes from the Italian word "broccolo," meaning "the flowering crest of a cabbage."
Fibre Content: 5g per cup (cooked)
Why You'll Love It: Broccoli is exceptionally rich in vitamin C, vitamin K, folate, and various antioxidants.
How to Eat: Steam, roast, stir-fry, add to soups, or enjoy raw with dips.
Also check: Is Frozen Food a Health Hero or Hidden Villain? The Shocking Truth Revealed!
16. Artichokes – The Surprising Fibre Leader

Many people don't realize that artichokes are one of the highest-fibre vegetables available. These unusual-looking vegetables are actually the immature flower buds of a type of thistle plant. Native to the Mediterranean region, artichokes have been cultivated as food for more than 3,000 years, prized for both their culinary and medicinal uses.
Fibre Content: 10g in a medium artichoke
Why You'll Love Them: Artichokes contain inulin, a type of prebiotic fibre that feeds beneficial gut bacteria.
How to Eat: Steam whole artichokes and eat the flesh from the leaves, or use canned artichoke hearts in salads, pastas, and dips.
17. Split Peas – The Humble Fibre Superstar

These unassuming legumes pack an impressive amount of fibre per serving. Split peas are simply dried peas that have been split along the natural seam, removing the outer hull. This process allows them to cook more quickly than whole dried peas while retaining their impressive nutritional profile. They come in both green and yellow varieties.
Fibre Content: 16.3g per cup (cooked)
Why You'll Love Them: Split peas are economical, easy to store, and rich in plant protein and various B vitamins.
How to Eat: Make classic split pea soup, add to curries, or turn into dal. They cook more quickly than many other legumes.
18. Popcorn – The Surprising Whole Grain Fibre Snack

Air-popped popcorn is a whole grain that offers a satisfying amount of fibre. This popular snack comes from a special variety of corn called Zea mays everta, the only type that pops. Popcorn has been enjoyed for thousands of years, with evidence of popped corn dating back to 4700 BCE in Peru. It expanded in popularity in the United States during the Great Depression as an affordable treat.
Fibre Content: 3.6g per 3 cups (air-popped)
Why You'll Love It: Popcorn is low in calories when air-popped, making it a volume-friendly snack. It also contains polyphenols, beneficial plant compounds.
How to Eat: Air-pop at home and season with herbs and spices instead of butter for a healthier option.
19. Barley – The Ancient Grain Fibre Source

This chewy, nutty grain is exceptionally high in fibre, particularly the soluble kind. Barley is one of the oldest cultivated grains in the world, with evidence of cultivation dating back to 10,000 BCE. It was so important in ancient civilizations that it was used as currency in some societies. Barley has a distinctive chewy texture and nutty flavor that adds dimension to many dishes.
Fibre Content: 6g per cup (cooked)
Why You'll Love It: Barley contains beta-glucan, the same cholesterol-lowering fibre found in oats.
How to Eat: Add to soups and stews, use as a rice substitute, or make a breakfast porridge.
Also check: 10 Different Types of South Indian Rice Dishes
20. Apples – The Convenient Fibre Fruit

"An apple a day" might be good advice when it comes to getting your fibre. Apples are among the most widely cultivated tree fruits globally, with over 7,500 varieties grown worldwide. Archaeological evidence suggests humans have been enjoying apples since at least 6500 BCE. Each variety offers slightly different flavors, textures, and nutrient profiles.
Fibre Content: 4.4g in a medium apple with skin
Why You'll Love Them: Apples contain pectin, a soluble fibre that helps feed beneficial gut bacteria. They're also portable and stay fresh longer than many fruits.
How to Eat: Enjoy fresh with the skin on, slice into salads, bake with cinnamon, or use in homemade applesauce.
21. Dragon Fruit – The Exotic Fibre Option

With its striking appearance and mild flavor, dragon fruit (pitaya) is gaining popularity as a nutritious and fibre-rich fruit. Native to Central America but now cultivated throughout tropical and subtropical regions worldwide, dragon fruit comes from a cactus species and has a unique appearance with bright pink or yellow skin and white or red flesh dotted with tiny black seeds.
Fibre Content: 5g per cup (diced)
Why You'll Love It: Dragon fruit is low in calories but rich in antioxidants, particularly betalains which give the red-fleshed varieties their vibrant color. The seeds are edible and contribute to the fruit's fibre content. Dragon fruit also contains iron, magnesium, and vitamins C and B, along with beneficial plant compounds that may have anti-inflammatory and immune-supporting properties.
How to Eat: Simply cut in half and scoop out the flesh with a spoon, add to fruit salads, blend into smoothies, or use as a colorful topping for breakfast bowls. Try freezing dragon fruit cubes for a refreshing addition to beverages or blend frozen pieces with a splash of lime juice for a simple sorbet. The mild, subtly sweet flavor pairs well with tropical fruits like mango and pineapple.
22. Brown Rice – The Fibre-Rich Grain Alternative

Choosing brown rice over white significantly increases your fibre intake. Brown rice is simply whole grain rice that still has the bran and germ layers intact, which are removed in white rice production. These outer layers contain most of the grain's fibre and many nutrients. Rice has been a staple food for more than half of the world's population for centuries.
Fibre Content: 3.5g per cup (cooked)
Why You'll Love It: Brown rice retains its bran and germ layers, which contain not only fibre but also vitamins, minerals, and beneficial plant compounds.
How to Eat: Use as a base for grain bowls, stir-fries, or as a side dish. Mix with other grains for variety.
23. Edamame – The Plant Protein Fibre Source

These young soybeans are not only high in protein but also provide significant fibre. Edamame has been consumed in East Asia for over 2,000 years, but has only gained popularity in Western countries in recent decades. These bright green beans are harvested when the soybeans are still young and soft, giving them a sweet flavor and crisp texture that mature soybeans lack.
Fibre Content: 8g per cup (shelled, cooked)
Why You'll Love Them: Edamame provides all nine essential amino acids along with fibre, making it nutritionally complete.
How to Eat: Steam and sprinkle with sea salt for a snack, add to salads, stir-fries, or grain bowls.
24. Figs – The Natural Sweet Fibre Option

Fresh or dried, figs offer impressive fibre content with natural sweetness. Figs are actually inverted flowers, with the flowers blooming inside the pod, which later becomes the fruit we eat. They're one of the earliest cultivated plants, with evidence of fig cultivation dating back to 9400-9200 BCE. Figs have played important roles in many religions and cultures throughout history.
Fibre Content: 2g per medium fresh fig; 5g per 3 dried figs
Why You'll Love Them: Figs are rich in minerals including calcium, magnesium, and potassium.
How to Eat: Enjoy fresh when in season, use dried figs in baking or as a snack, or add to salads for sweetness.
25. Dark Chocolate – The Indulgent Fibre Source

Yes, you read that right! High-quality dark chocolate (70%+ cocoa) contains a surprising amount of fibre. Chocolate comes from cacao beans, the seeds of the Theobroma cacao tree, which translates to "food of the gods." Cacao has been consumed for at least 4,000 years, beginning in Mesoamerica where it was so valued it was used as currency by ancient civilizations like the Mayans and Aztecs.
Fibre Content: 3g per 1-ounce serving (28g)
Why You'll Love It: Dark chocolate is rich in antioxidants and may help lower blood pressure when consumed in moderation.
How to Eat: Enjoy a small square as a treat, use in baking, or grate over oatmeal or yogurt for added flavor.
Creative Ways to Add More Fibre to Your Diet
Now that you know which foods are high in fibre, here are some practical tips to incorporate them into your daily meals:
-
Start your day with fibre: Choose oatmeal topped with berries and chia seeds or flaxseeds.
-
Snack smartly: Keep nuts, seeds, and dried fruits on hand for quick fibre-rich snacks.
-
Don't peel edible skins: The skins of fruits and vegetables like apples, pears, and potatoes contain much of their fibre.
-
Make simple swaps: Choose brown rice instead of white, whole grain bread instead of white, and bean-based pastas over regular.
-
Add legumes to everything: Sprinkle chickpeas or black beans on salads, add lentils to soups, or blend white beans into sauces.
-
Blend in extras: Add chia seeds, flaxseeds, or even spinach to your smoothies for a fibre boost.
-
Keep it whole: Choose whole fruits over juices to retain the fibre content.
Important Considerations When Increasing Fibre Intake
While adding fibre to your diet is beneficial, a few important points to keep in mind:
-
Increase gradually: Adding too much fibre too quickly can cause digestive discomfort. Gradually increase your intake over several weeks.
-
Stay hydrated: Fibre works best when it absorbs water, so drink plenty of fluids throughout the day.
-
Balance is key: Aim for a variety of fibre sources to get both soluble and insoluble fibre.
-
Listen to your body: Everyone's digestive system is unique. Pay attention to how different fibre-rich foods affect you.
The Bottom Line
Including high-fibre foods in your daily diet is one of the simplest yet most effective ways to improve your overall health. From supporting digestive wellness to helping maintain a healthy weight, fibre offers numerous benefits that make it worth prioritizing in your meals.
By incorporating some of these 25 fibre-rich foods into your daily routine, you'll not only meet your recommended fibre intake but also enjoy delicious, nutritious meals that keep you satisfied throughout the day. Remember, small, consistent changes to your diet can lead to significant health improvements over time.
Which of these high-fibre foods will you add to your shopping list this week? Your digestive system will thank you for making fibre a priority in your daily diet.
Read also: A Guide to Different Breads and Their Nutritional Value

Makhana Benefits: Have you ever wondered why health enthusiasts are increasingly turning to Makhana as their go-to snack? This humble seed, also known as fox nuts or lotus seeds, has taken the health food world by storm – and for good reason! Packed with nutrients and offering remarkable health benefits, Makhana deserves a prime spot in your pantry. Today, you'll discover why this ancient superfood might be exactly what your wellness routine needs.
What Is Makhana?
Makhana comes from Euryale ferox, a flowering plant in the water lily family (Nymphaeaceae). As the only surviving species in the genus Euryale, it's particularly special. These seeds grow extensively in marshy wetlands, tanks, ponds, and lakes across India, Korea, Japan, and parts of eastern Russia.
Did you know?
Bihar state in India alone accounts for 90% of world Makhana production, with the Mithilanchal region being especially renowned. In fact, Mithila Makhana received the prestigious Geographical Indication (GI) tag in 2022, recognizing its unique qualities and traditional production methods.

Commonly called prickly water lily seeds, popped lotus seeds, foxnuts, or gorgon nuts, Makhana isn't a simple crop to cultivate – special skills are required for farming, harvesting, and processing. The seeds are meticulously extracted and processed to make them ready to eat. In India, they're famously known as "Phool Makhana" due to their unique and flowery appearance when popped.
Impressive Nutritional Profile
What makes Makhana nutritionally distinct from other nuts is its low fat and high carbohydrate content. Let's break down what you get in a 100g serving:
| Nutrient | Amount |
|---|---|
| Protein | 9.7g (easily digestible) |
| Dietary fiber | 7.6g |
| Carbohydrates | 76g |
| Fat | 0.1g |
| Total minerals | 0.5g |
| Moisture | 12.8% |
| Calories | 350 |
Makhana is also exceptionally rich in essential minerals:
- Calcium: 60mg
- Potassium: 500mg
- Phosphorus: 0.9%
- Iron: 1.4mg
- Magnesium: 67mg
Compared to dry fruits like almonds, walnuts, coconut, and cashews, Makhana offers better sugar, protein, ascorbic acid, and phenol content. While one ounce (28g) of almonds contains 15g of fat and 168 calories, the same serving of fox nuts has only 0.5g of fat and 94 calories – making it an excellent choice for those watching their calorie intake.
20 Remarkable Health Benefits of Makhana
1. Weight Management Support
With high fiber and low fat content, Makhana helps improve metabolism and creates a feeling of fullness while providing minimal fat – making it a perfect ally in any weight loss program. Its low glycemic index (approximately 37%) means it causes a slower, smaller impact on blood sugar compared to processed snacks.
2. Heart Health Promotion
Makhana contains medical properties believed to strengthen the heart and improve cardiovascular function. The rich content of magnesium and potassium helps regulate blood pressure and support heart rhythms. Being low in sodium and cholesterol, it helps maintain healthy blood pressure levels and prevent hypertension.
3. Natural Insomnia Remedy
Instead of turning to sleeping pills, try Makhana! It's proven to help with sleep issues and offers a much healthier solution to deal with insomnia.
4. Diabetes Management
With its high fiber content but relatively low fat composition, Makhana is beneficial for diabetic patients with digestive problems. The slow digestion and absorption of its carbohydrates help maintain stable blood sugar rather than causing sharp spikes and crashes.
5. Rich Source of Calcium
At 60mg of calcium per 100g, Makhana provides valuable support for bone health. This makes it especially beneficial for those with arthritis or at risk for osteoporosis.
6. Blood Pressure Regulation
The high potassium and lower sodium content in Makhana is particularly beneficial for anyone with hypertension, helping to regulate blood pressure naturally.
7. Sexual Health Enhancement
Makhana has traditional aphrodisiac properties, reportedly increasing sperm quantity, reducing premature ejaculation, and increasing libido in men. For women, it may help increase fertility. It's also recommended as a natural solution to address impotence.
8. Digestive Health Support
For those with digestive issues, Makhana is highly recommended due to its very high fiber content, which is proven to support healthy metabolism. The fiber promotes healthy digestion and prevents constipation while supporting gut health by facilitating the growth of beneficial bacteria.
9. Anti-Aging Properties
Makhana is rich in kaempferol, a natural flavonoid also found in coffee, which has well-documented anti-aging and anti-inflammatory properties. The antioxidants in Makhana reduce oxidative stress, protect cells from damage, and may slow down the aging process.
10. Healthy Alternative for Coffee Lovers
Roasted Makhana could become a coffee substitute. For those concerned about excessive coffee consumption, substituting with Makhana offers a healthier alternative.
11. Pregnancy Support
The high nutrient content in Makhana makes it beneficial for pregnant women, especially those at high risk of gestational diabetes and hypertension. The calcium content supports fetal development.
12. Gluten-Free Protein Source
With high protein levels but no gluten, Makhana is highly recommended for those allergic to gluten who need healthy snacks to increase protein intake.
13. Kidney Health Support
Makhana helps blood circulate properly and eases kidney function. Its high potassium content may help prevent the formation of kidney stones.
14. Inflammation Fighter
Rich in flavonoids, Makhana contains natural chemicals that help reduce inflammation risk and support overall health.
15. Excellent for Vegetarians
For vegetarians, Makhana is an ideal snack because just one handful provides significant calcium, protein, and antioxidants – making it a nutritional powerhouse.
16. Respiratory System Support
Another health benefit of Makhana is its ability to rejuvenate the respiratory system, potentially helping those with breathing difficulties.
17. Natural Stress Relief
A handful of Makhana acts as a natural remedy for stress issues due to its calming properties. It contains compounds that improve cognitive function and help manage anxiety.
18. Skin Health Booster
Consuming foods rich in antioxidants provides healthier skin, and Makhana is a powerful source of these beneficial compounds.
19. Benefits for Special Populations
For women, Makhana is beneficial during menstruation due to its iron content, helping combat fatigue and replenishing lost energy. Lactating mothers may benefit from its comprehensive nutritional profile.
20. Balanced Electrolytes
The mineral composition of Makhana helps maintain electrolyte balance, supporting various bodily functions and overall health.
Versatile Culinary Applications
Makhana's versatility in the kitchen makes it a favorite ingredient across various cuisines. You can enjoy it in multiple ways:
As a Snack
The most popular way to enjoy Makhana is as a roasted snack. Simply roast with a small amount of ghee or olive oil and season according to your preference – from simple salt and pepper to more complex spice blends. This makes for a healthy alternative to popcorn or processed snacks.
In Traditional and Modern Dishes
- Sweet Dishes: Add to kheer (pudding) for a nutritious dessert
- Savory Preparations: Include in curries and raita (yogurt dish)
- Porridge: Use ground roasted Makhana to make creamy porridge with milk
- Salad Topper: Add roasted Makhana to salads for extra crunch
- Stir-fries: Incorporate into vegetable stir-fries for added texture and protein
- Chaat: Create a healthy chaat by mixing with chopped vegetables and spices
- Trail Mix: Combine with nuts, seeds, and dried fruits for on-the-go snacking
Preparation Methods
- Raw Consumption: Makhana seeds can be eaten raw
- Roasting: The most popular method – roast until crispy
- As a Paste: When raw, seeds can be made into a paste (used in Chinese pastries and Japanese desserts)
- Soaking: Dried lotus seeds may be soaked overnight prior to use
- Grinding: Create Makhana flour to blend with other ingredients
Making Makhana Part of Your Daily Diet
In today's fast-paced and hectic lifestyle, stress, pollution, and poor eating habits tend to take a toll on our well-being. The allure of junk food seems irresistible, but it often leads to a weakened immune system and various health issues like obesity, diabetes, heart disease, and depression.
Makhana contains a wide variety of nutrients vital for maintaining optimal immune system function, along with many other major health benefits. A bowlful of Makhana every day could be your secret to keeping diseases at bay!
Blending Makhana flour with other nutritionally rich legumes like daals and soybean or millets like bajra and jowar can create low-cost, gluten-free, protein-rich food supplements. These combinations help address eating disorders and combat malnutrition.
Potential Considerations
While Makhana offers numerous health benefits, a few considerations to keep in mind:
- Consume in Moderation: Excessive consumption may cause bloating or digestive discomfort in some individuals
- Allergies: Those with allergies to lotus or related plants should approach Makhana with caution
- Sodium Content: While plain Makhana is naturally low in sodium, commercially prepared varieties with added salt may not be suitable for those restricting sodium intake
Conclusion
Makhana stands out as a nutritional powerhouse with diverse health benefits and culinary applications. Its impressive nutritional profile, combined with medicinal properties recognized in traditional systems, makes it a valuable addition to contemporary diets.
From supporting heart health and managing blood sugar to promoting digestion and bone strength, Makhana offers holistic health benefits in a delicious package. Whether enjoyed as a simple roasted snack or incorporated into elaborate culinary creations, Makhana provides a perfect blend of nutrition, taste, and versatility.
Start living a healthier life today by incorporating this incredible superfood into your daily routine!

South Indian cuisine is incomplete without rice. It is the foundation of most meals in this region. People in states like Tamil Nadu, Karnataka, Kerala, Andhra Pradesh, and Telangana eat rice daily. It is used in both simple and elaborate dishes, making it an essential part of South Indian food culture. Whether served plain with sambar or transformed into flavorful rice dishes, it remains a favorite across generations.
Rice is also an important part of traditions and festivals. Many South Indian households prepare special rice dishes for Pongal, Navratri, and temple offerings. Every dish has a unique taste, texture, and significance. South Indian cuisine offers a variety of rice-based dishes, each suited to different moods and occasions. Some are comforting, some are spicy, and others are perfect for festive feasts. Whether you want something light and cooling or rich and indulgent, there is a South Indian rice dish for every moment.
Know more: Idli: The Ultimate Healthy South Indian Breakfast
The Love Affair Between South India and Rice
Rice is the backbone of South Indian cuisine. Every meal in a South Indian household features rice in some form. Whether it is plain steamed rice with sambar or an elaborate biryani, rice holds cultural and culinary importance.
In many South Indian homes, traditional meals are served on banana leaves, with rice at the center. It is also a key part of religious offerings and temple feasts. Over the years, different regions of South India have developed unique rice dishes that cater to diverse tastes.
Check more: Dosa: The Perfect Crispy & Nutritious South Indian Breakfast!
Iconic South Indian Rice Dishes & What Makes Them Special
1. Lemon Rice – The Zesty, Tangy Comfort Food

Lemon rice is a quick and easy dish that is perfect for lunchboxes and travel. It is made by mixing cooked rice with lemon juice, turmeric, mustard seeds, curry leaves, and green chilies. The tangy flavor makes it refreshing and light. It pairs well with papad or coconut chutney.
Also read: Sambar: A Nutritious South Indian Delight with a Rich History
2. Curd Rice – The Ultimate Soul-Soothing Dish

Curd rice is a cooling dish that is perfect for hot weather. It combines cooked rice with yogurt, tempered with mustard seeds, curry leaves, and green chilies. It helps with digestion and keeps the stomach light. In many South Indian homes, curd rice is the last course of a meal to aid digestion.
3. Tamarind Rice (Puliyodarai) – A Burst of Tangy and Spicy Goodness

Puliyodarai is a famous temple-style rice dish. It is made with tamarind paste, spices, and roasted peanuts. The tangy and spicy flavor makes it a favorite during festivals and special occasions. The dish is often packed for long journeys as it stays fresh for a long time.
Read now: Restaurant vs. Café: What Truly Sets Them Apart?
4. Coconut Rice – Subtle, Fragrant, and Coconutty Delight

Coconut rice is a simple yet flavorful dish made with freshly grated coconut and tempered spices. It is commonly prepared in Tamil Nadu and Kerala. The natural sweetness of coconut gives it a delicate taste. It is usually served with spicy vegetable curry or pickle.
5. Tomato Rice – The Fiery, Tangy Twist to Everyday Rice

Tomato rice is a spicy and flavorful dish made with ripe tomatoes, garlic, and aromatic spices. It has a slightly tangy and rich taste. The dish is easy to prepare and is best enjoyed with yogurt or fried snacks like vadas.
6. Bisi Bele Bath – Karnataka’s One-Pot Meal Wonder

Bisi Bele Bath is a famous Karnataka dish that combines rice, lentils, and vegetables with a special spice mix. It has a rich and slightly spicy flavor. Served hot with ghee and fried papad, it is a complete meal by itself.
7. Sambar Rice – A Homely Mix of Rice and Spiced Lentils

Sambar rice is a staple dish in South Indian homes. It is a comforting combination of cooked rice and sambar (a lentil-based vegetable stew). The dish is packed with flavors from tamarind, spices, and vegetables. It is best served with pickle and papad.
8. Ghee Rice – Aromatic, Rich, and Indulgent

Ghee rice is a simple yet luxurious dish made with basmati or jeeraga samba rice, cooked with ghee and whole spices like cardamom, cloves, and cinnamon. It has a rich aroma and is often served with spicy curries.
9. Pongal – The South Indian Khichdi with a Peppery Punch

Pongal is a traditional rice dish made with rice and lentils, flavored with black pepper, cumin, and ghee. It is popular as a breakfast dish and is also a festive offering during the Pongal festival. There are two versions—sweet and savory.
10. Vegetable Biryani – The Fragrant, Masala-Infused Delight

South Indian vegetable biryani is different from its North Indian counterpart. It is made with short-grain jeeraga samba rice, coconut milk, and aromatic spices. It has a distinct flavor and is often served with raita and pickle.
Beyond the Plate
- Curd rice is known for its probiotic benefits, which aid digestion and improve gut health.
- Tamarind rice was traditionally made in temples to distribute as prasad.
- The unique taste of South Indian biryani comes from using jeeraga samba rice instead of basmati rice.
- Coconut rice is a popular dish in Tamil Nadu and Kerala, known for its mild flavor and the natural sweetness of fresh coconut.
- Pongal, a traditional South Indian dish, is often prepared during the harvest festival and symbolizes prosperity and abundance.
South Indian Rice & Its Global Fan Following
South Indian rice dishes are becoming increasingly popular worldwide. Restaurants in the U.S., UK, and Australia now serve favorites like lemon rice, curd rice, and biryani. Their unique flavors and simple preparation make them a hit among food lovers. Many health-conscious people prefer these dishes because they are light, nutritious, and easy to digest. Curd rice, for instance, aids digestion and cools the body, while lemon rice offers a refreshing tangy taste. South Indian-style biryani, made with Jeeraga Samba rice, is also gaining global recognition for its rich aroma. These dishes continue to attract food enthusiasts across the world.
The Rice & Spice Connection
Spices play a key role in making South Indian rice dishes flavorful. Some essential spices include:
- Mustard Seeds & Curry Leaves: Used for tempering in most rice dishes.
- Asafoetida (Hing): Adds depth and a unique aroma.
- Black Pepper & Cumin: Give a spicy and earthy taste.
- Ghee: Enhances the richness of dishes like Pongal and ghee rice.
Choosing the Right Rice
The type of rice used can change the taste and texture of a dish. Some common rice varieties include:
- Sona Masoori: Light and fluffy, used in everyday meals.
- Ponni Rice: Commonly used for idli, dosa, and plain rice.
- Jeeraga Samba: Used for biryani due to its small grain and aromatic quality.
- Matta Rice: A red rice variety popular in Kerala for its chewy texture and earthy flavor.
Summing Up!
South Indian rice dishes offer a mix of comfort, flavor, and tradition. Whether you prefer the tanginess of lemon rice, the richness of ghee rice, or the spice of tomato rice, there is something for everyone. Exploring these dishes will give you a taste of South India’s rich culinary heritage. So, the next time you crave a satisfying meal, try one of these delicious rice dishes.

Dosa is a crispy, golden delight that has stood the test of time, winning hearts across generations. This thin, crepe-like South Indian delicacy is not just a meal—it’s a flavorful experience! Whether enjoyed plain, ghee-roasted, or stuffed with spiced potatoes, dosa is a perfect balance of taste and nutrition. With its origins tracing back to over 1,500 years ago in Tamil Nadu, dosa has become a culinary icon across India. The dish is believed to have been first mentioned in ancient Tamil literature. Over time, it spread across the country, gaining immense popularity, especially in states like Tamil Nadu, Karnataka, Kerala, and Andhra Pradesh. Karnataka, particularly Bengaluru, is known for its buttery dosa while Kerala’s paper-thin dosa is a local favourite. Today, dosa has crossed borders, making its mark on global food menus.
Nutritionally, dosa is a powerhouse of health—rich in complex carbs, proteins, and essential minerals. The fermentation process enhances its digestibility and boosts gut health with probiotics. A single dosa provides a good dose of fiber, keeping you full and energized. It’s also a low-fat, gluten-free option, perfect for fitness lovers and diabetics (especially when made with millets or quinoa). To keep dosa batter fresh, store it in an airtight container and refrigerate for up to a week. Got leftover dosas? Transform them into wraps, dosa rolls, or crispy snacks! Light, crunchy, and irresistibly delicious—dosa is the ultimate comfort food!
Know more: Idli: The Ultimate Healthy South Indian Breakfast
Where is Dosa Famous?
Dosa is most famous in the southern states of India, particularly in Tamil Nadu, Karnataka, Kerala, and Andhra Pradesh. Each region has its unique take on dosa. For instance, Karnataka is known for the buttery Benne Dosa, while Tamil Nadu serves the crisp and paper-thin Plain Dosa. The variations, such as Masala Dosa, Rava Dosa, and Mysore Dosa, have now gained popularity across India and even internationally.
Also read: Sambar: A Nutritious South Indian Delight with a Rich History
Nutrition Facts of Dosa
Dosa is not just tasty but also packed with essential nutrients. Here’s a breakdown of its nutritional value per one plain dosa (approx. 100g):
- Calories: 160-200 kcal
- Protein: 4-5g
- Carbohydrates: 30-35g
- Fat: 2-4g
- Fiber: 1-2g
- Glycemic Index (GI): -68 (moderate, making it a better alternative to white bread and refined foods)
Also check: A Taste of ‘South India’
Health Benefits of Dosa
1. Rich in Protein & Fiber: Dosa is made from a fermented batter of rice and lentils (urad dal), making it an excellent source of plant-based protein and fiber. This helps in muscle growth, digestion, and overall gut health.
2. Suitable for All Age Groups & Health Conditions: Dosa is easily digestible and light on the stomach. It is suitable for children, adults, and even the elderly. Since it is made with fermented batter, it is gut-friendly and aids digestion. Even people with mild digestive disorders or acid reflux can consume dosa without discomfort.
3. Good for Diabetes Management: With a moderate glycemic index of around 68, dosa is a healthier option compared to refined flour-based foods. The fermentation process also helps improve the bioavailability of nutrients, making it a good option for people with diabetes when consumed in moderation.
4. Heart-Healthy & Low in Fat: Dosa contains minimal oil when prepared correctly, making it a heart-friendly breakfast option. The presence of lentils adds to its protein content while keeping cholesterol levels in check.
5. Gluten-Free Alternative: Since dosa is made without wheat, it is naturally gluten-free, making it a great option for those with gluten intolerance or celiac disease.
How to Store Dosa Batter & Reuse It
If you want to enjoy fresh dosa without making the batter every day, follow these storage tips:
- Refrigeration: Store dosa batter in an airtight container in the refrigerator for up to 5-7 days.
- Freezing: For long-term storage, freeze the batter in portions. When needed, thaw it in the refrigerator overnight and use it the next morning.
- Reusing Leftover Dosa: If you have leftover cooked dosas, store them in an airtight container and reheat them on a tawa or in a microwave before serving.
Final Thoughts
Dosa is the perfect combination of taste and nutrition, making it an ideal breakfast choice. Whether you love the classic plain dosa or enjoy experimenting with varieties like Rava Dosa or Masala Dosa, this South Indian delicacy is a must-have in every kitchen. So, whip up some fresh dosa batter, cook a crispy dosa, and enjoy a healthy and delicious meal!

Indian cuisine is incomplete without bread. From soft rotis to crispy kulchas, every region has its specialty. Indian breads are not just delicious but also packed with nutrients. Some are light and healthy, while others are indulgent and perfect for festive feasts.
In this article, we will explore the different types of bread in India, their benefits, and the best ways to enjoy them. We will also look at popular brands offering high-quality wheat and flour to make these breads at home.
Read more: A Guide to Different Breads and Their Nutritional Value
1. Poori – The Golden, Crispy Delight

Poori is a traditional deep-fried Indian bread made from whole wheat flour, water, and a little oil. It is known for its light, airy texture and crisp golden-brown exterior. The secret to a perfect poori lies in kneading the dough firm but soft and rolling it evenly. Unlike other breads, poori puffs up due to the high frying heat.
Health Benefits and Concerns
- Rich in energy, making it a great choice for children and those who need a calorie boost.
- Whole wheat flour provides some fiber, but frying reduces its overall nutritional benefits.
- Not suitable for diabetics due to the high glycemic load.
- Excessive consumption can lead to weight gain due to high oil absorption.
Who Can Eat Poori?
- Good for: Children, those needing quick energy, or anyone looking for a festive treat.
- Avoid if: You have diabetes, high cholesterol, or digestive issues.
- Tip: Use less oil and pair it with fiber-rich foods like chana masala to balance the meal.
Also check: Traditional Food Items That You Must Try This Holi
2. Luchi – The Soft and Light Bengali Bread

Luchi is a Bengali-style deep-fried bread that looks like poori but is made from refined flour (maida) instead of whole wheat. This makes it softer, whiter, and more delicate in texture. Unlike poori, luchi is usually fried at a lower temperature, making it lighter and flakier. It is commonly eaten with aloo dum, cholar dal, or Bengali sweets.
Health Benefits and Concerns
- Easier to digest compared to poori due to its fine texture.
- Lower in fiber as it is made from refined flour.
- Not suitable for weight watchers due to high-fat content.
- May cause blood sugar spikes in diabetics.
Who Can Eat Luchi?
- Good for: People looking for a softer alternative to poori, occasional indulgence, and festive meals.
- Avoid if: You are diabetic, gluten-intolerant, or on a weight-loss diet.
- Tip: Pair luchi with protein-rich dishes like chana dal to balance the meal.
Check more: Sambar: A Nutritious South Indian Delight with a Rich History
3. Paratha – The Versatile Indian Bread

Paratha is a popular Indian bread made from whole wheat flour and cooked on a griddle with ghee or oil. It can be plain or stuffed with a variety of fillings like potatoes, paneer, spinach, radish, or even lentils. The layered, flaky texture makes it heavier than roti but more flavorful.
Health Benefits and Concerns
- Good source of complex carbohydrates, making it a long-lasting energy source.
- Whole wheat flour adds fiber and essential nutrients.
- Stuffed parathas with vegetables or paneer boost protein and vitamins.
- High in fats if cooked with excessive ghee or butter.
Who Can Eat Paratha?
- Good for: Growing children, active individuals, and those who need filling meals.
- Avoid if: You are on a low-fat diet or have cholesterol issues.
- Tip: Use less oil and serve with yogurt or pickle for a balanced meal.
4. Naan – The Rich, Soft Tandoori Bread

Naan is a soft, fluffy, and slightly chewy bread made with refined flour, yogurt, and yeast. It is traditionally cooked in a tandoor (clay oven), which gives it a charred flavor. Naan is often brushed with butter or ghee before serving. Variants like garlic naan, butter naan, and cheese naan add more flavor.
Health Benefits and Concerns
- Higher in protein compared to other Indian breads due to yogurt and milk.
- Refined flour makes it low in fiber, which can cause blood sugar spikes.
- Not suitable for gluten-intolerant people.
- Heavier to digest than whole wheat bread.
Who Can Eat Naan?
- Good for: Those who love soft, flavorful bread with gravies.
- Avoid if: You have diabetes, gluten sensitivity, or prefer whole grains.
- Tip: Opt for whole wheat naan for a healthier alternative.
5. Kulcha – A Soft and Stuffed Delight

Kulcha is similar to naan but made without yeast. It is often stuffed with spiced potatoes, paneer, or onions and cooked in a tandoor or on a griddle. The most famous version is Amritsari Kulcha, which is crispy outside and soft inside.
Health Benefits and Concerns
- Easier to digest than naan due to the absence of yeast.
- Stuffed kulchas provide extra nutrition, depending on the filling.
- Not ideal for weight loss due to refined flour.
- Can be heavy if cooked with too much butter.
Who Can Eat Kulcha?
- Good for: Those who love rich, stuffed bread with spicy curries.
- Avoid if: You have diabetes, gluten intolerance, or are on a diet.
- Tip: Try whole wheat kulcha with low-fat yogurt for a healthier option.
6. Appam – The Soft & Fluffy Kerala Pancake

Appam is a South Indian and Sri Lankan delicacy made from fermented rice batter and coconut milk. It is cooked in a special pan called an appachatti, which gives it a crispy edge and soft, fluffy center. Unlike other Indian breads, appam is gluten-free and naturally fermented, making it easy to digest.
Health Benefits and Concerns
- Rich in probiotics due to natural fermentation, which aids digestion.
- Low in fat, making it a good choice for a light meal.
- Gluten-free, making it suitable for people with gluten intolerance.
- Low protein content, so it should be paired with protein-rich foods like coconut chutney or egg curry.
Who Can Eat Appam?
- Good for: Those with gluten intolerance, digestion issues, or looking for a light, healthy meal.
- Avoid if: You need high-protein food or have trouble with fermented foods.
- Tip: Pair it with vegetable stew or lentil curry for a balanced meal.
7. Bhatura – The Puffy, Deep-Fried Indulgence

Bhatura is a thick, fluffy, deep-fried bread from North India. It is made from refined flour (maida), yogurt, and baking powder, giving it a soft and slightly tangy taste. Bhatura is most commonly paired with chole (spiced chickpeas), making the famous dish chole bhature.
Health Benefits and Concerns
- Rich in calories, making it an energy-boosting meal.
- Fermented dough aids digestion but can cause bloating in some people.
- High in oil absorption, making it unsuitable for people with heart issues.
- Not a good choice for diabetics due to its high glycemic index.
Who Can Eat Bhatura?
- Good for: Those who need high-calorie meals, occasional treats, and festive foods.
- Avoid if: You have diabetes or cholesterol issues or are trying to lose weight.
- Tip: Use whole wheat flour instead of maida for a healthier bhatura.
8. Puran Poli – The Sweet, Nutritious Flatbread

Puran Poli is a sweet stuffed flatbread from Maharashtra. It is made from whole wheat flour and stuffed with jaggery, chana dal (split Bengal gram), cardamom, and ghee. It is often eaten during festivals like Holi and Diwali.
Health Benefits and Concerns
- Rich in protein and fiber due to chana dal.
- Jaggery is a natural sweetener, making it healthier than sugar.
- Good source of iron, beneficial for people with anemia.
- High in calories, so portion control is important.
Who Can Eat Puran Poli?
- Good for: Those looking for a nutrient-rich sweet, growing children, and people with iron deficiency.
- Avoid if: You are diabetic or trying to reduce sugar intake.
- Tip: Use less ghee and pair with warm milk for better digestion.
9. Sheermal – The Fragrant, Royal Bread

Sheermal is a sweet, saffron-flavored flatbread from Mughlai cuisine. It is made with refined flour, milk, sugar, ghee, and saffron, giving it a rich, golden color and a soft texture. Sheermal is often eaten with kebabs, curries, or tea.
Health Benefits and Concerns
- Good source of energy due to its high carbohydrate content.
- Rich in milk proteins, making it better than plain bread.
- Not suitable for diabetics due to added sugar.
- Refined flour makes it low in fiber, which can cause blood sugar spikes.
Who Can Eat Sheermal?
- Good for: People looking for a sweet, rich bread with Mughlai dishes.
- Avoid if: You are diabetic or prefer whole grains.
- Tip: Try whole wheat sheermal with honey instead of sugar for a healthier version.
10. Bakarkhani – The Crunchy, Layered Delight

Bakarkhani is a thick, crunchy flatbread with multiple layers, often baked in a tandoor. It is made from refined flour, ghee, milk, and sugar, giving it a slightly sweet and crispy texture. It is popular in Kashmiri and Mughlai cuisine and is often paired with tea, korma, or kebabs.
Health Benefits and Concerns
- Good for energy due to high carbohydrate content.
- Rich in ghee and milk, making it flavorful but high in fat.
- Not ideal for weight loss due to refined flour and sugar.
- Can cause digestion issues if consumed in excess.
Who Can Eat Bakarkhani?
- Good for: Those who enjoy crispy, rich bread with tea or meat dishes.
- Avoid if: You have digestive issues, diabetes, or prefer low-fat foods.
- Tip: Try whole wheat Bakarkhani with less sugar for a healthier option.
11. Parotha – The Flaky and Flavorful Delight

Parotha, often confused with paratha, is a South Indian flatbread made from maida (refined flour) or whole wheat flour. It is known for its crispy, flaky layers achieved by folding and rolling the dough multiple times before cooking. Traditionally, it is cooked with a generous amount of ghee or oil, giving it a rich taste. Parotha is commonly paired with spicy curries like salna, kurma, or egg curry.
Health Benefits and Concerns
- High in energy, making it great for active individuals.
- Rich in fats, which helps keep you full for longer.
- Can be heavy on digestion due to the oil content.
- Not ideal for diabetics due to refined flour and high glycemic index.
Who Can Eat Parotha?
- Good for: Those needing a high-energy meal, people who love flaky breads.
- Avoid if: You have digestion issues or high cholesterol, or are trying to lose weight.
- Tip: Use whole wheat flour and less oil for a healthier version.
12. Laccha Paratha – The Layered North Indian Favorite

Laccha Paratha is a multi-layered, flaky bread made using whole wheat or refined flour. The dough is repeatedly folded and rolled, creating its distinct spiral layers. It is typically cooked with ghee or butter and served with rich curries like dal makhani, paneer butter masala, or kebabs.
Health Benefits and Concerns
- Good source of fiber when made with whole wheat.
- Tastes rich due to ghee but can be high in saturated fats.
- Better than maida-based breads due to complex carbohydrates.
- Not recommended for people with gluten sensitivity.
Who Can Eat Laccha Paratha?
- Good for: Those who enjoy flavorful, crispy bread with curries.
- Avoid if: You need a low-fat diet or have gluten intolerance.
- Tip: Use less butter and whole wheat flour for a balanced meal.
13. Roti/Chapati – The Everyday Indian Staple

Roti or Chapati is the simplest and healthiest Indian flatbread, made from whole wheat flour and water. It is a staple in Indian households, eaten daily with vegetables, lentils, or meat dishes. Unlike parathas, it is not fried or cooked with oil, making it a light and healthy choice.
Health Benefits and Concerns
- High in fiber, which helps with digestion.
- Low in calories, making it great for weight management.
- Packed with complex carbs, which provide long-lasting energy.
- May cause bloating in some people due to wheat gluten.
Who Can Eat Roti/Chapati?
- Good for: Everyone, including diabetics, weight-watchers, and kids.
- Avoid if: You have gluten intolerance or prefer grain-free diets.
- Tip: Pair with protein-rich dals or paneer to make a balanced meal.
14. Bhakri – The Stiff and Nutritious Farmer’s Bread

Bhakri is a thick, coarse, and slightly hard flatbread made from millet flours like jowar, bajra, or ragi. It is popular in Maharashtra, Gujarat, and Karnataka and is typically eaten with spicy chutneys, sabzi, or dal. Unlike soft rotis, bhakri has a dense texture and is cooked over an open flame.
Health Benefits and Concerns
- Rich in fiber and gluten-free, making it ideal for digestion.
- Good source of iron and calcium, beneficial for bone health.
- Helps control blood sugar levels, making it great for diabetics.
- Dry texture may not be liked by everyone.
Who Can Eat Bhakri?
- Good for: Diabetics, people with gluten intolerance, and those needing high-fiber food.
- Avoid if: You prefer softer breads or need low-carb options.
- Tip: Serve hot with ghee or curd to enhance taste and texture.
15. Tandoori Roti – The Smoky and Rustic Delight

Tandoori Roti is a thick, slightly chewy flatbread made from whole wheat or refined flour, cooked in a tandoor (clay oven). The high heat gives it a charred, smoky flavor. It is often served with tandoori chicken, dal makhani, or rich curries in North Indian cuisine.
Health Benefits and Concerns
- Lower in fat than fried breads like naan or paratha.
- It's a great source of fiber if made with whole wheat flour.
- Has a chewy texture, which some may not prefer.
- It may be made with maida in restaurants, which reduces its nutritional value.
Who Can Eat Tandoori Roti?
- Good for: People looking for a low-fat, fiber-rich option with curries.
- Avoid if: You have trouble chewing or dislike smoky flavors.
- Tip: Ask for whole-wheat tandoori roti at restaurants for a healthier option.
16. Baati – The Rajasthani Baked Delight

Baati is a traditional hard, round, and baked wheat bread from Rajasthan. It is usually served with dal (lentil curry) and lots of ghee. The dough is made with coarse wheat flour, semolina, ghee, salt, and baking soda. Baati is baked in a clay oven or over open flames, giving it a crisp outer layer and soft inside. Some variations include stuffed baati with spiced dal or paneer.
Health Benefits and Concerns
- Rich in fiber due to whole wheat flour.
- High in healthy fats when made with ghee.
- Good for digestion but can be heavy if eaten in excess.
- Best consumed fresh, as it becomes hard when cold.
Who Can Eat Baati?
- Good for: Those needing an energy-rich meal, travelers, and people with active lifestyles.
- Avoid if: You have difficulty chewing hard foods or are on a low-carb diet.
- Tip: Eat with ghee and dal for better digestion and flavor.
17. Litti – The Stuffed Bihari Specialty
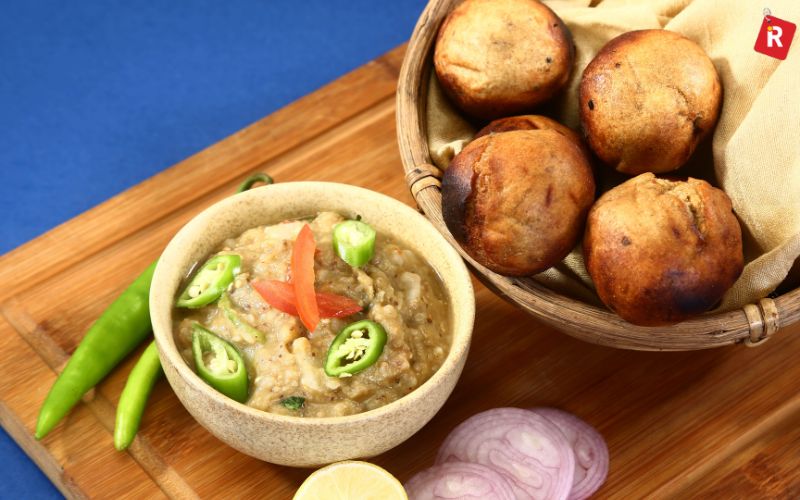
Litti is a famous Bihari dish similar to baati but stuffed with sattu (roasted gram flour) and spices. The dough is made with whole wheat flour and ghee, and the litti is baked over charcoal or tandoor. It is eaten with chokha (mashed potato, tomato, or brinjal) and lots of ghee.
Health Benefits and Concerns
- High in protein and fiber, making it filling.
- Rich in iron from sattu, helping with energy levels.
- Easily digestible, but excessive ghee can add extra fat.
- It can be made healthier by reducing ghee and using whole wheat flour.
Who Can Eat Litti?
- Good for: People looking for a protein-rich vegetarian meal, travelers, and those with a high-energy diet.
- Avoid if: You have digestive issues or prefer soft foods.
- Tip: Pair with curd and fresh chutney for a refreshing taste.
18. Kachori – The Crispy, Spicy Snack
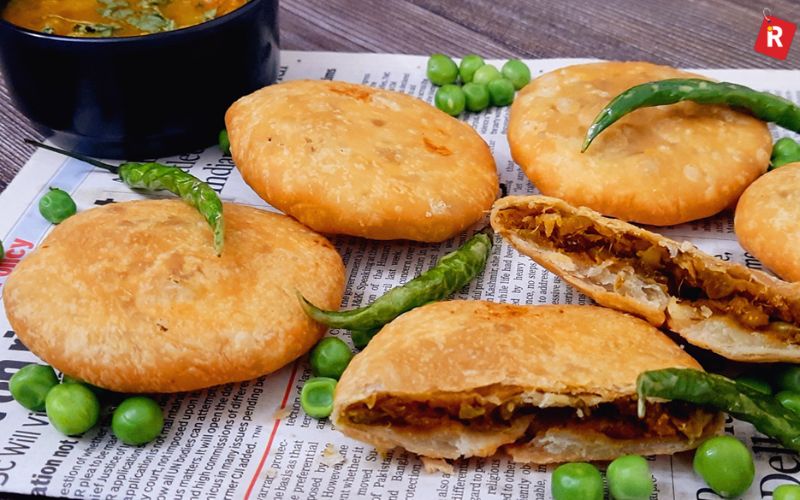
Kachori is a deep-fried, crispy snack filled with spiced dal, peas, potatoes, or onions. It is popular in Rajasthan, Uttar Pradesh, and Madhya Pradesh. The outer layer is made from refined flour (maida), making it extra crunchy. Kachoris are best enjoyed with tamarind chutney or spicy aloo sabzi.
Health Benefits and Concerns
- Very high in fat, making it less suitable for daily consumption.
- Provides instant energy, perfect for long work hours.
- Deep-fried, which may not be good for heart health.
- Best consumed in moderation to avoid digestive issues.
Who Can Eat Kachori?
- Good for: Those craving a tasty snack, occasional treat lovers.
- Avoid if: You are on a low-fat diet or have digestive problems.
- Tip: Opt for baked or air-fried kachoris for a healthier version.
19. Thalipeeth – The Nutritious Maharashtrian Flatbread

Thalipeeth is a thick, spicy, and multi-grain flatbread from Maharashtra. It is made using a mix of jowar, bajra, wheat, chana dal, and rice flour along with spices, onions, and herbs. It is pan-fried and eaten with curd or butter.
Health Benefits and Concerns
- High in fiber, great for digestion.
- Rich in protein, making it filling.
- Gluten-free, suitable for those with wheat allergies.
- Can be spicy, which may not be ideal for sensitive stomachs.
Who Can Eat Thalipeeth?
- Good for: Health-conscious individuals, people with gluten intolerance, and diabetics.
- Avoid if: You have a spice-sensitive stomach.
- Tip: Add grated vegetables like carrots or bottle gourd for extra nutrition.
20. Thepla – The Gujarati Travel Bread

Thepla is a soft, thin, and mildly spiced flatbread from Gujarat. It is made with whole wheat flour, methi (fenugreek leaves), curd, and spices. It stays soft for long hours, making it a great travel food. Thepla is usually eaten with pickle, curd, or tea.
Health Benefits and Concerns
- Rich in iron and fiber from methi leaves.
- Low in fat, making it healthier than deep-fried snacks.
- Good for digestion, thanks to methi.
- May turn dry if stored for too long.
Who Can Eat Thepla?
- Good for: Travelers, diabetics, and those looking for a light meal.
- Avoid if: You don’t like fenugreek’s slightly bitter taste.
- Tip: Add yogurt or grated vegetables for extra softness.
21. Taftan – The Persian-Influenced Sweet Bread

Taftan is a soft, slightly sweet, and saffron-flavored flatbread with Persian origins, popular in North India and Pakistan. It is made using maida (refined flour), milk, yogurt, and saffron, giving it a soft texture and mild sweetness. It is often paired with rich Mughlai curries.
Health Benefits and Concerns
- Soft and easy to digest, perfect for children and elders.
- Contains dairy, which provides extra calcium.
- High in refined flour, making it less nutritious than whole wheat breads.
- Best eaten fresh, as it becomes chewy when cold.
Who Can Eat Taftan?
- Good for: Those who love soft, mildly sweet bread.
- Avoid if: You are on a gluten-free or low-carb diet.
- Tip: Pair with rich gravies for an authentic experience.
The Love for Indian Breads Lives On!
Indian breads are an essential part of every meal, offering a variety of textures and flavors. From the soft and nutritious roti to the deep-fried indulgence of bhatura, each bread has its unique charm. Parathas are stuffed and flavorful, while naan and kulcha pair perfectly with rich curries. Regional favorites like thepla, thalipeeth, and litti bring unique tastes and health benefits.
With top brands providing ready-to-make dough and flours, preparing these breads at home has become easier. Many options include whole wheat, multigrain, and gluten-free varieties to suit different diets. Whether you enjoy crispy pooris, flaky laccha paratha, or sweet puran poli, Indian breads enhance every meal. Explore the rich diversity of Indian breads and try new varieties to add flavor to your kitchen. From breakfast to dinner, these breads offer taste, nutrition, and tradition in every bite!

HyperCITY Retail (India), one of the largest hypermarket chains in the country unveiled the ‘Hyper Food Island’ an exclusive section that hosts an assortment of niche international and national brands.
Announced at HyperCITY’s flagship store –Malad, the Food Island, brings together some of the finest brands under one roof across categories.
Aligning with the thought of offering ‘Something Fresh Everyday’ - the ‘Hyper Food Island’ aims to provide a range of carefully handpicked products to suit the needs of the contemporary customers, through HyperCITY’s large, modern and exciting format store.
“It has been our constant endeavour to enhance customer experience in our stores and we are pleased to introduce the ‘Hyper Food Island’ a niche assortment of brands. The island is specially curated to embark on the tantalizing culinary journey of our customers,” shares Ramesh Menon, Chief Executive Officer, HyperCITY Retail (India) Ltd.
Brands like Doyen, Smoor, Tea Culture of the World, Cool Story, Wingreen’s Farm, RRO- International Cheese, Emporio, Muralidhar Shrikhand, Punjab & Sind and Brownie Cottage are a part of the Hyper Food Island.
Through the activity, HyperCITY aims to encourage young innovators and women entrepreneurs to grow and focus on the strength of their businesses, while also allowing them to reach out to a larger set of audience.
“We are strong supporters of entrepreneurship, especially women as they are our most powerful customers. At HyperCITY, we have created platforms such as Hyper Budding Chef and Hyper Food Island to encourage food entrepreneurs and boost-up their business skills,” adds Menon.

Where does Dumpling Momo sits today in terms of growth?
Presently we have three outlets. Our first outlet is inside the Diamond plaza mall at Kolkata and then we came up with our second outlet within three months of opening our first outlet. After that we launch the third outlet at city centre mall near salt lake.
What is your product range?
We deal only with Momo as the dumpling base. We have 48 different varieties of Momos. For instance Steamed Momo, fried Momo, Pan fried Momo, Chocolate Momo, Veg Hara Bhara Momo(which are in pure veg form & green in colour without using any additives) and many more. We are also launching Tandori Momo which will be in a different format from the market .
Our specialaties are like veg HaraBhara momo (a green colour momo), Dimshom momo (an egg momo with a bit of chicken flavour in it and Dumpling Cottage cheese momo (momos in mix & white sauce base which is basically a fusion of tibetan & italian cuisine), Khow-Suey (hot burmese soupy noodles along with the tibetan soupy noodle "thukpa"). All these products makes us different from the current market.
Who are your target customers? What is the average footfall at your outlets?
Our target customers are mainly office goers, college goers, housewife everyone who like the finger foods. Footfall has been great at the current outlet. We receive a daily sale of approximately Rs 8000-9000.
Do you see any threat from your competitors?
Yes, we have competitions in the market especially Wow Momo. But we have a great variety than Wow. Even people are giving us reviews that they like our product and it is better than Wow Momo.
How do you do pricing?
It is same as you get in market, it range from Rs 50 -110.
What is your present revenue and target revenue?
Our present revenue is 3.5 Lakh and the target revenue will be 4.5 lakh in a month.
What are your expansion plans?
Currently, we are working at Kolkata only. But now we are focusing on other cities like Delhi and North Indian market.
What are the opportunities one can get from the franchise route?
Franchising gives us opportunities to expand in other cities for instance with the help of franchising, we are planning to expand in cities like Guwahati, Patna, Delhi, Jaipur, Hyderabad, Bangalore etc. And in return we can provide support, staff training, procuring raw materials, serving to guest, equipments, furnishing the outlets and marketing the outlets to the franchisor.

Known for creating modern Indian cuisine, Zorawar Kalra recently launched new menu at his multi award winning restaurant Made in Punjab.
A critically acclaimed, smart-casual concept under Zorawar Kalra’s Massive Restaurants umbrella, the new menu incorporates a fine balance between earthy-rustic and modern-chic.
Made in Punjab endeavours to offer a contemporary culinary experience, retaining the cuisine’s traditional essence, taking the legacy forward as #PunjabiNext.
“Representing over 5000 years of culinary heritage, Indian food is one of the oldest known cuisines in the World. Since its commercial proliferation and representation in India and more so, overseas, Indian food has come to be synonymous with Punjabi cuisine in its numerous hues. With the launch of Made in Punjab’s new menu, we are earnestly endeavoring to offer our patrons traditional flavors of Punjab, while also showcasing the vibrancy of its people and their zest for life,” shared Zorawar Kalra, Founder and Managing Director of Massive Restaurants Pvt. Ltd.
The restaurant takes its customers through a culinary legacy from regions of Amritsar, Patiala, Lahore, Rawalpindi, Peshawar, among others.
“While food forms a large part of a true Punjabi lifestyle, no Punjabi celebration is complete without a cocktail to match. Therefore, innovation taking centre-stage, Made in Punjab has curated its signature beverage section with equal aplomb, offering concept beverage options such as LOL Mary, Gold Fashioned and Kalmi Down cocktails that taste as interesting as their names sound. Using some of the finest blends and contemporary innovations, these exciting cocktails are crafted to enhance and bring out the complexity of the rich, intense and layered flavors of the cuisine served at Made in Punjab,” added Zorawar.
Brief us about your product?
Vini’s sauces is a brand that caters fresh sauces market segment. We make fresh pizza, pasta and other sauces without using any preservatives.
Currently, we have 14 kinds of sauces in our product line. We started with four flavours in 2013 and today we have expanded to 14. Our products include six types of red and white pasta sauce, basil pine nut pesto, salsa and mango salsa, hummus and periperi hummus and Greek dips.
From where do you source the products?
All our products are self-made, under my supervision.
What is the major challenge you faced in retailing?
Distribution is the biggest challenge for today. As a product is made fresh and there is no added preservative, it has a shorter shelf life. Distribution needs to be done in a day or so, making the sauces and delivery to be under controlled temperature conditions. Currently, I have a delivery system that is made in the morning and sent out in next 24 hours.
How do you decide pricing for the Indian market?
Pricing is very subjective and has nothing to do with the cost of making the product. It is more of a perceived value. In our case, the price of ingredients are fluctuating based on season and produce in a particular season. We absorb these fluctuations and not let the customer feel the heat. While our end product is an artisan product–hand made at a smaller scale, our pricing is more for the masses. We want masses to taste global flavours at prices that are easy on the pocket and they don’t have to think twice before spending on our products.
What do you do to ensure the quality of food going out to the customer?
I am 200 per cent involved in the manufacturing process, so I ensure all is being done to maintain the quality and taste of the product. I also believe that a good product can only be made if the base ingredients are of great quality. When we started, I myself use to go and pick up the best ingredients from the market. Now, we have tie ups with vendors who provide us with the best vegetables and herbs.
You also supply to restaurants and hotels. Please name some?
There are restaurants like Hungry Lion, which uses our Pizza Sauce. A café called Tea Brew, which uses hummus. It is supplied to Big Basket also.
What is your expansion plans?
Currently, we are only looking for organic growth. Our USP is “Fresh no preservatives” product, we do not want to get into industrial scale production yet. We are still working on how to expand without losing the “Fresh“ tag on our product line. May be in next couple of years, we will look at expansion by franchising to other metros.
What’s the source of funding? Are you looking for any investment or fund raising any time soon?
At present, we are self funded and looking for more funds, once we are ready for expansion in two years.

Please share your entrepreneurial journey and what led to the inception of your brand?
It has been 15 years, since I opened lanterns and has indeed been a long journey. I do remember that time of transformation from a foodie into a passionate chef. But after lanterns, there was no looking back for me. Lanterns was named by our consultant. The restaurant started when I was 18 year old.
How many stores are there within your brand and what is the average store size?
Presently, we have two stores and 2500 carpet area is minimum requirement.
What are the challenges in growing your business– maintaining standards, brand integrity, customer experience etc and how have you met these challenges?
Well, the most important thing for any restaurant these days would be their HR; staff holds a key for a successful restaurant. We have also used technology to a certain level, where we can monitor customer experience and try to use it to improve our services. For instance, one such is waiter call button- Gone are those days when you needed to call or raise your hand for your needs.
Can you tell us more about your business operations from the standpoint of loyalty Program, technology (Hardware & software), raw material sourcing and talent recruitment & training?
We have a loyalty program in place for last four years. I think customer engagement is the most important thing, if you cannot connect with consumers, you cannot generate increased footfall. We have our apps, website with online ordering and reservations, also tablets for waiters to take orders, free wi-fi for customers, waiter call button on every table and many more such things for building a strong CRM.
Do you have a growth targets for the next few years and can you reveal any strategy for how you intend to achieve this?
Every year, we see a growth of minimum 15 per cent excluding the price increase in menu. According to me, give your customer value for money and you would never look back.
Where would you like to see your brand in the next 5 years?
I hope to open few more outlets, but with a better management system in place.
What is your expansion plans?
In spite of rentals in Delhi being pretty high and survivability becoming little difficult for restaurants, we are still looking at a lot of projects with a controlled cost structure and to open small outlets rather than opening giant size restaurants.

We wanted to offer people a different kind of theme, a theme which was sufficient on its own. Therefore, we decided to go ahead with the idea of opening a country pub with pastoral look. We started working on this project from June 2015 and finally everything got into place by December 2015. The reason for choosing Connaught Place as the spot was because of the underlying motive of making our brand more accessible to our customers and to be connected with youth. CP has eventually turned as a quite happening place and most preferable hangout zone among youth. The other reason of choosing CP was that it has a colonial effect set up by Britishers. So, we wanted a place which has a traditional effect.
Tell us about your journey to become an entrepreneur?
We shared a common passion of opening a restaurant, but we were not sure of what to open, where to open and its implications. We took inspirations from various legends in this industry, who are doing well and then we started strategizing things one by one. We finalized the theme and then started short listing articles and pointers, which will help us to distinguish from others. We started looking for a place in or around inner circle of CP from December 2014 and finally chose our spot in M block outer Circle by June 2015. We started our journey in July 2015 and went through various challenges in terms of permissions from authorities, finalizing the contractors for civil works, consultant for kitchen and bar, furniture style and vendors etc. Bringing all that together, we created ‘House of Commons’. It is a success story which is difficult to put on papers, but we think it was our ‘Passion and Zeal’ towards opening a Gastro pub.
What cuisines you have in your product line?
Menu is extensive featuring from Salads to Pastas, wraps to noodles, biryani to tikkas, we have all. We have also taken inspirations from England and created our food and drinks accordingly. Our menu is a world cuisine including Italian, Continental, Indian and Chinese. We have kept a separate section of “quickies”, if you are looking for a quick meal specially to cater the corporate crowd during lunch hours. The food is meaty and comforting, includes the Gastronomic experience. The menu is shaped to maintain the balance between the typical Gastro pub food, best of Indian and International fusion.
What is your marketing approach to survive in this market?
We as a team wanted to offer our customers pleasure of having quality food and drinks. With this underlying idea, we have used the concept of Gastronomy, which is a law of regulating stomach. We give special attention to our food because we have noticed that most of the Pubs are not focusing on the same. Drinks are more or less same in almost all the outlets, but food is something, which makes a place special to revisit.
We are keeping our marketing approach in line with special focus on foodies. We are trying to pair food with excellent range of cocktails such as Drunken Tea Master and Deconstructed Sex on the Beach. Our marketing approach includes pitching corporate for get-togethers and parties and entertaining the walk-in youngsters. We also putting special focus on sports events such as English Premier League and inviting football lovers to watch the screening on our Big Screen.
Who are your competitors in the business?
Frankly, we do not believe in competition. It’s a small market, small place with a limited crowd. At present, we are trying to put ourselves apart. We are offering our guest something unique in food, music, drinks; football matches screening, moments and fun. We believe such moments spent at HOC will be the trigger to visit again.
What are the major logistics challenges faced by start-ups like you?
Since we are new in this industry, we encountered many challenges in terms of designing interiors, technical, music setup, furniture, Bar and Kitchen. We have taken help from various consultants at all stages to see them off. Once the place is functional, we still face issues in terms of vendors, quality of food, ingredients to be procured and of course the costing in terms of operational expenses.
According to you, what are the top trends that will drive the industry in 2016?
We feel that the customers must feel special when they are visiting any outlet. So, service delivery in terms of TAT and promptness, attitude of stewards and managers towards the guest, offerings in terms of food and music will be the distinguishing factors in the industry. Apart from the above, customers also look at various innovative things that the outlet is doing for serving their food and drinks. Molecular technology, which is used these days, will remain for years to come.
What is your expansion plan?
At present, we wish to focus on running this outlet successfully and gain some recognition in the market. However, we also plan to venture with the ‘upper house of UK parliament’ by the coming year.

Brief us about your product?
The product range includes idly and dosa batter of one and two kg parotas, which include Malabar and whole wheat parota and whole wheat chapati. All these are made from fresh ingredients and absolutely no chemicals or preservatives for people to enjoy healthy, traditional home-style food, just the way they make it at home.
From where do you source the products?
All ingredients, raw materials that go into making our products are of premium quality. It’s sourced from across the country and from trusted partners who have been with us for long.
What is the major challenge you faced in retailing?
Like other FMCG brands, retailing is very crucial for us. Our products are replenished on an every-day basis to retain the freshness and reach the consumer.
The major challenges we face are in making the product visible amongst the clutter and the actual available physical space at stores and chillers. To maintain our quality, it is very important for us that our products be stored in proper chillers with the right temperature. Another challenge is to ensure that fresh products reach the stores every day. The logistics and the sheer traffic on Indian roads today is one of the biggest challenges we face every day.
What do you do to ensure the quality of food going out to the customer?
iD follows good manufacturing practices and uses state of art equipment’s. All food products are prepared in ultra-hygienic factories. The products are tested by the management before it goes to the market. And as mentioned above, we replenish our stock at the retail store almost every single day.
How do you decide pricing for the Indian market?
Pricing decisions are based on the category we operate in and a balance between internal costs and what customers are willing to pay.
You also supply to restaurants and hotels. Please name some?
Yes, we do cater to restaurants and hotels. There are a large number across the country, which ranges from super premium locations to mass Darshini kind of outlets.
What is the supply chain process at your end?
We have a cohesive and seamless supply chain process. All products are made fresh and sent to the market on the same day. We start our supply in the morning around 4am and see that they reach shelves at stores latest by 12 noon to maintain freshness.
Since the products are highly perishable, our team visit’s each store every day. We work on a zero inventory model, where the products are discarded post the shelf life.
What are your expansion plans?
We are planning to diversify in many cities primarily in south and the UAE. Also, new dishes like idly rava batter, vada batter and value added dairy products would be introduced.
What’s the source of funding? Are you looking for any investment or fund raising any time soon?
Funding is needed for expansion to newer territories, marketing and investment in new plants. We are in the process of evaluating various options that’s available.

How is the response so far? What is your USP?
We have only completed six months and over 60-65,000 people came to our restaurant. Because of our unique concept, we can extract more people towards our restaurant.
The USP is that United Kitchens of India is a standalone restaurant in India, which has seven state cuisines under one roof. It is a standalone restaurant in India with a separate coffee shop and lounge bar at our outlet. We also have good parking space, which is not present in any other restaurant in Hyderabad.
How did you design your menu?
As Hyderabad is a growing city in India because of cooking. People across the country travel to Hyderabad and we have design the menu accordingly. Cuisines, which are included in our product line, are Telangana, Andhra, Kerala, Tamil Nadu, Bengali, Punjabi, Rajasthani and continental.
How’s your concept different from others?
We maintain the authenticity and urgency of a product. Like, Bengali food is made by Bengali people only.
Who are your target customers?
We mainly target corporate people and people who travel from different states.
Do you feel threatened by your competitors?
At least, in Hyderabad and Pune, I don’t feel any competition. As many restaurants only serve Andhra food, North Indian food, Bengali food, but my restaurant serves all these cuisines.
What is your average footfall?
The average footfall during weekends is 500-600 and for weekdays is 350.
What is your marketing strategy?
We didn’t do any marketing. All our responses are completely from mouth to mouth publicity.
What is your expansion plans?
As of now, we have not decided in terms of expansion. But definitely, we want to expand in Bangalore. And for Hyderabad one restaurant is sufficient.
 Indian restaurantsBeing a restaurateur today goes beyond offering good food and service. It’s about truly understanding your customers' evolving needs. Diners now…
 Indian restaurantsPlating in fine dining isn’t just about making food look good, it’s a way of showing respect for the ingredients and for the person enjoying the meal…
-
Icecream marketWith the sun soaring through the skies and people being tortured by its heat, they have started craving their favorite summer treat: ice cream. But…
 Hotels and restaurantsEncased in glass and surrounded by lush greenery, gentle lighting, and calming water features, Infine offers a serene retreat from the city’s fast…
Copyright © 2009 - 2025 Restaurant India.