


Roasting is more than just cooking food in dry heat. For professional chefs and restaurant kitchens, it's a technique that brings out deep flavors, golden textures, and rich aromas. Whether it’s a perfectly cooked chicken or crisp seasonal vegetables, roasting can elevate the simplest ingredients into something extraordinary.
In this article, we’ll break down everything you need to know about roasting — the types, techniques, tools, when to use what, and how to master it in a professional kitchen. If you're a chef looking to refine your roast game, or a restaurant owner trying to improve your kitchen's efficiency and flavor output, this guide is for you.
Read more: 5 Restaurants to Explore in South India This Monsoon & Bakrid Weekend
What is Roasting?
Roasting is a dry-heat cooking method that uses hot air, typically in an oven, to cook food. It caramelizes the outside and locks in the flavor. This method is used mostly for meats and vegetables. The key here is high temperature — it browns the surface and gives a crispy texture while keeping the inside juicy and tender.
Unlike baking, which usually uses lower temperatures and covers items like pastries or breads, roasting is for bold, savory dishes. And compared to grilling, it gives you more even cooking and better moisture control.
Know more: High Protein Indian Meals You Should Try
How to Pair Beer with Indian Food: A Desi Guide to Perfect Pints
The Science Behind Roasting
The magic of roasting lies in the Maillard reaction — a chemical process that happens when proteins and sugars react under high heat. This creates that brown, crispy surface we love in roasted meats and vegetables.
Roasting also removes moisture. But when done right, it only dries out the surface, leaving the inside juicy. For chefs, understanding temperature and timing is key. Roast at 160–220°C depending on what you’re cooking. High heat gives crispiness, while lower heat helps cook thicker cuts more evenly.
Types of Roasting Every Chef Should Know

In a restaurant kitchen, you may need to use different roasting methods based on ingredients and serving size. Here are the main types:
- Open Roasting: The classic method. The food is placed uncovered in an oven. Best for meats and vegetables.
- Closed Roasting: Food is covered with foil or a lid. This keeps in moisture. Used for tougher meats or recipes that need braising.
- Slow Roasting: Low temperature (around 120–150°C) for long hours. Perfect for large roasts like briskets and whole lamb.
- High-Heat Roasting: Fast cooking at 200–230°C. Used for crisping poultry skin or caramelizing vegetables.
- Pan Roasting: A combination of stove-top and oven. Meat is seared in a pan, then finished in the oven.
- Spit Roasting (Rotisserie): The food rotates over a heat source. Popular for whole chickens in commercial rotisserie ovens.
Each type gives a different texture and flavor. Choose based on the dish you want to serve.
Differences Between Roasting Methods
Understanding the differences between roasting methods can make or break a dish in a restaurant setting.
- Moisture: Open roasting gives a crisp texture, while closed roasting keeps the food moist.
- Time: Slow roasting takes hours but gives soft, tender meat. High-heat roasting is quicker but risks drying out if overdone.
- Flavor depth: Slow roasting develops deep flavor. High-heat roasting is good for caramelization.
- Texture: Want a crunchy outer crust? Use high heat. Want fall-apart texture? Go slow and low.
Also check: 10 Superfoods That Will Supercharge Your Diet & Make You Feel Like a
10 Must-Try Gujarati Dishes That Will Delight Your Taste Buds
Best Dishes to Roast
Some dishes just shine when roasted. Here’s what chefs commonly roast in restaurants:
- Whole roast chicken or turkey
- Prime rib or lamb leg
- Pork belly or shoulder
- Cauliflower or broccoli florets
- Baby carrots, beets, and sweet potatoes
- Spiced nuts (in dry roasting)
- Coffee beans (specialty cafes and roasteries)
Each of these responds beautifully to heat and brings out deep, satisfying flavors.
When to Use Which Roasting Technique
- Use open roasting for dishes where crispness is key — like roast chicken or vegetables.
- Use closed roasting when cooking large or tough cuts like lamb shank or pork shoulder that need more time to soften.
- Use slow roasting when preparing in bulk or pre-cooking meats for service later.
- Use pan roasting when you want control — like when searing duck breasts before finishing in the oven.
- Use high-heat roasting for sides like potatoes and bell peppers for that charred finish.
Understanding the ingredient and desired outcome is what helps chefs decide.
Tools and Equipment You’ll Need
You can’t master roasting without the right gear. Here’s what a professional kitchen should have:
- Commercial convection oven: For even heat circulation
- Thermometers and probes: To check internal temperatures precisely
- Roasting racks and pans: Helps heat surround the food for uniform cooking
- Cast iron skillets: Great for pan roasting
- Rotisserie ovens: For spit-roasting large quantities
- Basting tools: To keep the food moist during roasting
Each piece of equipment supports better results and efficiency in a busy kitchen.
Check more: Restaurant vs. Café: What Truly Sets Them Apart?
Outdoor vs. Indoor Dining: Which Experience Stands Out?
Tips for Perfect Roasting
- Preheat your oven. Always. A cold oven leads to uneven cooking.
- Room temperature food. Don’t roast straight from the fridge. Let it rest for 20–30 minutes first.
- Season generously. Roasting intensifies flavors, so make sure your rubs or marinades are bold.
- Use a meat thermometer. Avoid cutting to check doneness. It lets the juices escape.
- Let it rest. After roasting, rest your meat for 10–20 minutes before slicing. This helps redistribute juices.
Pairing Roasted Dishes with Sides and Sauces
A good roast needs a great support act. Some suggestions:
- Sides: Herb-roasted potatoes, sautéed greens, roasted garlic mash, buttered rice
- Sauces: Classic jus, peppercorn gravy, red wine reduction, chimichurri
- Wines: Red meats go well with bold reds like Shiraz or Cabernet. Roasted chicken pairs beautifully with Chardonnay.
Pairing enhances the full dining experience and boosts the perceived value of the dish.
Why Roasting is a Restaurant Chef’s Best Tool
Roasting is one of the most efficient techniques in a restaurant kitchen. It allows chefs to prepare large batches with minimal hands-on effort, making it perfect for high-volume service. Its versatility is unmatched — from meats and vegetables to nuts and even coffee beans, nearly anything can be roasted. This method brings out deep, rich flavors and enhances the natural taste of ingredients. It also helps reduce food waste by turning leftover produce into flavorful sides or garnishes. Visually, roasted dishes offer golden browns, crisp edges, and an appealing, rustic look that stands out on the plate. More than just a technique, roasting brings warmth and homestyle charm that resonates with diners and keeps them coming back.
Final Thoughts
Roasting is more than just applying heat — it’s a careful balance of timing, texture, and transformation. For restaurant chefs, it’s one of the most dependable techniques to bring out bold flavors and rich aromas in meats, vegetables, and even nuts. Whether it’s a quick, high-heat roast for crispy skin or a slow, low-temperature method for tender cuts, each roasting style has its place on a professional menu. Mastering this art means understanding which technique suits which ingredient, using the right tools, and maintaining consistency in every batch. When done right, roasted dishes become crowd favorites — comforting, flavorful, and deeply satisfying. Make roasting a signature element of your kitchen and let your next roast steal the show.

Mexican food stands out for its strong flavours, bright colours, and long traditions. Each dish carries a story from local streets, home kitchens, and lively markets. Many Indian travellers enjoy Mexican cuisine because it feels new yet slightly familiar. The use of spices, corn, beans, fresh herbs, and slow cooking gives every plate a rich and lasting taste.
The flavours are bold but balanced. The dishes are simple but full of character. These qualities make the cuisine easy to enjoy for travellers of all ages. This guide brings together seven must-try dishes that show the real spirit of Mexico. Each dish opens a small window into the country’s culture and everyday life. For travellers who want to taste something true and memorable, these dishes offer the best start. They help visitors understand why Mexican cuisine is loved across the world and why it stays in memory long after the trip ends
Find Top Mexican Dishes You Must Try
1. Tacos

Tacos are the heart of Mexican street food. They are simple, fresh, and full of flavour. A taco uses a soft corn tortilla as the base. It is then filled with meat, vegetables, or seafood. Some stalls and shops serve tacos with grilled chicken, slow-cooked beef, or spicy pork.
The most famous one is Taco al Pastor. It is made with spit-roasted pork, pineapple slices, and mild spices. This mix creates a sweet and smoky taste. Fresh onion, cilantro, and lime juice are added before serving. Travellers love it because it feels light yet satisfying. Tacos are available everywhere in Mexico. They are quick to eat, very affordable, and full of local flavours.
Read more: What is Kimchi? Top Veg Kimchi You Can Try at Home
Top 10 Vegan Street Foods in India Every Indian Loves
2. Quesadillas
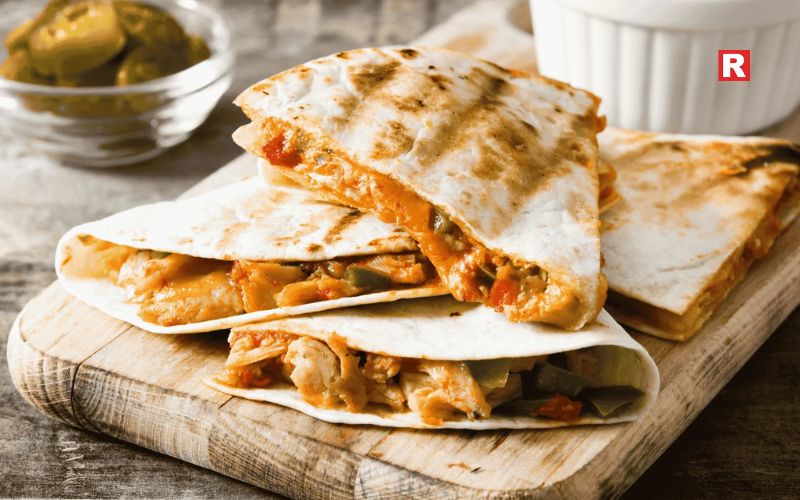
Quesadillas are another favourite. They are warm, crispy, and full of cheese. A quesadilla has a tortilla filled with cheese and grilled on a hot plate until the cheese melts. It becomes soft on the inside and crisp on the outside.
Some regions add chicken, mushrooms, peppers, or squash blossoms for extra taste. The dish is simple but comforting. It is perfect for travellers who want something mild yet flavourful.
Quesadillas are also great for people who are trying Mexican food for the first time. They offer a mix of familiar ingredients and authentic Mexican style.
3. Enchiladas

Enchiladas offer a rich and colourful experience. They are made by rolling tortillas with fillings like chicken, beans, or cheese. These rolls are then covered in chilli sauce. The sauce can be red, green, or brown depending on the region and ingredients used.
The dish is baked with cheese and topped with onion, cream, or fresh herbs. Enchiladas have deeper flavours compared to tacos and quesadillas. The chilli sauces add warmth and a mild kick. Travellers who enjoy layered and saucy dishes often pick enchiladas as their favourite.
4. Guacamole
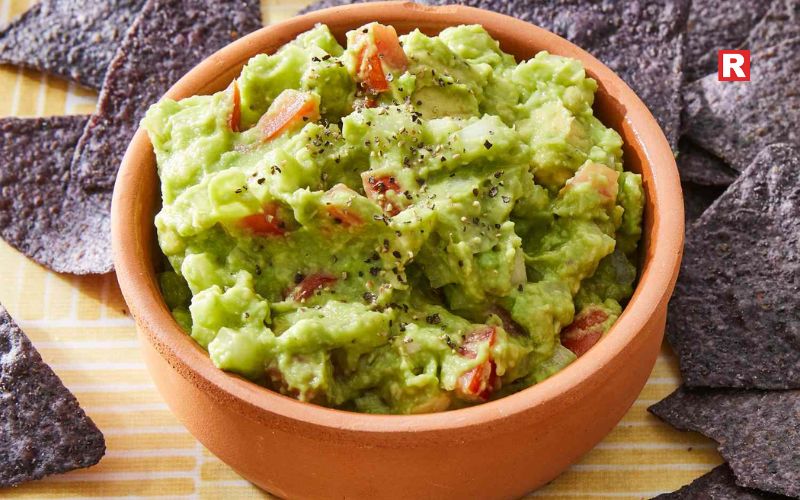
Guacamole is one of the most popular Mexican dishes worldwide. But the authentic version in Mexico is fresh, fragrant, and very different from what most restaurants elsewhere serve. It is made with ripe avocados, lime juice, cilantro, salt, and chopped jalapeño. Some places also add onion or tomato.
The dish is creamy and bright. It is usually served with tortilla chips, tacos, or grilled foods. Indian travellers enjoy guacamole because it feels clean and refreshing. It also pairs well with spicy dishes. Guacamole is considered a must-try for anyone visiting Mexico.
Know more: 5 Cities That Serve the Best Non-Vegetarian Street Food
5. Tamales

Tamales connect visitors to old Mexican traditions. This dish has been part of Mexican culture for hundreds of years. A tamale is made with corn dough, known as masa. The dough is filled with chicken, pork, beans, cheese, or even sweet corn. The filled dough is wrapped in a corn husk and steamed.
This makes the dish soft and earthy. The taste is mild but rich. Each region in Mexico has its own version of tamales. Some are spicy, some are sweet, and some use colourful masa.
Travellers who enjoy unique and traditional foods often find tamales very memorable.
6. Pozole
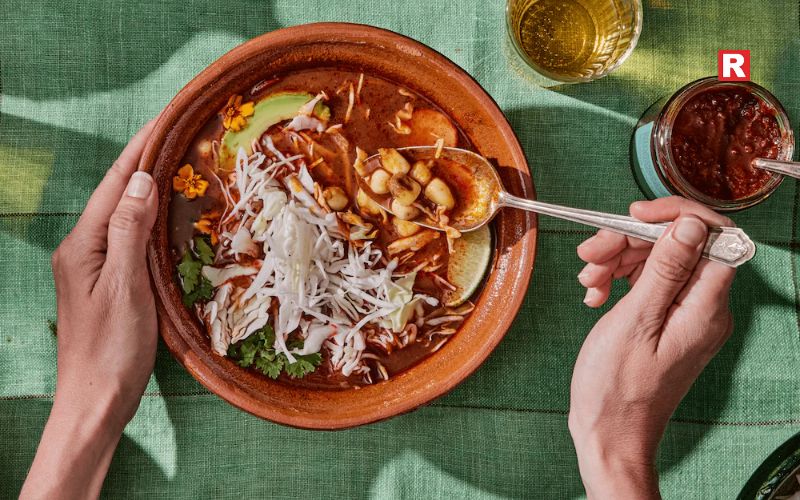
Pozole is a classic Mexican soup. It is slow-cooked for hours to build deep flavour. The soup includes hominy, which is a special type of corn. It also has chicken or pork. The broth turns rich and thick as it cooks.
Before serving, locals top the bowl with lettuce, radish, lime, onion, and chilli flakes. Each addition adds crunch and freshness. Pozole feels comforting, especially on cooler days or evenings. Travellers looking for a filling and traditional dish often enjoy pozole. It shows how simple ingredients can create something bold and satisfying.
7. Churros

Churros are a popular Mexican dessert. They are long dough sticks, fried until golden and crisp. After frying, they are rolled in cinnamon sugar. Some stalls serve them with hot chocolate, caramel, or thick chocolate sauce.
Churros are warm, sweet, and soft on the inside. They are perfect for travellers who like desserts that feel familiar but still offer a local twist. Many visitors enjoy churros while exploring markets or evening streets. This dessert brings a light, joyful ending to a day of eating Mexican dishes.
Check more: Top Veg Japanese Dishes You Must Try on Your Next Visit
8 Cheesy Foods Like Lasagna That Melt in Your Mouth
Understanding the Flavours of Mexico
Mexican cuisine uses ingredients that shape its identity. Corn is the most important. It is used in tortillas, tamales, and many other dishes. Beans add protein and texture. Chillies bring heat and flavour. Fresh herbs like cilantro add brightness. Lime juice balances spicy and savoury notes. Slow cooking brings depth. Every dish uses these elements in different ways.
Travellers from India often appreciate Mexican food because it shares a similar love for spices, layers, and comfort.
How to Choose the Most Authentic Dishes
Choosing the right places to try Mexican dishes can make a big difference.
- Look for small street vendors or family-run kitchens.
- Choose dishes served with corn tortillas instead of wheat.
- Try regional specials whenever possible.
- Avoid places that use heavy processed ingredients or too much fusion.
Eating local helps travellers understand the true taste of Mexican cuisine.
Regional Mexican Flavours Worth Knowing
Mexico has diverse regions, each offering something special:
- Oaxaca is famous for mole, a rich sauce made with spices, nuts, and cocoa.
- Puebla is known for cemitas and colourful food traditions.
- Yucatán uses citrus, spices, and slow-roasted meats.
These regions show how wide and creative Mexican food can be.
Taste Of Mexico!
Mexican cuisine blends colour, warmth, and long history in every dish. Each bite offers new textures and bold flavours. These seven dishes give travellers a real taste of the country. They show how simple ingredients can turn into strong and memorable flavours. The food is easy to enjoy and fits all budgets. Street stalls, small cafés, and local homes serve these dishes with pride. Each recipe comes from old traditions that have been passed down for many years. Travellers who try these dishes understand the spirit of Mexico better. The meals highlight everyday life, family cooking, and regional styles. For anyone planning a trip, this list makes the journey easier. It helps them know what to order and what not to miss. These dishes bring the true taste of Mexico to the table in a direct and honest way.
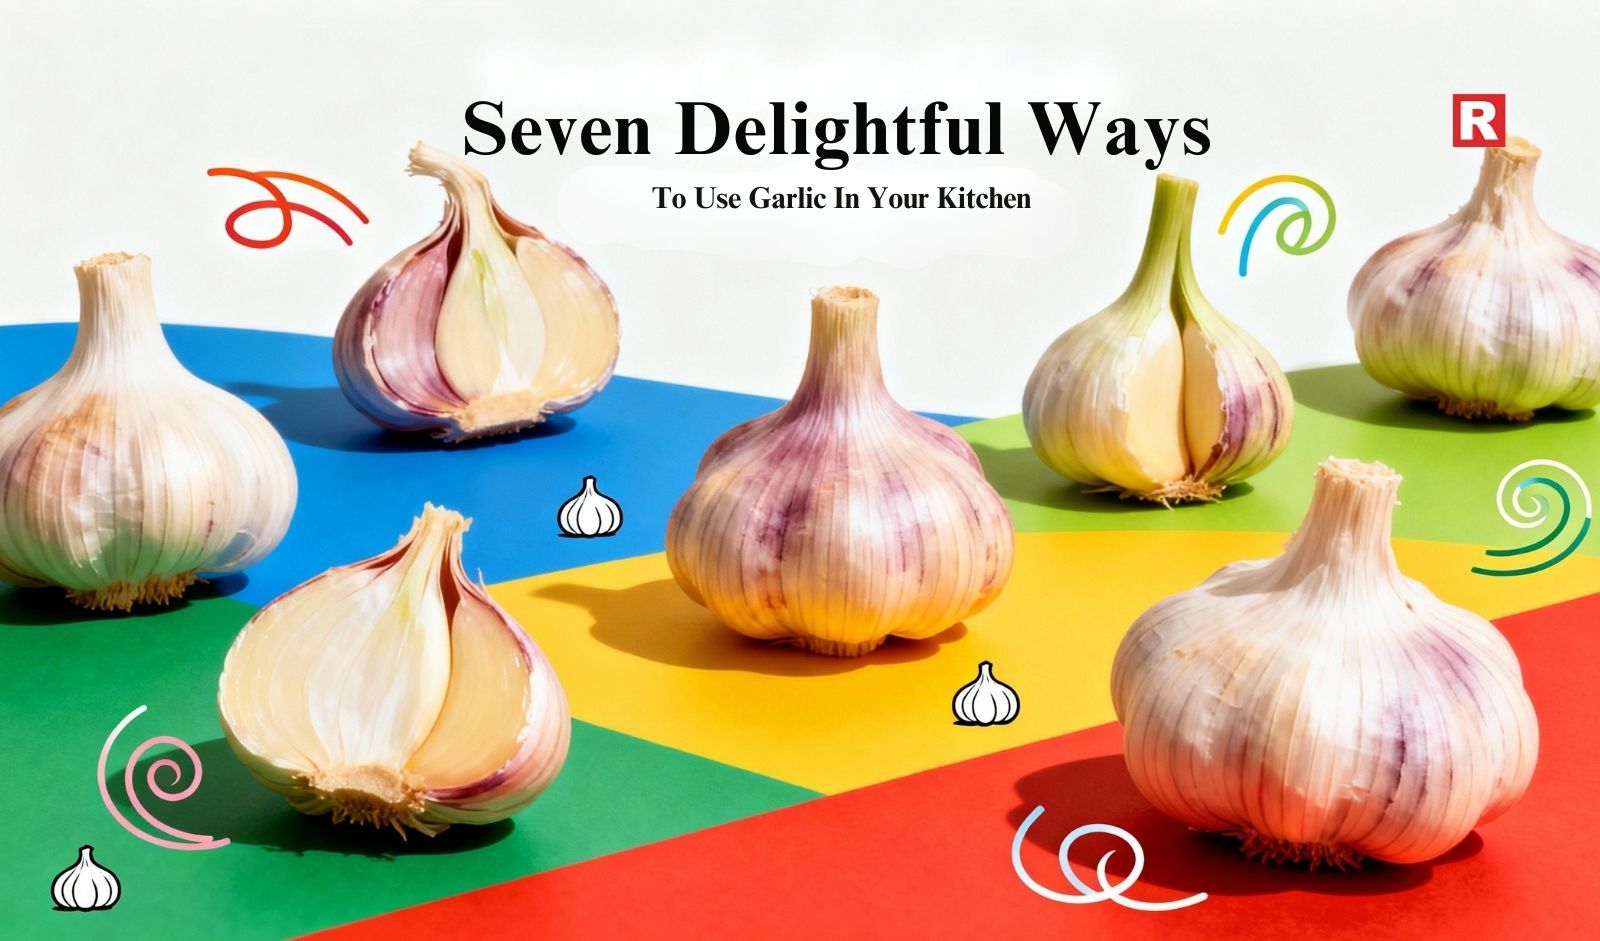
Garlic is a bulbous vegetable, closely related to onions, leeks, and chives. Growing underground, it normally comes as clusters of tiny cloves wrapped by a papery skin. Its pungent aroma, combined with the sharp taste, has been cultivated for thousands of years and is held in high regard in many cuisines all over the world, particularly in India.
In the kitchen, garlic is a big multitasker: It can be fresh, roasted, powdered, or used as a paste to bring depth and aroma to an immense number of dishes. Whether it's added to flavor curries, marinades, breads, and quick stir-fries, it enhances taste and fragrance, turning simple meals into extraordinary ones.
This article will share with you seven delightful ways to use this ingredient in your cuisine, its health benefits, and some tips for growing and storing garlic in or around the house.
Read more: 10 Genius Ways to Peel Garlic Like a Pro
7 Ways to Use Garlic in Your Kitchen
1. Garlic-Infused Oils and Condiments
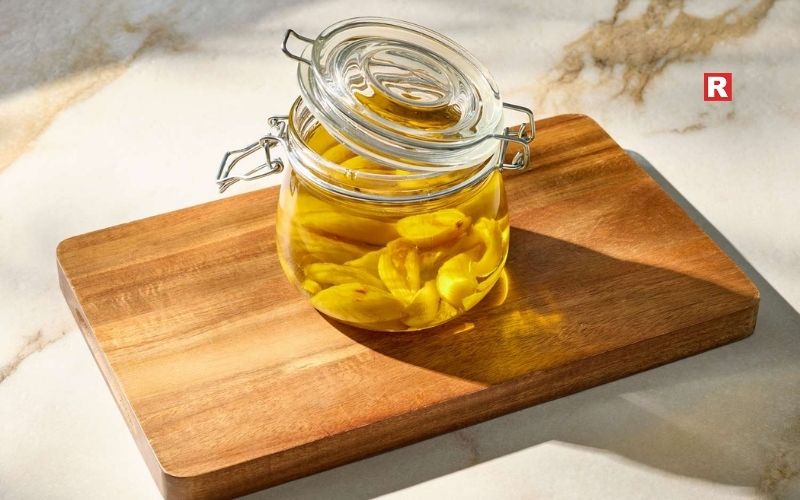
Making garlic-infused oils at home is simple, and they give a great, rich taste to lots of foods. Gently cook some peeled garlic cloves in oil (such as mustard or olive oil) over low heat. Then, strain it and keep it in a sealed bottle. You can use this oil on salads, when stir-frying veggies, or to marinate meat.
Garlic butter is another favorite. Spread it on bread or mix it into cooked veggies. Also, garlic chutneys or pickles, often prepared with local spices, go great with Indian food. These things can be used in many ways and make many dishes taste and smell better. Make sure to keep them in a cool, dry spot and use them within about a week to get the best taste.
Know more: 10 Best Snacks without Onion and Garlic you can order today
2. Roasted Garlic for a Milder, Sweet Flavor

Roasting garlic turns a sharp, pungent flavor into a sweet one. In the oven, roast entire bulbs wrapped in foil for approximately 30-40 minutes. Softened cloves can be squeezed out and spread on bread or blended into soups and sauces for a subtle garlic nuance.
Roasted garlic works perfectly in mashed potatoes, soups, and even pasta dishes with its complex, comforting flavor without overwhelming heat. In case you are sensitive to the raw intensity of garlic, then roasted garlic will be a better option for you.
3. Garlic in Indian Curries and Gravies
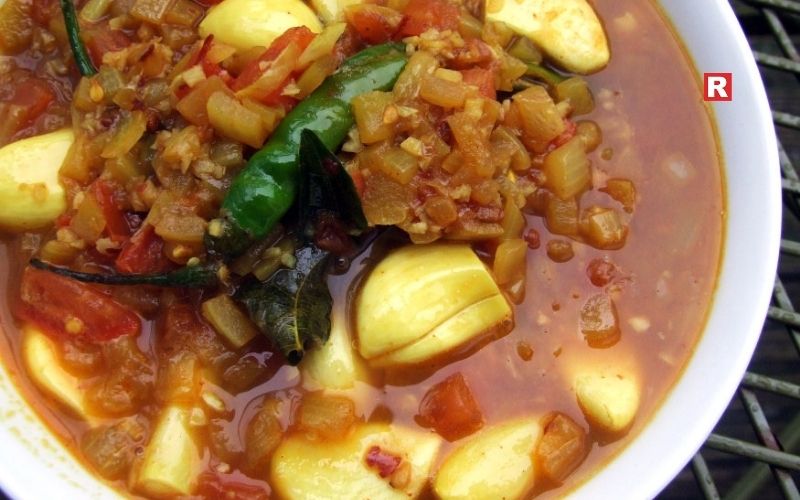
Garlic paste is a basic Indian curry recipe ingredient that has a strong base flavor of spices like cumin, coriander, and turmeric. The dishes might differ from region to region due to the different styles of ingredients used in each region, for instance, using garlic-heavy masalas for North Indian recipes or using it alongside mustard seeds and curry leaves in South Indian dishes.
Balanced use of garlic with other spices makes good gravies, while the aroma of garlic gives value to lentil-based dals. Experimenting with the amount of garlic and cooking time in your curries can help you develop your ideal flavor.
4. Garlic as a Marinade Ingredient

Garlic adds a great tenderness and flavor to the marinade. Mix crushed or powdered garlic with yogurt, lemon juice, turmeric, chili powder, and salt, and you have a nice paste ready for marinating chicken, paneer, or vegetables.
Marinate for at least 30 minutes or longer for tougher meats, which allows for deep penetration of garlic and spices. This technique gives the dish aroma and makes it juicy and tender after cooking.
5. Garlic in Quick Stir-Fries and Sautéed Dishes
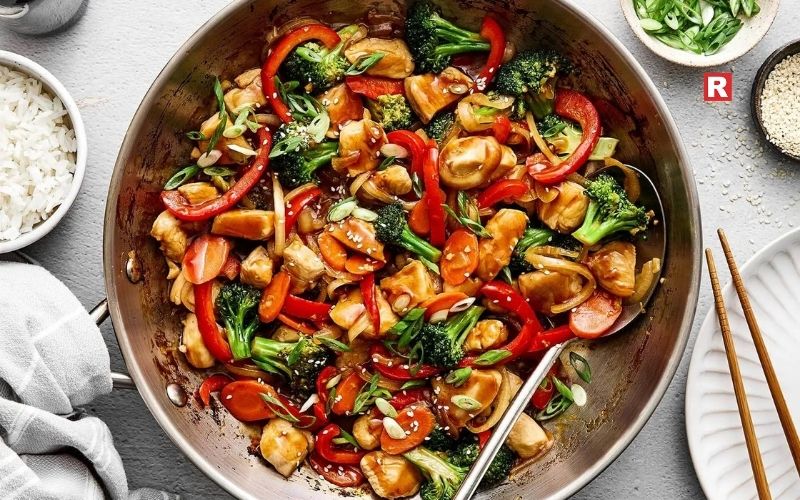
Quick dishes, like stir-fries, are usually much enhanced by the aroma of freshly chopped or sliced garlic when sautéed early in cooking. Garlic releases flavor quickly into hot oil to make a tasty base for vegetables, tofu, or chicken.
Be sure not to let the heat get too high, because burned garlic is bitter and ruins the dish. Use it moderately, according to your preference for either light or strong flavors, and appreciate the freshness it brings to quick weeknight dinners.
What's new: Why Gluten-Free Is Becoming the New Trend + 10 Gluten-Free Meal Ideas
6. Garlic-Infused Breads and Snacks
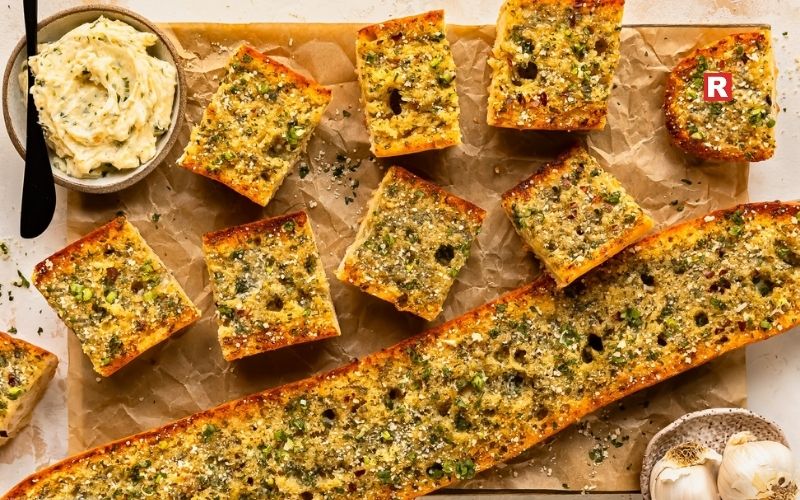
Garlic bread is not limited to Western cuisine; its Indian versions, such as garlic naan, bring fusion flavors to your table. Brushed with garlic butter and baked after being rolled out, these breads pair wonderfully with dal and curries.
Then there are garlic pakoras, snacks of fried garlic-flavored fritters, or even namkeen flavored with garlic. These are generally made for teatime or any festive occasion, where every bite fills the mouth with a garlicky taste.
7. Garlic for Health and Medicinal Uses in the Kitchen
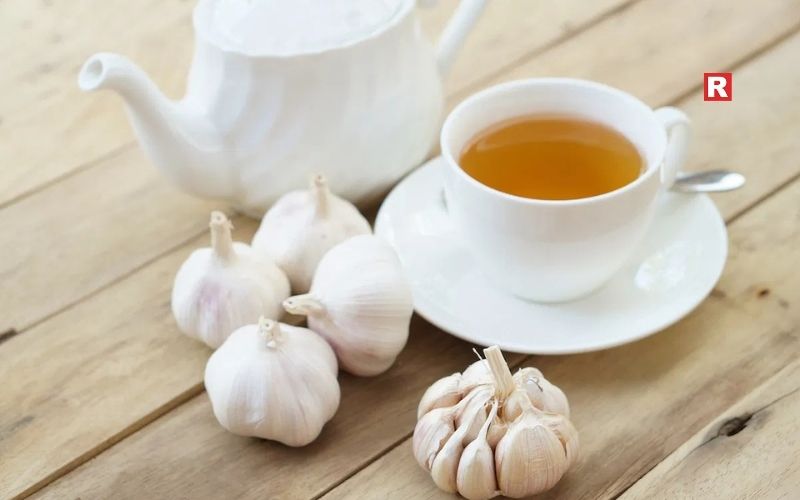
In most Indian homes, garlic has traditionally been regarded for its healing properties, improving digestion, boosting immunity, and lowering the chances of heart disease.
Garlic teas and broths are consumed during colds and flu to soothe symptoms. Some people take raw garlic with honey or warm water for infections as a remedy. Adding garlic to daily food gives medicinal advantages and also improves the taste and aroma of the food.
Scientific Health Benefits of Garlic
- Rich in Bioactive Compounds: Garlic contains allicin, a sulfur-containing compound responsible for many of its health benefits.
- Antibacterial and Antiviral Properties: Some studies prove that garlic helps fight infections by enhancing immune functioning.
- Anti-inflammatory Effects: Garlic is anti-inflammatory, and its consumption decreases the risk of several chronic diseases.
- Heart Health: Regular garlic consumption is related to the reduction of blood pressure and cholesterol levels.
- Improved Immunity: White blood cells are stimulated by garlic. This helps the body against sicknesses.
- Antioxidant Properties: It acts to combat one of the major causes of aging and a wide variety of diseases, oxidative damage.
- Recommended Intake: About 1-2 cloves a day could assure health benefits, but as too much of it may invite digestive discomfort, it is best to consume in moderation.
Check out: Your Simple Guide to 7 Vitamin C-Rich Foods
11 Benefits of Eating Chia Seeds
Growing and Storing Garlic at Home
Growing Garlic in Indian Climates
- Garlic is easily grown during the cooler months in most areas of India.
- Select healthy garlic bulbs that have large cloves to plant.
- Plant cloves individually in well-draining soil, installing them about 2 inches deep and 4-6 inches apart.
- Garlic should be kept moist but never waterlogged.
- Defoliation usually occurs at 8-10 months after planting. This is when leaves start to turn yellow and dry.
- Growing your own garlic ensures both a fresh supply and the joy of home gardening.
Storing Garlic to Maximize Freshness
- Keep garlic bulbs in a cool, dry, and well-ventilated place to prevent mold and sprouting.
- Avoid refrigerating unless garlic is peeled, as cold temperatures will encourage cloves to sprout prematurely.
- Keep garlic away from direct sunlight, as this speeds up the depletion.
- For ventilation, use mesh bags or open containers instead of plastic bags.
- Whole bulbs can last for up to 3 months under proper storage conditions. Peeled cloves, on the other hand, will last about a week.
Learn more: 10 Vegan Side Dish Ideas That Complete Any Meal
Garlic Summed Up
Garlic really is the unsung kitchen hero, bringing unmatched flavor and aroma while also packing some pretty amazing health benefits. From infused oils and roasted garlic spreads, to the backbone it provides in so many curry and marinade recipes, there are truly a million ways to make use of garlic in the kitchen. Be it for cooking magic or simple medicine, there's just no way to go wrong with adding garlic to any meal for an extra boost of natural vitality. Growing your own garlic and storing it properly will guarantee that this powerful ingredient is always at your fingertips. Enjoy the following uses for garlic and find out how this modest bulb can make a difference in your kitchen.

A gluten-free lifestyle has gained popularity in recent years, evolving from a small trend to a relatively common health choice, even in India. Gluten is a protein that's in wheat, barley, and rye. All the stuff that a lot of Indian food is based on. Since more people are learning about gluten intolerance and celiac disease, they’re starting to understand how gluten can affect their bodies.
What used to seem like a Western phenomenon is now gaining popularity in Indian homes and restaurants. People in cities here are trying out gluten-free diets not just to deal with health problems, but also because they want to eat healthier and cleaner. Everyone from gym-goers to regular families is starting to see going gluten-free as a way to eat smart and take care of themselves.
In this article, we’ll look at why gluten-free is becoming such a big deal in India. There’s also a list of 10 tasty gluten-free meal ideas that suit Indian tastes, so you can easily add them to your everyday meals.
Read more: 10 Biscuit Brands in India That Pair Perfectly With Chai or Coffee
Understanding Gluten and Its Impact
What is Gluten?
Gluten is a naturally occurring protein mainly found in wheat, barley, and rye. It acts as a binding agent, helping dough stick together, providing elasticity and chewiness. Indian food staples like chapati, paratha, bread, and lots of snacks contain gluten, so it's a normal component of India’s diverse cuisine.
Impacts of Gluten on Health
- Celiac Disease: People with celiac disease cannot eat gluten, because it triggers their immune system to attack the lining of their small intestine. This makes it hard for the body to absorb nutrients and can lead to health problems.
- Non-Celiac Gluten Sensitivity: Some people get symptoms like bloating, stomachaches, headaches, and tiredness when they eat gluten, but they don't have the intestinal damage that comes with celiac disease.
- Common Symptoms of Gluten Intolerance: These can include tummy troubles, skin rashes, headaches, joint pain, and trouble concentrating.
- Commonality: While gluten intolerance doesn't affect a huge number of people, lots of people go gluten-free to deal with symptoms or just feel better.
- What to Do: If you have celiac disease, stay away from gluten. Try cutting back on gluten to see if the symptoms get better. Before you start a gluten-free diet, it's a good idea to talk to a doctor to make sure you don't cut out foods you need or mess up your nutrition.
Know more: Your Simple Guide to 7 Vitamin C-Rich Foods
Why Is Gluten-Free Becoming the New Trend in India?

Increasing Health Awareness
More people in India are getting diagnosed with gluten issues like celiac disease because they have better access to medical info and tests. People are starting to notice symptoms like tummy troubles, feeling tired, and skin problems that could be due to not being able to handle gluten well. Because of this, a lot of people are trying out gluten-free diets to either prevent problems or help them feel better.
Changing Dietary Preferences
In India, the wellness trend is causing people to choose healthier, less processed foods. People in cities are starting to eat less wheat and are trying out other natural foods like millets and pulses because they think these are better for them. Since everyone wants food that has good nutrition and fewer additives, gluten-free choices are becoming more popular.
Rising Cases of Lifestyle Diseases
More and more people are dealing with autoimmune issues and digestive problems like IBS. Because of this, gluten-free diets are getting a lot of attention as a way to relieve symptoms. Some research shows that gluten might cause inflammation in people who are sensitive to it. That's why many are trying to cut out gluten to see if it helps them feel healthier overall.
Influence of Social Media and Celebrities
Indian celebrities and fitness influencers are openly sharing their gluten-free journey online, which is getting this lifestyle a lot of attention. You can find gluten-free recipes and advice on Instagram and YouTube, making it easier for people to try it out. Social media is really helping these health trends spread fast to lots of different people.
Availability of Gluten-Free Products
It's way easier now to find gluten-free food products. Supermarkets and online stores have things like besan, millet, and rice flour, which are good alternatives to wheat. Plus, there are also many gluten-free snacks. Even Indian restaurants are joining the trend, with more gluten-free items on their menus. So, you can stick to your gluten-free diet without missing out on your favourite tastes or traditions.
What's new: 10 Vegan Side Dish Ideas That Complete Any Meal
10 Gluten-Free Meal Ideas for Indian Palates
Breakfast Ideas
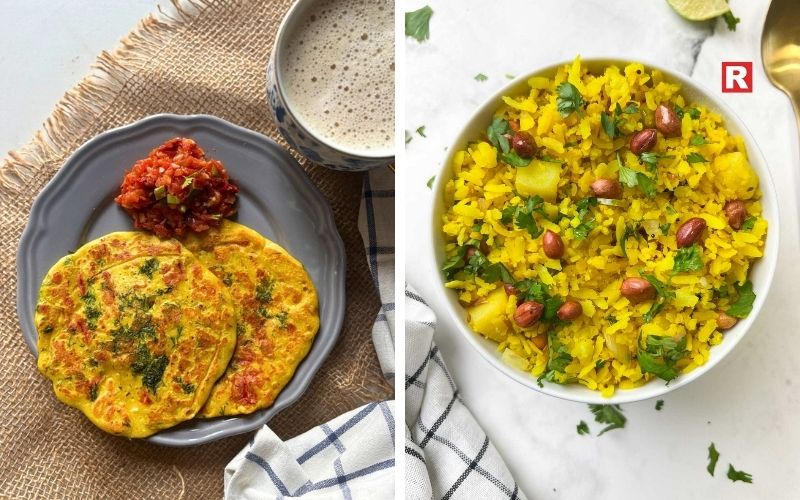
- Besan Chilla (Gram Flour Pancake): This tasty pancake is made with chickpea flour, so it's gluten-free. It's packed with protein, and you can easily toss in some grated veggies like carrots, spinach, or onions. You can also pair it with mint chutney or yogurt for a good breakfast.
- Poha with Nuts and Vegetables: Poha is flattened rice, so it's gluten-free. You can stir-fry it with mustard seeds, curry leaves, peanuts, and whatever veggies are in season. It's a light and healthy way to start your day, especially when you're short on time.
Lunch/Dinner Ideas
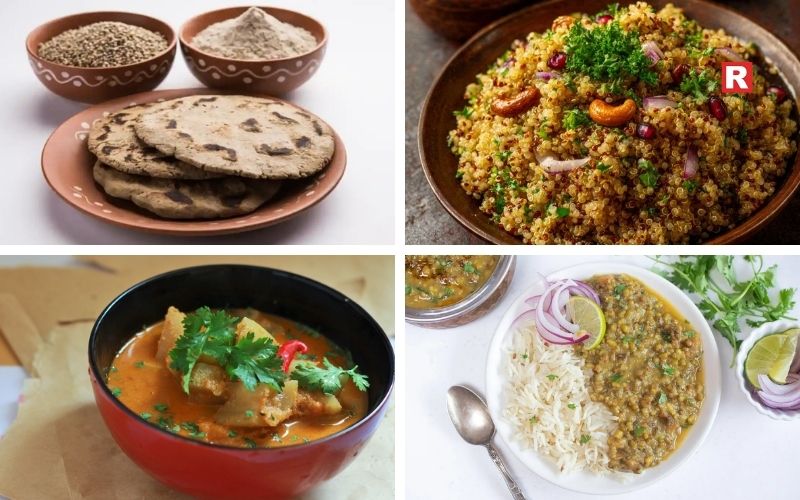
- Millet Rotis (Bajra, Jowar, Ragi): Traditional millets don't have gluten and are full of fibre, vitamins, and minerals. Bajra and jowar rotis are eaten a lot in some Indian regions and are good options if you want to avoid wheat bread or roti. They taste great with dals, veggies, and chutneys.
- Quinoa Pulao with Vegetables: Quinoa is originally from South America, but it's becoming popular in India as a gluten-free grain with lots of protein. When you cook it with veggies and spices, it turns into a tasty and healthy pulao that Indians enjoy.
- Lauki (Bottle Gourd) Curry with Rice: Lauki curry is easy to digest and doesn't have gluten, so it's great for lunch or dinner. It's a nice and healthy choice when you eat it with rice or millet.
- Chickpea or Moong Dal Curry: Pulses don't have gluten naturally and are a big part of Indian vegetarian food. Chickpeas and moong dal cooked with spices give you protein and fibre without any gluten.
Snacks/Appetizers
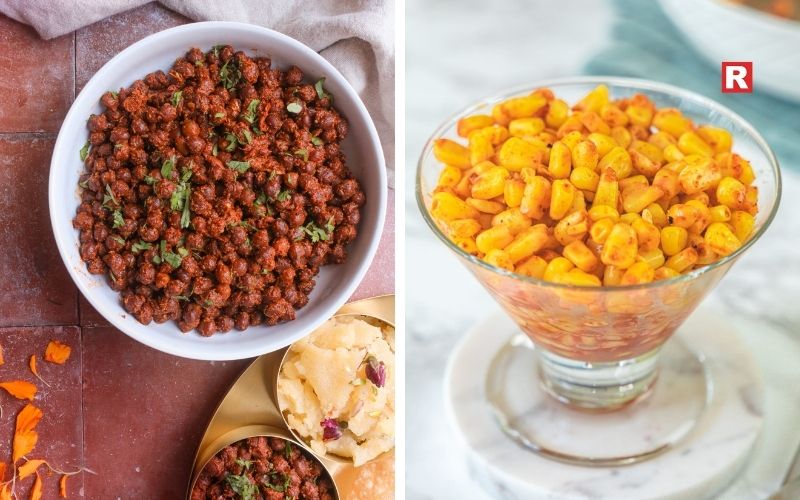
- Masala Chana (Spiced Chickpeas): Roasted or boiled chickpeas, seasoned with chaat masala, cumin, and chilli powder. They're crunchy, full of fibre, and a great gluten-free snack for anyone.
- Masala Corn: Boiled or roasted corn mixed with butter, lemon juice, and some spices. You can find them a lot on the street, and it's really easy to make at home, and also it's naturally gluten-free.
Check out: 10 Healthy Spreads Ideas That Turn Bread Into a Better Snack
10 Veg Chicken Substitutes for High-Protein, Balanced Meals
Desserts
- Millet or Quinoa Kheer: Although rice is already gluten-free, you can still try swapping it with millet or quinoa in your kheer for a healthier version. Cook it in milk and add cardamom, nuts, and saffron for a tasty and healthy dessert.
- Coconut Ladoo with Jaggery and Nuts: These sweet balls made from grated coconut, jaggery, and nuts require no wheat or gluten-containing ingredients and are popular during festivals and everyday treats.
Tips for Adopting a Gluten-Free Diet in India
- Read Product Labels Carefully: When buying packaged foods, watch out for gluten hiding under names like maida (refined wheat flour), rava (semolina), malt, and certain starches.
- Choose Naturally Gluten-Free Flours: When you're cooking or baking, try using gluten-free flours, such as besan (gram flour), millet flour (bajra, jowar, ragi), rice flour, or cornflour. They're also a healthier choice than maida or wheat.
- Shop at Specialized Stores: For more gluten-free choices that you can trust, check out stores or websites that specialize in gluten-free products.
- Prevent Cross-Contamination: In your kitchen, keep your gluten-free stuff away from everything else. Use different spoons, pots, and pans so you don't mix gluten-free food with food that has gluten.
- Explore Traditional Indian Recipes: Lots of Indian foods that use grains, beans, and rice don't have gluten anyway. Try adding some of these to what you eat, so you still get great flavor without the gluten.
- Use Indian Spices and Herbs: Make sure your meals are still tasty by using the spices you already have. That way, you don't have to give up food that tastes good just because you're eating gluten-free.
- Consult Healthcare Professionals: before you stop eating gluten completely, have a chat with a dietitian or your doctor. This makes sure you're still getting all the stuff you need and that you change your diet in a good way that you can keep up with.
Learn more: 10 Vegetarian Indian Foods That Help You Gain Weight the Healthy Way
Enjoy Gluten-Free Living
Going gluten-free in India isn't just a passing trend. It shows people are paying more attention to their health and how well they digest food. It helps some feel better when they have long-term health problems. Other people see it as a way to get healthier. And now, it's much easier to switch because you can find gluten-free food. You can still enjoy tasty and healthy gluten-free meals that taste Indian just by changing some ingredients and coming up with clever recipes, like millet rotis and quinoa pulao. As with any diet change, seeking professional guidance is important to thrive on this trend safely and happily.
Disclaimer: This article is intended for general informational purposes only and should not be considered a substitute for professional medical advice, diagnosis, or treatment. Readers are advised to consult a qualified healthcare professional before making any dietary, health, or lifestyle changes.

Indian’s love for biscuits is something that cannot be comprehended by words alone. But this love is incomplete without the chai, or in some cases, coffee. When you imagine having a tea or coffee break, biscuits are always included. And there isn’t any biscuit you can pair with your chai or coffee. Certain brands have power over half the biscuit industry just because they are a perfect pair with chai.
This is why the biscuit market in India has taken a step up, with numerous options available for everyone. You can find many different varieties from classic butter biscuits to chocolate ones. And, as more and more people in India are becoming health-conscious, lots of brands have launched biscuits with oats, nuts, and jaggery. This is great for both people who prefer taste and the ones that prefer health.
This article is intended to list 10 biscuit brands found in India that are great with chai or coffee. So that you can find your next choice of biscuits for your tea and coffee time.
Read more: 10 Best Tea and Dessert Pairings for Café Enthusiasts
The Biscuit Market of India
The biscuit market in India is at a level where it is thriving, with a value of around USD 4.76 5.05 billion in 2024, and is expected to grow at an annual rate of (CAGR) of 5.88% to 9.61% over the next few years. Indian biscuit brands dominate the market more than foreign ones, which have a smaller share in the market. What makes the Indian biscuit market interesting is that there is a constant innovation in flavors and textures. There are also health-focused options, like multi-grain or sugar-free, which cater to the evolving demands of customers. Many brands have unique biscuits made with desi ghee or regional specialties. This makes biscuits a versatile and popular snack choice across the country.
The Top 10 Biscuit Brands For Your Chai and Coffee
1. Parle
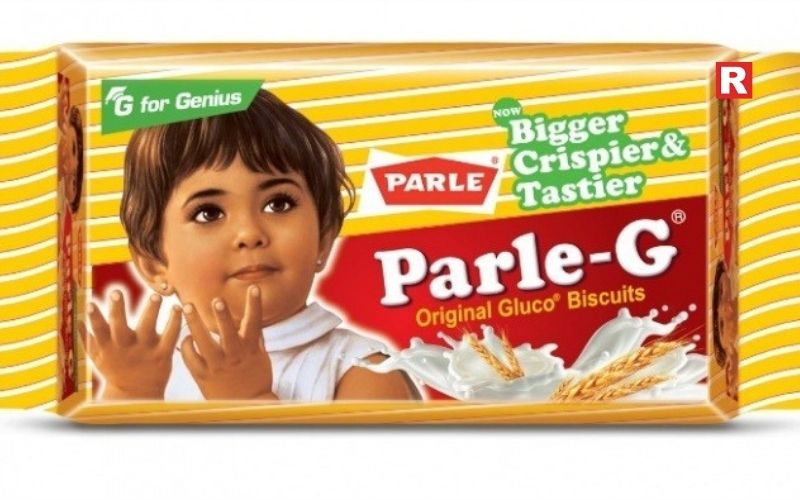
India’s most famous brand, which every Indian must have heard of, Parle, became popular because of its flagship product, Parle-G. Its tagline, "G Mane Genius," is a great marketing tool. Parle-G is known for its sweet taste and crunchy texture, which, if dipped in chai or coffee, becomes soft and mushy. It is like the perfect match for chai and coffee. Whether it is morning or evening, tea or coffee time, Parle-G is there to complete the experience. It has also become a household staple due to its affordability and availability. Parle, the brand, also offers biscuits like Krackjack and Monaco, which are salty, making them perfect for people who like a salty snack with their chai. This brand’s quality has remained consistent over the years, making it a favorite for many.
Know more: Top 10 Tea Brands in India That Every Chai Lover Swears By
2. Britannia

Britannia is well-known for its wide range of biscuits, including Good Day, Marie Gold, and Bourbon. Good Day biscuits are buttery and nutty, oftentimes coming in different flavors like Pista Badam, Cashew, Butter Jeera, etc. They offer a more premium tea time experience if you’re having chai or coffee in a middle-class Indian household. Marie Gold, on the other hand, is light and crisp. It doesn’t soak in chai well after dunking, but it is preferred by people who want to get the taste of biscuits more clearly. Bourbon, which has a chocolate layer between two biscuits and sweet sugar sprinkled on top, is a perfect choice for coffee, especially the less sweet ones. Britannia’s biscuits are widely available across the country and loved for their quality and taste.
3. Sunfeast

Sunfeast is known for tasty and new flavors and good quality, so tea and coffee fans love it. Dark Fantasy cookies are a popular choice with coffee drinkers. They have a rich chocolate taste that pairs well with a strong cup of coffee. Sunfeast Marie biscuits are light and crispy, just right with chai, for those who like to taste the biscuit without it getting too soggy. Sunfeast also has digestive and multigrain choices for people watching their health, who want a good snack with their drinks. People like Sunfeast biscuits because they taste good, are of good quality, and can go with anything. This makes them a go-to for tea time in Indian homes.
4. Oreo

Oreo, a cream biscuit introduced by Cadbury, is famous not just in India but in other countries as well. It comes in two fillings, white and brown chocolate. This biscuit is a good choice for pairing with coffee and provides a sweet and indulgent experience. With black coffee or americano, its flavor is perfect to balance out the coffee’s bitterness. It might not be a good choice with a sweet milk tea, though. It has a unique texture that goes beyond just normal snacking. Oreo, rather than just being a biscuit, has become an ingredient and a flavor in itself. You can find Oreo Shakes at any juice stall, or Oreo cakes, and even Chocolate with Oreo filling. This biscuit is popular among young adults and families that are looking for a premium biscuit option.
What's new: 10 Most Popular Coffee Blends in India
5. Bourbon (Britannia)

These biscuits are so good that they need a separate section from their brand’s other varieties. Bourbon is known for its creamy center of chocolate and crisp exterior, making it a good choice for pairing with coffee. The chocolate center isn’t too sweet and pairs well with the crunch exterior. When you take a bite of this biscuit, you experience a flavor that is sweet but not overwhelming, rich, gentle, and lingers on your taste buds. Bourbon is also a popular choice with chai for those people who enjoy a sweeter snack. The biscuit’s rich taste and quality have made it a favorite for tea and coffee lovers across India.
6. Anmol

Anmol biscuits are known for their good quality and classic taste, which is why Indian families have trusted them for years. Their Glucose biscuits taste great with chai and give you a light, sweet crunch that is perfect with a warm cup of tea. They’re made with simple ingredients, so you get a good snack without any artificial ingredients. Anmol has other biscuits, too, like cream, butter, and digestive ones, so there’s something for everyone. People love the brand because the biscuits always taste good and don’t cost much, making them perfect for tea every day. You can find Anmol biscuits in stores and supermarkets all over India. Their simple, classic flavors have made them a favorite with both kids and grown-ups. They also have other items besides biscuits, like chai-friendly Rusk, waffles, and mini-cakes.
7. Priya Gold

Priya Gold biscuits are pretty good, with both classic and new flavors for people who care about taste. Their Cheese Cracker is a hit if you like something cheesy with your tea or coffee. They have a strong cheese flavor and a nice crunch. Marie Lite biscuits are another common choice. They're light and crispy, good for dipping in your chai or coffee without getting mushy. Priya Gold also has other biscuits, like fruit and nut types, if you want something a bit fancier with your tea. The brand cares about good ingredients and great taste. People pick these biscuits for celebrations or when they want a treat. You can find Priya Gold biscuits in most stores and online. So, if you're in India and love biscuits, you can easily get your favorites.
Check out: Top Flavour Coffee Brands in India That Every Coffee Lover Must Try
Best Cookie Brands in India: A Complete Guide for Cookie Lovers
8. Googly (Bisk Farm)

Googly biscuits, produced by Bisk Farm, are pretty popular because they have unique flavors and an innovative texture. People especially like their cream-filled biscuits with coffee. The cream makes the coffee taste even better. If you like chai, the plain Googly biscuits are a good match. They don’t take away or overpower the flavor of teamaking them suitable for people who like a more subtle pairing with their tea or coffee. Googly also experiments with different kinds of biscuits, and makes biscuits like flavored and multigrain ones, so everyone can find something they like. Basically, Googly biscuits are made to be versatile, so they can go with whatever you're drinking, whether it's coffee in the morning or tea at night. They're known for being creative and yummy. Popular choice for those who love to try new flavors and textures with their favorite drinks.
9. Patanjali
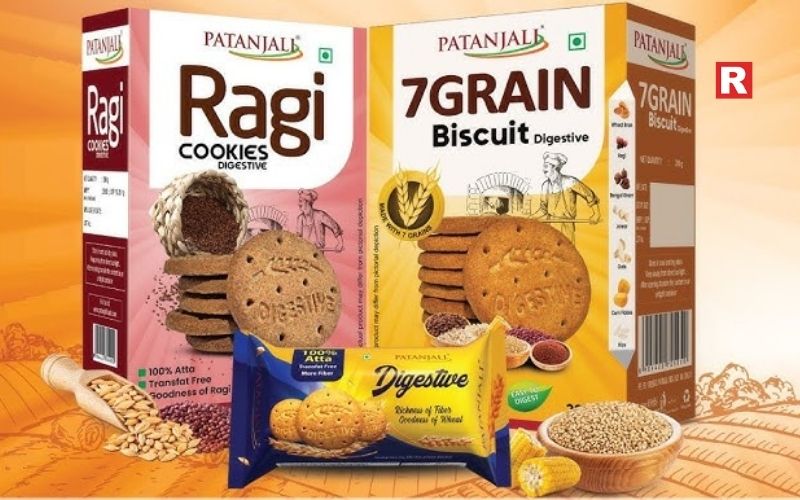
Patanjali is a popular Indian brand that's known for its natural and Ayurvedic products, and their biscuits are no different. They sell unique biscuit varieties such as Doodh Biscuits and Nutty Delite, which contain stuff like milk, oats, and nuts. These biscuits don't have artificial flavors or preservatives, so they're a great choice for people who care about their health and for families who want snacks without the guilt. Their biscuits taste great with both chai and coffee, giving you a nice crunch and a bit of sweetness that goes well with a warm tea or a rich coffee. Because the brand uses natural ingredients and keeps prices low, their biscuits are liked by people in cities and villages. You can eat them for a fast breakfast, an afternoon snack with tea, or a small evening treat. Patanjali biscuits give you a good experience that fits with today's health ideas while still feeling like a classic Indian biscuit.
10. Unibic
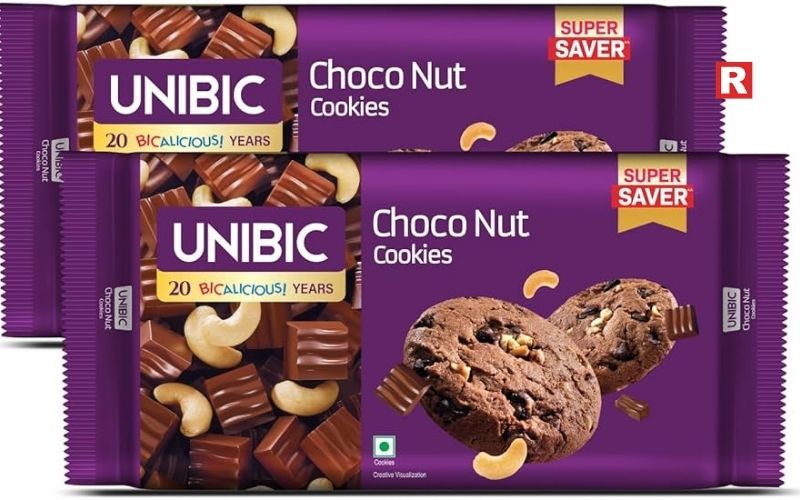
Unibic is known for its gourmet biscuits. They offer a wide variety of premium choices like chocolate chips, fruit, or nuts. They’re made to give you an indulgent experience, especially for people who like something sweet with their coffee. These biscuits also work well with chai. Their strong flavors and crunch make your tea time even better. Young people and families who like high-quality biscuits love Unibic because of their good quality and ability to elevate their tea or coffee time. Unibic uses quality ingredients and also comes up with innovative recipes, which is why people who love tea and coffee enjoy them. Whether you're having coffee or chai, Unibic biscuits make any moment feel a little special, so they're a popular pick if you like fancy biscuits.
Learn more: India's Famous Namkeen Brands: The Top 10
Finding the Perfect Pair
In India, there's nothing quite like dipping a biscuit into your chai or coffee. It's a simple pleasure that brings happiness to homes everywhere. These little treats make everyday moments better, with a yummy mix of tastes and textures that go perfectly with both sweet and savory drinks. You can find all sorts of biscuits these days, from the old favorites to fancier ones and even some healthy choices. They're not just snacks, they're a key part of India’s tea-time tradition and happy memories of many. Whether you're taking a quick break or settling in for a cozy evening, biscuits and tea or coffee are a beloved Indian custom that celebrates good taste, tradition, and spending time together.
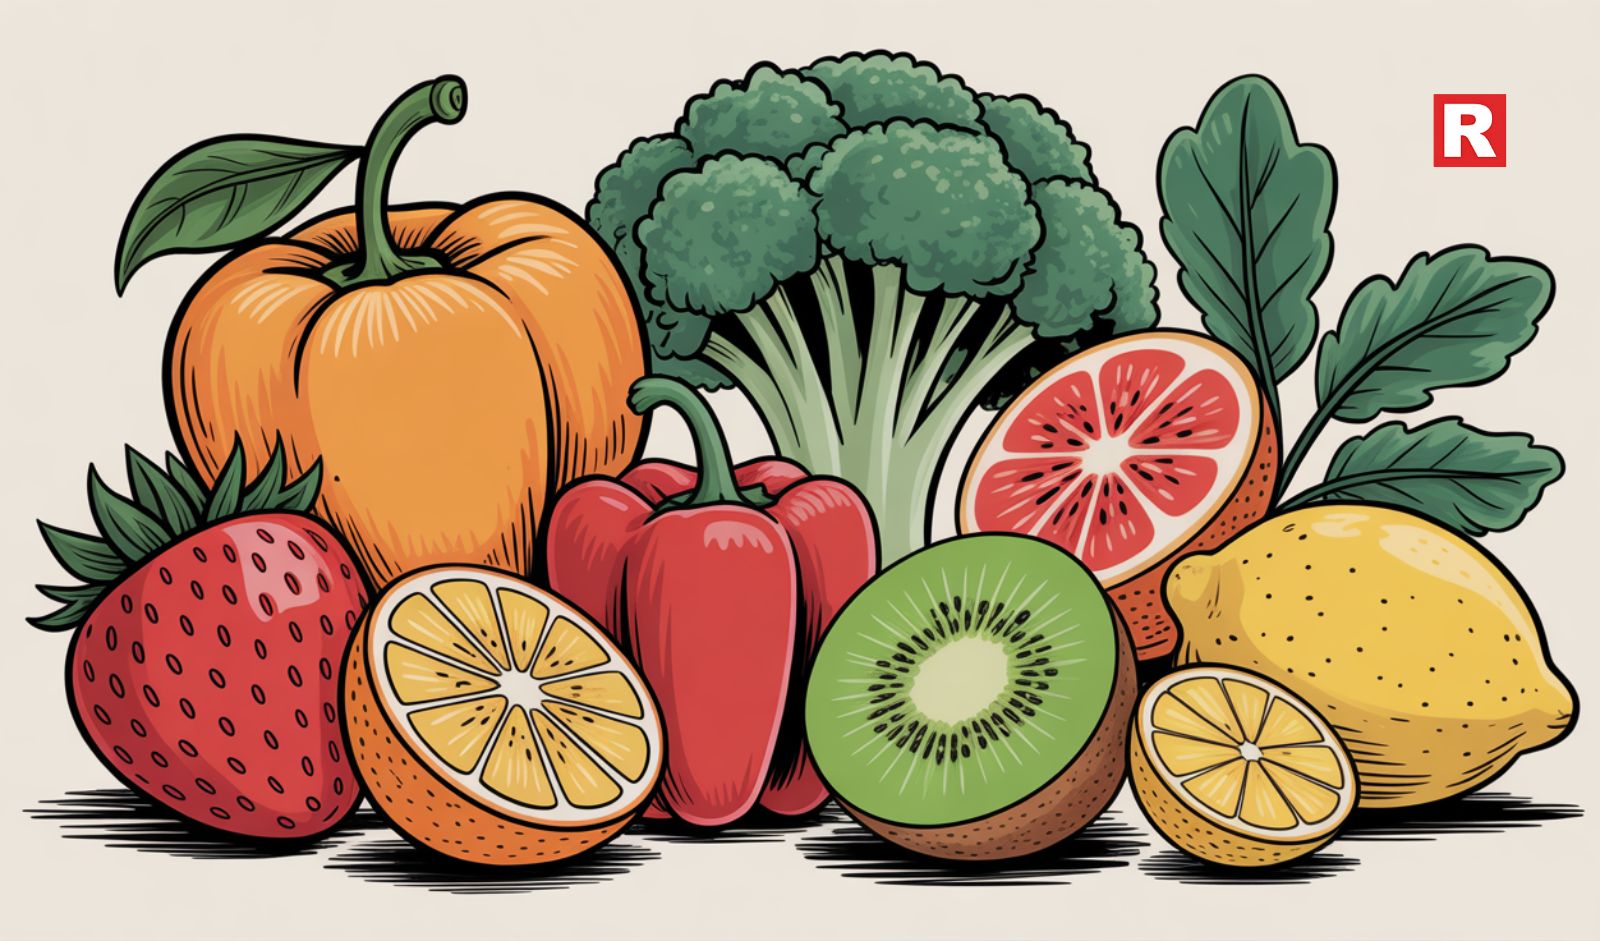
Vitamin C is a nutrient that's common in our diets. People like it because it boosts immunity, keeps skin healthy, and enhances their well-being. Most people try to get Vitamin C in their meals, whether it's from fruits, veggies, or drinks. However, your body can't store it for long, so you need to get it regularly.
In India, there are lots of foods that are a great source of Vitamin C. You can find them easily at local markets and stores. They're good for any region and don't take much work to add to your meals. Because of this, Indian families have been eating these things for a long time, no matter the season.
This article will list seven foods that are loaded with Vitamin C. Also, it’ll explain why they are good for you, how you can eat them, and why you should include them in your daily diet.
Read more: 12 Foods Like Avocado That Are Creamy, Healthy, and Tasty
Why Your Body Needs Vitamin C
- Supports iron absorption: Vitamin C helps your body absorb iron from plant-based foods. This can really help with keeping your energy up and fighting off tiredness, especially if you're a vegetarian.
- Strengthens immunity: Getting enough Vitamin C can also help your immune system. Many find they feel better during seasonal changes when they get enough of it.
- Protects cells: It also protects your cells from damage caused by things like stress, pollution, and not eating properly, which helps keep your body in good shape.
- Aids collagen production: Vitamin C is used by the body to make collagen, which is important for healthy skin, comfortable joints, and healing wounds.
- Easy to obtain: It's actually easy to get Vitamin C. Even though people talk about it a lot, it's one of the simplest nutrients to find in everyday foods.
- Must be taken through diet: Your body can’t make Vitamin C on its own, so it’s important to get it daily from the food you eat.
Lots of fruits and veggies used in Indian cooking have Vitamin C. Here are seven great examples.
7 Vitamin C-Rich Foods
1. Amla
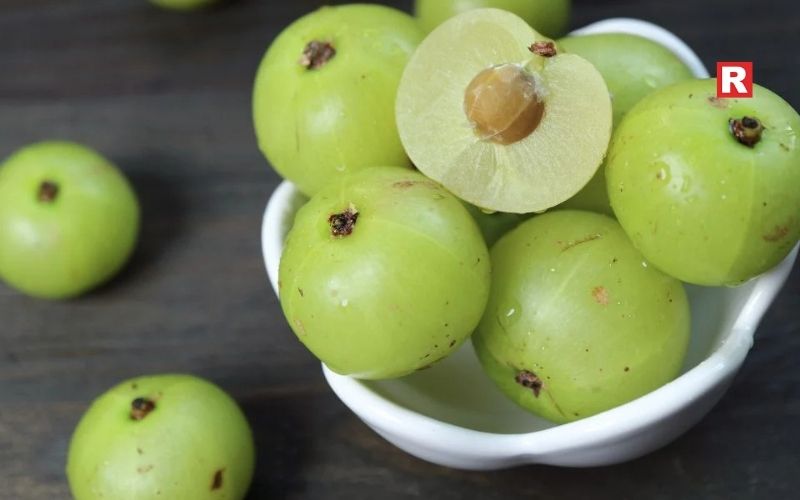
Amla is packed with Vitamin C. People eat it raw, pickled, or drink it as juice. It's been a go-to in Indian diets for ages. Amla helps your immune system, makes your skin look better, and keeps your stomach happy. Plus, it has nutrients that fight off damage from the environment.
You can grate Amla into salads, mix it with water and honey, or eat it as murabba. Some like them sun-dried because it's not as strong. Since you can find it in most Indian markets, it's easy to eat a little bit regularly. Just one piece gives you a good dose of Vitamin C, so it's a simple choice.
Know more: 10 Vegetarian Indian Foods That Help You Gain Weight the Healthy Way
2. Oranges

Oranges are a favorite all over the country, especially in winter. They taste great, with a mix of sweet and sour, and they're full of Vitamin C. They help you stay hydrated, keep your immune system strong, and just make you feel good. A lot of people like them as a quick afternoon snack because they're easy to eat.
You can eat oranges as they are, or juice them. The sections have fiber and natural sugars that give you a steady energy boost. Kids usually love them, so they're great for family meals. Since you can find different types of oranges in different areas, most families can get them during the winter.
3. Guava
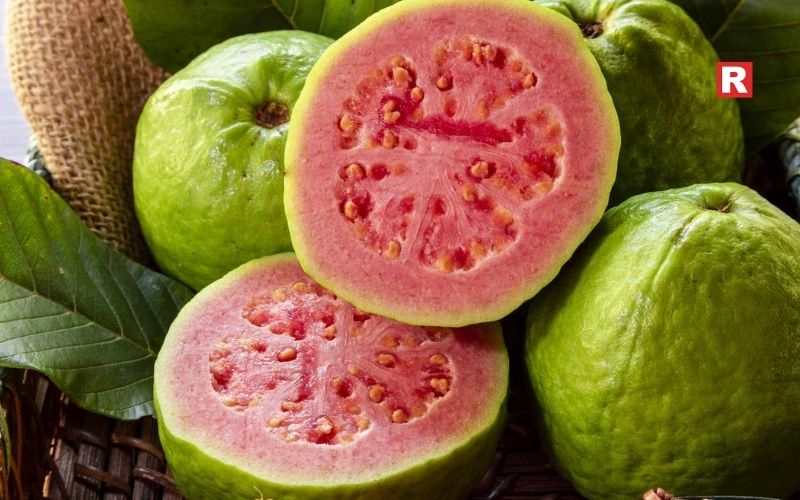
In India, guava is known as a super-nutritious fruit because it has more Vitamin C than a lot of citrus fruits. People like it because it's good for your digestion, tastes sweet, and has a nice, firm feel. If you eat it with the skin on, you get fiber and other small nutrients that are good for your gut.
You can just slice up a guava and eat it, put it in fruit salad, or blend it into a juice. Whether it's pink or white inside, it's packed with Vitamin C. Since guava is cheap and easy to find in stores, it's a simple way to get more nutrients every day without a big change to what you eat.
4. Lemon
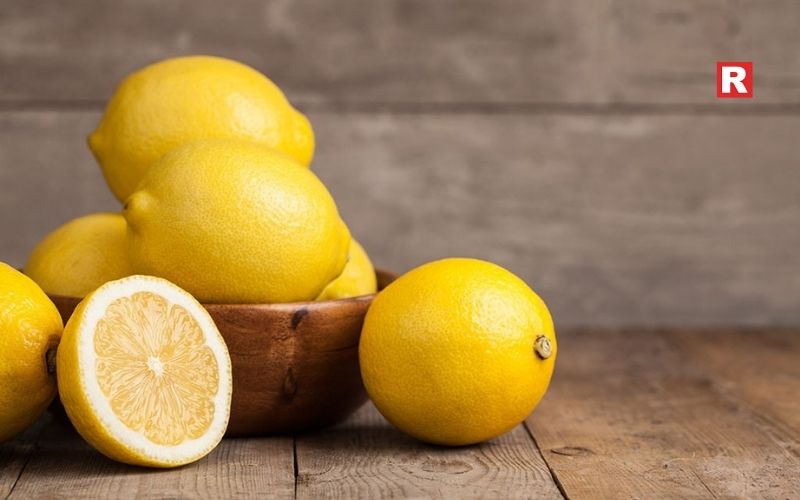
Lemons are a must-have in Indian kitchens. Just a little squeeze gives you a good dose of Vitamin C. People put lemon in everything from dal and salads to chutneys and drinks. It makes food taste better, aids digestion, and just makes everything brighter. Lemon juice is also great for helping your body soak up iron from veggies, which is super useful if you're a vegetarian.
Since lemons are around all year, they're a vitamin C source you can always count on. A warm glass of lemon water in the morning is what many people drink every day. And it is also great for keeping you hydrated when added to cold drinks when the weather gets hotter.
5. Papaya
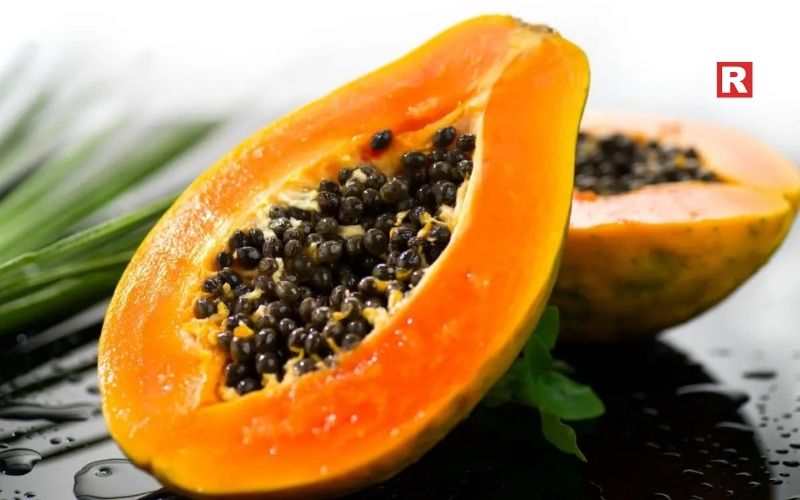
Papaya is a nice, gentle fruit packed with Vitamin C. It also has some other good stuff that can help your digestion and make your skin look good. It's easy on your stomach, so it's often a good choice if you're getting over a cold or something. Plus, it has enzymes that help you break down your food better.
You can just eat papaya by itself, put it in a smoothie, or toss it in a fruit salad. You can find it pretty much everywhere in India, and it won't cost you too much. Eating it regularly can help keep your immune system strong and keep you feeling good. Some people even use it on their skin because of those enzymes and antioxidants.
What's new: 10 Anti-Inflammatory Foods to Add to Your Diet
6. Capsicum
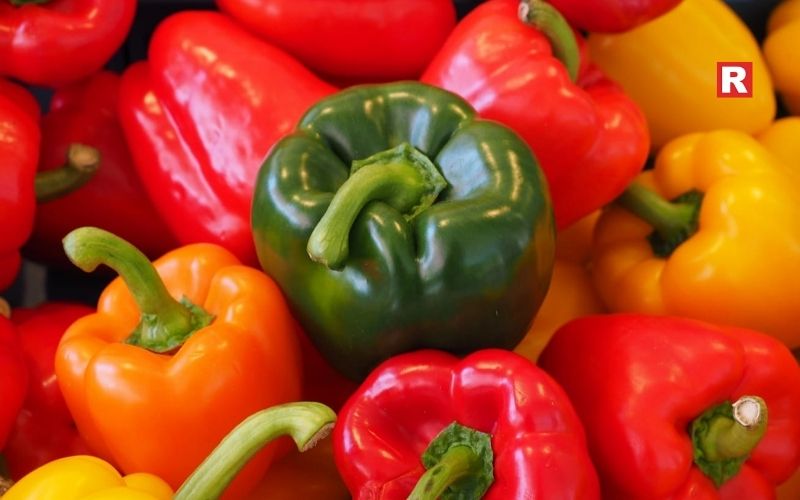
Bell peppers, especially the red and yellow ones, are packed with Vitamin C. Lots of families often go for the green kind since they're cheaper and easier to find. Bell peppers help your immune system and protect your cells. Plus, they've got fiber, which is good for your digestion.
You can stir-fry bell peppers, toss them in salads, put them in sandwiches, or cook them with lentils and rice. Their crunchy texture and bright colors make even simple meals taste better. Since bell peppers cook fast, they're perfect for busy families who want healthy meals without spending ages in the kitchen.
7. Strawberries
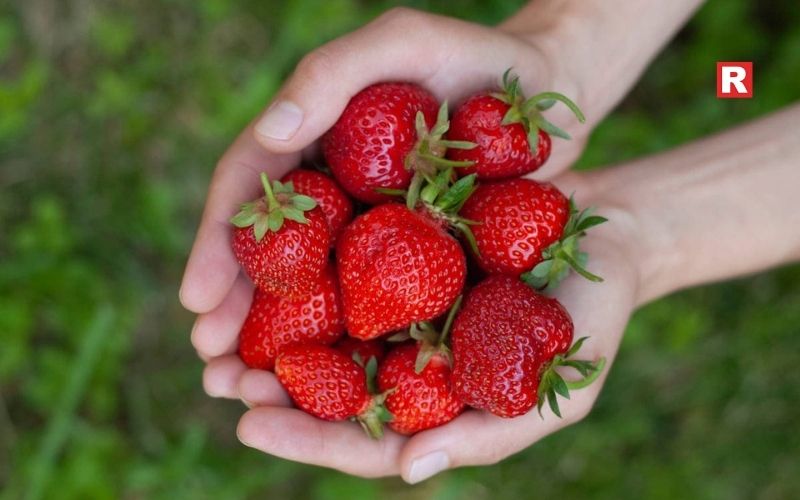
Strawberries are a winter fruit in India and are packed with Vitamin C. Their bright color comes from antioxidants, which are good for your skin and health. People like to eat them in desserts, shakes, or just in a bowl. If you eat them fresh, you also get fiber and water.
Strawberries can be a bit expensive, but even a few can give you a good boost of Vitamin C. They're a popular treat in the winter. Some people freeze them so they can enjoy them longer. Just be sure to handle them carefully and wash them well, and you can easily add them to your daily snacks.
How Vitamin C Supports Immunity
Vitamin C helps boost your body's defence system. It makes your immune cells work better and react faster. This is really helpful when the seasons change, and people tend to get sick more easily. Eating foods that have a lot of Vitamin C can keep your energy levels up and help your body ward off sickness.
Taking Vitamin C regularly can make you feel less tired and help you bounce back faster after working out. It also reduces stress in your body, which helps you stay balanced even when you're busy. Because of all these good things, Vitamin C-rich foods are great for everyone, no matter how old they are.
Check out: Best Exotic Fruits to Enjoy This Winter for Taste, Health and Glow
Top A2 Ghee Brands in India to Keep You Warm & Healthy This Winter
How Vitamin C Helps Skin Health
Vitamin C aids collagen production, which keeps your skin firm. It also guards against daily stressors like the sun and pollution. A lot of people see clearer, brighter skin with regular vitamin C intake. Plus, it helps heal wounds and keeps dryness away.
You can easily add vitamin C-rich foods to your snacks, salads, and drinks. Since it works best when you take it consistently, small amounts each day are better than large doses once in a while. This constant approach is the key to lasting skin health.
How to Include These Foods in Your Routine
It's easy to add more Vitamin C to what you eat every day.
- Just try to eat at least one fresh fruit each day. Good choices are oranges, guavas, or papayas.
- Squeeze some lemon juice over your food.
- Use bell peppers in your usual cooked veggie dishes or salads.
- Keep fruits that are in season handy for when you want a snack, like strawberries.
- Make small amounts of amla chutney or juice.
These simple changes can help you have a more balanced and varied diet.
Learn more: Top 10 Healthiest Breakfast Bowl Fruits
Your Vitamin C Path
Getting enough Vitamin C is easy in India because the food that has it is easy to find, cook, and grow all over the place. It's good for your immune system, gives you energy, and helps your skin, so it's just good for you overall. If you eat these seven foods often, you will get enough Vitamin C without having to change what you do much. You do not need to look for ingredients that are hard to find; instead, just get used to eating stuff you already know and like. If you know why these foods are good for you and how to add them to your meals, you can easily get healthier.

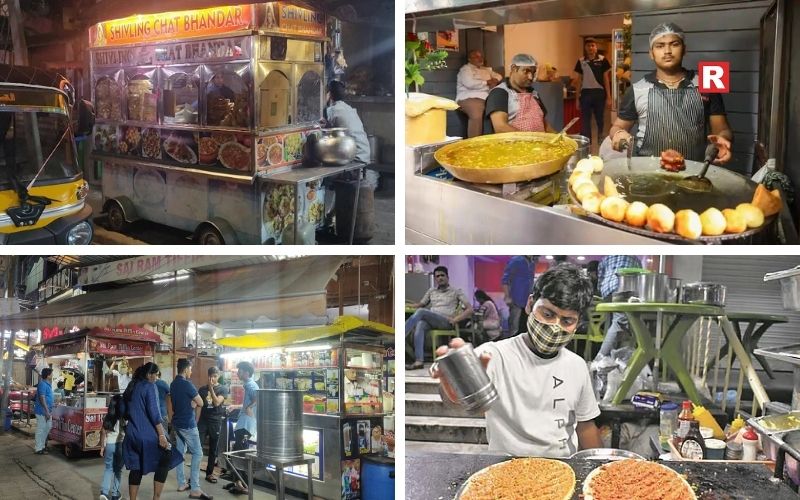
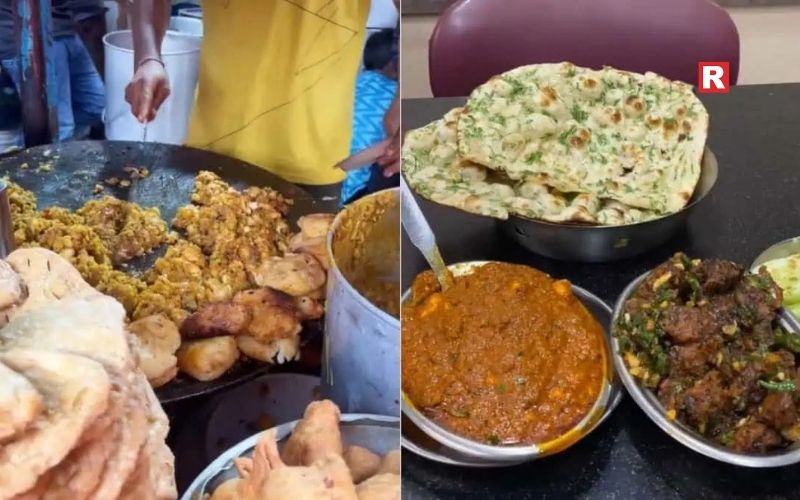
Hyderabad's street food scene is lively and friendly. While everyone knows the city for its biryani, the little food stalls and night vendors are not to be underestimated. They really show off how much the city loves strong tastes and makes people feel at home, locals and travellers alike.
In old Hyderabad, you can still taste the royal touch of Nizam kitchens. You'll see it in dishes cooked slowly with lots of spices and made the old-fashioned way. But in the newer parts of town, it is the modern street food that brings the young people together every night. What makes it all so great is how the city's history mixes with daily life. Just walking around Charminar or Gachibowli, you'll find tons of stalls selling dosas, kebabs, chaat, and Irani tea. This mix of old and new is what Hyderabad street food is all about.
If you want to visit Hyderabad on your next trip, but don’t know where to find the best street food, then read this article, as we have compiled a list of the best places there.
Read more: Top Famous Veg Street Foods in Kolkata That You Must Try Once in Your Life
What Makes Hyderabad’s Street Food Unique?
Hyderabad's street food is special because it mixes Mughlai, Andhra, Telangana, and Irani tastes. Vendors use spices passed down through families, which gives the food a taste that locals know and love. You'll see slow-cooked meats, crunchy snacks, flavorful chutneys, and sweets that show Persian influence. Lots of these food stalls have been around for years, serving up the same great flavors that keep people coming back. Irani bakeries, tiny dosa places, kebab stands, and chaat spots each add something special. This mix of history and local flavors makes Hyderabad's street food feel rich and diverse.
Popular Areas for Street Food
- Charminar: You can find classic Hyderabadi food here, stuff like kebabs, cookies, biryani, and haleem seasonally.
- Mozamjahi Market: This place is great for old-school bakeries, fruit ice cream, and traditional desserts.
- Tank Bund: It becomes very lively at night with lots of snack vendors selling all sorts of delicious snacks.
- Sindhi Colony: People know this spot for chaat, sandwiches, pav bhaji, and fast-food-style snacks.
- Gachibowli: This area has a bunch of modern food trucks and stalls that are popular with young people who work in offices or students from neighbouring schools.
- Madhapur: A cool area to grab a quick bite from trendy stalls and fusion street food.
- Ameerpet: This place is popular for all kinds of dosa and cheap snacks, perfect for students.
Know more: Famous Street Food to Try in Chandni Chowk
Top 10 Street Food Spots in Hyderabad
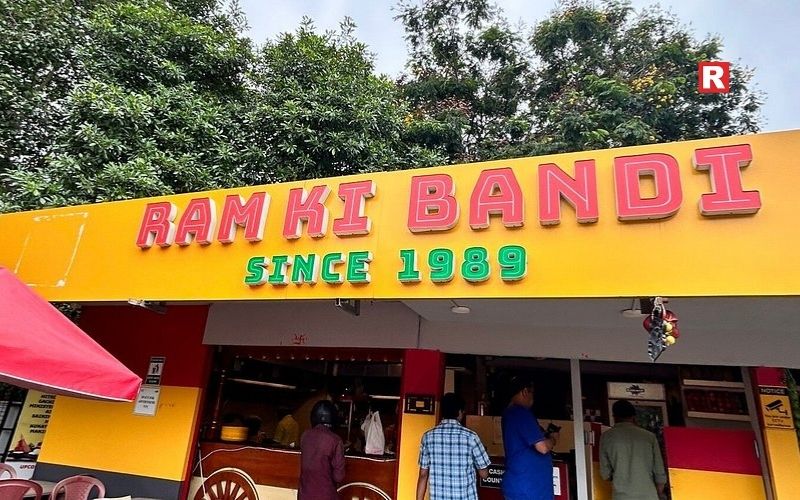
1. Ram Ki Bandi
Ram Ki Bandi is famous for its dosas and idlis, which they make early in the morning with lots of fillings and chutneys. People especially enjoy the cheese dosa, pizza dosa, and upma dosa because they taste both familiar and special. The service is usually fast, so it's popular with people on their way to work and students. You can expect to pay around ₹150 to ₹250 for two people. It's best to go between 3:30 AM and 8 AM to get the freshest food. The location near Nampally is the most popular, but you can find other locations around the city. It's always busy because of its simple setup and tasty food.
2. Gokul Chat

If you're looking for great chaat in Hyderabad, Gokul Chat in Koti is a super popular spot. It's been in business for about 50+ years. They're famous for their pani puri, dahi puri, tikki, and pav bhaji, and they also have fresh fruit juices. The food always tastes the same, and you get a generous portion for your money. You'll see all kinds of people there, from students, families, to people who've been going for years. It'll cost you around ₹200 to ₹300 for two people. What makes them special is that they mix North Indian chaat with local spices. Many people say you have to try it when you're checking out the street food in Hyderabad. But do make sure to carry cash with you, as they do not accept UPI payments.
3. Sindhi Colony Food Street
If you love street food, you have to check out Sindhi Colony in Hyderabad. It's got tons of options, including many for vegetarians. People know the area for its chaat, pav bhaji, sandwiches, and quick snacks, which are perfect when you're craving something in the evening or just hanging out. Lots of the stalls have been around for ages, giving the whole place a friendly vibe. You can grab crispy pani puri, rich milkshakes, super cheesy sandwiches, and smaller bites that are great for sharing with friends or family. The prices are fair, and it's always buzzing with activity. It's super easy to taste a bunch of different things in one go.
4. Madhapur Street Food and Food Truck Lane

Madhapur's a cool place for street food now, packed with food trucks selling things like shawarma, momos, noodles, sandwiches, and some creative snacks that mix flavors. You'll mostly see younger professionals and college students hanging around. Shawarma, momos, and grilled chicken are big hits there. Expect to pay around ₹300 to ₹450 for two people. It's best to go after 7 PM when the majority of the food trucks are starting to cook up fresh food. Being close to Hitech City gives the place a lot of energy, and with so many choices, you can try something different every visit.
What's new: Top 10 Vegan Street Foods in India Every Indian Loves
5. Charminar Food Street

Charminar's streets are known for their tasty food like kebabs, biryani, nihari, lukhmi, Irani chai, and haleem (when it's in season). There's a ton to pick from, especially when night falls. You'll see vendors who've been around for ages and new little stands selling local favorites. The best time to go is after 7 PM. During Ramzan, the area really comes alive with special food and extended hours. It's a great spot to try real Hyderabadi food.
6. Mozamjahi Market

Mozamjahi Market is a favorite spot for its fruit ice cream, baked treats, samosas, and Irani chai. The ice cream is made on a cold stone with fresh, seasonal fruits. Many drop by after dinner for a light dessert or snack. It is affordable too. The best time to go is between 8 PM and midnight when the weather is nice. The area has a calm feel and an old-city vibe that makes eating there even better.
7. Tank Bund Street Food

Tank Bund is a great place to go for an evening walk. You can grab snacks there. Vendors sell things like roasted corn, pani puri, and momos. It's popular because it's chill and the snacks are perfect for a casual hangout. The best time to visit is around sunset or in the early evening. You might not find full meals, but the beautiful lake scenery mixed with the quick snacks makes it a favorite hangout for many.
Check out: 8 Famous Street Foods of Agra You Can’t Miss
A Bite of Banaras: 8 Iconic Street Foods You Can’t Miss in Varanasi
8. Begum Bazaar and Feel Khana Lane
Begum Bazaar and Feel Khana Lane are in the middle of Hyderabad's busy old city. People know these areas for their packed streets, wholesale stores, and lots of street food. Begum Bazaar is a great place to grab traditional snacks, especially kebabs, rumali roti wraps, pulao, and local sweets. Right next door, Feel Khana Lane has cheap eats, tawa dishes, samosas, keema, and evening snacks, which attract employees and customers. If you want to taste real Hyderabadi cooking, these lanes are a good place to start.
9. Nimrah Café, Charminar

Nimrah Café, close to Charminar, is famous for its Irani chai and lots of different bakery biscuits. It's been a favorite spot for ages, and many people stop by after checking out the market. You gotta try their Osmania biscuits, naan khatai, and also the light, buttery cookies. They're incredibly delicious with the strong, sweet tea. It’s budget-friendly for your wallet and feels like a brief glimpse of old Hyderabad. The best time to go is early in the morning or in the evening when it’s lively but not too packed.
10. Gachibowli Food Trucks and Night Stalls

If you're in Gachibowli and hungry late at night, you're in luck! There are tons of food stalls open late serving stuff like shawarma, fried rice, momos, rolls, and grilled chicken. It's a great spot to grab a quick bite after work. The best time to go is between 9 PM and 1 AM when all the stalls are most active. The place has a lively vibe, and you usually get your food pretty fast. That makes this area a reliable option if you are looking for late-night food in Hyderabad.
Hygiene and Safety Tips
- Make sure the stall's counter is clean.
- Don't eat at places where food is left out in the open.
- Go for bottled water or drinks you know are clean.
- Choose food that's cooked fresh and hot instead of remaining unattended.
- It’s better to go when it’s not super crowded.
- See if the people serving food are wearing gloves or using clean tools.
- Check if they're reusing oil or sauces too much.
Learn more: Top Iconic Street Foods from Every Indian State You Must Try
City’s Flavors on A Plate
Hyderabad's street food is a mix of classic dishes and exciting modern flavors. Checking out the food stalls lets you feel the city's vibe. No matter if you're into light snacks, meaty meals, or sweets, every place has its own flavor. Eating here isn't too expensive, and it's fun to try new things with friends and family. When you visit these ten spots and taste different dishes, you'll get why Hyderabad's streets are such a great place to eat. Have fun, don't rush, and let each bite become a cool memory of the city.
Hummus is popping up in Indian kitchens as folks want tasty, healthy spreads that go great with bread, veggies, and regular meals. It's creamy, well-seasoned, and you can do a lot with it, so it's not just for health nuts anymore. Sure, we still love our usual Indian snacks, but hummus has found its place with people who want something fast and full of protein.
City people are a big reason why it's getting so popular. If you're busy, it's nice to have dips ready to go, and hummus is perfect because it's simple and tastes good with everything. Even restaurants and cafes are putting it on the menu, so people start buying it at the store, too. Now, there are tons of brands selling tubs of it in all the big cities.
Both Indian companies and international brands are selling it here. You can find regular chickpea hummus, or try kinds with Indian spices and herbs. There are lots of choices, so it's easy to find new flavors you like.
Read more: 10 Healthy Spreads Ideas That Turn Bread Into a Better Snack
Why Hummus Is Becoming Popular in India
- Taste and Versatility: Hummus is good with pretty much any eating style. Spread it on sandwiches, dip veggies or crackers in it, or have it with grilled food. Lots of folks in India like how you can use it with anything since it doesn't take over the taste of the other food.
- Good for Healthy Living: Since more people want plant-based protein in their diet, hummus is a go-to pick. It is made with chickpeas, tahini, olive oil, and some simple stuff. This means it's a good fit for folks who want snacks that are balanced and full of fiber, without a bunch of junk added.
- Rising Café Culture and Global Food Influence: Cafés, Mediterranean spots, and places that mix different foods have shown hummus to more people. When people get used to eating it out, they look for it in stores. That's why you can find it all over the place now in supermarkets and online.
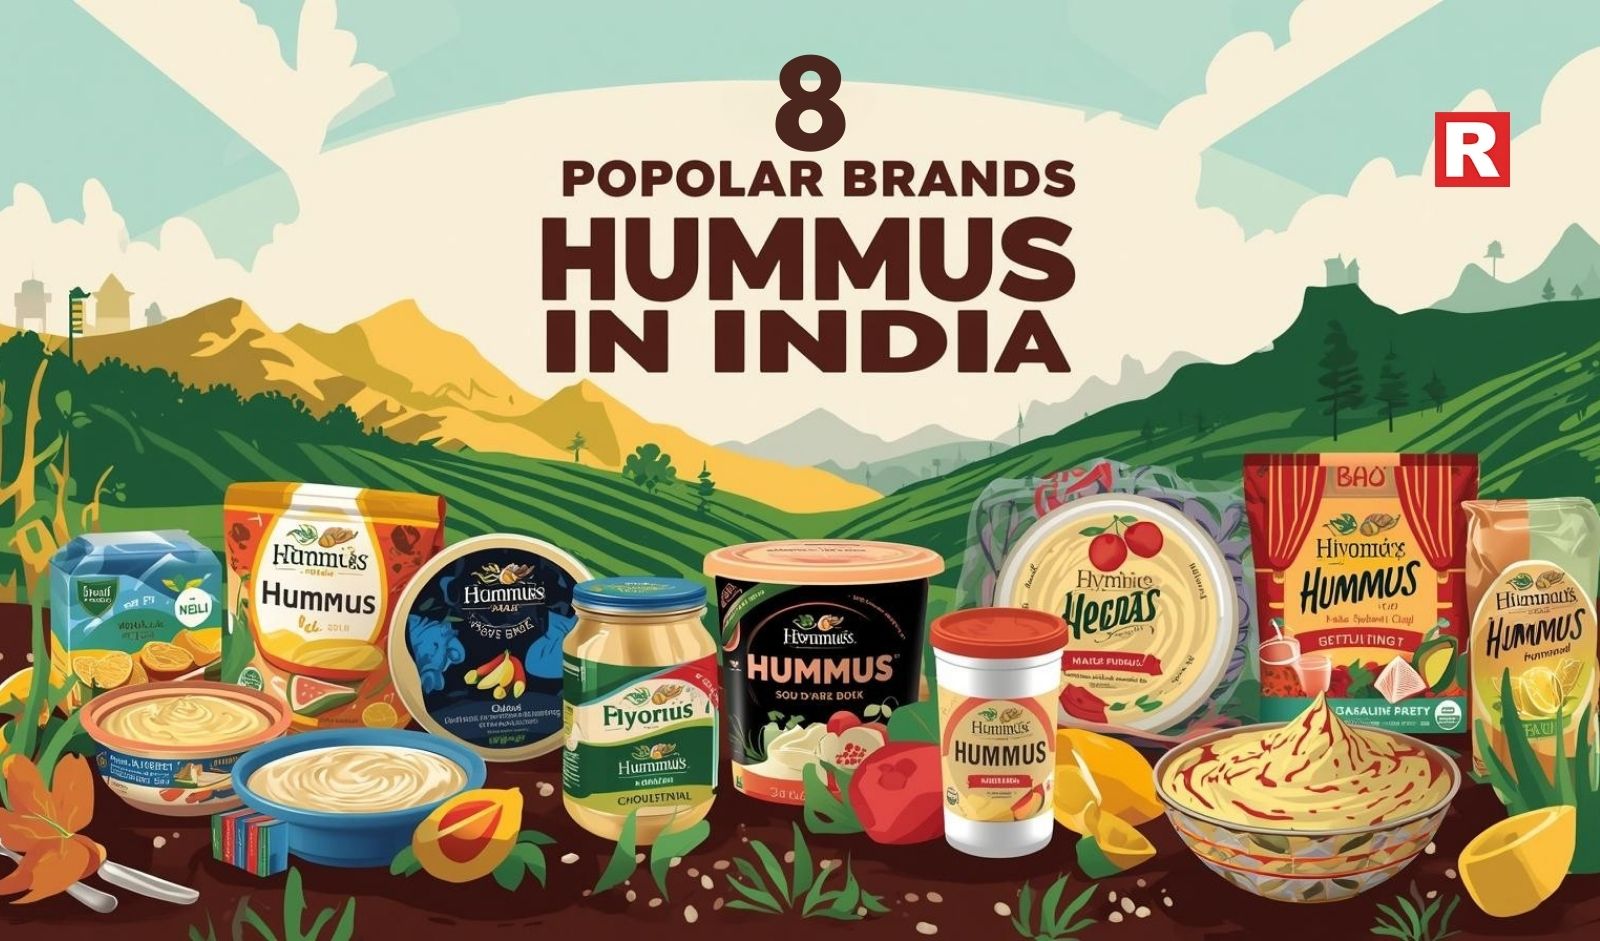
The 8 Popular Hummus Brands in India
1. Wingreens Farms

Wingreens Farms was one of the first brands to make hummus easily accessible throughout India. People who like a little spice or tang enjoy their regular hummus, plus the peri-peri, jalapeño, and garlic kinds. They care about good ingredients and talk about using cold-pressed oils and spices that taste just right. You can find their tubs in most stores and online. Since the flavors go well with sandwiches, chips, and salads, lots of people buy Wingreens all the time. It tastes the same every time, and the price is usually the same, which is why they're doing well.
Know more: Top 5 Barbecue Sauces for Marinades or Dipping: Smoky, Sweet & Absolutely Irresistible
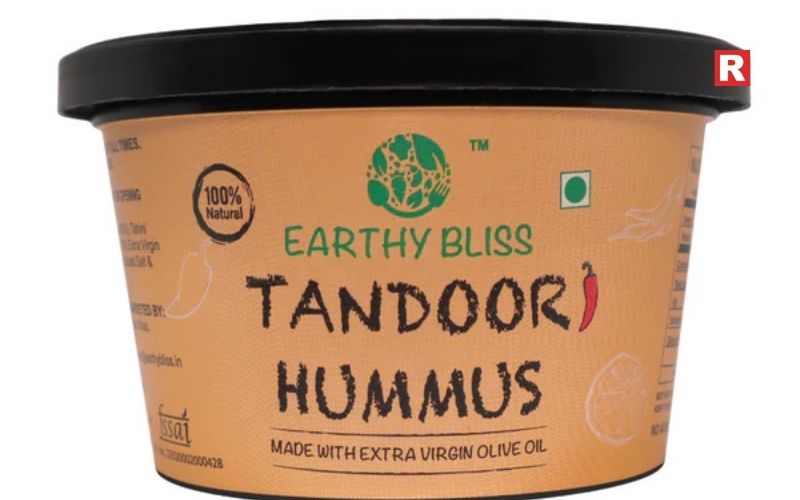
2. Earthy Bliss
Earthy Bliss offers various types of hummus, including the basic variety, as well as olive, beetroot-ricotta, and tandoori flavors. They say it's all vegan, organic, and has no preservatives. They ship all over India and are trying to get the attention of people who want fancy, healthy dips. People seem to like how they package and market their stuff, particularly folks who are into modern, city-style dips.
3. Del Monte
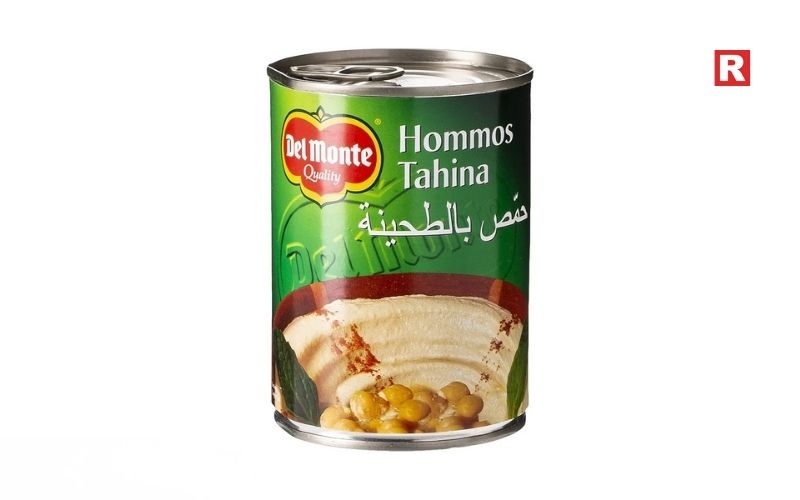
Del Monte is bringing its global recognition to the Indian hummus scene. They're already known for things like condiments and Mediterranean food, so their hummus is simple and mild. It's great for people who don't like strong flavors. It stays creamy without being too thick, which makes it easy to use as a dip, spread, or in bowls. They really focus on using good ingredients and keeping the texture the same every time, so customers can count on it. You can find it easily in stores, and the price is good for families who want a dependable, ready-to-eat spread.
What's new: 10 Vegan Side Dish Ideas That Complete Any Meal
4. Natuf
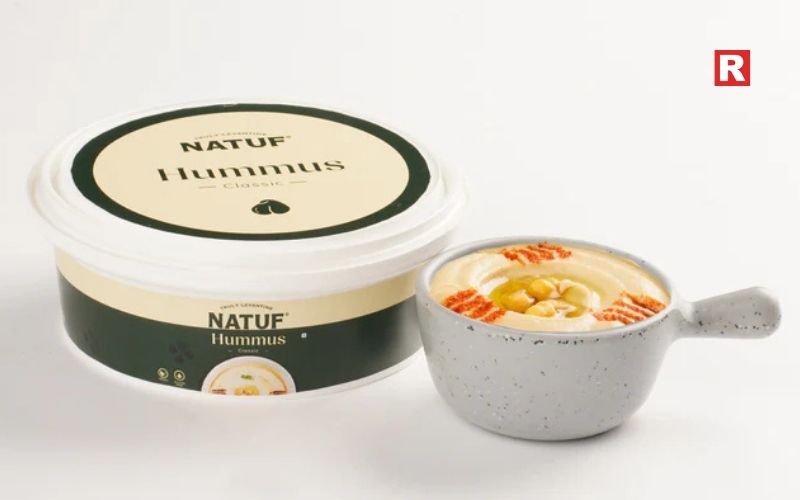
Natuf is also becoming a popular choice, mostly in some cities. They have regular, beetroot, and spicy hummus, usually aimed at people who make Mediterranean food. Right now, they mainly deliver in specific cities (like Bangalore). Natuf shows that more and more hummus fans want different flavors than just the regular kind.
5. Indic Roots
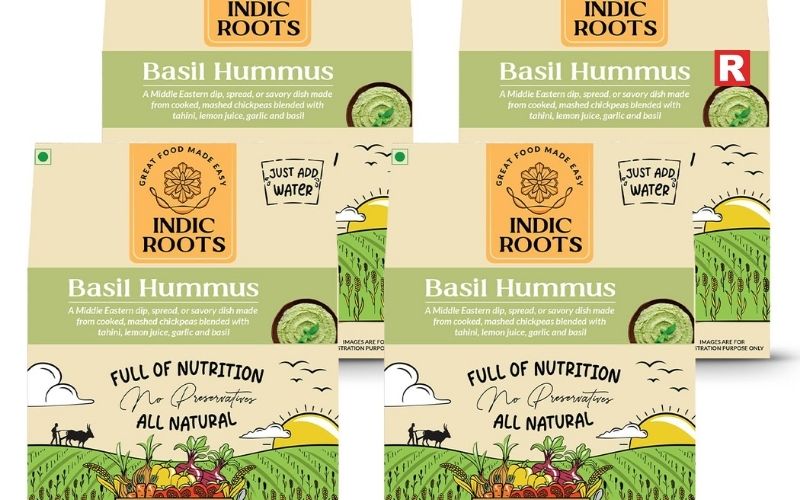
Indic Roots is a brand that sells hummus that's ready to eat or quick to make. It's got stuff like chickpeas, sesame seeds, olive oil, and some spices – nothing fake added. Indic Roots focuses on natural ingredients and a simple taste, so it's good for folks who like dips that are light and fresh. Since it started in India, it might be easier to get it into some stores there. Still, it doesn't seem to be as widely available as some of the bigger brands you see everywhere.
6. All That Dips
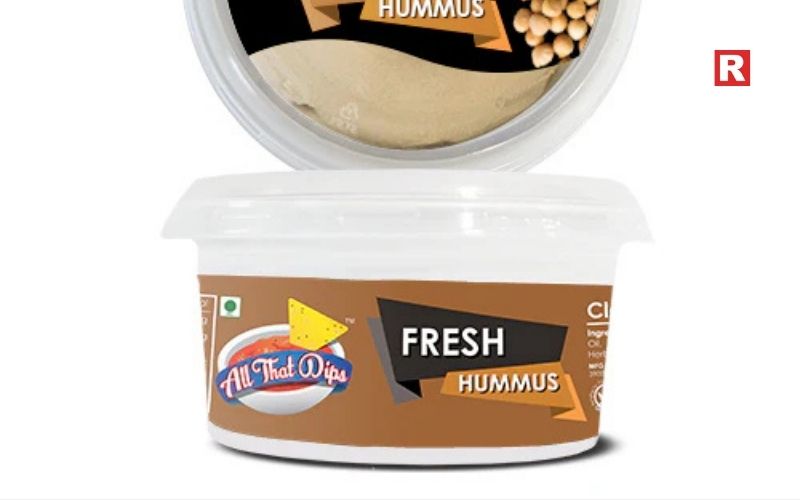
All That Dips is a brand from Vadodara that's famous for its dips and spreads made fresh without any yucky preservatives. Hummus is one of their big sellers. They have different kinds of hummus, like roasted garlic, spicy Sriracha, and the regular chickpea kind. They all come in 150-gram tubs, so you can start snacking right away. What makes them special is that they make their products in small batches and only use real ingredients. All That Dips sells its hummus in a bunch of cities in India. You can get it from online grocery stores and regular shops. So, it's easy for anyone who wants some good Mediterranean-style spreads.
Check out: India's Famous Namkeen Brands: The Top 10
5 Ways to Keep Tomatoes Fresh and Storage Tips
7. Kaze Living
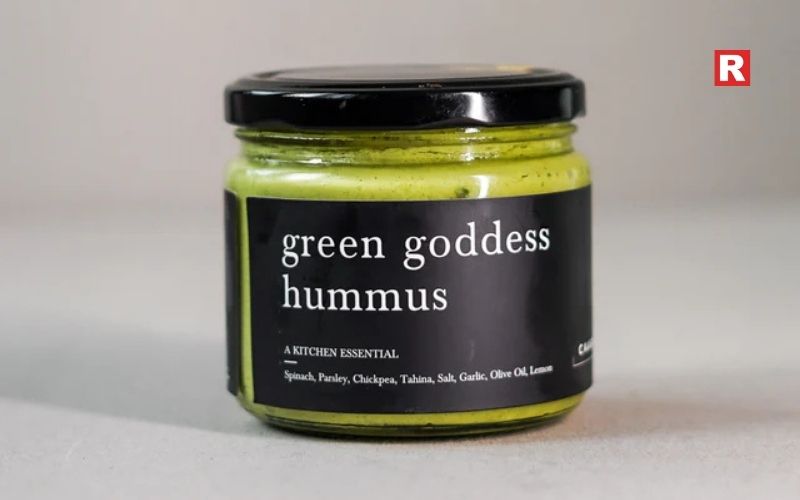
Kaze Living started out in Delhi NCR as a food startup that cared about good food and living sustainably. They wanted to get fresh, good food, often made by hand, to people in the city. They sell things like organic veggies, milk-free options, sauces, snacks, and also their own ready-to-eat hummus, as a healthy lifestyle thing. Kaze Living says their hummus is natural and doesn't have preservatives. It's got the usual stuff like chickpeas, tahini, olive oil, garlic, and spices. You can buy it in small tubs that are good for dipping, wraps, salads, or just snacking. They sell regular hummus, olive hummus, and other kinds too, for city folks who want easy and healthy spreads.
8. DAMAI
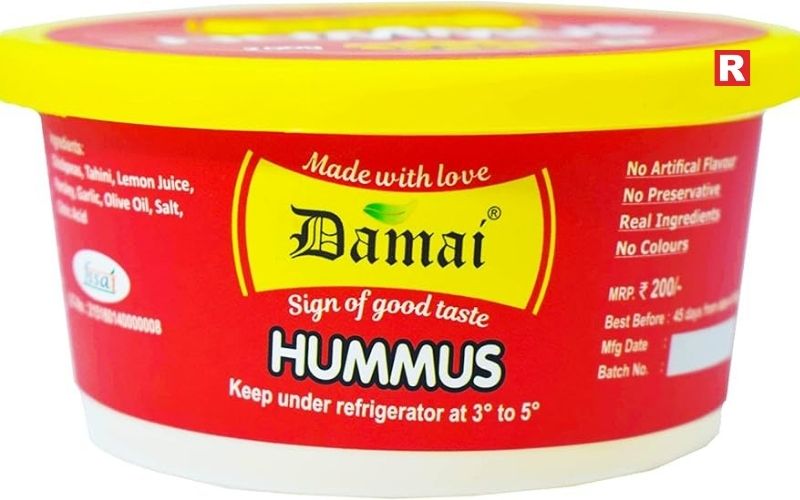
DAMAI is an Indian company based in Mumbai that makes hummus, jalapeño, and pepper dips. You can find them in trade and wholesale directories. They seem to focus on selling in large quantities to businesses instead of individual retail customers. Since DAMAI has its trademark in the food-spread area, which includes hummus and veggie dips, it looks like they want to sell ready-made dips in India instead of just importing them. If you're a business, like a caterer or restaurant, looking for hummus, DAMAI could be a good option for large orders. But you might not find their products in regular supermarkets across the country since they probably sell through distributors. So, DAMAI is aimed at businesses and people who buy in bulk.
Learn more: 15 No-Oil Recipes That Taste Amazing
The Final Scoop
Hummus is getting bigger in India as people want easy, good-for-you food with simple stuff in it. The brands that do hummus well have a texture people can count on and good flavors. Hummus is easier to find now, too, since it's not just in fancy health food shops anymore. The eight brands you see here are some of the reasons it's getting so popular. They're also helping people who care about what they eat find what they're looking for.

India’s love for savoury snacks runs deep, with roots that stretch back centuries. Every region has its own signature blend of crisp, spiced, and aromatic treats. Snacks like namkeen that are easy to carry and can handle the country’s warm climate. What started as a local speciality from small neighbourhood shops has, over time, grown into a thriving industry, thanks to rising demand and changing lifestyles.
Over the last thirty years, the way namkeen is made and enjoyed has undergone dramatic changes. Improved transportation, organised production, and better packaging have helped regional recipes gain fans nationwide. Today, grocery shelves are lined with a colorful array of familiar packets, perfect for everything from a quick bite to festive celebrations.
As incomes have grown and retail networks have expanded, some brands have become household names. Their products are trusted for their consistent flavors and wide variety, making them the backbone of India’s packaged savoury snack market. Let's take a look at 10 such brands that come to the top.
Read more: 12 Simple Tiffin Dish Ideas for Kids
Evolution of Branded Namkeen in India
The journey from loose snacks sold at local shops to the neatly packaged namkeen we see today has been quite remarkable. Small businesses that once served only in their neighbourhoods began experimenting with mechanized frying, standardized recipes, and basic packaging. As more people developed a taste for these snacks, producers scaled up, introduced quality checks, and started making larger batches.
The rise of supermarkets and the convenience of online shopping has also accelerated this transformation. Suddenly, flavors that were once local secrets became available nationwide. Brands that adapted quickly built strong distribution networks, secured reliable ingredient supplies, and invested in packaging that kept snacks fresh. These changes helped namkeen evolve from a local favorite to a staple in homes across India.
The Top 10 Namkeen Brands in India
The following brands are widely available across the country and have become favorites for millions of snack lovers.
1. Haldiram’s

When it comes to packaged namkeen, Haldiram’s is often the first name that comes to mind. Starting as a small shop in Rajasthan, it has grown into a national powerhouse, offering everything from mixtures and bhujia to nuts and sweets. Haldiram’s is known for its reliable quality and flavors that appeal to both traditionalists and those looking for something new. Classics like Aloo Bhujia, Khatta Meetha, and Navrattan Mix are staples in many households. With strong marketing, a focus on hygiene, and a reputation for consistency, Haldiram’s has set the standard for the industry.
Know more: 10 Best Tea and Dessert Pairings for Café Enthusiasts
2. Bikanervala

Bikanervala has managed to keep the spirit of Bikaner’s culinary traditions alive while adapting to modern packaging and distribution. Famous for its crisp bhujias, nut mixes, and savory blends with just the right amount of spice, the brand is especially popular during festivals. Its retail outlets have helped it reach customers far beyond northern India, and every mix reflects a commitment to preserving authentic flavors while ensuring consistency.
3. Bikano

As the packaged foods division of Bikanervala, Bikano has become a familiar sight in grocery stores nationwide. The brand specializes in ready-to-eat namkeen that stays fresh and flavorful, even after long storage. Popular offerings include Chana Jor Garam, All In One Mix, Moong Dal, and spiced peanuts. Bikano’s sturdy packaging and reliable distribution make it a go-to choice for those seeking both value and taste.
4. Balaji Wafers

Balaji started in Gujarat and has steadily built a strong presence across India. While it’s best known for potato wafers, the brand also offers a range of mixtures, sev, and other namkeen varieties. Balaji’s appeal lies in its affordable pricing and flavors that fit everyday snacking habits. By focusing on straightforward tastes and improving its distribution, Balaji has become a favorite among younger consumers and families alike.
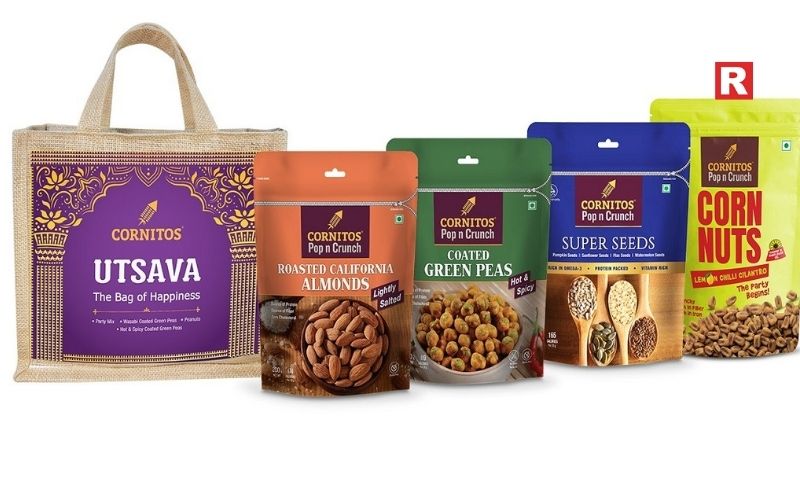
5. Cornitos
Cornitos brought a fresh twist to the Indian snack scene with its nacho crisps and roasted nuts. Over time, it expanded its range to include mixtures and coated peanuts, catering to those who prefer spicy namkeen made with cleaner ingredients. Cornitos stands out for its focus on roasting instead of deep frying, giving its snacks a unique texture. With modern packaging and a strong presence in supermarkets and online stores, it’s a top pick for anyone who enjoys global-style snacks with an Indian touch.
6. Prabhuji Pure Food

Part of the Emami group, Prabhuji Pure Food blends the rich heritage of eastern Indian recipes with large-scale production. The brand offers bhujia, chanachur, dal mixtures, and special festival packs that appeal to a wide audience. Known for its bold, sharp flavors, Prabhuji has expanded its reach across major cities, earning a reputation as a dependable choice in the national namkeen market.
7. Aakash Namkeen

Aakash Namkeen began in Indore, a city famous for its snacking culture. By staying true to its regional flavors while ensuring consistency, Aakash has grown from a local favorite to a nationally recognized brand. Its range includes sev, mixtures, peanuts, and dal-based snacks that stay crunchy and fresh. Improved packaging and a wider product line have helped Aakash find its way onto shelves across India, especially for those who crave the taste of central Indian namkeen.
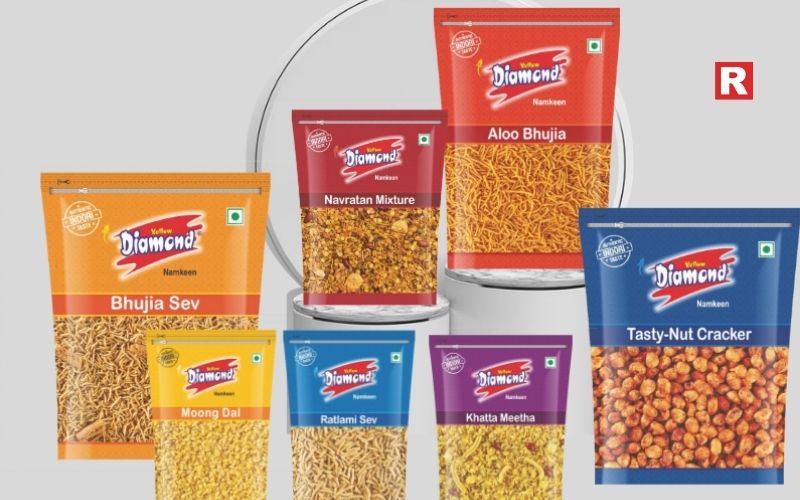
8. Yellow Diamond
Yellow Diamond, from Prataap Snacks, is known across India for its chips and namkeen blends. The brand focuses on simple, well-seasoned flavors that are perfect for family snacking. With products like rings, sticks, dal mixes, and sev, Yellow Diamond offers affordable options for daily treats. Strong partnerships with retailers have helped it compete with bigger brands and become a staple in many homes.
What's new: 10 Vegan Side Dish Ideas That Complete Any Meal
9. Haldiram’s Nagpur (Haldiram Foods International)

While it shares Haldiram’s name, the Nagpur-based company operates independently, with its own extensive distribution network. Its classic mixtures, lighter namkeen options, and nut-based snacks are easy to find in supermarkets and online. Consistent packaging and balanced spice levels keep customers coming back, and the brand’s mix of traditional and modern products appeals to all ages.
10. GRB Snacks
Originally a dairy and sweets brand from South India, GRB later branched out into namkeen. Its national reach is built on reliable distribution and long-standing trust. GRB offers mixtures, sev, murukku, and other regional favorites, with a flavor profile that leans toward South Indian spices. The brand’s presence in both offline and online stores makes it easy to find, offering a tasty alternative to the more common North Indian styles.
Check out: 10 Healthy Spreads Ideas That Turn Bread Into a Better Snack
11 Alcohols With the Highest ABV in India
Role of Regional Influence in National Brands
Regional flavour traditions continue to play a significant role in shaping the product lines of national namkeen companies. Many of these brands originated in small towns, where unique spice blends and preparation styles contributed to the development of a unique local namkeen.
As these businesses expanded their operations across India, they retained the essential characteristics of their original flavours. At the same time, they made careful adjustments to elements such as salt content, spiciness, and texture to accommodate the preferences of a wider consumer base.
This careful balance between authenticity and adaptation has enabled these brands to appeal to customers nationwide while maintaining a connection to their roots. Consumers often identify these regional flavour notes immediately, fostering a sense of familiarity and trust.
Consequently, the market reflects a harmonious relationship between local tradition and national presence, with both aspects complementing rather than competing with each other.
Comparison of Flavour Profiles and Price Range
These ten brands showcase a wide variety of flavors. Northern styles typically use gram flour, mild heat, and a hint of tanginess. Western options often feature dry spices and a warmer flavor profile, while southern snacks might include curry leaves and sharper, bolder notes. This diversity means there’s something for everyone, no matter your taste preferences.
Prices vary depending on pack size, but all brands offer both small, affordable packets and larger family packs. The combination of familiar flavors and accessible pricing keeps these snacks popular in every part of the country.
Learn more: 5 Ways to Keep Tomatoes Fresh and Storage Tips
The Golden Crunch
India’s namkeen market is, in some ways, the story of Indian food in general. It is tradition and mass production working side by side. These brands can serve people from many different parts of the world, while still maintaining that regional appeal, but a consistent quality across every town, city and region of the country. Their products have not only formed everyday habits but also shown up during celebrations and in backpacks. As they have expanded distribution and taken care of their packaging, they have also kept a strong flavour profile: They shape how Indian snacks are. They unite different tastes under the umbrella of one familiar flavour.
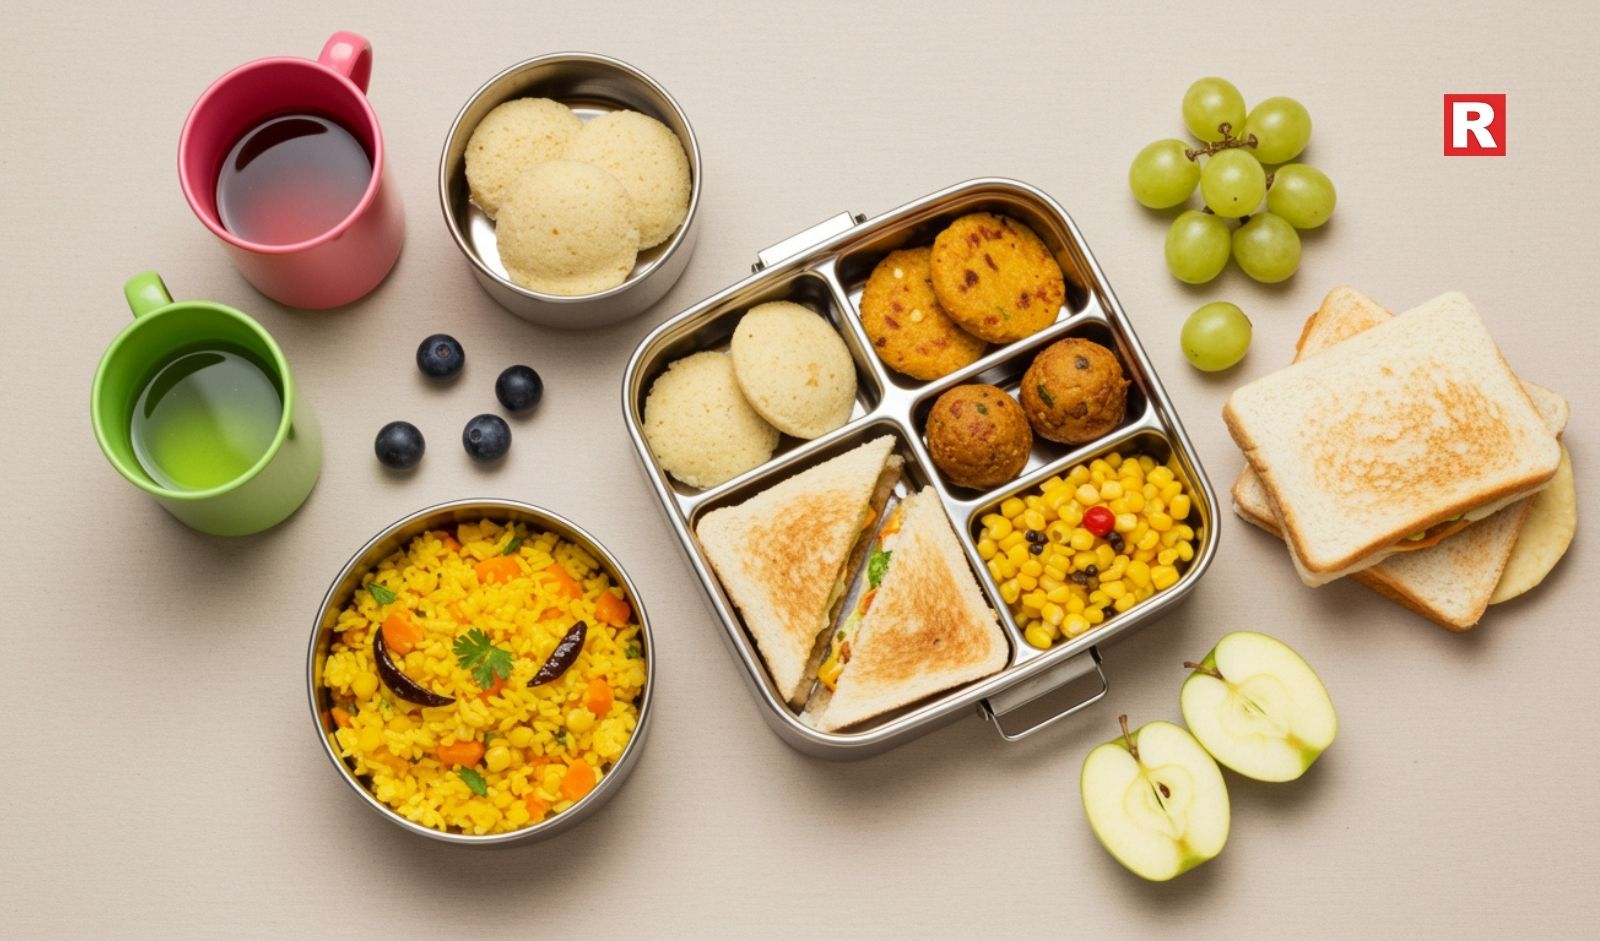
Every parent knows how tiring it is to pack a tiffin for your child every day. Especially when your child is bored with the same repetitive menu every day and demands something new. And it isn’t easy for you to keep coming up with new recipes every day that are easy to make, fast to pack and make your child satisfied at the same time. Also, the weekday rush makes it difficult to prepare something new within minutes.
But honestly, making healthy lunches doesn’t have to be such a headache. Kids really just need a good balance of carbs for energy, protein for growing, and veggies for all those vitamins. The trick isn’t to make some picture-perfect meal; it’s about finding recipes that work on real, busy mornings. And this is where simple tiffin recipes come in. They are easy to make and delicious to the core.
In this article, we will be sharing 12 simple tiffin ideas for parents to look forward to. If you’ve got the basic ingredients ready, then you can turn those chaotic mornings less stressful.
Read more: How to Dry Foods at Home for Beginner Meal Preppers
The List of 12 Simple Tiffin Dish Ideas
1. Vegetable paratha roll

Paratha rolls are a good choice if you want to sneak in some veggies in your kid’s tiffin without them knowing. Prepare the dough in advance, then fill with grated carrot, cabbage, or mashed potato and a pinch of spices. Once the paratha is cooked, wrap it with a dab of curd or butter. The rolls stay intact for several hours, stay soft, and are easy for kids to eat.
2. Mini idli with podi

Mini idlis are easy for children to eat and digest. Make the batter the night before to save time. After steaming, just toss them with a bit of ghee and mild podi mix. They’re bite-sized and go well with some cucumber or fruit on the side. As they are gentle on the stomach, they are suitable for eating after a heavy dinner or a hot day.
3. Vegetable fried rice cups

Turn leftover rice into cute fried rice cups by just pressing warm veggie rice into cup shapes with the back of a spoon. This keeps the portion organised and also makes it easy to eat for children. The rice can have simple vegetables like peas, carrots, and corn, along with some salt and pepper. They’re tidy, easy to eat, and can be packed neatly into any box. Plus, they stay tasty without getting oily.
Know more: 10 Healthy Spreads Ideas That Turn Bread Into a Better Snack
4. Besan chilla wraps
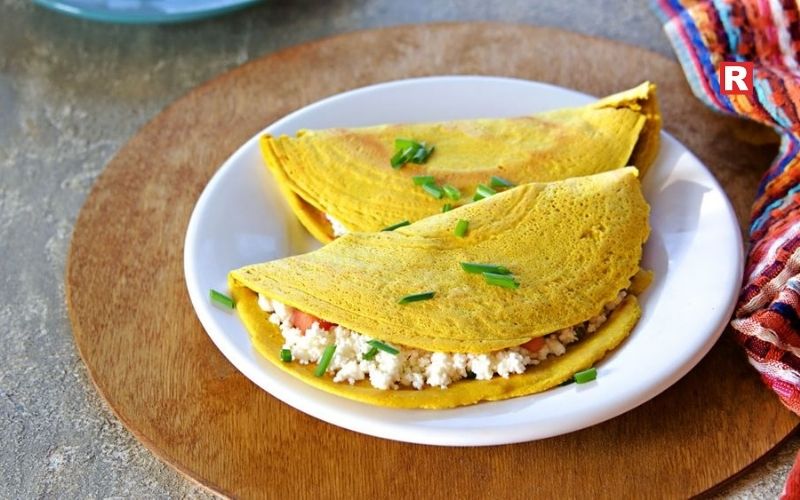
Besan chillas are soft, cook fast, and the batter can be made ahead of time. You can fill them with grated veggies or paneer after cooking, roll them up, and make a wrap that stays moist and easy to chew. Children find them easy to chew and also enjoy their mild taste. This also helps you to add protein to your child’s diet as they are made from chickpea flour.
5. Curd rice with cucumber

Curd rice is a classic and soothing tiffin option. It stays well in a thermos and feels light and gentle on the stomach, even on hot days. Mix rice with fresh curd, a little salt, and chopped cucumber. Add a quick tempering of mustard seeds and curry leaves for a nice aroma, and it’s done. The soft, cool texture and hint of crunch are comforting for kids, especially those of younger ages.
6. Stuffed paneer sandwiches

Stuffed paneer sandwiches are a good mix of flavor and protein. Mix crumbled paneer with finely chopped veggies and gentle seasoning, stuff it between lightly toasted bread slices, and you’re done. They’re quick to make, easy to eat, and stay fresh for long hours. Paneer tastes well even with minimal spices, so even picky eaters eat it without hesitation.
7. Lemon sevai
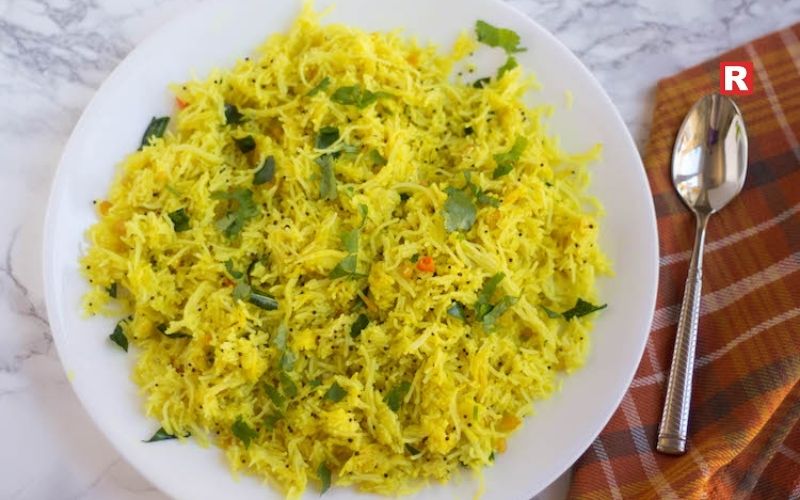
Lemon sevai is quick, light, and full of flavour. What makes it cool is that it is full of flavor without being spicy. Vermicelli is thin, so it cooks fast and soaks up lemon juice evenly. Toss in some mustard seeds, curry leaves, and turmeric for colour and aroma. It stays loose in the tiffin and doesn’t clump up, even after cooling. This is great when you don’t have much time to cook something up but still need a comforting meal.
8. Masala poha
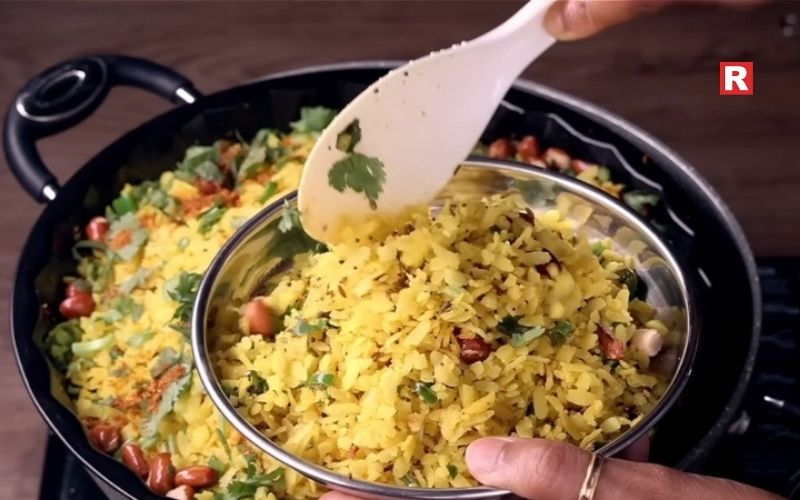
Masala poha is a balanced mix of carbs and veggies. Just sprinkle water, a little bit of salt and a little bit of sugar over poha (Flattened rice). Water will soften the poha, and salt will enhance the flavours of other ingredients. Sugar, on the other hand, balances the flavour and adds a little bit of sweetness. Then cook them with peas, carrots, or peanuts and a squeeze of lemon. Poha stays soft and warm in an insulated box and fits easily into small tiffin sections.
What's new: 10 Vegan Side Dish Ideas That Complete Any Meal
9. Dal rice muffins
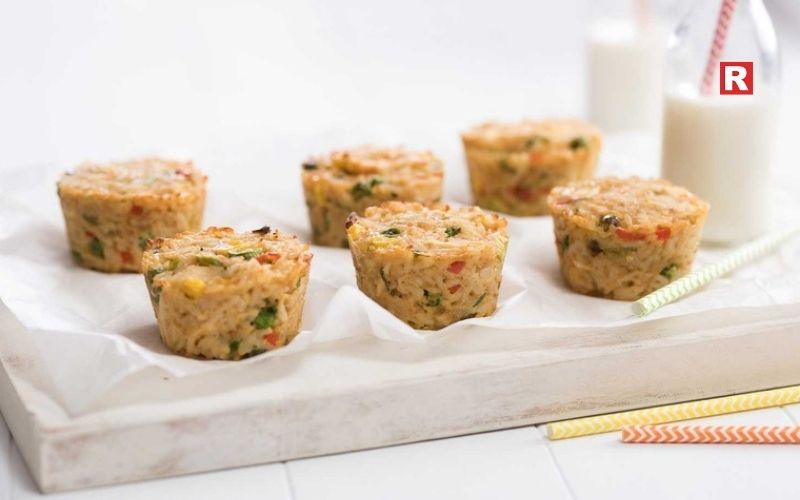
These dal rice muffins are made by blending cooked rice, dal, veggies, and a spoonful of curd, and then baked in little moulds. Once they’re done, they become firm on the outside but stay soft inside, making them perfect for school tiffins. Each muffin packs in protein from the dal and energy from the rice. The taste is gentle, so most kids don’t make a fuss, and the muffin shape always gets their attention. They store well and don’t crumble easily.
10. Soft thepla with yoghurt dip

Soft thepla, made from whole wheat and fresh fenugreek, keep their moisture if you wrap them up right. They can be folded into triangles and packed with a portion of yoghurt in a separate container. The theplas have a gentle seasoning, and dipping them in cool yoghurt balances things out. This combo works neatly into a tiffin and stays fresh for hours. It’s a safe choice for days when your kid needs something filling but not too heavy.
11. Sweet corn pulao
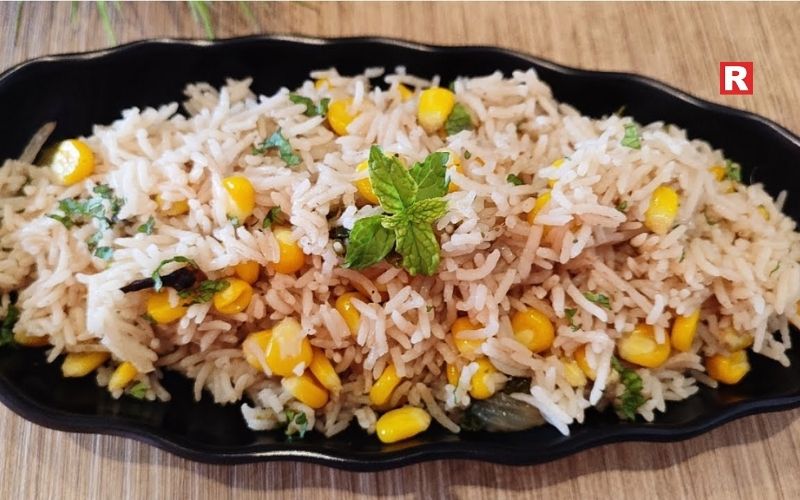
Sweet corn pulao is mild and a bit sweet, which many kids like. You just need cooked rice, sweet corn, and some gentle spices. You can add peas or carrots for color if you like. The pulao smells good and is easy for children to scoop up with their spoons. It is great for kids who like soft, gentle textures. The corn adds a bit of pop, making the meal interesting without overwhelming spices.
12. Moong dal cheela bites
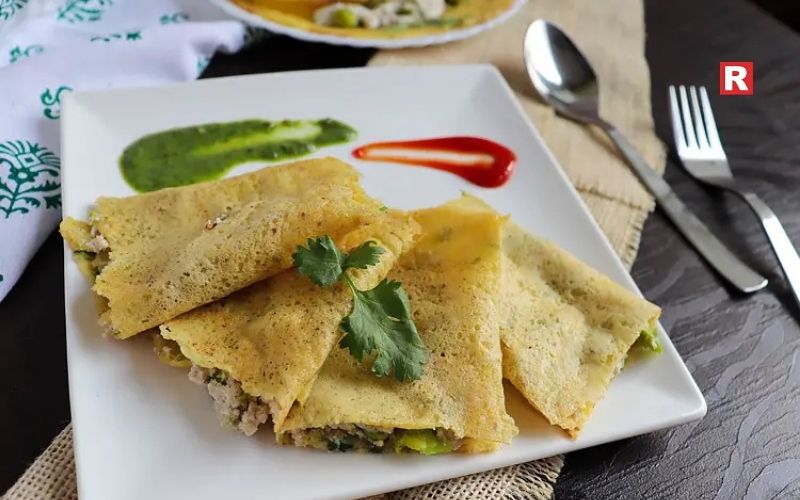
Moong dal cheelas cook quickly and carry plenty of protein. Once made, cut them into small bites so that it is easy for kids to eat on their own. You can make the batter ahead of time and store it in the fridge. Sometimes, a light filling of vegetables or paneer can be added for variety. These cheela bites stay soft and flavourful for hours. They work as a main dish or as part of a mixed tiffin.
Check out: 5 Ways to Keep Tomatoes Fresh and Storage Tips
10 Veg Chicken Substitutes for High-Protein, Balanced Meals
Common Prep Shortcuts for Busy Parents
- Making doughs, cheelas, and batters the night before can save you loads of time in the morning. You’ll just need to cook them up in the morning when you don’t have enough time.
- Chop your veggies in advance and keep them in airtight containers. Carrots, beans, capsicum, or whatever your kid likes. They stay fresh and help to maintain variety.
- Cooking grains like rice, sevai, or millet ahead of time is a good way to cut time. You can store them in the fridge as they stay usable for a day or two, and you can make quick meals without starting from scratch.
- If you can, pack parts of the tiffin the night before. Dry snacks, fruit, or anything that won’t spoil can be placed into containers. This helps you save time and prevent rushing first thing in the morning.
Variations for Picky Eaters
Most kids are picky eaters at some point, but small adjustments can make a big difference. You can swap out veggies for the ones your child actually likes. Cheese or mild spreads can make sandwiches or wraps more tempting. Familiar flavors help kids warm up to new foods without hesitation. When you make slow, steady changes, kids slowly get braver about trying new things.
Learn more: 15 No-Oil Recipes That Taste Amazing
Tiffin Made Easy
Parents have a lot of tasks each morning, including preparing lunches or tiffins, which can feel like an extra chore in their hectic schedules. However, this task becomes easier when parents know these simple, balanced, and easy-to-make recipes that also help their children during the long hours at school. When meals are healthy, colourful, mild-flavoured and easy to eat, they support good eating habits within children and help develop a positive relationship with food. With a little planning and a few shortcuts, packing tiffins gets easier for everyone.

The side dishes on a dinner plate are often secondary to the main dish, but they can influence the overall dining experience. In plant-based cooking, side dishes take on an even more significant role by providing contrast to the primary dish, adding extra nutrition, and creating a sense of satisfaction. Well-chosen vegan side dishes also create a visual and flavorful balance to the main dish by adding color, freshness, and texture to enhance the overall experience rather than detracting from it.
While the concept of creating side dishes is relatively easy, the questions that arise about seasoning, cooking methods, and combinations frequently halt progress. However, once the basic principles are understood, vegan side dishes will become one of the easiest aspects of daily cooking.
In this article, ten ideas for side dishes are listed, which can be easily used in either Indian or international cooking. Although relatively easy to prepare in a short amount of time, these ten ideas can be quite flexible for larger meals.
Read more: How to Dry Foods at Home for Beginner Meal Preppers
What Makes a Great Vegan Side Dish
Clean flavours are the basis of any good vegan side dish. Fresh vegetables, grains or legumes provide the foundation, and herbs, spices and acids provide brightness and clarity to the dish. A good side complements the main dish without oversaturating it.
In addition to flavour, texture plays a role. A plate should include a mixture of crunchy slaws, tender greens, soft grains and crispy roasted vegetables that create a balanced meal. When textures are mixed, this adds to the overall impression of a complete meal.
Most importantly, a good side dish is quick to prepare. The ideas below can be created using a minimal number of steps. They use simple preparation methods like Roasting, Sautéing or Simmering. These techniques allow for the ingredients to be highlighted, while still being flavourful without using any heavy seasoning.
Ten Vegan Side Dish Ideas
1. Roasted Seasonal Vegetables
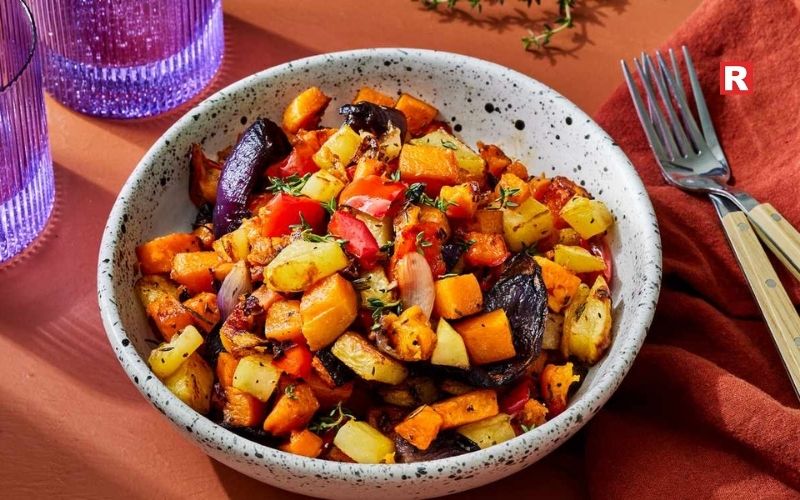
When it comes to meal preparation, roasted vegetables are a versatile option and can be made with whatever you happen to have on hand. If you cut your vegetables (carrots, pumpkins, beans, peppers, potatoes, etc.) into uniform pieces, toss them in oil and salt, and add whatever spices you want to use, you will have a wonderfully roasted vegetable that is full of flavour due to the heat, and a crispy outer layer while being very soft on the inside. You can serve roasted vegetables with rice bowls, light tofu, or any type of lentil base. Additionally, roasted vegetables can be refrigerated for a day or so, making them easy to prepare in advance for large meals or to use as leftovers.
Know more: 10 Healthy Spreads Ideas That Turn Bread Into a Better Snack
2. Warm Lentil and Herb Salad
A warm lentil salad provides healthy protein to eat as a side dish with stews, bread or grilled vegetables. Brown and green lentils can maintain their texture when cooked. When cooking lentils, you can add cooked lentils to a salad of chopped fresh herbs, lemon juice and a bit of olive oil. To give it a vibrant look, add a sprinkle of freshly ground black pepper and chopped onion and tomato. The heat of the lentils allows them to absorb the seasonings, giving the salad a wonderful depth of flavour. The salad is intended to complement rather than compete with main courses.
3. Garlic Sautéed Greens

Garlic sautéed leafy greens like kale, spinach, mustard leaves, or amaranth soften rapidly once placed into a sauté pan. The garlic provides a strong enough taste that you could serve these sautéed greens by themselves; however, their flavours also complement many different types of larger meals and entrees. With sautéed greens, you can prepare them using very few ingredients. The cooking time is so quick that nutrients and colour are retained while providing a tender texture. As a side dish, sautéed greens complement grain bowls, pasta dishes, and bean-based main dishes extremely well. Sautéed greens are an excellent method of adding freshness when your main dish may seem too heavy or dense.
4. Crisp Vegetable Slaw with Light Dressing
Shredded cabbage, carrot sticks and sliced bell pepper provide good crunch. When using shredded cabbage for slaw, you may want to keep the dressing on the light side: just a squeeze of lemon juice, salt, pepper, and a drizzle of oil will suffice. Keep the vegetable pieces thinly sliced to maintain their crunch. Slaw works really well when eaten with sandwiches, in stir fry dishes, as an accompaniment to baked tofu recipes and on any platter where a cool and crunchy addition will enhance the dish. As slaw keeps fairly well in the refrigerator for several days, if you decide to make slaw ahead of time, it will be convenient to have it ready before making your meal.
5. Chickpea and Cucumber Toss
To create a tasty salad that is high in protein, it is best to use chickpeas as your base. Chickpeas are an excellent source of protein, and their dense texture provides an excellent foundation for a salad that is refreshing and light. Adding cucumbers, tomatoes and fresh herbs results in a happy combination of flavours and textures that are crisp and satisfying, with just a sprinkling of salt, lime juice and black pepper typically required for seasoning. This salad pairs perfectly with pita breads, rice, grilled vegetables or other simple side dishes, and it can also balance out heavier meals that rely upon cooked ingredients. Because the preparation method involves using only pre-cooked chickpeas and uncooked vegetables, it is considered to be quite easy to prepare.
6. Pan-Seared Tofu Bites

Tofu absorbs flavour easily when cooked this way, so once the tofu cubes are well browned on each side, seasonings such as salt, pepper, lemon or lime juice can be added to enhance the flavour of the dish. This tofu recipe provides a delicious texture, as well as providing the savoury flavour that will complement a variety of dishes, including stir fries, grain bowls or soup. In addition, adding these cubes of tofu to any dish will provide protein that can make a meal more significant. The secret to achieving a good sear on tofu is to remove any excess moisture before placing the cubed tofu into a hot pan. Removing excess moisture will lead to cleaner sears on the tofu cubes.
What's new: 10 Vegan Fusion Curries From Around the World
7. Quinoa Pilaf with Nuts and Herbs
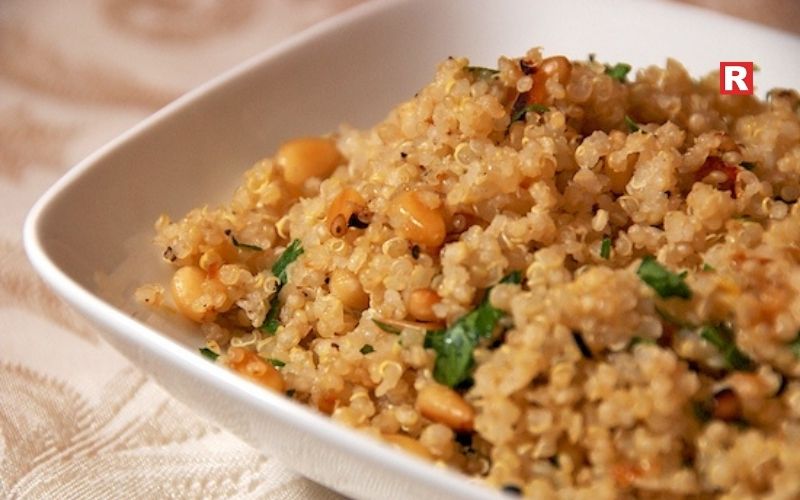
Quinoa is a grain that provides an airy base for both Indian and international dishes. Quinoa can be mixed with nuts, herbs, and a light, indulgent seasoning once cooked and sprinkled with a touch of lemon juice to enhance its flavour. The quinoa pilaf absorbs flavours nicely, remains fluffy and does not become sticky. You can use it as a side dish for lentil curries, grilled tofu, or roasted vegetables. Another advantage of using quinoa is that it cooks quickly and does not need any preparation for quick weeknight meals.
8. Mashed Sweet Potatoes

Sweet Potatoes are naturally sweet and are smooth-textured. They add to the texture and appearance of the plate. Simple boiling with a little oil and salt can be mashed into a deep consistency, with pepper or cinnamon added to produce complexity in flavour. This mash pairs nicely with other roasted vegetables, mushrooms, or bean-based main courses and also balances out spicy dishes by providing steady, mild flavours. The texture of the mashed sweet potatoes softens the crisp texture of many of the meal elements on the plate.
9. Sautéed Mushrooms with Fresh Pepper
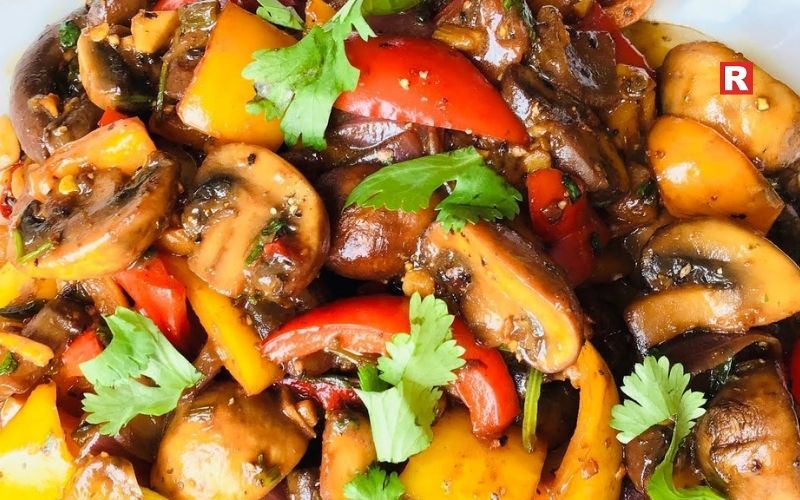
Pan-fried mushrooms have a nice brown colour and earthy flavour, which provides a nice pairing for rice and bean-based meals. Sautéing mushrooms with garlic or onion adds a great tenderness to the mushrooms and an added depth of flavour. Freshly cracked black pepper is very complementary to their earthy richness. Mushrooms work nicely as a side dish with rice bowls, tofu stir-fry and warm salads. Cooking mushrooms is quick and requires minimal additional ingredients, which is a strength of the mushroom, especially when the other items on your plate have a lot of complex flavours.
Check out: Top 10 Vegan Street Foods in India Every Indian Loves
Top 10 Vegan Dishes in Asian Cuisine
10. Stuffed Bell Peppers or Baked Vegetable Cups
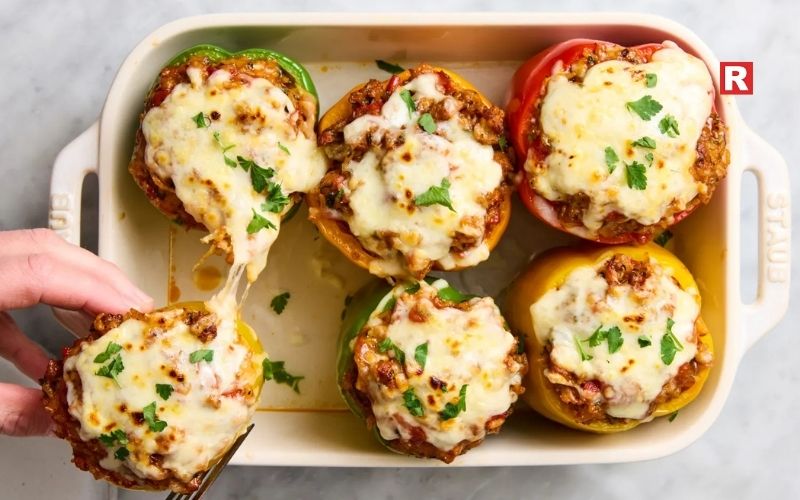
Stuffed vegetables are a nice way to have a more significant side-dish and create a bit of an elevated feel for your meal without having to go out of your way. You can stuff bell peppers, tomatoes or small pumpkins with cooked grain, vegetable or bean mixtures. The shells of the vegetables will become soft and tender while the filling stays warm through a short baking time. Stuffed vegetables are a great addition to any kind of festive or everyday meal that needs to have a central support item. Stuffed vegetables add colour and a nice touch of care to your dining table. Additionally, you can always change the colour of the filling depending on the season, giving you lots of flexibility with the concept.
Ingredients to Keep Ready for Quick Vegan Sides
- Olive oil, mustard oil or any non-aromatic oil can be used to season your dishes.
- The simplest ways to add flavour to your meal are to add salt, pepper, cumin and paprika.
- Adding citrus fruits, juices will provide the additional acidity you want for a more balanced flavour profile.
- Fast-cooking grains like quinoa, millet and rice are reliable bases for your meals.
- Beans and lentils are great additions for texture as well as protein and bulk.
- Using seasonal vegetables will help to make it easier to create fresh combinations of meals.
- Finishing touches using herbs such as coriander, mint and parsley will give your dish a clean taste.
Learn more: 7 Protein-Rich Vegan Foods That Pack a Punch – No Meat, No Problem!
Plant Powered Sides
Choosing thoughtfully created Vegan Sides can make a simple meal feel like a complete and comforting feast. When cooking with vegetables, grains and legumes in their most natural state, you'll find endless options with minimal work. Seasonal and personal taste variations also work well for each dish, making everyday cooking practical. As you create new combinations, you'll build a sense of balance within your creations and add flavour, texture and visual interest to your table. Having a small collection of go-to vegan sides will also help you easily and quickly create delicious plant-based meals.

A lot of people are shocked when they find out just how much produce goes to waste at home. Almost a third ends up in the trash just because it spoils before they can even use it. So, what can you do if you want your fresh ingredients actually to last, but you don’t want to rely on constant refrigeration or daily shopping trips?
Drying food is one of the oldest methods that works exceptionally well. By taking out the moisture, you slow down spoilage and turn fruits, veggies, and herbs into compact and long-lasting ingredients. Most people have heard of drying, but if you’re a beginner, it’s easy to feel a bit lost. You don’t know how to start, and neither if the dried food is safe to eat or not.
Once you get the basics down, you waste less, save some cash, and make meal planning way easier. In this article, you’ll know the essentials needed for drying food at home, tips for using simple tools, and step-by-step advice so you can tackle your first batch with confidence.
Read more: 10 Healthy Spreads Ideas That Turn Bread Into a Better Snack
Why Drying Helps with Meal Prep
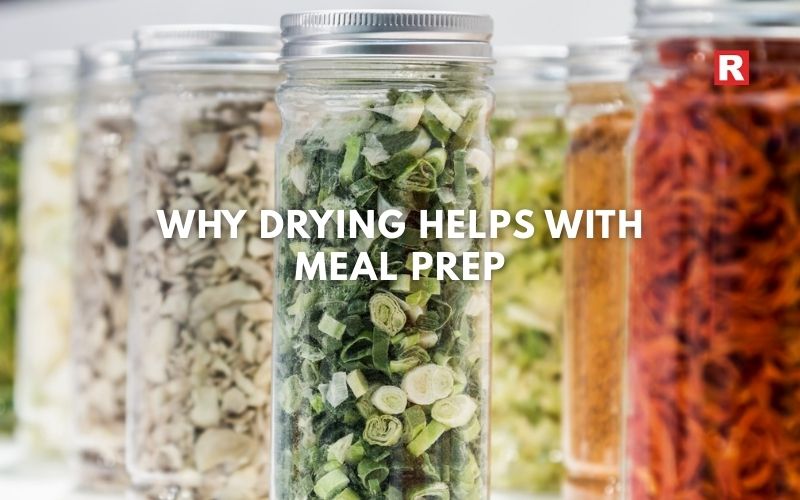
Drying makes meal planning a lot easier. First off, it keeps fresh produce good for way longer, so you don’t have to rush to use everything up. Plus, dried ingredients take up less space, so your pantry doesn’t get crowded.
You can prep a bunch of stuff on the weekend, stash it away, and then just grab what you need during busy weekdays. It also saves money. Just buy seasonal produce in bulk when it’s cheap, dry it, and you’re set for months. You always have reliable ingredients ready for soups, stews, and even snacks. Dried items behave the same way each time they are rehydrated, which simplifies planning.
Know more: 10 Veg Chicken Substitutes for High-Protein, Balanced Meals
Foods That Dry Well

Most ingredients handle drying pretty well, but some need a bit more attention.
- Fruits like apples, bananas, mangoes, and pineapples keep their flavor and turn into sweet, natural snacks.
- Tomatoes, onions, carrots, and peas dry out nicely, too. Later, you can toss them into quick meals without much fuss.
- Herbs like mint, parsley, thyme, and coriander dry fast and stay fragrant if you stash them right.
- You can even dry-cook grains like rice, millet, or quinoa. They make light, easy-to-carry meal mixes for later.
- Mushrooms keep their character after drying and rehydrate with a good texture when you rehydrate them.
- As for nuts, give them a gentle warm-up to get rid of any leftover moisture before you pack them away for the long storage.
If you’re just getting started, stick with fruits, veggies, and herbs. Once you’re comfortable, try branching out.
Overview of Drying Methods

Not every drying method works for every home or climate.
- Air drying: It is great for herbs and thin veggies if you’ve got a clean, dry room.
- Sun drying: If you live somewhere sunny and not too humid, sun drying makes sense. Just remember to cover the food with mesh to keep bugs away.
- Oven drying: It lets you control the heat and airflow, so it’s a solid choice for beginners.
- Dehydrators: These are even easier. They keep a steady temperature for hours, and you can dry a lot at once without much effort.
You’ll need a little practice with each method, but the main goal never changes: slow, steady removal of moisture.
Preparing Foods for Drying
Getting things ready makes a huge difference. Wash your fruit first, peel if you need to, and slice everything into even pieces. That way, everything dries at the same speed. Some veggies do better if you blanch them. Just a quick dip in boiling water. It brightens the color and keeps the texture nice while they dry. For herbs, rinse them gently, pat them dry with a towel, and give them a little space to breathe.
How you set up your trays matters, too. Don’t let the pieces touch. Thin slices make it easier for moisture to get out. If you want fruit to keep its color, give it a quick dip in lemon water. Always pat veggies dry before laying them out, or else the extra water slows everything down.
What's new: 10 Vegetarian Indian Foods That Help You Gain Weight the Healthy Way
Step-by-Step Drying Guide
- Start with fresh, firm produce.
- Peel and slice as needed.
- Lay everything on trays covered with parchment paper or mesh.
- Set your oven or dehydrator to a low temperature, whatever suits your ingredient.
- If you need to, rotate the trays so everything dries evenly.
- As things get close to being done, check the texture.
- Keep drying until the centers are completely moisture-free.
The more you practice, the better you’ll get at knowing how each ingredient behaves.
How to Tell When Foods Are Fully Dry
A few easy checks help to figure out if the produce has dried completely. Fruit should feel leathery, not sticky. Bend a piece, and if it doesn’t leak moisture, you’re good. Veggies should snap or feel crisp, depending on their type. Herbs should crumble easily in your fingers. Mushrooms turn firm and light, and shouldn’t feel spongy in the middle.
A common beginner error is to stop the process too early. Even a little leftover moisture can cause mold when you store things. If you’re not sure, let it dry a bit longer. When it’s done right, it creates a texture that feels solid, dry, and stable.
Cooling and Storing Dried Foods

Cooling is an essential step. Hot dried food usually lets off a bit of trapped moisture as it cools, so leave it uncovered for a short while. Once it’s cool, pack it into airtight jars, vacuum bags, or sturdy containers.
Label everything and mark what it is and when you dried it. Store your jars somewhere cool and dark to keep the color and flavor. Sunlight or heat can shorten shelf life. It’s worth checking your stash regularly to make sure everything stays dry and in good shape.
How to Use Dried Foods in Meal Prep
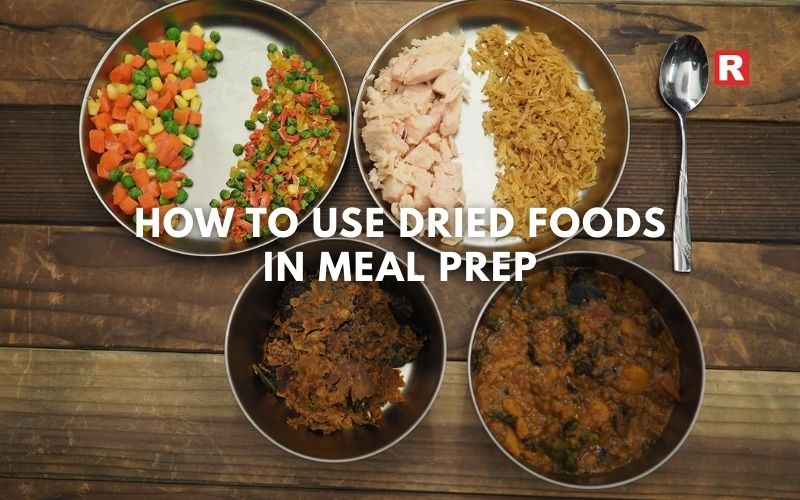
Rehydrating dried foods is pretty simple. Most veggies just need about ten to fifteen minutes in warm water. After that, they’re soft again and work just like fresh ones in soups or stews. Dried tomatoes soak up water and taste great stirred into pasta or as a flavor boost. As for fruit, you can snack on it right out of the bag, or soak it if you want to bake with it.
Meal prep gets a whole lot easier when you’ve got dried foods ready to go. Throw some dried lentils, onions, tomatoes, and herbs in a jar, and you’ve got everything you need for a quick stew. Pack some dried fruit and nuts together, and there’s your snack for the office. Even cooked grains, once dried, spring back to life with a splash of hot water. This is a lifesaver on a busy day.
Check out: 15 No-Oil Recipes That Taste Amazing
Top 6 Fireless Food Dishes for Your Quick Meals
Safety Tips for Beginners
Safety isn’t just a rule; it’s what sets you up for success in the long run.
- Start simple by keeping your knives and surfaces clean.
- Dry your trays and containers before you use them. Water just invites trouble.
- Watch your temperatures. If things get too warm, microbes move in fast.
- Avoid drying items that contain high fat levels.
- If you spot weird smells, colors, or see mold, toss it. Don’t take chances.
Stick to these basics, and you’ll feel way more confident, and your food won’t let you down.
Frequent Mistakes to Avoid
Several common errors interrupt the process:
- If your slices aren’t the same size, they won’t dry evenly.
- Cramming too much onto the trays? That blocks the air and slows everything down.
- Relying only on time leads to some pieces ending up too dry, while others still being sticky.
- If you pack food up before it’s cool, you’ll trap in moisture.
- And storing dried food somewhere warm or humid? That just makes it spoil faster.
The good news is, once you spot these issues, it’s simple to fix them.
Simple Starter Projects
The best way to begin is with items that dry quickly and predictably.
- Apple rings
- Banana chips
- Onion flakes
- Mixed vegetable chips
- Tomato flakes
- Dried mint or coriander
- Simple herb seasoning blends
These projects help beginners understand the process without much cost or effort.
Learn more: Easy & Delicious Meal Prep Ideas for a Busy Week
Your Drying Journey
Drying food at home is a simple way to start preserving and makes you pay more attention to how you cook. Every time you try it, you get a better feel for timing, texture, and how to store what you make. Over time, you end up with a pantry that is fully organised. When you’ve got jars of dried fruits, vegetables, and herbs on hand, putting together a meal gets a whole lot easier and faster. You don’t need fancy gear or some kind of expert training, either. Mostly, it just takes patience and a bit of care. Once you get the hang of it, drying food slips into your routine. You save time, cut down on waste, and start to feel a lot more confident in your kitchen.

Bread becomes a more enjoyable food option when combined with tasty spreads that are nutritious and diverse. Many people use traditional toppings such as butter or jam; however, many healthier choices of spreads exist that can provide greater balance and richer flavour. Spreads can transform a plain piece of bread into a healthy snack for busy mornings, late-night cravings, or quick meals at work when properly selected.
A healthy spread has a combination of natural ingredients, thoughtful flavors, and better nutrition, which is far better than packaged snacks. Healthy spreads will replace unhealthy habits that lead to empty snacking and an unhealthy lifestyle. Healthy spreads are generally made in a single serving and typically contain at least one source of protein, fiber, and healthy fats.
This article will list 10 healthy spreads that you can eat with your bread. Each one adds a different character to bread, allowing you to experiment with taste while improving your eating habits.
Read more: 5 Ways to Keep Tomatoes Fresh and Storage Tips
Why Healthy Spreads Matter for Better Snacking
Snacks often influence your overall diet more than you might believe. Most of us choose the most available option, which often means processed food high in either sugar, salt, or refined fats. Healthy spreads create an alternative that's quick but still nourishing.
Spreads made from nuts, seeds, vegetables, or yogurt provide important nutrients like proteins, minerals, and antioxidants. They keep hunger in check, help the digestive process, and maintain energy at an even level. Even children have something to gain from nutritious spreads that are not overly sweet.
You cut down on empty calories and add in more whole foods in a day just by changing over to better spreads. It's simple changes like this that are the backbone of a healthier pattern of eating.
List of 10 Healthy Spread Ideas
1. Almond Butter with Honey

Almond butter provides protein, vitamin E, and healthy fats. Its taste is nutty and mellow; it pairs well with a small drizzle of honey. This spread works on warm toast, as it slightly softens the almond butter and blends smoothly. It can also be a reliable snack before workouts or during busy mornings since it provides a steady release of energy. Most enjoy their toast in a light evening meal with sliced fruits on the side.
Know more: 10 Veg Chicken Substitutes for High-Protein, Balanced Meals
2. Greek Yogurt and Cucumber Mix
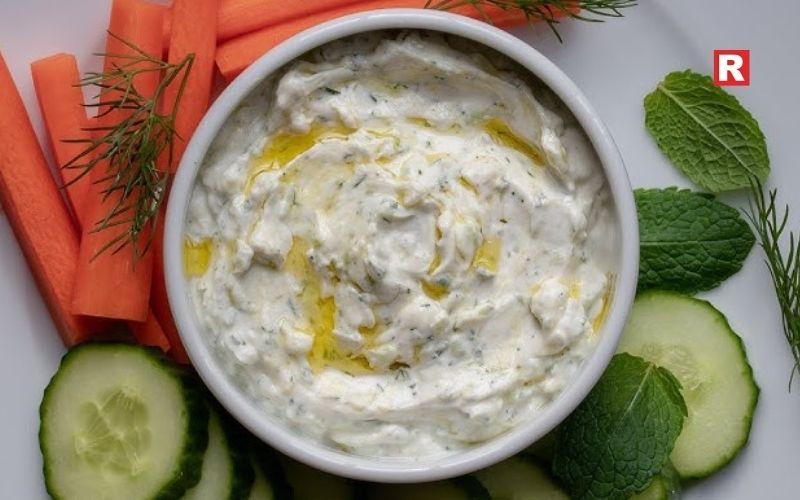
A thick Greek yogurt-based spread, with the addition of grated cucumber, salt, and fresh herbs, is a cool, refreshing taste. Rich in protein, it aids digestion. Spread on whole wheat bread for an easy snack that tastes clean and light. This mix is a soft version of tzatziki and goes well with sultry weather. It also goes well with sliced tomatoes or toasted garlic bread.
3. Mashed Avocado with Lime
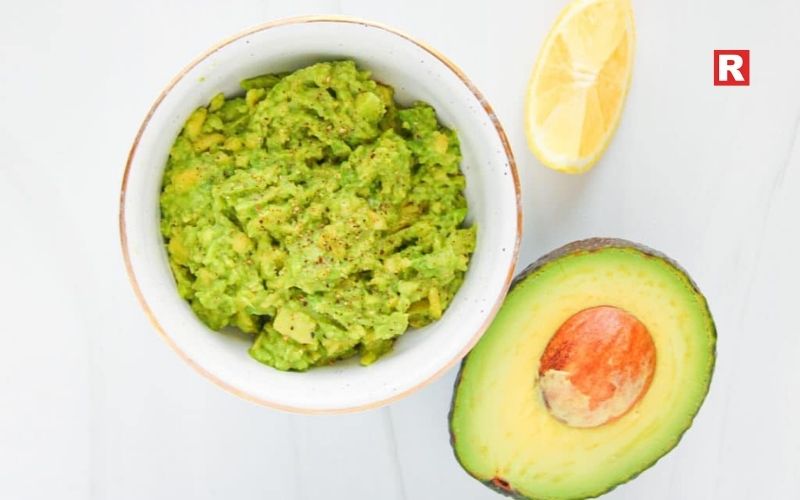
The mashed avocado, sprinkled with lime juice, salt, and a little pepper, is creamy and bright. Avocado provides healthy fats that help maintain heart health while offering a silky texture that feels nice on toast. This spread works well as either breakfast or a mid-afternoon bite. Now add chopped onions or coriander for a slight Indian touch. It goes well with sourdough or multigrain bread.
4. Peanut Butter and Banana Mash
The peanut butter and mashed banana combine naturally into a sweet, filling spread. You get a combination of protein, potassium, and healthy fats. The banana softens the peanut butter and adds aroma without added sugar. A great combination for children and adults alike. It gives long-lasting energy, hence suitable for school snacks or office breaks. Light toasting helps in balancing out the softness of the mixture.
5. Hummus with Roasted Bell Pepper

Hummus offers protein from chickpeas, calcium from tahini, and richness from olive oil. When blended with roasted red bell pepper, the taste becomes sweeter and brighter. The color also becomes more inviting, and the spread is lighter in tone. This version goes well with multigrain bread and can even be used to replace mayonnaise in sandwiches. It works especially well for those who prefer savory snacks that can be quick yet nutritious.
6. Cottage Cheese and Herb Mix
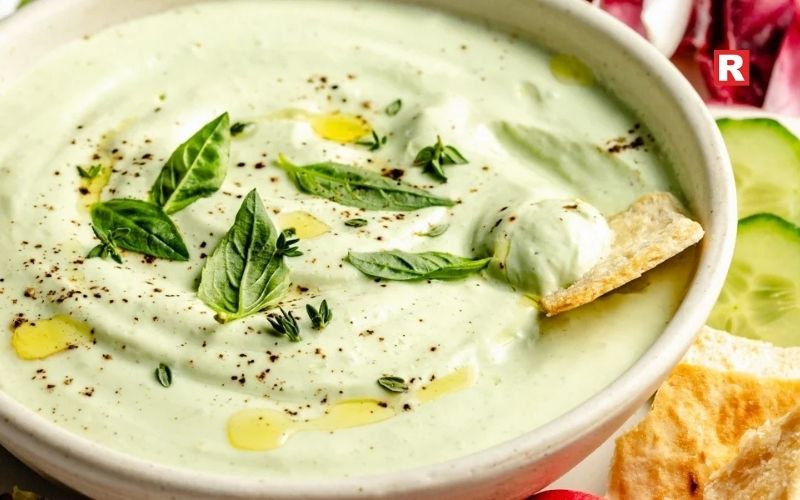
Cottage cheese mashed with fresh herbs, salt, and a few drops of lemon makes for a light, wholesome spread. Cottage cheese provides the protein without heaviness, while the herbs add freshness. This is best suited for those who like really mild flavors. It also works fairly well as a base for layered sandwiches with lettuce and vegetables, as this mixture holds its shape pretty well on toasted bread and can make a very balanced, light snack.
What's new: 10 Most Popular Coffee Blends in India
7. Tomato and Basil Chutney

This is a sweet and tangy chutney, made with the slow cooking of tomatoes and basil. It contains antioxidants from tomatoes and flavor from herbs. Apply it to warm bread for a comforting taste that can suit both breakfast and teatime. This chutney can also be prepared ahead and stored in the refrigerator. Serve it with a paneer sandwich or with cheese toast to create a nice contrast.
8. Pumpkin Seed Pesto

Pumpkin seed pesto is a great alternative to basil pesto. Ground pumpkin seeds, olive oil, garlic, and herbs come together in this green, nutty spread rich in zinc and healthy fats. The taste is strong and earthy, perfect for those who like stronger flavors. Spread it on lightly toasted bread for a savory snack. On the other hand, the pesto goes great when combined with grilled vegetables or eggs.
9. Date and Walnut Paste
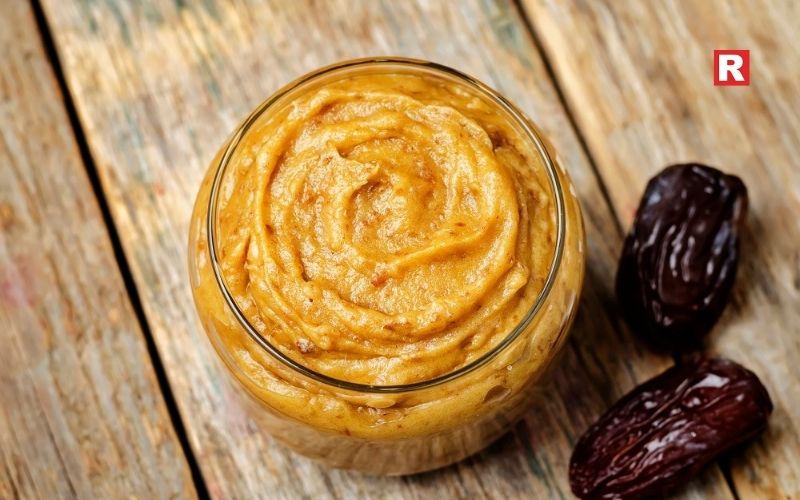
A paste made with softened dates and crushed walnuts offers natural sweetness with fiber and omega-3 fatty acids. It will make for a satisfying dessert-like spread with no refined sugar. It works well with warm bread and can also be used as a topping on crackers. Many people enjoy this spread at night when they want something sweet but wholesome. It is also great for children who prefer gentle flavors.
Check out: 10 Vegetarian Indian Foods That Help You Gain Weight the Healthy Way
15 No-Oil Recipes That Taste Amazing
10. Spinach and Yogurt Dip

Blended spinach mixed with thick yogurt, garlic, and a little salt creates a mild green spread, high in calcium and iron. The yogurt lends a silky smoothness, while the spinach creates depth. It works well on multi-grain bread, offering a refreshing change from the heavier spreads. This dip is easy to store in your refrigerator and can serve as a sandwich base with vegetables
Tips for Making Healthy Spreads at Home
Homemade spreads offer more control over ingredients, freshness, and flavor. When preparing them, select ripe produce and high-quality nuts or seeds. Fresh herbs will improve the aroma and enhance even simple combinations. A small blender or food processor can speed up the work, although many spreads can be prepared by hand.
Balance is a key factor in the preparation of spreads. Acid, fat, salt, and texture go together to achieve a satisfying taste. Lemon juice brightens creamy spreads, while toasted spices enhance vegetable-based options. If you want to add sweetness, focus on natural sources such as fruit or dates.
Storing spreads correctly keeps them safe and flavorful. Nut butters can last longer at room temperature, whereas yogurt or vegetable spreads need to be refrigerated. The preparation of small batches encourages variety throughout the week and helps avoid waste.
Common Mistakes to Avoid
- Many people use more spreads than is necessary. Even healthy options add extra calories when applied heavily. A thin, even layer is usually enough to satisfy both taste and nutritional needs.
- Sugary add-ins only degrade what could otherwise be a healthy snack. It's best to avoid sweetened syrups or processed toppings altogether.
- Too soft bread cannot hold heavier spreads; light toasting enables it to maintain its structure, enhances flavor, and stops sogginess.
- Pairing spreads with simple toppings enhances texture and nutrition. Items such as sliced cucumber, herbs, or seeds make the snack more balanced with very little effort.
Learn more: 15 Pancake Dishes From Around the World That Every Foodie Should Know
Elevate Every Slice
Healthy spreads give everyday bread a new purpose. They turn snacking into something more nourishing without adding fuss to your daily routine. With basic ingredients and simple, sensible preparation, you can create combinations that keep you full, support better nutrition, and bring some variation to your meals. Each spread in this collection has its own charm, whether you prefer it creamy and bright, sweet, or savory. You can easily make a basic slice of bread into a balanced snack that suits any time of day-from morning to late night-just by choosing thoughtful pairings and fresh ingredients. Little adjustments like these make healthy eating practical and enjoyable.

Tomatoes add a burst of color and freshness to any meal, but honestly, they’re some of the most delicate fruits you can bring home. Their taste changes according to the weather, ripeness, and even how you handle them. One minute they’re firm and juicy, and the next, they’re mushy and flavorless. The funny thing is, most of the common tomato troubles start with simple mistakes like popping them in the fridge before they’re ready or washing them too soon. By learning how tomatoes respond to warmth, light, and moisture, you can keep them in good condition for far longer. It’s not rocket science. You just need to know mainly which tomatoes belong on the counter, which will stay better in the fridge, and how to handle them after cutting or harvesting. With these small adjustments, you can reduce waste, maintain better flavour, and enjoy tomatoes that hold their character well beyond the day you buy or pick them.
Read more: 10 Veg Chicken Substitutes for High-Protein, Balanced Meals
Understanding Tomato Ripeness
Step 1: Check firmness
Give the tomato a gentle squeeze. If it’s hard, it’s probably not ready. A little bit less firmness means it’s ripe. If it feels really soft, it’s overripe.
Step 2: Observe the colour
Next, check the color. Underripe tomatoes look pale and a little patchy. Ripe ones show off a deep, even color, while overripe tomatoes might look drab or have wrinkly spots near the skin.
Step 3: Smell the stem scar
Take a sniff at the stem end. Ripe tomatoes have a fresh, strong aroma. If you barely smell anything, it’s not there yet.
Step 4: Look for signs of overripeness
Look for signs like little splits, juice seeping out, or sagging skin. If you spot these, use the tomato soon.
Step 5: Match ripeness with the right storage
Keep underripe tomatoes at room temperature. If it is underripe, then leave it out on the counter. For ripe tomatoes, find a cool spot with some airflow. Overripe? Eat it soon, or store it in the fridge to stretch its life a bit.
Know more: 10 Most Popular Coffee Blends in India
Why Tomatoes Lose Freshness
Tomatoes change quickly because of factors like heat, moisture, and handling pressure. They release ethylene gas, which also speeds up ripening. Heat just kicks things into high gear. Dry air sucks the moisture right out and shrivels the skin. Toss them around too much, and you’ll bruise them. Even if you can’t see it, the inside of the fruit is already breaking down. Cold air slows things down, but it can mess with the texture if you use it too soon. The trick is balancing the tomato’s ripeness with the right kind of storage, so you hold on to both the flavor structure that remains intact.
5 Different Ways to Keep Tomatoes Fresh
1. At Room Temperature

If your tomatoes need to ripen a bit more, keep them at room temperature. Find a dry spot away from direct sun or any heat. Lay them out in a single layer, so they don’t stack up and bruise each other. Give them a little space, as airflow helps. Put them stem-side down on a clean cloth or tray. This seals the scar and stops it from drying out. Don’t wash them until you’re about to use them. Water just invites mould. Check on them every day. If one starts to ripen faster than the others, move it to a cooler place. With this routine, ripe tomatoes usually stay good for two or three days. The firmer ones can last even longer.
2. In the Fridge

Put tomatoes in the fridge only when they’re fully ripe. Cold air slows down the enzymes that give them their flavor, so let them finish ripening on the counter first. When they taste just right, the fridge will help them keep that freshness for a few extra days. Store them in something that lets air through, or just toss them in the crisper drawer. Don’t use the sealed plastic bags as they trap moisture and speed up spoilage. When you want to eat, let the cold tomatoes sit out for a bit. This small step restores some of the aroma and juiciness that cold air tends to mute.
3. After Cutting
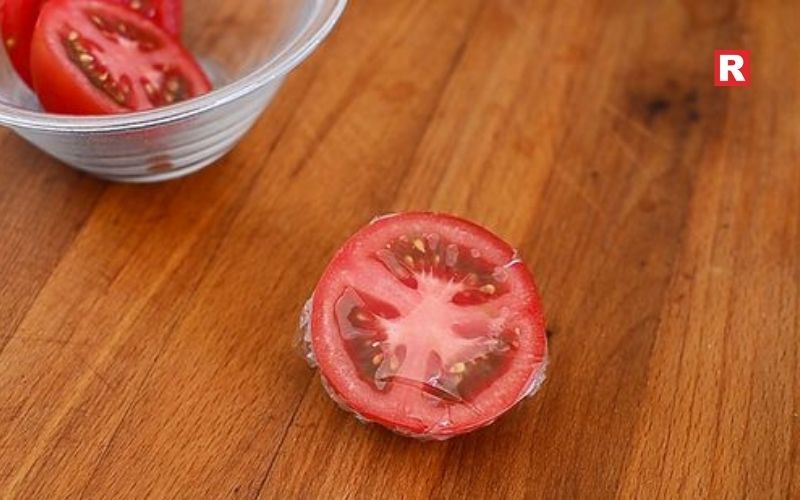
Once you cut a tomato, it starts to lose its moisture fast. To slow this down, cover the cut side tightly with wax paper or stick them cut-side down in an airtight container. Keep them in the fridge, and use them within a day or two for the best taste. If you’ve got diced tomatoes, pour off any extra juice before refrigerating. That keeps the pieces from getting soggy. Don’t leave cut tomatoes uncovered in the fridge. The cold air of the fridge will dry them out and dull their flavor.
What's new: 7 Tequilas That Deserve a Spot on Your Bar Shelf
4. After Picking Fresh from the Stem
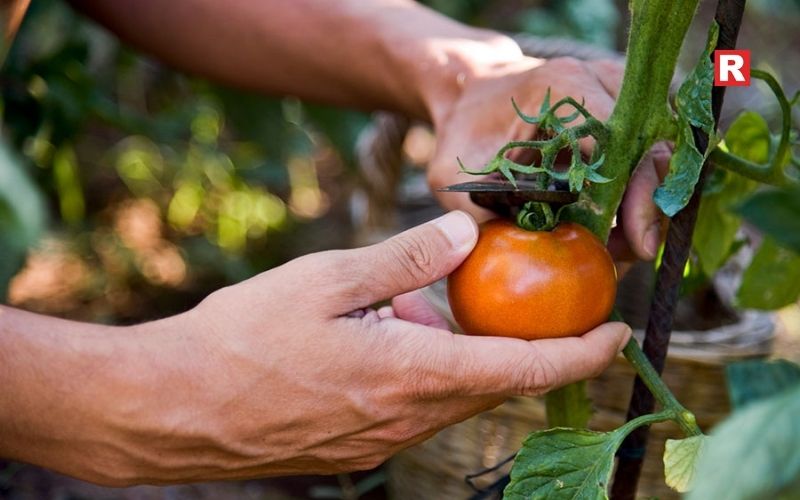
Fresh tomatoes taste best when you treat them gently right after picking. Just brush off any dirt. Don’t wash them until you’re ready to use them. If they’re still warm from the sun, let them rest inside, somewhere cool and out of direct light. Lay them out in a single layer, with the stems down. If some of them aren’t fully ripe yet, or if they’re just starting to turn color, leave them at room temperature so they can finish ripening. If you are harvesting in a hot climate, then don’t leave them for a long time in the heat, as it makes them go soft in no time. Indoors, out of the sun, they hold their shape and taste better. Once they’re as ripe as you like, pop them in the fridge to stretch their life for a few more days.
5. How to Store Whole Tomatoes for a Long Time
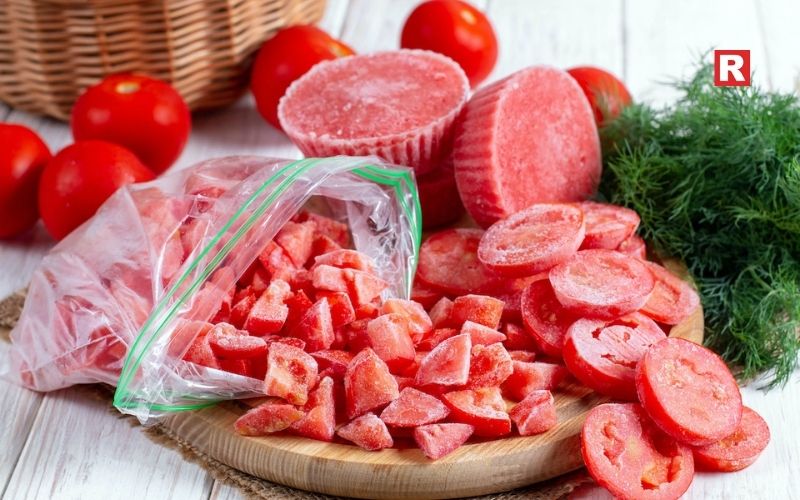
If you want to keep your tomatoes fresh for even longer, consider methods that change the tomato’s form while protecting its flavour. Freezing is the easiest way. Rinse, dry, and freeze them whole on a tray. When they’re solid, toss them in a freezer bag. Later, the skins will slip right off after thawing. Sure, frozen tomatoes aren’t great for salads, but they’re perfect for sauces or soups. You can also roast tomatoes before freezing. Roasting brings out their sweetness and gets rid of some water. Let them cool, pack them up, and freeze. Or, blend ripe tomatoes with a bit of salt, pour into freezer-safe jars, and freeze. If you want them to last even longer, try home canning. Just make sure you’ve got the right gear and follow safe steps. These tricks let you enjoy tomatoes long after their season ends.
Check out: 15 No-Oil Recipes That Taste Amazing
Top 10 Japanese-Inspired Matcha Desserts to Try
Mistakes to Avoid
- Washing tomatoes before storage increases surface moisture and encourages mould.
- Crowding tomatoes in a deep bowl leads to bruising, especially in the lower layers.
- Chilling underripe tomatoes weakens their texture and dulls their flavour.
- Wrapping tomatoes in plastic traps moisture against the skin and speeds spoilage.
- Storing tomatoes near ethylene-sensitive produce, such as cucumbers, affects the quality of both.
- Keeping tomatoes in direct sunlight causes rapid overripening and softening.
How Airflow Supports Freshness
Tomatoes stay better when they can breathe. When trapped in stagnant air, moisture builds up, and that’s how you end up with mushy spots and mould. Just spread them out in an open tray or a roomy basket. That’s usually enough to keep them at a steady temperature and stops them from getting squishy. Skip the deep bowls or stacked storage; the ones at the bottom always take the hit and get bruised. If your tomatoes come wrapped up tight from the store, tear that open as soon as you get home. Let that humidity out. Letting air flow around the tomatoes won’t stop them from ripening, but it makes a big difference. Their skin stays dry, and they stay firm way longer.
Quick Tips for Everyday Use
- Spread ripe tomatoes in a shallow tray and check on them daily.
- Sort them by how ripe they are, so you can use the softest ones first.
- If you want to ripen some up faster, then put them near apples or bananas.
- Take tomatoes out of those sealed grocery bags as soon as you get home.
- If you find a really soft tomato, cook with it right away.
- If your fridge is extra cold, then store ripe tomatoes in the crisper drawer.
Learn more: Top Korean Noodles Brands You Can Find in India
Freshness Through Care
The trick to keeping tomatoes fresh is simple: match how ripe they are to where you keep them, and don’t handle them too roughly. Once you get a feel for how warmth, air, and moisture change their texture, you’ll know whether to leave them on the counter, stash them in the fridge, or set them aside for longer storage. These little habits lock in flavor and help you waste less. Pay a bit of attention every day, and you’ll always have tomatoes that taste great and are ready to use whenever you need them.

Plant-based eating has significantly expanded over a period of a few years, not only among vegetarians but also among people who intend to decrease the amount of meat in their diet while still keeping the flavour and nutrition intact. More and more households in India are using vegetarian proteins that can give the same satisfaction as chicken but are better in terms of fibre content, cholesterol level, and affordability.
The idea is pretty simple. One needs meals that can provide the necessary nutrients, taste familiar, and be compatible with a certain exercise routine or simply serve as daily nourishment. Luckily, nowadays, the market offers plenty of ingredients that imitate the texture of chicken or serve the same purpose on your plate. Every one of them can easily be mixed with curry, grills, stir-fries, biryanis, or any other daily meals.
This article features the ten most excellent vegetarian chicken substitutes, with explanations about their flavours, cooking methods, and their strongest points. You can create a diet that not only contains an ample amount of protein but is also diverse and easy to prepare at home with the ingredients listed in this article.
Read more: 10 Most Popular Coffee Blends in India
What Makes a Good Chicken Substitute
Most of the time, the vegetarian ingredients fail to replace chicken as effectively as one might want. A proper substitution should have sufficient structure to maintain the integrity of the cooking process, it should be able to soak up the flavours well and most importantly, it should be a good source of protein. Texture is the most important factor since chicken is often liked for its specific bite and firmness. Protein levels indicate whether the meal meets your dietary needs, especially if you are into fitness or just want to have a stable source of energy. Furthermore, accessibility is also a factor that contributes to this. Substitutes only make sense if they are available in normal markets and at a reasonable cost. Therefore, flexibility also counts.
10 Vegetarian Chicken Alternatives
1. Soya Chunks
Soya chunks are still one of the easiest high-protein meat substitutes to get in India. After they are rehydrated, they have a texture that is chewy and somewhat firm, just like the textured mutton pieces or pieces of cooked chicken. So, they are perfect to make curries, biryanis, pulao, kebabs, and even sautéed dry dishes. Their ability to soak up marinades and spices is what makes them so powerful. A quick soak in hot water and a gentle squeeze will rid soya chunks of any raw smell. Since they can be used in simmering or slow cooking, what is more, they are great because they retain their shape. A 100-gram serving is an excellent source of protein and the highest among all vegetarian ingredients.
Know more: 10 Vegetarian Indian Foods That Help You Gain Weight the Healthy Way
2. Tofu
When you change a little, tofu can become a softer but still satisfying chicken replacement. It is a product of soy milk, and it comes in different textures, but density-wise, firm tofu is the closest substitute for dense chicken pieces. When cooking it, brown tofu is best. It is very fast at absorbing a marinade, and it can even be spiced without turning into a pulp. The best possible uses would be in stir-fries, grilled skewers, salads, and very mild curries like the ones from Thailand with coconut gravies. The texture gets more springy after wiping tofu with a towel. Small yet steady, the protein content of tofu is a reliable everyday ingredient. Without changing the flavour, one gets to season tofu to their best liking; thus, they are free to make any dish they want.
3. Tempeh
Among the vegetarian proteins, tempeh uniquely stands out. As it is made from whole fermented soybeans, it is firmer, earthier, and more structured than tofu. Its nutty flavour performs like a charm in deepening the dishes, and its compact body provides a bite similar to that of grilled chicken. You may cut it into slices, cubes, or simply crumble it in your recipes. Particularly, it is delicious in sandwiches, stir-fries, tandoori-style grills, and wraps. Along with other benefits, the fermentation process supplies tempeh with extra advantages, and its protein becomes more bioavailable. Due to its thickness, it is very good at holding marinades and browning fast on a pan or grill. Although tempeh is rarely found in normal stores, its increasing presence is turning it into a viable choice for those who want to spice up their diet of protein.
4. Paneer
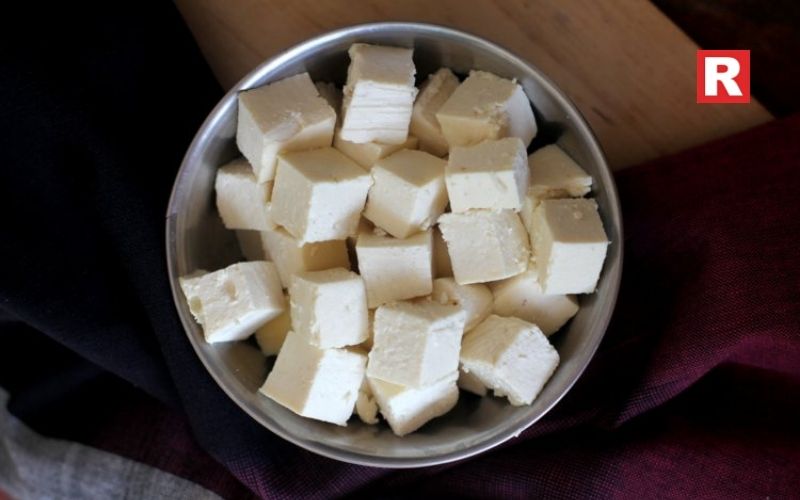
Paneer, the quintessential Indian protein, is a very simple chicken alternative that has been around forever. A firm yet soft texture of paneer can be used without limitations in creamy gravies, grills, or dry tawa dishes. To be able to keep the shape of paneer when heated, it must be handled properly, and then it will not turn rubbery. Its protein content is not high, but still, it can be a reliable source of protein when combined with vegetables, lentils, or whole grains. Paneer tikka, paneer bhurji, paneer butter masala, and paneer stuffed rolls are some of the many examples that show how easily paneer can be a substitute for chicken in both everyday and festive meals. Moreover, as it is available everywhere, it is one of the most convenient substitutes for households that are short on time.
What's new: 7 Tequilas That Deserve a Spot on Your Bar Shelf
5. Raw Jackfruit
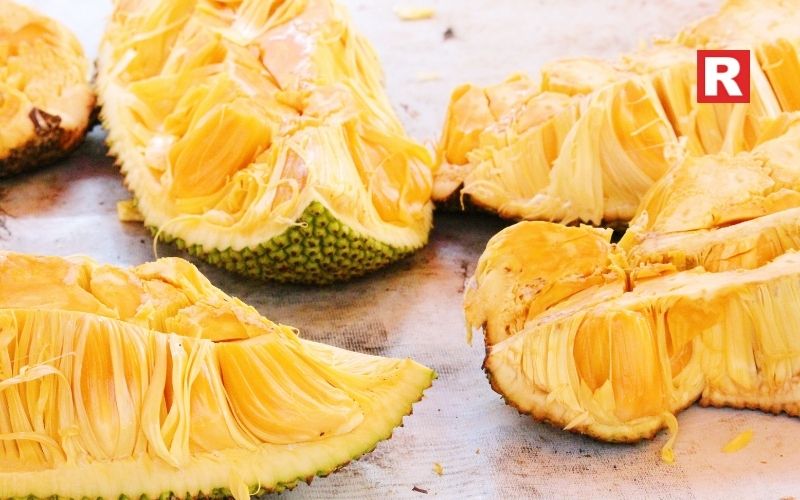
Raw jackfruit gives a naturally fibrous texture, which is very similar to that of shredded chicken. After cooking, it stays tender but has a little stringy texture, thus making it ideal for pulled “meat” sandwiches, curries, and slow-cooked dishes. It is a spice lover since it absorbs the spices without any problem and can then be utilised in cutlets, rolls, or stir-fries. The raw version of the fruit, unlike the ripe one, has a very subtle flavour that hardly changes when mixed with the other savoury seasonings. First of all, it is great for preparing comforting home-style curries; secondly, it is an excellent ingredient for creating plant-based versions of such dishes as korma or kofta. Furthermore, its nutritional profile contains moderate amounts of carbohydrates and fibre, together with a light dose of protein, thus making it a nutritious source of everyday meals.
6. Seitan
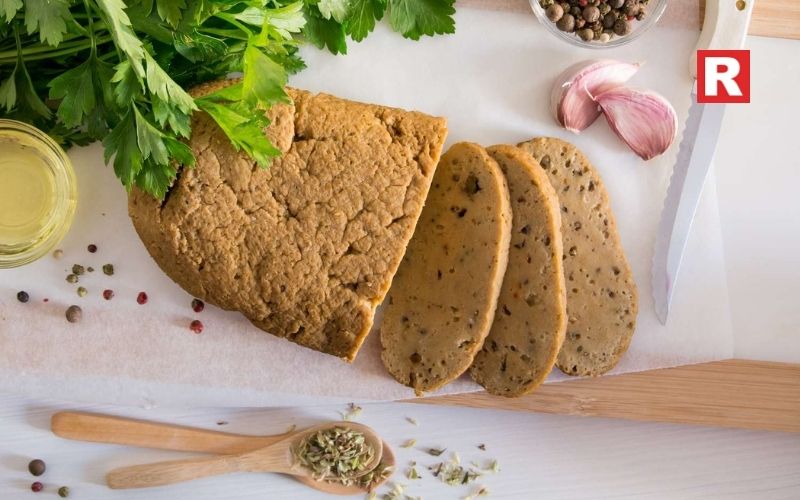
Seitan is a gluten-based product which is derived from wheat and is one of the plant-based proteins that most closely resemble the texture of chicken. It is very firm, elastic, and, therefore, it can be used in grilling, roasting, and stir-frying without falling apart. Due to its high protein content, it is a favourite among athletes who follow vegetarian diets. Seitan is also a quick flavour absorber, and if browned in a pan, it develops a very nice savoury taste. It is especially good in Indo-Asian dishes, wraps, skewers, and any recipe where a firm bite is required. Nevertheless, the best thing for people without a gluten intolerance is that seitan is still a great choice if they want hefty meat-like meals.
7. Plant-Based Mock Meats
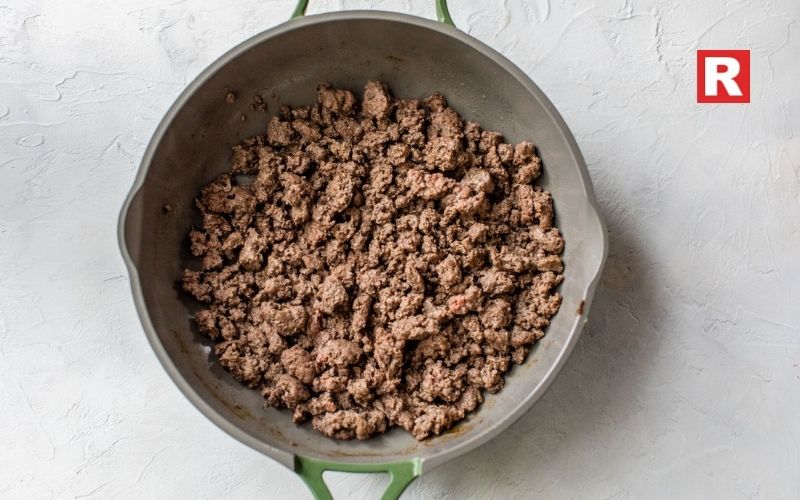
Mock meats made from soy, pea protein, wheat protein or any blend of plant ingredients have become widely popular in India. The products have been made keeping in mind that they should look and taste like chicken, which makes them very handy when used in dishes that are already familiar to the users. You can easily make kebabs, burgers, mixed vegetable curry, biryani, and even tandoori dishes without going far in your kitchen. Most of them also come pre-marinated or pre-shaped, so you do not have to worry about the time you spend getting things ready. Their protein content varies, but in general, they are not less than or equal to chicken. Mock meats are the perfect choice for beginners who want a very close replica without going out of their way in the lab.
Check out: 15 No-Oil Recipes That Taste Amazing
Top Korean Noodles Brands You Can Find in India
8. Mushrooms (Oyster and Shiitake)
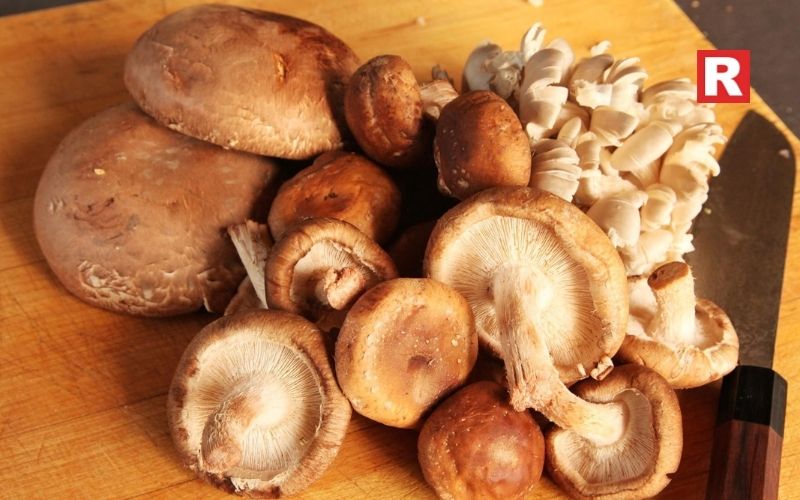
Oyster and shiitake mushrooms have a natural fibrous structure that is very similar to chicken and therefore works as a good chicken substitute. Their flavour is mild and becomes stronger when the mushrooms are cooked in a pan or on a grill, thus making it a perfect base for treats like curries, pasta, stir-fries, and fried rice. The mushrooms offer less protein than soy-based substitutes, but their texture, umami, and versatility overcome that easily in well-balanced vegetarian meals. By shredding and seasoning oyster mushrooms, one can get very close to the chew of shredded chicken. Mushroom pepper fry, mushroom masala, and mushroom stir-fried noodles are just a few of the many simple dishes that can be made using mushrooms.
9. Lentils and Dals
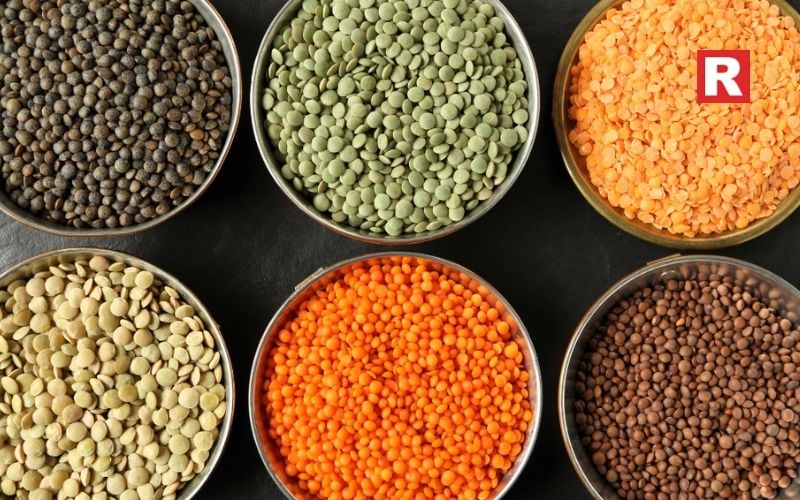
Lentils may not imitate the texture of the chicken, but they do provide the necessary protein and are the main ingredient of the vegetarian diet. On their own, lentils are incomplete, but when coupled with vegetables, spices, and whole grains, they ensure total nourishment. Lentil kebabs, lentil cutlets, dal-based curries, and mashed lentil patties are some of how one can replace chicken in everyday meals. Besides, they are quick to cook, can be used in a variety of cuisines, and are still affordable. Also, their inherent fibre content makes them good for digestion and gives the body energy that is stable. Dals are still a reliable and healthy option for those seeking high-protein meals without soy or mock meats.
10. Chickpeas
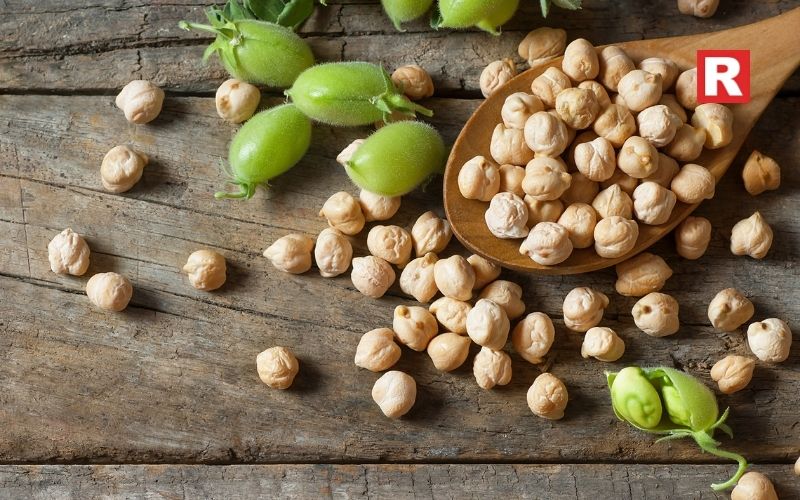
Chickpeas can give a solid texture and provide a steady amount of protein, thus making them trustworthy substitutes in dishes that are body and richness-dependent. They can be cooked as curries, thrown in salads, wraps, stews, grills, as well as many other things. Mashing them makes the perfect base for patties, koftas, and burger fillings, while keeping them whole makes them suitable for such dishes as chole, chickpea sauté bowls, or Mediterranean-inspired plates. In addition, chickpeas can be mixed with paneer, vegetables, or grains, which gives you the freedom to easily create nutritious meals. Moreover, their feature of giving saturation without heaviness makes them equally appropriate for lunch and dinner.
Learn more: Top Veg Japanese Dishes You Must Try on Your Next Visit
Smarter Veg Choices
Transitioning to vegetarian alternatives doesn't confine your meals. It actually gives you more options and allows you to be more creative. These components provide the body, taste and are a source of healthy nutrients in equal amounts. No matter if you are cooking for health, saving money, or just for the pleasure of it, plant-based chicken substitutes enable you to make meals that are both delicious and nutritious. Through the use of texture, flavour, and method, you can discover the mixture that works best for you and your daily routine. Each replacement on this list is equipped to perform a certain function in the kitchen, and as a result, they form a complete, protein-rich plan for regular meals.

Healthy eating doesn't mean giving up the foods you love just because of oil. You'll be delighted to discover how delicious no-oil cooking can be. Whether you're managing your weight, reducing cholesterol, or simply trying to adopt a healthier lifestyle, removing oil from your diet can create a lighter, more balanced approach to eating. But here's the best part: oil-free food doesn't have to be bland, dry, or boring. In fact, with the right cooking techniques, fresh spices, and creative ingredient swaps, oil-free dishes can taste even better than traditional recipes.
Dishes are abundant all over the world that naturally don't require oil, and even some Indian dishes, which are often rich in tadkas, can easily be remade into flavorful, wholesome, no-oil versions.
This article lists 15 recipes that taste absolutely amazing even without oil. You'll also learn the science behind oil-free cooking, expert techniques, and simple tips to help you cook healthier without compromising on taste.
Read more: 12 Foods Like Avocado That Are Creamy, Healthy, and Tasty
Health Benefits of No-Oil Recipes
Switching to oil-free cooking can greatly improve your overall health surprisingly quickly. Here's how:
- Better Heart Health: Removing or lowering the amount of oil from your food helps reduce levels of saturated and trans fats, hence improving one's LDL, or bad cholesterol levels. This decreases the chance of heart disease, high blood pressure, and arterial blockage.
- Supports Weight Loss: Oil is really calorie-dense. Just 1 tablespoon contains about 120 calories. Cutting out or using less oil instantly reduces daily calorie intake without sacrificing portion sizes.
- Improved Digestion: Oil-heavy food often causes bloating, acidity, and sluggish digestion. No-oil dishes feel lighter and easier on the stomach
- Helps Manage Diabetes & Cholesterol: It has been demonstrated that plant-based diets, free of oil, can improve insulin sensitivity and maintain healthier cholesterol levels.
- Encourages Cleaner Eating: When you skip the oil, you are naturally relying on whole ingredients, fresh vegetables, herbs, and spices, making the diet more nutrient-dense.
Overall, the no-oil approach isn't just a trend. It's a sustainable, healthy way of living, which still allows you to enjoy rich flavours and comforting meals.
15 No-Oil Recipes That Are Filled With Flavour
1. Oil-Free Moong Dal Chilla
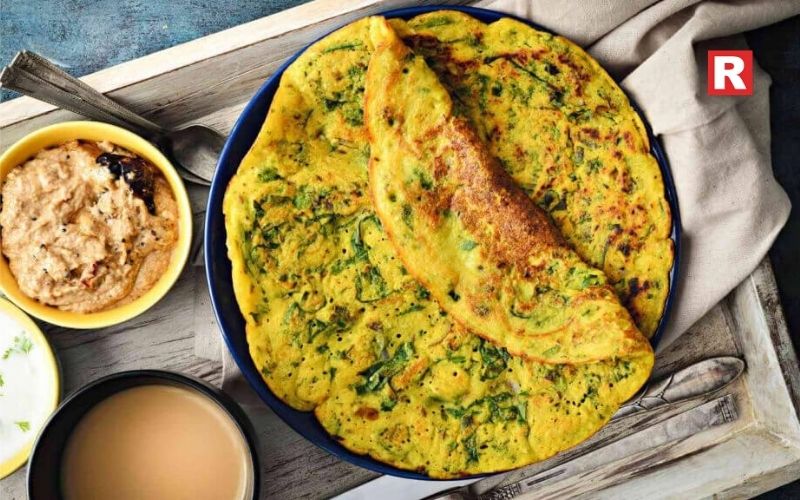
A pancake that is packed with proteins, made with ground moong dal, ginger, green chillies, and spices, all well-cooked on a non-stick tawa without a drop of oil. The batter spreads beautifully to give a crispy, soft chilla that goes well with chutneys. The natural starch in the dal helps it brown without getting burnt and retains its texture beautifully, making it an ideal breakfast or light snack.
Know more: How to Make Momo at Home for a Healthy Treat
2. Steamed Veg Momos
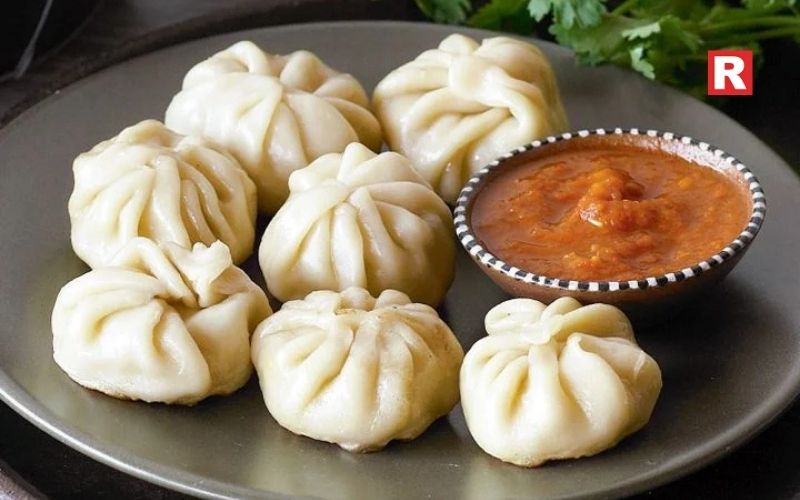
Steamed momos are equally tasty with or without oil. The filling of cabbage, carrots, onions, garlic, and pepper releases its natural moisture during steaming, lending tenderness and flavour to the dumplings. Serve with spicy tomato chutney for an oil-free yet satisfying meal.
3. No-Oil Rajma Masala
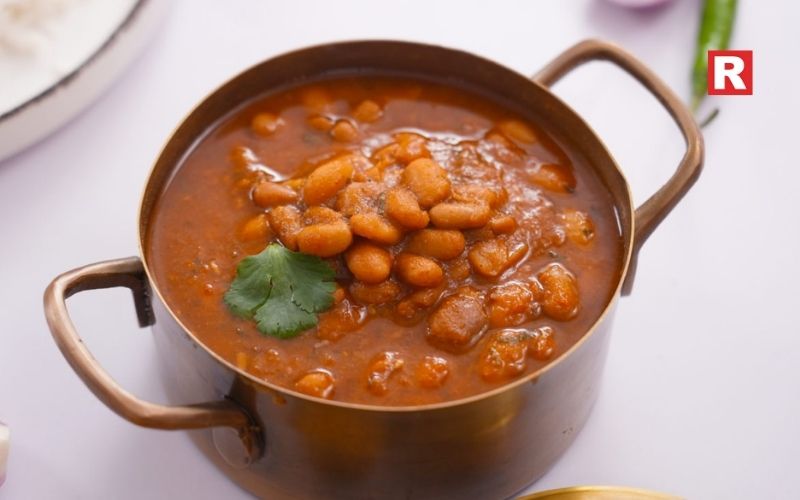
Rajma, slow-cooked, turns creamy without any addition of oil. The trick lies in sautéing onions and tomatoes in water or vegetable broth till they dissolve into a thick gravy. Add some warm spices like cumin, paprika, and garam masala into the pot. It blends nicely, turning into a hearty, soul-comforting curry for rice or roti.
4. Air-Fried Tandoori Paneer
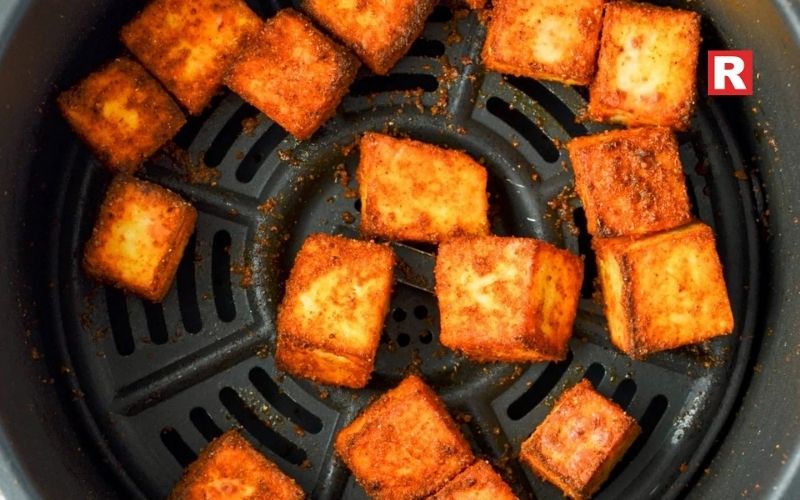
Using an air-fryer makes marinated paneer into crispy, charred bites without using any oil. The marinade of yoghurt, lemon juice, chilli, Kashmiri red powder, and tandoori masala caramelises on its own. It becomes a smoky, tangy, and guiltless snack.
5. Zero-Oil Lemon Rice
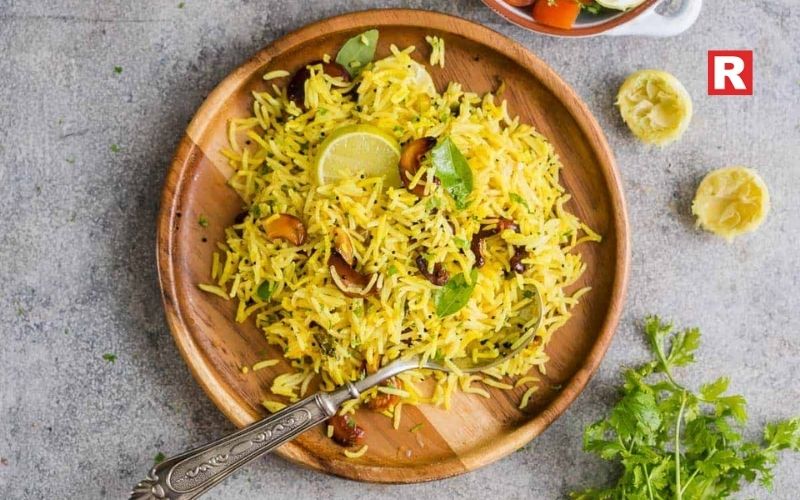
While traditionally, it is prepared with oil tempering, this version uses dry-roasting the spices like mustard seeds, chana dal, and curry leaves before mixing in warm cooked rice and fresh lemon juice. The flavour stays bright and aromatic, and the turmeric gives a beautiful golden colour without adding any heaviness.
6. Steamed Dhokla
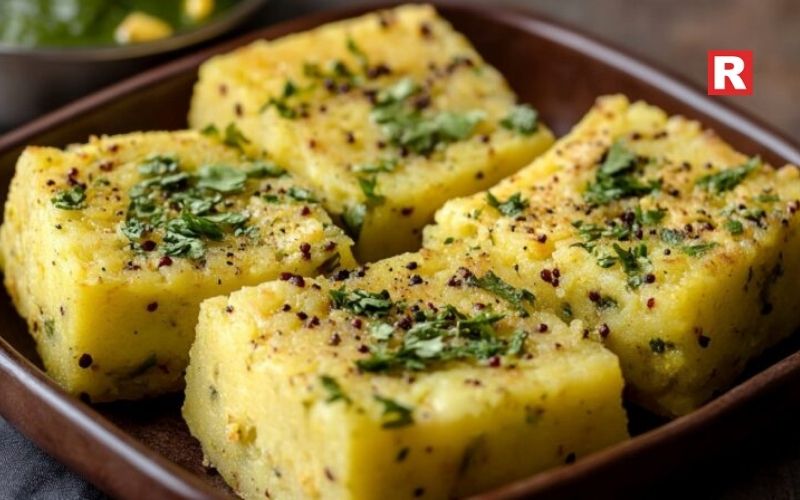
This Gujarati classic is a naturally oil-free dish prepared by steaming. Fermented besan batter turns fluffy and soft, absorbing sweet and tangy flavours from lemon and green chilli. Instead of an oily tadka, sprinkle roasted sesame seeds and fresh coriander for texture and freshness.
7. Oil-Free Vegetable Biryani
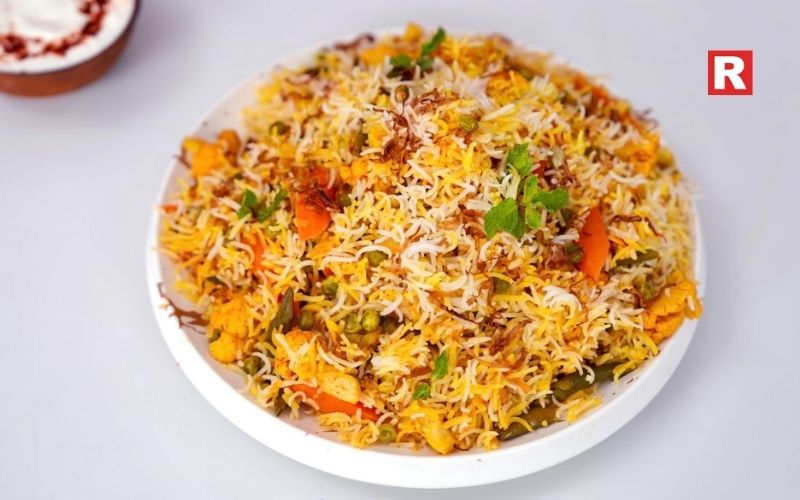
Flavorful aromatic rice and vegetables are cooked together in a sealed pot with spices like cardamom, bay leaf, and cloves-with absolutely no oil. Steam cooks the biryani and infuses the aromatic flavour deeply, but keeps it light in calories. Adding fresh herbs and a squeeze of lime makes it even better.
What's new: Top 10 Japanese-Inspired Matcha Desserts to Try
8. Baked Samosa

Making a samosa with no oil can sound like an impossible thing to do, but baking instead of frying keeps the pastry crisp while significantly reducing the calories. The spiced potato-pea filling is already cooked, so skipping oil is possible. This process keeps this iconic snack crunchy, golden, and guilt-free.
9. No-Oil Tomato Rasam
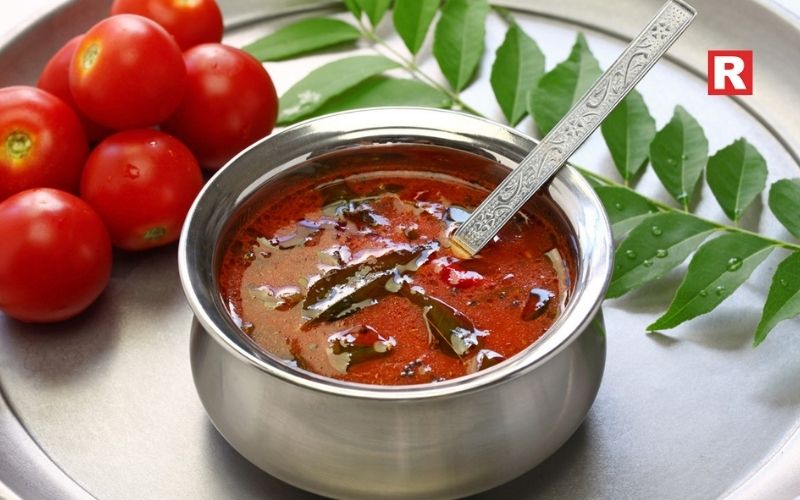
This sour South Indian broth gets its flavour from tomatoes, tamarind, pepper, cumin, and coriander. Instead of oil tempering, the spice mixture can be dry-roasted in advance to unlock the aroma. The result is a warm, light, and digestion-friendly soup.
10. Zero-Oil Hummus
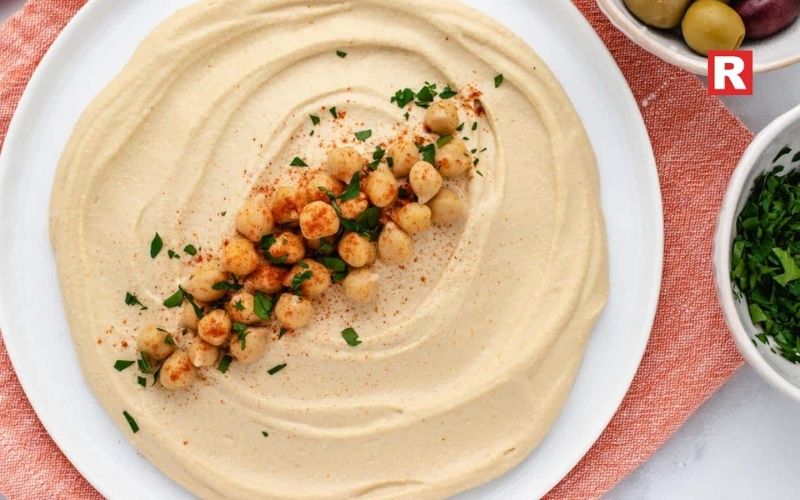
Traditional hummus is made with tahini and olive oil, but you can make a creamy alternative by blending the chickpeas with lemon, garlic, aquafaba, and tahini only. It remains thick and velvety in texture. Feel free to enhance its flavours with herbs or roasted garlic.
11. Air-Fried Roasted Vegetables
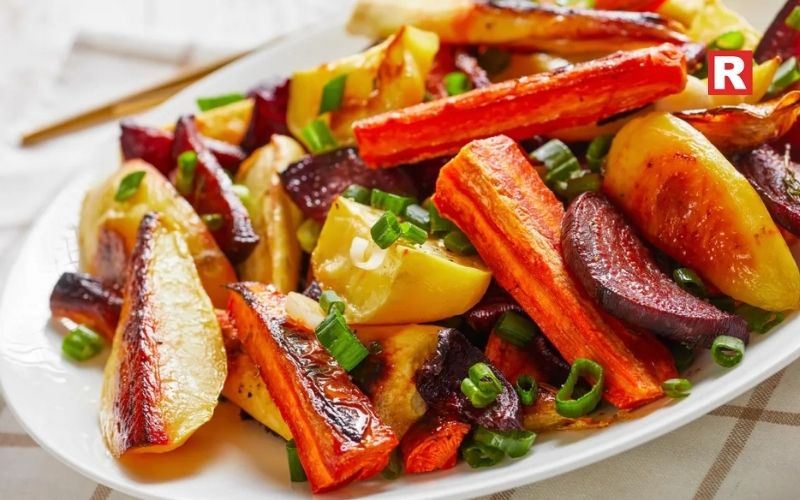
Air-frying vegetables like bell peppers, zucchini, sweet potatoes, and mushrooms allows them to caramelise without oil. Their natural sugars develop a smoky, roasted depth that makes this a healthy side dish packed with nutrition.
12. No-Oil Chole Masala
Chole can be cooked perfectly without oil using tomato purée, onion paste and aromatic spices. Boiled chickpeas soak in the masala as it simmers to get a thick, flavourful gravy. It is an ideal combination with whole wheat kulchas or rice.
13. Steamed Idli with Mint Chutney
Idlis are an excellent choice if you are aiming to avoid the use of oil in your diet, as they are steamed and thus do not require any oil. Idlis are made of rice and urad dal-based fermented batter, and are healthy, soft, and filling in nature. Coupled with the mint-coriander chutney, this meal is a source of complete nutrition and energy.
14. Zero-Oil Oats Cutlets
These vegetables are turned into delicious snackable patties by mixing oats, carrots, peas, and spices. Either baking or air frying these patties gives you a nice crust on the outer side, while the inside remains soft. These are perfect for tea time or a healthy evening snack.
15. No-Oil Thai Green Curry
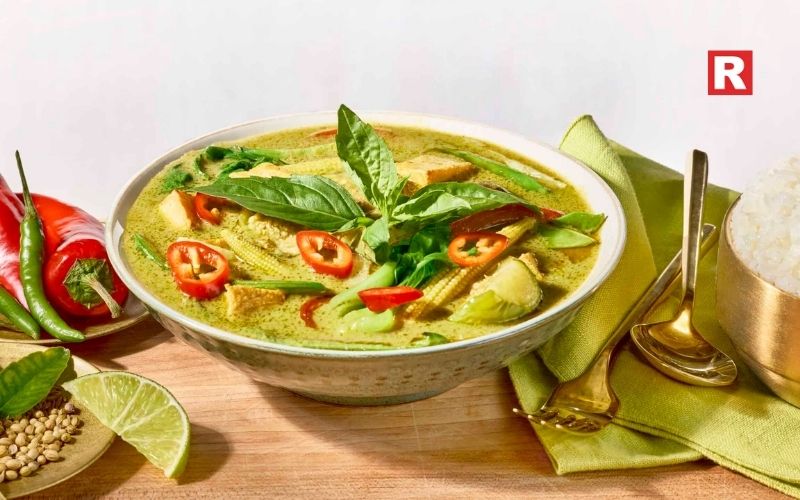
Without the use of oil, this delicious curry can be made by using only natural ingredients such as coconut milk, lemongrass, basil, and fresh green curry paste. The vegetables are cooked until they are very tender in a tasty coconut base, which is full of Southeast Asian flavours. It can be eaten with steamed jasmine rice.
Check out: Top 12 Vodka Brands Loved In India
Top Korean Noodles Brands You Can Find in India
Techniques Used in Oil-Free Cooking
Oil-free cooking has been made more convenient with the help of modern methods and intelligent kitchen gadgets. Below are the most effective techniques:
- Water Sautéing: Do not fry onions and tomatoes in oil. Sauté them in some water or vegetable broth. Once the liquid has evaporated, the ingredients will caramelise on their own.
- Steaming: Steaming is a method that preserves the colour, vitamins, and texture of food. Thus, it is suitable for momos, idlis, vegetables, and dumplings.
- Baking & Air-Frying: Baking or air-frying can result in a crispy or browned exterior without using oil; thus, these methods are perfect for dishes that need deep-frying in oil.
- Dry Roasting: Spices get their full flavour when they are roasted on low heat. They release essential oils that enhance aroma and depth.
- Slow Cooking: Beans, lentils, and curries develop rich flavours when simmered in their natural moisture.
- Using Non-Stick Pans: Non-stick cookware helps you to prepare pancakes, chillas, and vegetables without using oil.
Ingredients That Replace Oil’s Role
Oil adds richness and prevents sticking, but several healthy ingredients can take its place:
- Coconut Milk & Nut Pastes: Cashew, almond, or coconut adds creaminess to gravies and curries.
- Tomato & Yoghurt Bases: These help build gravy without oil while adding tang and depth.
- Vegetable broth: It enhances flavours in soups, chole, and sautéed items.
- Fresh Herbs: Mint, coriander, basil, dill, and curry leaves brighten flavours instantly.
- Natural Fats: Avocado, tahini, and peanuts add body without processed oils.
- Tangy Agents: Lemon, vinegar, and tamarind help lift flavours and adjust spices.
Tips for Making No-Oil Food More Delicious
- Always use spices that release a stronger aroma.
- Enhance your flavour by adding acids like lime or tamarind.
- Marinating vegetables or proteins can keep their moisture locked.
- Play with the different textures by using crunchy seeds or toasted grains.
- Do not rush your cooking; slow simmering helps to deepen the flavour.
- Frequently tasting your dish helps to adjust the seasoning at the right time.
- Use umami items such as soy sauce, mushrooms, miso, or nutritional yeast.
Learn more: Top Veg Japanese Dishes You Must Try on Your Next Visit
Light, Tasty, Easy
Cooking oil-free is not a matter of limiting the amount, but rather rediscovering taste in its simplest form. It is proven by these 15 no-oil dishes that healthy food can be of various colours, satisfying, and highly adaptable. By knowing the proper methods and selecting the right ingredients, it is possible to have the lighter versions of the dishes that are your favourites without giving up on the taste. Whether you are initiating a healthy lifestyle or merely experimenting with cleaner cooking ways, these recipes offer you the whole world of flavours in your kitchen.

Matcha is a simple, bright green powder of green tea that has taken the world by storm. But it is so much more than just a popular ingredient. Matcha is produced by grinding shade-grown green tea leaves into a fine powder and possesses a unique flavor profile that feels earthly, slightly bitter, umami-rich, and deeply aromatic. What sets matcha apart from regular green tea is that you consume the entire leaf rather than an infusion, making it far more concentrated in antioxidants, amino acids, and nutrients.
Over the past decade, matcha has found its way from traditional tea ceremonies out into modern cafes, bakeries, and dessert kitchens around the world. The beverage's bold colour, elegant flavour, and health benefits have turned it into a dessert superstar. Whether you are a newbie with matcha or it has already captured your heart and senses, an exploration of Japanese-inspired matcha desserts can open an entirely new world of flavor and creativity for you.
In this article, we will be listing ten matcha desserts that are inspired by Japanese cultures, cafes, and cuisine.
Read more: Top Famous Indian Desserts You Can Have After Your Meal
Why Matcha Works Well in Desserts
Matcha is visually striking, but also a very versatile dessert ingredient. The earthy bitterness cuts through sweetness with a beautiful balance and depth not often replicated by the most common dessert flavors on their own. Unlike overly sweet treats, matcha brings in a certain refined umami flavor that will appeal to both traditional tastes and modern foodies.
Another reason matcha works so well in desserts is its compatibility with a range of textures, like creamy, chewy, flaky, crunchy, or airy. Whether folded into whipped cream, blended into batter, or dusted on top as a finishing touch, matcha enhances both flavour and appearance. Its natural colour is also a major attraction. That intense green hue signals freshness and sophistication, turning even the simplest dessert into something visually stunning.
And then, of course, there's the health angle. Matcha boasts a high level of antioxidants in the form of catechins, the calming L-theanine, and a subtle kick of caffeine, contributing to the sense that matcha desserts are an indulgence with benefits. In short, matcha makes desserts taste elegant, look beautiful, and nutritious, compared to traditional sweets.
Know more: How to Make a Healthy Dessert With Just 5 Ingredients
List of Top 10 Japanese-Inspired Matcha Desserts
Below are ten irresistible Japanese-inspired matcha desserts, each described in rich, indulgent detail.
1. Matcha Mochi

Matcha mochi strikes a perfect balance between chewiness and fragrance. This popular Japanese dessert combines tender, elastic glutinous rice dough with the subtle hint of matcha, thus creating a comforting and unique dessert. The slight bitterness from the matcha cuts through the sweetness in the mochi, which makes it satisfying but not overwhelming. Fill this with red bean paste or cream, and matcha mochi becomes even more delectable. Its simplicity and addictive chewiness make this a signature Japanese dessert.
2. Matcha Mille Crepe Cake
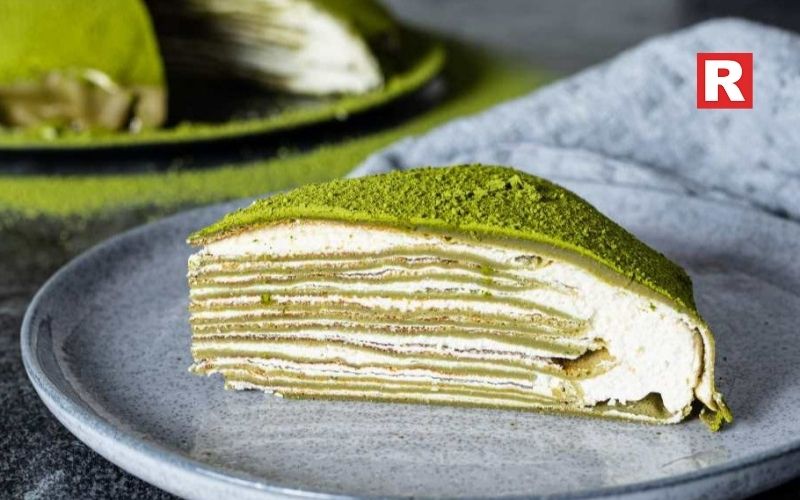
The Matcha Mille Crepe Cake is elegantly layered to perfection. Made from dozens of thin crepes stacked with matcha-infused pastry cream, this dessert is a masterpiece of texture and flavour. Every bite melts in your mouth as soft layers give off a well-balanced sweetness and the earthiness of matcha. The subtle bitterness balances the creaminess, making this dessert feel luxurious rather than heavy. Delicate-looking and sophisticated to taste, the cake is always a favorite in upscale cafes.
3. Matcha Dorayaki

Dorayaki are soft and fluffy pancakes traditionally filled with sweet red bean paste, but they get a vibrant twist when it is filled with matcha. Matcha dorayaki combines airy green pancakes with a sweet filling that complements the tea flavor so well. The earthiness of matcha blends well with the mild sweetness of the red bean, giving this dessert a nostalgic yet refreshing taste. It is the perfect tea-time snack since it's portable, satisfying, and only sweet enough.
4. Matcha Cheesecake

Matcha cheesecake is where Japanese flavor meets Western indulgence. Surprisingly, the creamy, velvety texture of cheesecake works well with the bitterness of matcha, creating a dessert that's rich but never syrupy. The green hue makes it stand out visually, while the flavor strikes a perfect balance between creamy and earthy. Whether baked or no-bake, this has become a favorite worldwide among dessert lovers who crave something different.
What's new: Top Korean Noodles Brands You Can Find in India
5. Matcha Taiyaki

Taiyaki is a cute fish-shaped pastry that is usually filled with red bean paste, custard, or chocolate. The addition of matcha makes it even more appealing. The slightly crispy outer shell carries the aroma of matcha very well, while the warm inner filling provides a satisfying contrast. Matcha taiyaki is fun, creative, and full of flavor-perfect for anyone who loves street-style desserts of Japan.
6. Matcha Ice Cream
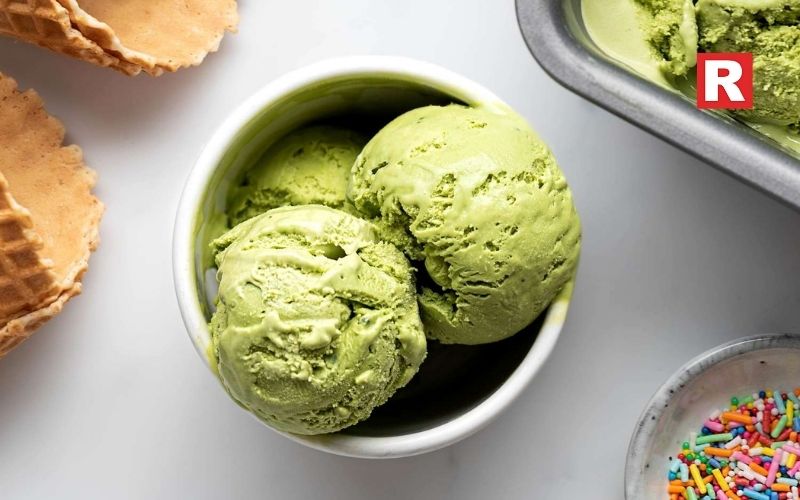
No matcha dessert list is complete without matcha ice cream. Silky, creamy, and refreshingly earthy, this frozen treat has captured the hearts of foodies from around the world. It has just the right amount of sweetness to balance bitterness, which makes it far more intriguing than its plain vanilla or chocolate counterparts. Chilling enhances the flavor of matcha, making it a truly cooling and aromatic experience with each spoonful. Whether served alone or paired with mochi, red beans, or waffles, matcha ice cream is always a crowd-pleaser.
7. Matcha Parfait
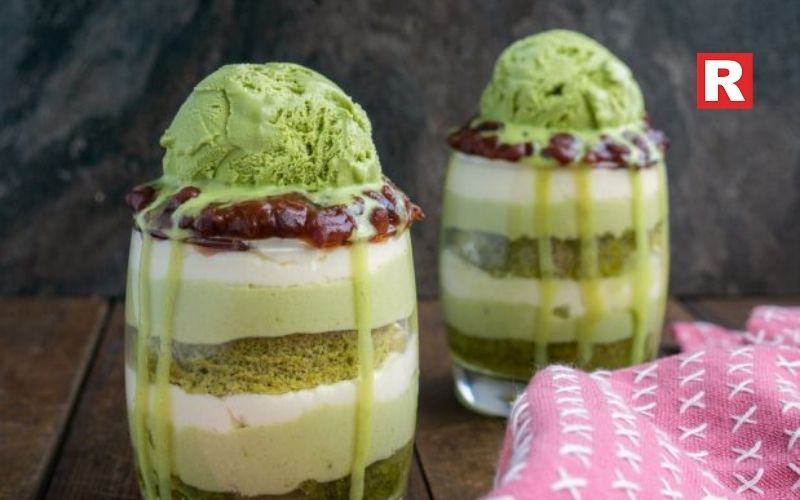
Matcha parfait is a layered treat made from ice cream, whipped cream, jelly cubes, red beans, dango, and crunchy granola or cornflakes. From layer to layer, different textures come into play, creating a symphony of chewiness, creaminess, and crunch. The matcha ice cream brings it all together with the richness of tea flavor that carries the sweetness. It’s visually stunning and highly satisfying. It is a perfect dessert for those who enjoy variety in every bite.
8. Matcha Daifuku
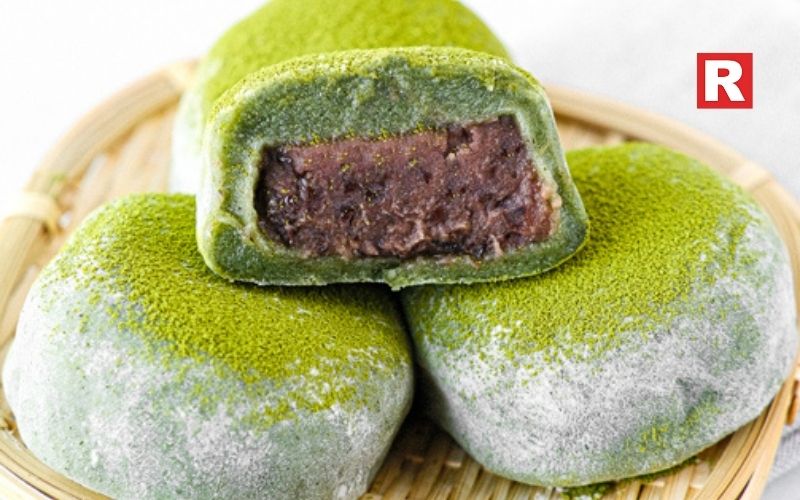
Daifuku is similar to mochi but typically filled with sweet fillings such as red bean or whipped cream. Matcha daifuku adds an extra layer of flavor due to the addition of matcha within the dough or filling. With soft mochi, the creamy center, and the aromatic matcha, this dessert feels luxurious and approachable at the same time. Its smooth bite and well-balanced sweetness are reasons to love it.
9. Matcha Cookies
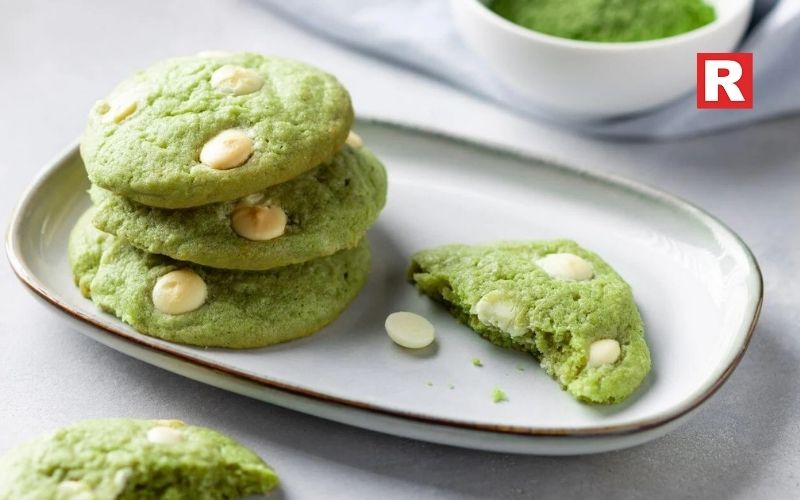
Crispy on the edges and chewy in the middle, matcha cookies are the modern take on classic baked desserts. The matcha gives the cookies not just a beautiful green color but also enriches them with a deep, slightly bitter note that perfectly pairs with white chocolate chips or nuts. These cookies are indulgent yet not overly sweet, making them perfect for anyone who enjoys more subtle flavors.
10. Matcha Roll Cake

Delicate, soft sponge rolled with light matcha cream creates a dessert that is as appealing to the eyes as it is to the palate. The sponge is soft and airy, and the matcha cream is smooth and fragrant. These two together combine into a perfect harmony of texture and flavor. When this bright green swirl is displayed inside the cake, the cake is simply irresistible-a favorite found in Japanese bakeries.
Check out: Top 12 Vodka Brands Loved In India
15 Pancake Dishes From Around the World That Every Foodie Should Know
Ingredient Recommendations
Choosing your ingredients correctly vastly enhances the flavor, color, and general quality of your matcha desserts. The most important component is the grade of matcha. Culinary-grade matcha is generally used in desserts because it blends seamlessly into batters and creams while holding its flavor. However, ceremonial-grade matcha will provide a brighter color and a smoother taste in desserts, which would be perfect for no-bake treats such as ice cream or parfaits.
When purchasing matcha, try to find vibrant green, finely milled powders that are sourced from well-regarded Japanese regions like Uji, Nishio, or Shizuoka. Stay clear of anything that seems dull or yellowish because this tends to have lower quality and a more bitter taste.
Complementary ingredients include red bean paste (anko), mochi, white chocolate, fresh cream, glutinous rice flour, and vanilla. Each of these pairs really well with the earthy tones of matcha. When making baked goods, using good-quality butter, cream cheese, and fresh eggs will amplify flavours and textures in your desserts.
Tips for Making Matcha Desserts at Home
- Sift the matcha powder to avoid lumps and ensure a smooth mixture.
- Whisk matcha with warm water first to help it dissolve and release the full flavor.
- Use culinary-grade matcha for baking, and ceremonial-grade for no-bake desserts.
- Adjust sweetness to balance matcha’s natural bitterness.
- Avoid high heat, which dulls matcha's colour and taste.
- Matcha should be stored in an airtight container away from light and moisture.
- Pair matcha with complementary flavours such as red bean, white chocolate, or cream.
- Mix properly into dry ingredients to retain color and texture in baked goods.
Learn more: Top Veg Japanese Dishes You Must Try on Your Next Visit
Savour the Green
Japanese-inspired matcha desserts are truly a beautiful combination of tradition, artistry, and flavor. Their unique balance, earthy and sweet, makes them different from the ordinary dessert options, and the natural green color brings class to any creation. Be it silky matcha ice cream, a delicate mille crepe cake, or comforting mochi, each dessert tells its story of Japanese culture.
Trying matcha desserts is one of the most delightful ways to discover new flavors, where subtle bitterness turns beautiful, textures play in harmony, and each single bite feels both modern and timeless. With the right matcha, quality ingredients, and practice, you can make these Japanese delights right in your kitchen.

Korean noodles have gained considerable popularity in India in recent years. Students and young professionals are loving them for their bold flavours with simple cooking. The influence of K-dramas, K-pop, and Korean food culture has made Korean food brands available in the Indian market. You can find many Korean brands in today's Indian supermarkets, whether online or offline. Their shelves are filled with bowls of spicy ramen, packets of jjajangmyeon, seafood ramyun, and cups of Korean-style noodles.
These noodles have shifted from being a snack to a category of food, a food trend, comfort food or fun food for millions of Indian noodle consumers. Korean noodle brands, ranging from hot to cheesy ramen bowls, provide an option for every eater's preference.
If you're wondering what Korean noodles are popular to try in India, the following article lists the top Korean noodle brands, where to find them, and what makes them unique.
Why Korean Noodles Are Popular in India
Korean noodles have become popular in India due to a combination of culture, convenience and curiosity. K-dramas often highlight comforting late-night ramyeon scenes, and many viewers find themselves wanting to eat noodles in that moment. Indian food is also known for its wide variety of quick-to-eat snacks that are full of spices and bold flavours. Korean noodles also provide endless variety with soup-based noodles, stir-fry ramyeon, cheese ramen, kimchi bowls and mild creamy flavours for both adventurous eaters and beginners.
Korean noodles are also easily accessible now through many leading platforms, including Amazon, Blinkit, BigBasket and JioMart. All those leading platforms in one place, with great pricing, make Korean brands easier than ever to purchase.
Korean Noodle Brands in India
1. Samyang
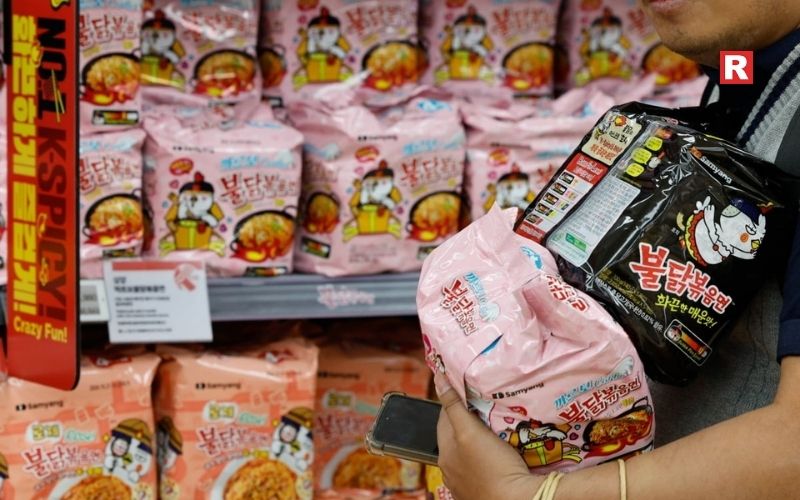
Samyang has taken the Indian market by storm thanks to their famous Buldak “Hot Chicken” Ramen, which went viral around the world for being extremely spicy. These noodles are thick, chewy and full of robust flavour with a significant kick that satisfies a spicy palate. Samyang has also produced various other popular versions, including Carbonara, Cheese and Jjajang Buldak, each with its own character. Whether seeking a spiciness challenge or simply enjoying heavy, smoky flavours, Samyang offers a memorable noodle experience that has consumers constantly coming back for it.
Popular Variants in India:
Below are several of the leading flavours of Samyang noodles that can be purchased by Indian customers:
- Samyang Buldak Hot Chicken Flavour Ramen (Original): The “fire noodle” flavour that started it all. It is a stir-fried and really spicy variety of noodles with Samyang's signature chilli sauce.
- Samyang 2× Spicy Hot Chicken Ramen: A double-spice version that has a little more kick of chilli.
- Samyang 3× Spicy Hot Chicken Ramen: This ramen has the same flavour but packs an even more intense heat. Many supermarkets list it as the 3X spicy.
- Samyang Buldak Cheese Hot Ramen: This ramen offers a cheese packet, which adds a creamy, cheesy flavour to help balance out the extreme spiciness.
- Samyang Hot Chicken Stew-Type Ramen: Soupy and stew-like option for those who like heat but also want more broth.
2. Nongshim
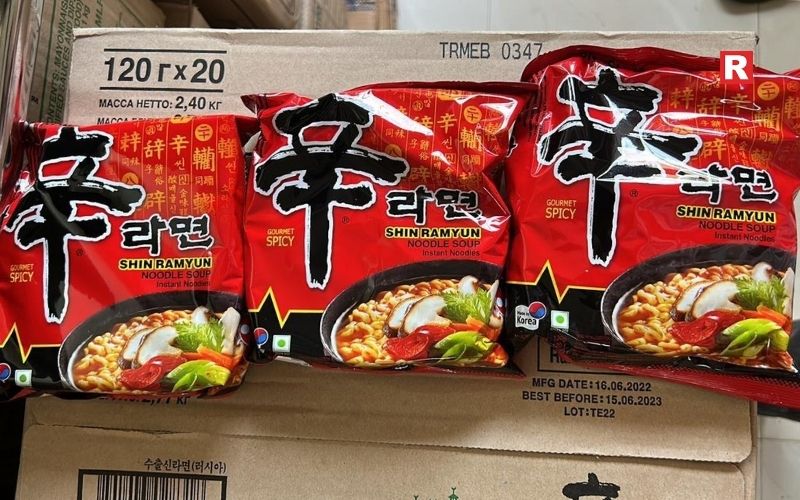
Nongshim is one of Korea’s most respected noodle brands and popular among Indian consumers who enjoy their ramen in soup style. Its signature Shin Ramyun possesses a wholesome and layered broth and chewy noodles that soak in flavour well. It is hearty and comforting in a way that distinguishes it from most other instant noodle products. Nongshim also has a variety of other flavours, providing plenty of options for vegetarians and non-vegetarians. With its deep flavour and consistent quality, Nongshim is often the favourite for those who enjoy hearty noodles that are highly liquid-based.
Popular Variants in India:
- Shin Ramyun: Nongshim's specialty, a spicy, savoury noodle in a soup.
- Shin Ramyun Black: Shin's premium noodles. It is more intense, with more toppings.
- Shin Red Super Spicy: Shin's super spicy broth for more spice.
- Neoguri: Thick noodles + a spicy seafood broth. Neoguri is loved for its unique chewy texture and distinct seaweed flavour.
- Chapagetti: Based on jjajangmyeon (noodles with black bean sauce), Chapagetti is Nongshim's version of the classic Chinese-Korean noodle dish.
- Chapaguri ("Ram-don"): Best recognised from the film Parasite, this dish is a hybrid, combining Chapagetti with Neoguri.
3. Paldo

Paldo offers a milder take on Korean noodles with a nice balance of spice, savoury, and comfort. Their Jjajangmyeon (Korean black bean noodles) is a customer favourite, presenting a umami sauce that is both delicious and unique. Paldo offers a variety of soups and spicy noodles that appeal to Indian consumers, but do not have an overbearing spice level. Their noodles are soft, smooth, and designed for those new to Korean food traditions. With more mellow, but still flavourful, spice profiles, Paldo is commonly referred to as the “comfort food” brand of Korean ramyun.
Popular Variants in India:
- Paldo Fun & Yum Bibim Men: A sweet–spicy Korean cold noodle dish, it is a fantastic summer dish. The sauce is tangy, refreshing, and mildly spicy, which is great for Indian foodies looking for something different. Products are available on import grocery websites.
- Paldo Jjajangmen: Chewy noodles served with a thick, savoury black-bean sauce. It’s Korea’s famous jajangmyeon in an instant noodle form, and it’s a great way for people to try something different from spicy ramen noodles.
- Paldo Volcano Chicken Noodles: One of Paldo’s spiciest noodle varieties with a hot red sauce and strong chilli flavour. It is hotter than most, though slightly milder than Samyang’s 2×. It has made itself popular among spice lovers in India.
- Paldo Teumsae Ramen: Famous for its deep, spicy broth, combining chilliness and umami. It’s the soup-style ramen known for flavour + spicy, and available through Korean specialty grocery stores online.
4. Ottogi
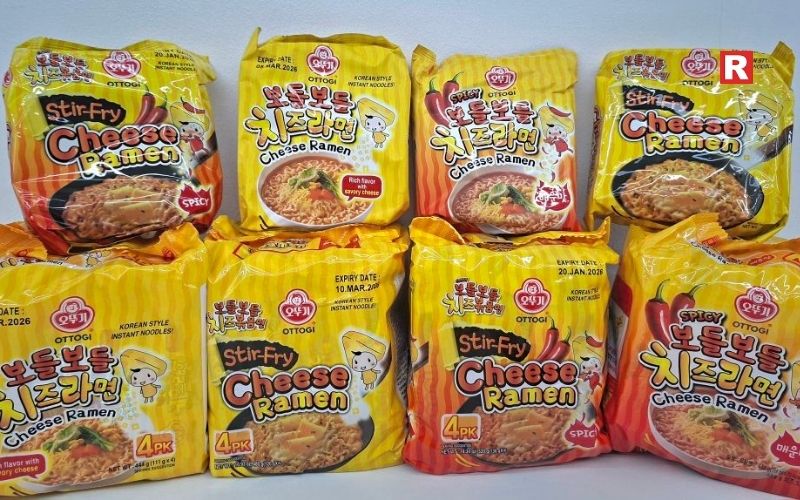
Ottogi is the brand for those wanting creamy, cheesy, and milder-flavoured noodles. Ottogi's Cheese Ramen is one of the best-selling options in India, known for its rich, creamy taste that blends perfectly with the springy noodles. Ottogi's Jin Ramen is a classic pantry staple from Korea, carrying both a mild and spicy option with a more neutral flavour. Ottogi also offers sesame and curry noodle options, leaving every consumer with a choice. This brand is most appropriate for children, new eaters, or consumers who simply want Korean noodles that are flavourful but not too spicy.
Popular Variants in India:
- Ottogi Jin Ramen (mild): A mild, non-spicy noodle that is comforting to newcomers. It has a smooth, flavourful broth with soft chewy noodles and is great for the ramen flavour of Korea without the heat.
- Ottogi Jin Ramen (spicy): A spicy version of the traditional Jin Ramen with a vivid red broth with chilli heat and authentic umami deep flavour. A great everyday Korean ramen that balances great spicy flavour.
- Ottogi Cheese Ramen: A creamy, cheesy ramen with a seasoning packet that melts into a rich broth. It is loved by Indian students as the cheese cuts the spice and adds a smoothness of mouthfeel and even a richness.
- Ottogi Yeul Ramen: One of the spiciest ramen from Ottogi, it has a very similar feel to Samyang hot flavours but lots of broth as well. It has a chilli-forward heat with a clear umami base. It can also be purchased from Korean grocery stores online.
5. CJ Bibigo

Bibigo is a high-end Korean brand known for its gourmet-style products and healthy noodles. The brand has a more gourmet-like flavour that feels like eating at a restaurant. Many noodle types are air-dried, not fried, giving them a lighter texture that is not greasy. The seafood broth noodles and knife-cut or "cut-style" are both appealing to consumers who enjoy the authentic and more delicate tastes of Korean cuisine. If someone is after a healthier and cleaner option to instant noodles, they will have a more elevated gourmet experience with Bibigo.
Popular Variants in India:
- Bibigo Japchae Stir-Fried Glass Noodles: A popular Korean dish made from sweet potato glass noodles, vegetables, and a soy sauce-based seasoning. Chewy, savoury, and mildly sweet, this dish is ideal for folks who want to enjoy the authentic flavours of Korean food but do not like very spicy food. Order from Korean grocery stores online.
- Bibigo Chicken & Vegetable Japchae Noodles: A noodle bowl you just need to heat up to eat. This bowl features tender chicken, chewy dangmyeon noodles, stir-fried vegetables, and a balanced savoury sauce. Perfect for a gourmet-style, quick meal inspired by Korean food.
- Bibigo Spicy Mushroom Kalguksu: A knife-cut noodle soup featuring thick, soft noodles and a mildly spicy mushroom broth. This dish is a comforting, homestyle Korean dish found on import specialty sites like Fetch N Buy.
- Bibigo Japchae Bowl (Frozen Meal): A microwavable frozen version of a japchae-style meal featuring chewy noodles, vegetables, and a soy-sesame seasoning. Great for anyone looking for a quick fix of Korean noodles without cooking.
6. Yopokki

While this brand's specialty is Korean rice cakes tteokbokki, Yopokki has gradually expanded to offer a range of Korean noodles that have been well received by customers for their sweet-spicy flavours. Yopokki noodles often contain cheesy, tangy, and mildly spicy combinations that parallel the flavours of other Korean food eaten on the street. Yopokki noodle dishes are often packaged in cups for quick and easy cooking, and are especially favoured by students, young adults and K-drama fans who are looking for Korean street-style flavour they can enjoy at home.
Popular Variants in India:
- Yopokki Rabokki (Original Sweet & Spicy): A combination of chewy rice cakes (tteok) and instant noodles in Korea’s iconic sweet-spicy gochujang sauce. Ideal for beginners looking for an authentic Korean street-food flavour.
- Yopokki Rabokki Hot & Spicy: A spicier version of their original rabokki, with an even bolder red sauce and heat level. A perfect option for spice lovers wanting a filling, saucy, and very quick Korean meal with both noodles and rice cakes.
- Yopokki Cheese Rabokki: A creamy, cheesy twist of the original rabokki flavour. The cheese seasoning melds into the spicy sauce; the two flavours balance nicely, resulting in a dish that is satisfying and comforting. This version is a hit with Indian students.
- Yopokki Jjajang Rabokki (Black Bean Flavour): Korean savoury black-bean sauce with the noodles and rice cakes. This option is mild and earthy, making it a great alternative for those who are more in favour of a flavourful dish, rather than a spicy dish.
Spice, Slurp, Repeat
Korean noodles have transitioned from a niche international specialty to one of the fastest-growing convenience food trends in India. Each brand has its own specialty: whether it's spicy noodles, rich broths, or comforting, restaurant-styled flavours that can be replicated at home. With delivery and supermarkets expanding their Korean section, it has never been more convenient for Indians to try global flavours in their own kitchen. The Korean noodle market segment in India has enough offerings to experiment with, whether you are looking for ultra-spicy ramen challenges, creamy noodle cups, or your more classic noodles with a soy-based broth. Whatever your preference, grab a favourite, add toppings like eggs or cook up vegetables and enjoy a bowl of comfort.

Pancakes are one of the most universally popular dishes around the world. While many people typically think of pancakes as fluffy, stacked cakes drizzled with syrup over the top, pancakes take on many different forms depending on available ingredients, cooking methods, and cultural customs.
What is especially interesting about pancakes is their universality. A pancake can be served and enjoyed at breakfast, as a snack, street food, or as a holiday treat. In some cultures, pancakes are layered with fruits and honey, while in other cultures, pancakes are filled with meats, vegetables, and spices as a savory dish. Pancakes are a comfort food that can be eaten anywhere as a shared community experience.
This article lists 15 different regional pancake specialties from around the world that aspiring or seasoned home cooks can look forward to for inspiration or enjoyment of the wonderful flavors pancakes hold.
Read more: 12 Affordable Spirits That Taste Like They Cost a Fortune
15 Types of Pancakes From Different Places
1. American Buttermilk Pancakes

What pancake list would be complete without a basic American buttermilk pancake? These fluffy, soft cakes are made with flour, eggs, sugar, and buttermilk (which provides a slight sour taste to the cake). When cooked on a hot surface like a griddle, the cake rises nicely and is served in stacks of 2 to 6 along with butter, maple syrup, or fresh berries for breakfast or brunch. American pancakes are all about warmth, comfort, and satisfaction. The experience of enjoying a pancake can be great anytime during the day, especially when paired with coffee.
2. French Crêpes
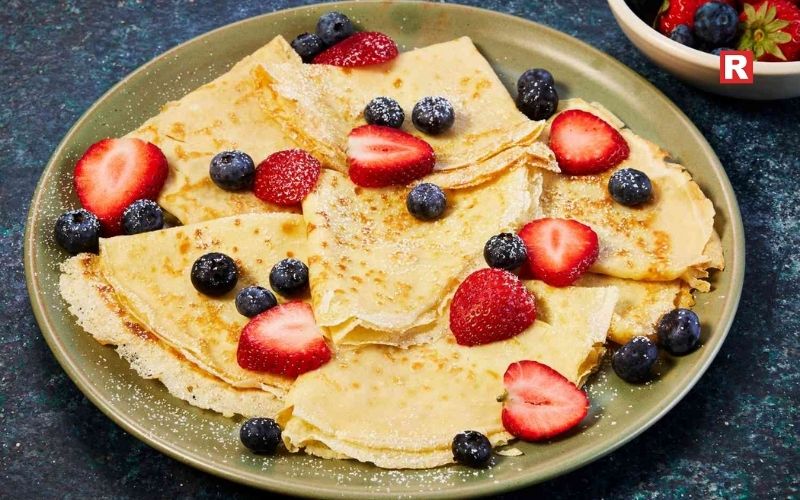
Crêpes are ultra-thin pancakes found on street corners in Paris and are an item on the menu in any local French bistro. Crêpes are typically made of wheat flour, milk, and eggs and can be sweet or savory. While sweet crêpes often feature Nutella, fruit, or whipped cream, savory crêpes are called galettes, which are often stuffed with cheese, ham, eggs, or vegetables. The delicate texture and versatility of crêpes make them a canvas for both traditional French flavors and modern creative twists.
Know more: 10 Vegan Fusion Curries From Around the World
3. Russian Blini

Blini are small, yeasted pancakes, traditionally made with buckwheat flour, that have a nutty flavor and a somewhat dense texture. Blini are often served during celebrations, such as Maslenitsa, and are paired with sour cream, smoked salmon, or caviar. They are not just food; they represent hospitality and warmth in Russian culture. Their small size is perfect as appetizers, plus they can be layered or stacked on a plate for family gatherings or holiday meals.
4. Japanese Okonomiyaki
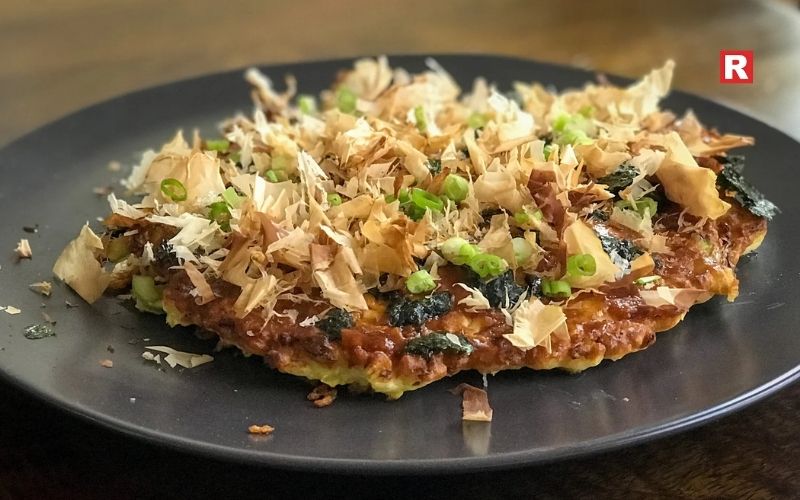
Okonomiyaki is a savory Japanese pancake that is almost a meal by itself. The base of okonomiyaki is a batter made with flour, eggs, shredded cabbage, and dashi. Okonomiyaki is cooked on a griddle and topped with mayonnaise, okonomiyaki sauce, bonito flakes, and seaweed. Okonomiyaki can include variations based on the preferred meat, which may include pork, seafood, or vegetables. Known as popular street food in Osaka and Hiroshima, okonomiyaki has a soft, fluffy center with a crispy outside, and its umami flavor is deeply satisfying.
5. Korean Hotteok

Hotteok is a sweet Korean street food pancake, enjoyed in the winter season, for its warm, gooey filling. The dough is made of wheat flour and yeast, then filled with brown sugar, cinnamon, and crushed nuts, before pan-frying to a crisp golden brown. The sugary filling melts in, creating a caramel-like center that cannot be resisted. Hotteok is best eaten as a snack or dessert, offering a warm, sweet bite of comfort at the heart of Korean street food culture.
6. Ethiopian Injera
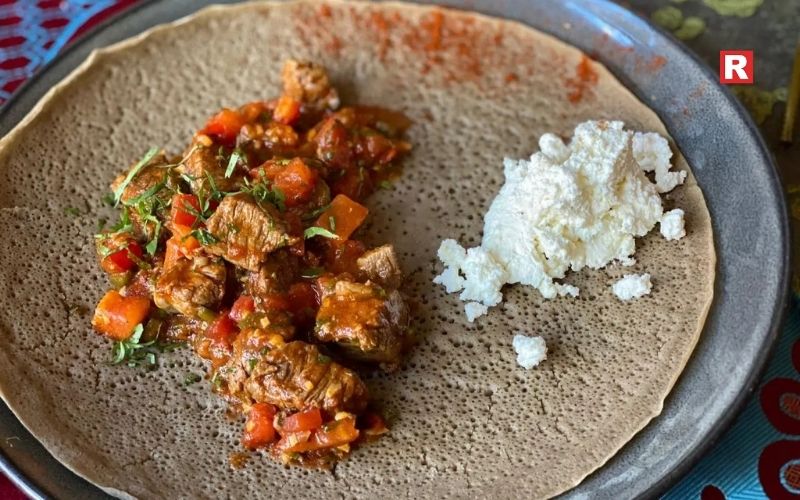
Injera is commonly considered a "staple" food in Ethiopian cuisine, made from ground teff flour and fermented for a slight sour flavor. Unlike most pancakes, injera is large, spongy, and used as both a plate and utensil with various stews, vegetables, and meats placed on top. The fermented flour, as well as its unique style of serving, gives injera a very unique texture and flavor with a soft, airy, and absorbent quality. Eating injera reflects Ethiopian traditional culture, hospitality, style, and the social aspect of sharing food in the community.
7. Dutch Pannenkoeken

Dutch pannenkoeken are thinner and larger than American pancakes and thicker than French crêpes. They can be sweet or savory and are typically baked or pan-fried. Good pannenkoeken can be topped with all sorts of delicious fillings and toppings, such as bacon, apple slices, cheese, or powdered sugar. What makes pannenkoeken so special is their size. You can stuff, fill, or fold them with just about anything, which makes them an easy food to be eaten for breakfast, lunch, and dinner. In the Netherlands, pannenkoeken are especially popular and are served in restaurants known as “pannenkoekenhuizen.”
8. Chinese Cong You Bing (Scallion Pancakes)
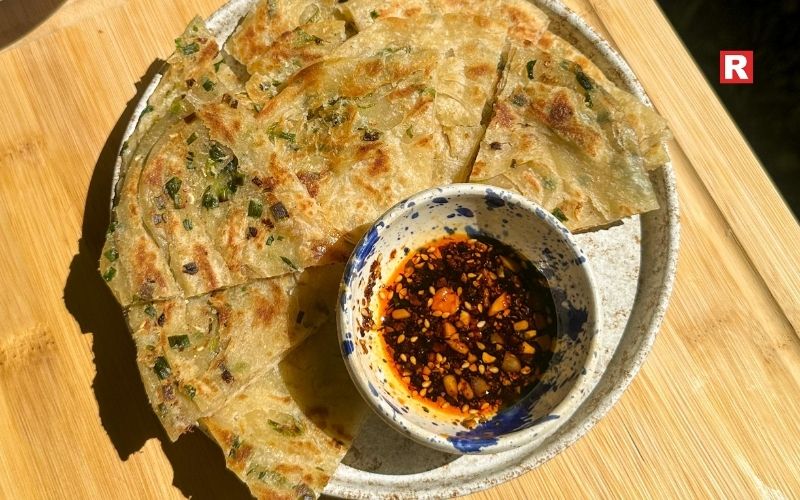
Cong You Bing, or scallion pancakes, are a popular street food across China, made from unraised dough that is filled with finely chopped scallions. Cong you bing is pan-fried until golden brown and flaky, and thus has a chewy texture inside and crispy layer outside. Scallion pancakes are usually served with soy-based dipping sauce and eaten as a snack or appetizer. The simplicity of scallion pancakes paired with their bold flavor makes them a popular food item in Northern China and among dumpling and pancake lovers.
9. Swedish Raggmunk

Raggmunk is a classical potato pancake from Sweden, made from a simple mixture of grated potato, flour, and eggs. They are fried until they are both crispy on the outside and soft on the inside. Raggmunk is typically served with lingonberry jam and sour cream. The savory and slightly sweet combinations of flavors create a unique flavor profile. Raggmunk is commonly served during family meals or celebratory occasions and showcases the Swedish culture of hearty, comforting, and locally inspired food.
10. Indian Dosa
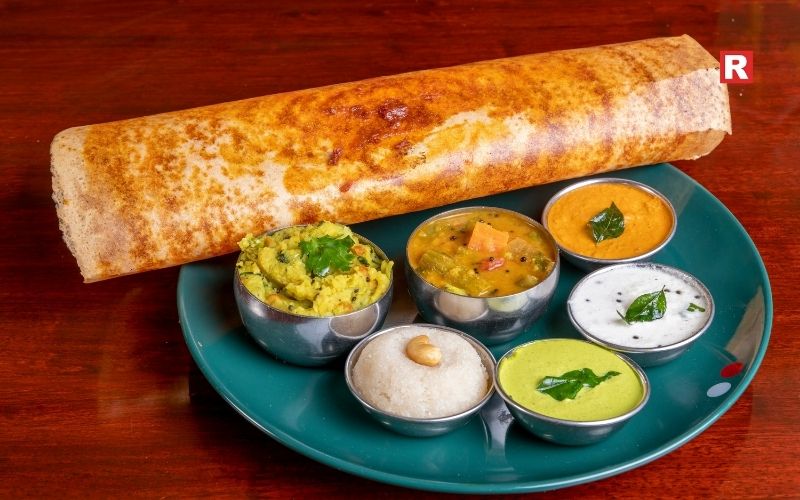
Dosa is a thin, crispy pancake that originates from South India, made from a fermented batter of rice and urad dal (black gram). It is commonly served with a variety of chutneys or with sambar (spicy lentil soup). Dosas can be served plain or stuffed with several fillings, including masala potatoes (masala dosa) and paneer. Dosa is a staple in many Indian households and restaurants and is enjoyed widely for breakfast and as street food. With a crispy texture and a tangy flavor, dosa is versatile and has culinary variations enjoyed throughout India and beyond.
What's new: Top Coconut Rum Brands in India: Tropical Flavours You Will Love
11. Vietnamese Bánh Xèo

Bánh xèo means "sizzling pancake," a fried and crispy Vietnamese street food made with rice flour, turmeric, and coconut milk batter. Stuffed with pork, shrimp, and bean sprouts, it is cooked and fried until lightly crisped in a pan. Bánh xèo is eaten by wrapping it in a piece of lettuce leaf and dipping it into a tangy fish sauce. The combination of colorful, bright ingredients, crunchy texture, and savory filling makes bánh xèo a classic example of the balance of elements found in Vietnamese cuisine.
12. Thai Khanom Krok
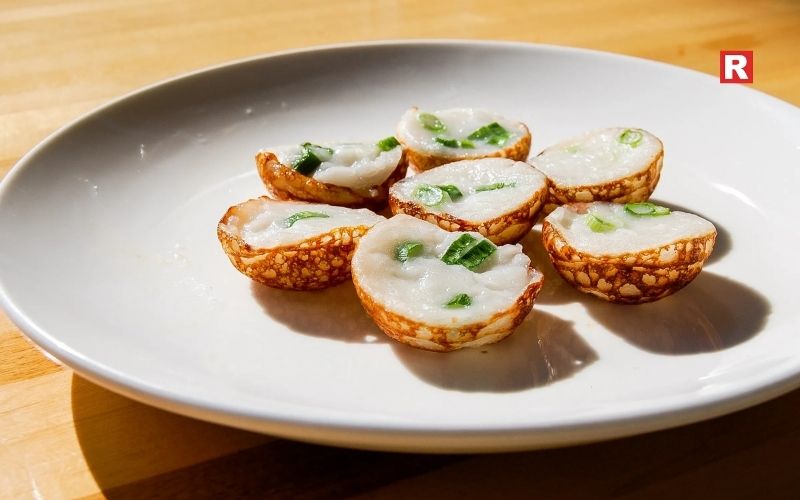
Khanom krok are small Thai pancakes made with coconut milk and cooked in a special cast-iron pan with small round molds. The batter uses rice flour and coconut milk, resulting in a pancake filled with a creamy, slightly sweet interior and crispy edges. They are topped with green onion pieces or (sometimes) sweet corn, and served in bite-sized portions. These pancakes show Thailand's love of coconut flavors, as well as its sweet-meets-savory combinations. They are a must for anyone seeking out Southeast Asian dishes.
Check out: 20 Unique Fritter Recipes From Every Corner of the Globe
Best Cookie Brands in India: A Complete Guide for Cookie Lovers
13. Mexican Hotcakes

Mexican hotcakes are mildly sweet, fluffy pancakes frequently enjoyed with butter, cajeta (caramelized milk), or fresh fruits. They are made from wheat flour, milk, and eggs; they are thicker than crêpes, but less so than American pancakes. Mexican hotcakes are a breakfast staple in Mexican food culture, where they are typically served with a cup of hot chocolate or coffee. Their soft texture, sweet toppings, and comforting smell make them a household breakfast favorite in many Mexican homes.
14. Turkish Gözleme
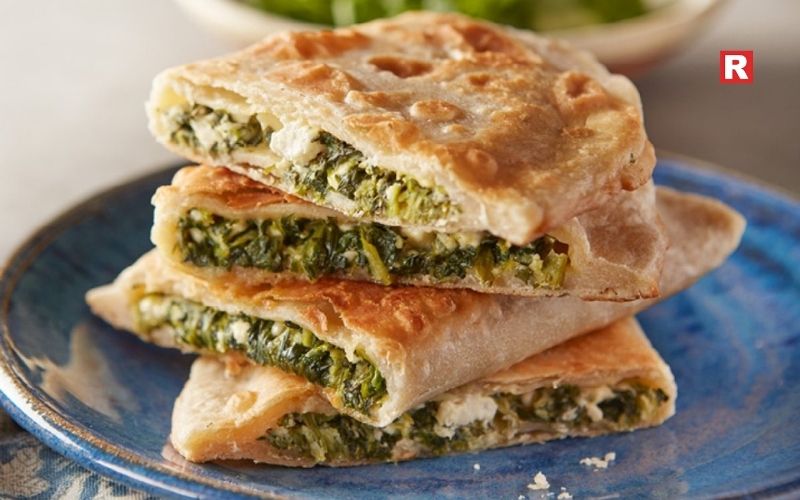
Gözleme is a rustic-style, traditional Turkish stuffed pancake that is made by hand-rolling thin pieces of dough with an oil brushing, then filled with delicious fillings and cooked on a griddle. The fillings can really vary and can include things like spinach and feta, minced lamb, potatoes, mushrooms, or a medley of vegetables. When the pancake cooks, the outside of the dough crisps lightly and the inside gets warm and flavorful. Gözleme is often sold from street markets and pushed by breakfast sellers during festivals throughout Turkey.
15. Israeli Malawach

Malawach is a pancake from Yemen that has become popular in Israel. It is layered dough, pan-fried, and flaky, buttery, and a little crispy. It is sometimes served with hard-boiled eggs, tomato sauce, or zhug (a mixture of cilantro and chili pepper). Unlike many pancakes, malawach is not sweet; rather, it is rich and savory. Malawach is a frequently eaten breakfast in Israel, a symbol of the various traditions that enrich Middle Eastern food culture by combining basic ingredients with many different layers and textures.
Learn more: 10 Classic Wine and Cheese Pairings That Taste Luxurious
A Delicious World Tour
Pancakes may seem like a simple dish, but throughout the world, they transform with culture, memory, and imagination. From the crisp edges of a bánh xèo to the warm sweetness of a hotteok, each pancake carries the story of a place and its people. They are an invitation to experience customs, techniques, and the heart of home cooking across the globe. These fifteen pancakes represent far more than a food journey; they are an opportunity to appreciate how cultures across the globe celebrate the morning hours, connect families, and share stories with flavors.
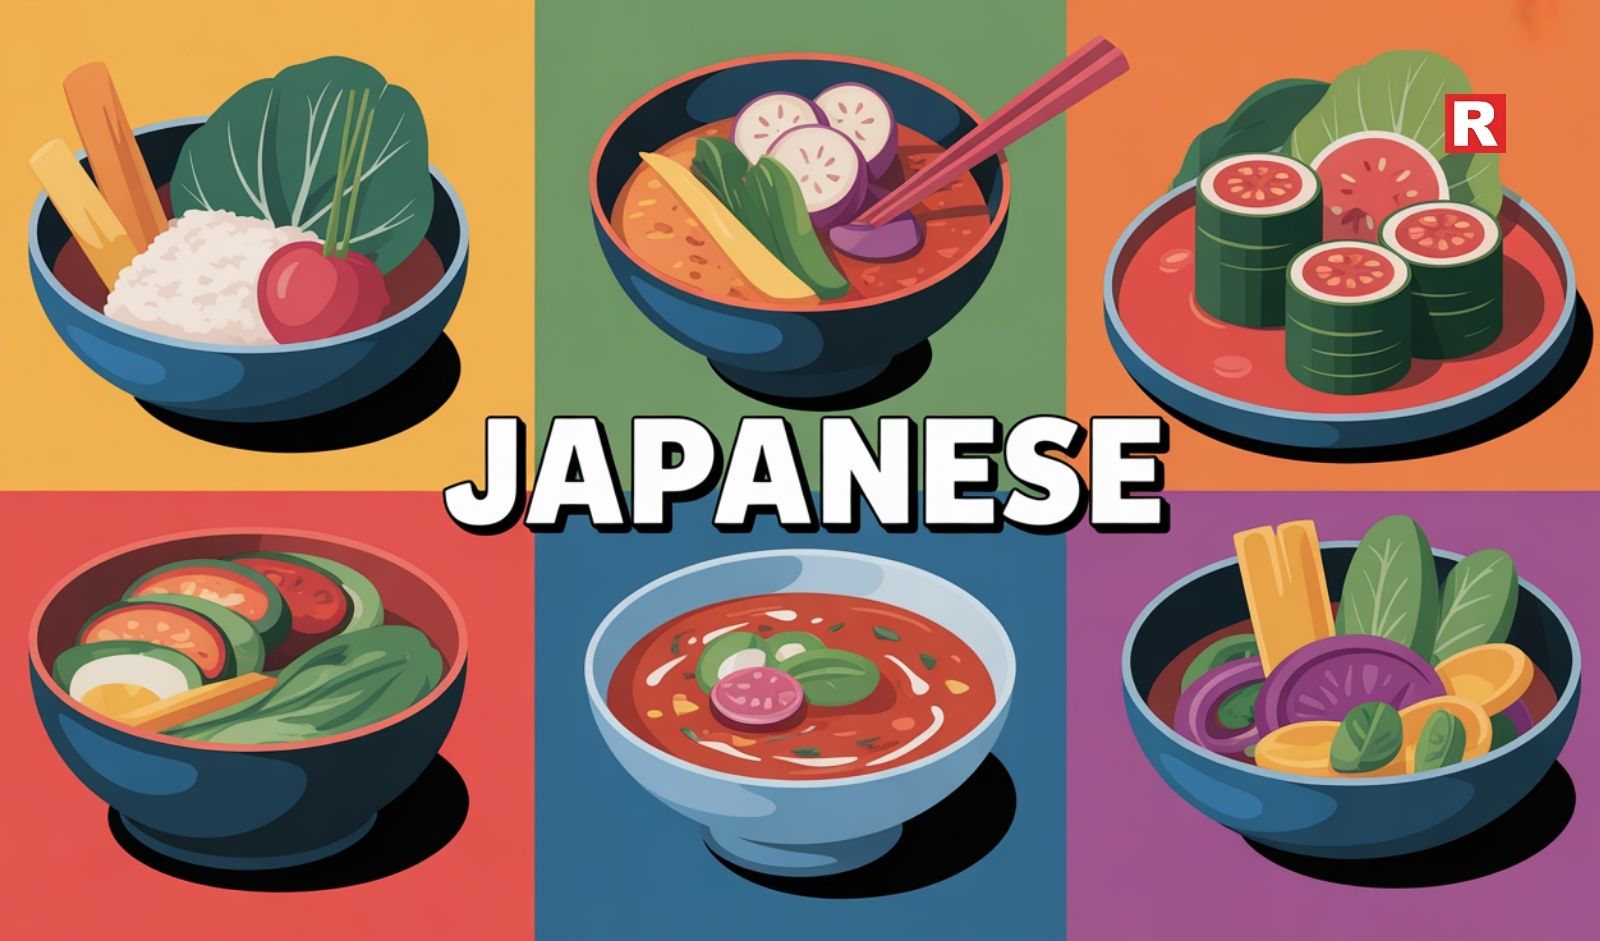
Japanese food is famous around the world for its clean flavours, beautiful presentation, and fresh ingredients. Many people think Japanese cuisine is all about seafood and meat. But Japan also has a strong vegetarian food culture, especially because of its Buddhist traditions. Over the years, more restaurants, cafés, and food stalls have also added veg options for travellers.
This guide highlights the top vegetarian Japanese dishes that every traveller should try. The dishes are simple, tasty, and packed with authentic flavours. They are also easy on the stomach, which makes them perfect for long travel days. Anyone visiting Japan for the first time will find these dishes comforting and enjoyable.
Explore Top Veg Japanese Dishes
1. Vegetable Tempura
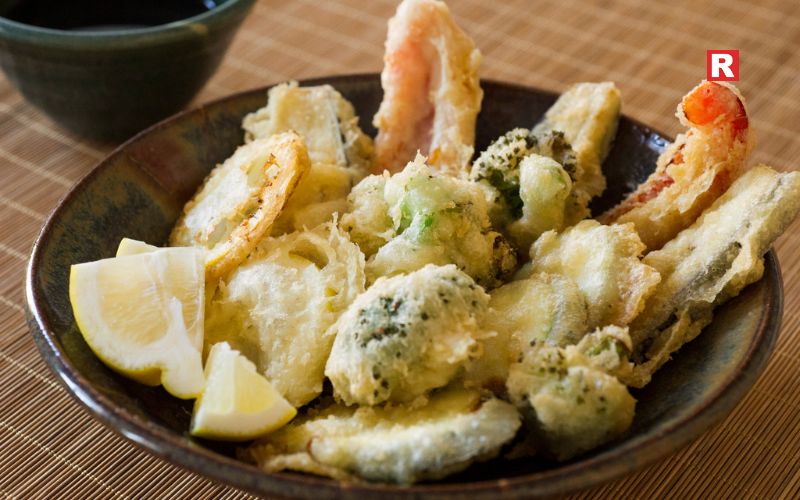
Vegetable tempura is one of Japan’s most popular vegetarian dishes. It is light, crispy, and made with seasonal vegetables. Chefs usually use ingredients like sweet potato, pumpkin, eggplant, lotus root, and green beans. The vegetables are dipped in a thin batter and fried quickly to keep them crunchy.
Travellers often enjoy tempura with a soy-based dipping sauce. Some restaurants also serve it with flavored salt. Tempura is found everywhere in Japan—from street-side shops to upscale restaurants. The dish is famous because it celebrates natural flavours without being oily or heavy. People who love light snacks or crispy food will find vegetable tempura perfect during their trip. It is also a great introduction to Japanese food for anyone who prefers simple tastes.
Read more: What is Kimchi? Top Veg Kimchi You Can Try at Home
7 Desi Alternatives to Oatmeal for Weight Loss
2. Veg Ramen
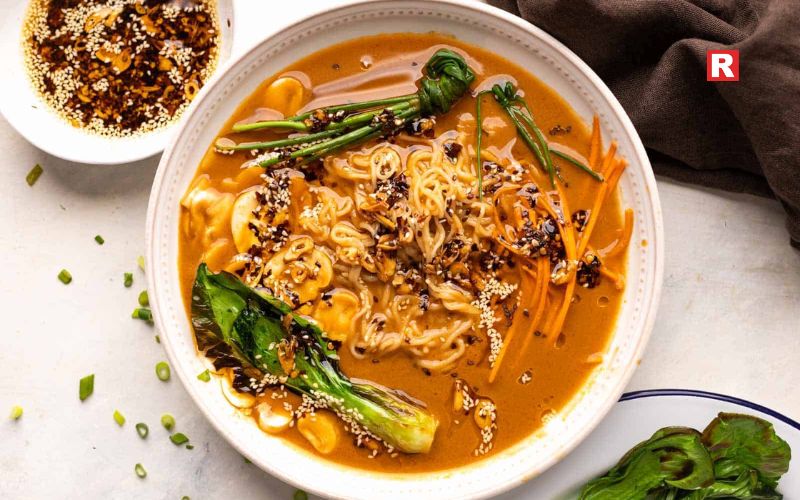
Ramen is a globally loved Japanese dish. Many travellers assume ramen broth always contains meat. But Japan now offers many delicious vegetarian ramen bowls made with vegetable broth, miso, mushrooms, tofu, and fresh noodles.
The broth is the hero of ramen. Veg ramen often uses ingredients like kombu (seaweed), miso paste, mushrooms, ginger, and slow-cooked vegetables. This gives the broth a rich umami flavour without any animal products. Toppings include bean sprouts, corn, spinach, tofu, bamboo shoots, and spring onions. Some restaurants even add roasted garlic or spicy oil for stronger flavours.
Veg ramen is comforting, warm, and perfect for cold days. Travellers often find it filling and balanced, especially after long walks or sightseeing. Cities like Tokyo, Kyoto, and Osaka have many specialised ramen shops that serve vegetarian bowls.
3. Onigiri with Veg Fillings
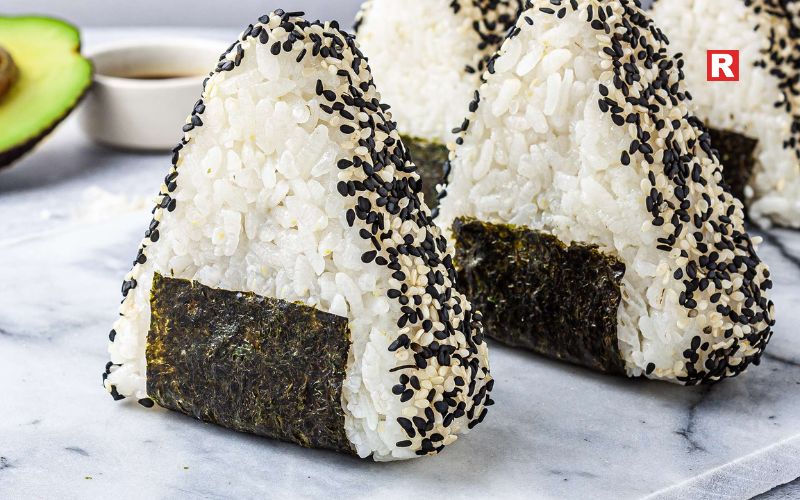
Onigiri is a simple rice ball wrapped in seaweed. It is one of Japan’s most loved and convenient foods. Many travellers try onigiri during train rides, day trips, or early-morning breakfasts because it is quick and tasty.
Vegetarian fillings are very common in Japan. Popular options include pickled plum (umeboshi), shiitake mushrooms, seaweed, sesame seeds, and seasoned rice. These flavours are mild, salty, and refreshing. Onigiri is found in convenience stores, supermarkets, and cafés. What makes it special is that it reflects everyday Japanese food culture. It is not complicated or fancy, yet it feels satisfying and comforting. Travellers often compare it to Indian home-style snacks because it is simple and delicious.
4. Kappa Maki and Oshinko Maki (Veg Sushi Rolls)
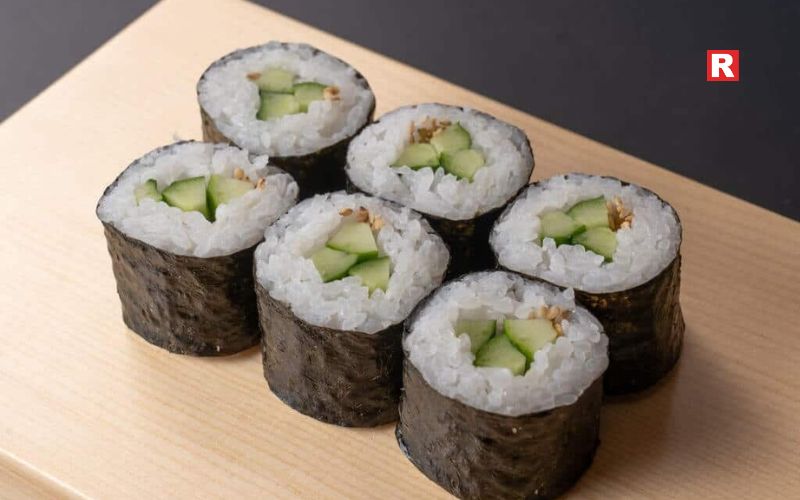
Sushi is the first thing that comes to mind when someone talks about Japanese cuisine. While many sushi items contain fish, vegetarian options are widely available and extremely popular. Kappa Maki is a sushi roll filled with cucumber. It is fresh, crunchy, and loved for its clean taste. Oshinko Maki contains pickled radish, which adds a slightly tangy flavour.
Both rolls are small, light, and easy to eat. They pair well with soy sauce and wasabi if someone prefers a stronger kick. Veg sushi rolls are available in sushi restaurants, train stations, supermarkets, and even department store food courts. These rolls help travellers experience authentic Japanese sushi without stepping away from vegetarian preferences. Many people enjoy them as a quick lunch or a light dinner.
Know more: Best Instant Noodles Brands in India That Make Every Slurp Worth It
5. Zaru Soba (Cold Buckwheat Noodles)
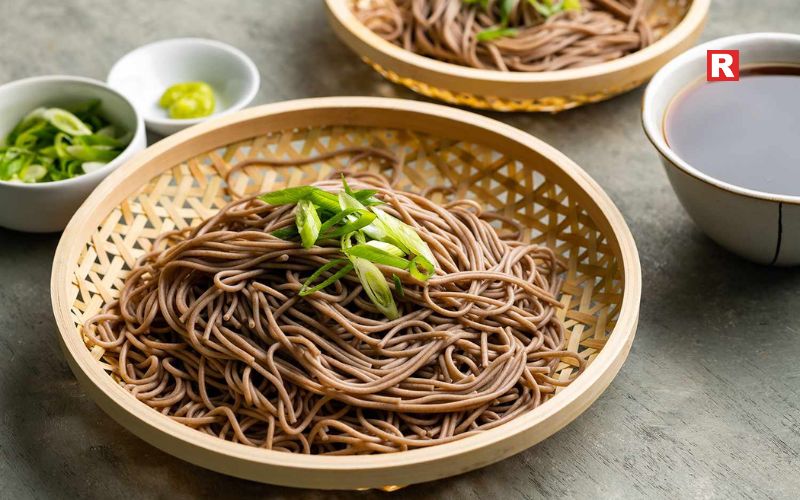
Zaru Soba is a classic Japanese dish known for its simplicity. It is made from buckwheat noodles served cold on a bamboo tray. Travellers dip the noodles into a chilled dipping sauce made from soy, mirin, and dashi alternatives suitable for vegetarians. What makes Zaru Soba special is its cooling and refreshing taste. It is popular during summer, but many travellers enjoy it throughout the year. The dish is healthy, light, and easy to digest.
Buckwheat noodles are also high in nutrients, which makes the dish a good choice for health-conscious travellers. Many restaurants offer vegetarian-friendly dipping sauces, and some even add toppings like seaweed or green onions. Zaru Soba is commonly found in soba shops, train stations, and local eateries across Japan. Its mild flavour and smooth texture make it a favourite among vegetarian tourists.
6. Inari Sushi

Inari sushi is another vegetarian sushi option that is naturally sweet and savoury. It consists of sushi rice stuffed into soft tofu pockets called “inari.” The tofu skin is marinated in soy sauce, sugar, and mirin, giving it a rich flavour.
Inari sushi is soft, slightly sweet, and extremely comforting. It is also very beginner-friendly, especially for travellers trying Japanese food for the first time. Many people enjoy it as a snack during sightseeing. The dish is easily available in supermarkets, bento shops, convenience stores, and sushi restaurants. It also pairs well with miso soup or green tea, making it an ideal light meal.
Why Vegetarian Food in Japan Is Unique
Vegetarian Japanese dishes focus on natural flavours. Chefs use seasonal vegetables, herbs, tofu, noodles, and fermented ingredients. Many of these dishes follow Buddhist temple traditions known as “Shojin Ryori.” This cooking style avoids strong spices and encourages clean eating.
Travellers appreciate Japanese vegetarian food because:
- It is light on the stomach
- It uses fresh ingredients
- It feels balanced and wholesome
- It highlights regional and seasonal produce
Vegetarian food in Japan shows how simplicity can be delicious.
Tips for Vegetarian Travellers in Japan
Many tourists worry about finding vegetarian food in Japan. But the situation has changed significantly in recent years. More restaurants offer veg options, and menus often have clear labels.
Useful tips include:
- Asking for “yasai” (vegetables)
- Checking for “vegetarian” signs in cafés
- Visiting temple restaurants in Kyoto
- Trying food halls in department stores
Simple Japanese phrases such as “Watashi wa bejitarian desu” (I am vegetarian) also help.
Also check: Top Famous Veg Street Foods in Kolkata That You Must Try Once in Your Life
8 Famous Vegetarian Dishes of Uttar Pradesh and Their Timeless Legacy
Veg Treat!
Japan has many vegetarian dishes that suit every kind of traveller. Each dish carries history, tradition, and a unique flavour. The food is clean, light, and full of natural taste. Travellers who enjoy simple and fresh meals often find Japanese vegetarian food very comforting. In cities like Tokyo, visitors can try quick and flavourful options in small cafés and street shops. In Kyoto, many restaurants near temples serve calm and soothing vegetarian meals inspired by old Buddhist cooking. These places focus on seasonal vegetables and gentle flavours. The six dishes mentioned earlier give a true idea of Japan’s food culture. They are easy to enjoy and are made with care. They also show how Japanese chefs respect ingredients and prefer balance in every meal. For anyone planning a trip, these vegetarian dishes offer a warm and authentic Japanese experience. They make the journey richer and more memorable.

Salt is one of the most basic ingredients in every Indian kitchen. Yet it is also one of the most important. It adds flavour, supports the body’s functions, and brings the right balance to every dish. Over the years, salt has moved from being a simple white crystal to a wellness product. Today, people look for purity, iodine, minerals, and special health benefits before choosing a pack.
India is one of the world’s biggest salt producers. The country has a strong salt industry that supplies households, restaurants, and even global markets. Gujarat alone produces most of India’s salt, and states like Rajasthan and Tamil Nadu also play a major role. As awareness about thyroid health and mineral-rich foods grows, consumers are shifting toward clean, safe, and value-based salt brands. This article covers the top 7 salt brands in India. Each brand is known for purity, consistency, and strong trust among Indian families. The information below will help you choose the right salt for your cooking and health needs.
Why Choosing the Right Salt Matters
Salt does more than season your food. It supports the thyroid, maintains fluid balance, and keeps nerve and muscle functions stable. That is why iodised salt became important in India. Low iodine once caused major health issues, and branded salt products helped solve this.
Today, people want more. They want minerals, natural processing, and clean crystals. Some choose pink salt for its rich minerals. Some prefer rock salt for sabudana days. Some look for low-sodium options for heart health. With so many choices, picking the right brand matters.
What Makes a Salt Brand “Top”?
A top salt brand in India must check a few boxes:
- High purity
- Safe and clean processing
- Correct iodine levels
- Good mineral balance
- Easy flow
- Hygienic packaging
- Strong brand trust
- Different types of salt for different needs
The seven brands below meet these standards and stand out in the market.
Discover Top 7 Salt Brands in India
1. Tata Salt
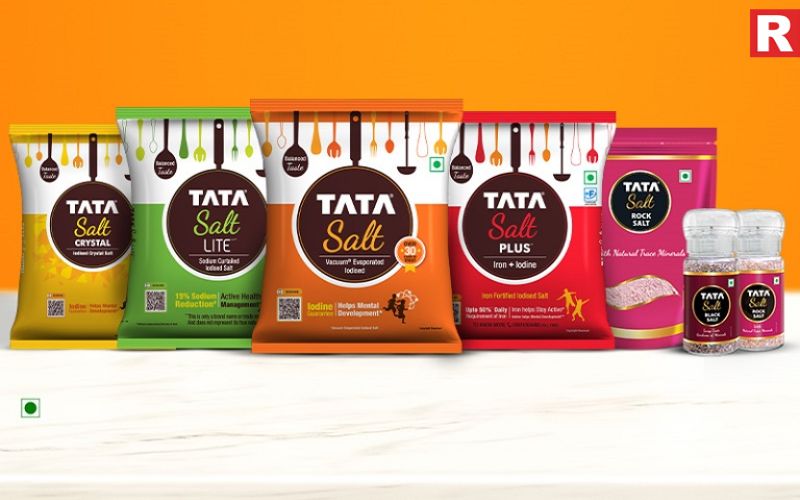
Tata Salt has been India’s most trusted salt for decades. Many Indian households start their cooking day with Tata Salt. The brand focuses on purity and stable iodine levels. It is known for its uniform crystals, clean taste, and consistent quality.
Tata Salt also offers several options like Tata Salt Lite (low-sodium), Himalayan pink salt, and black salt. The brand’s strong distribution makes it easy to find in every city, town, and village. For families that want reliability and clean processing, Tata is a safe and popular choice.
2. Aashirvaad Salt

Aashirvaad, known for its flour and spices, also offers high-quality iodised salt. It promises purity, balanced minerals, and fine crystals that blend well into daily cooking. Aashirvaad Salt is refined, clean, and free from visible impurities.
The brand also focuses on slow-cooking flavour, as many Indians use it for curries, dals, and rotis. Its packaging keeps the freshness intact. If someone prefers a smooth, mild-tasting salt with consistent quality, Aashirvaad is a good option.
Read more: Top 10 Vegan Street Foods in India Every Indian Loves
Best Instant Noodles Brands in India That Make Every Slurp Worth It
3. Saffola Salt

Saffola is known for heart-health products, and its salt range follows the same idea. Saffola Salt Lite is popular among people who want lower sodium intake. This helps those who want to manage blood pressure or improve overall heart health.
The taste of Saffola salt remains close to regular salt, which makes it easier for families to shift to healthier choices. For individuals who want to take a conscious step toward cleaner living, Saffola offers a balanced option.
4. Organic Tattva Salt
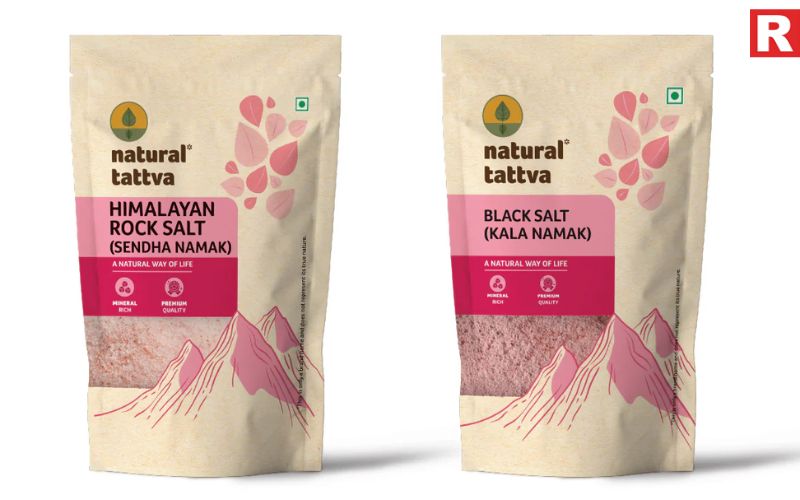
Organic Tattva is a favourite for people who want natural, chemical-free food. Their salt range includes Himalayan pink salt, rock salt, and organic sea salt. These salts are minimally processed and retain natural minerals.
Pink salt from Organic Tattva is especially popular because it contains minerals like magnesium, iron, and calcium. The crystals have a light flavour that works well in salads, seasoning, and daily cooking. If someone prefers clean, natural, and unrefined options, this is a strong brand to pick.
5. Catch Salt

Catch is well known for spices, but its salt range is also widely loved. The brand offers iodised salt, rock salt, black salt, and gourmet salts. Catch Salt is fine, free-flowing, and easy to use.
One of the key advantages of Catch is variety. People who experiment with flavours enjoy their black salt for chaats and rock salt for fasting seasons. Catch Salt also comes in smart packaging that keeps it moisture-free. This makes it a convenient choice for modern kitchens.
Know more: Top Famous Veg Street Foods in Kolkata That You Must Try Once in Your Life
6. Patanjali Salt
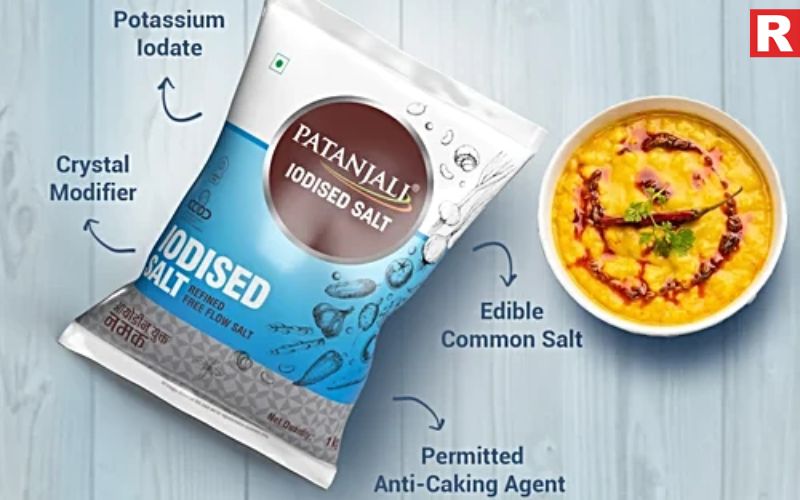
Patanjali has a strong base in India, especially in semi-urban and rural areas. Its iodised salt is known for purity and affordability. Patanjali also offers rock salt and black salt, which connect with its Ayurvedic image.
The brand focuses on natural sourcing and minimal processing. Many buyers trust Patanjali because of its Indian roots and wide availability. Households that want safe salt at a budget-friendly price often choose this brand.
7. Urban Platter Salt
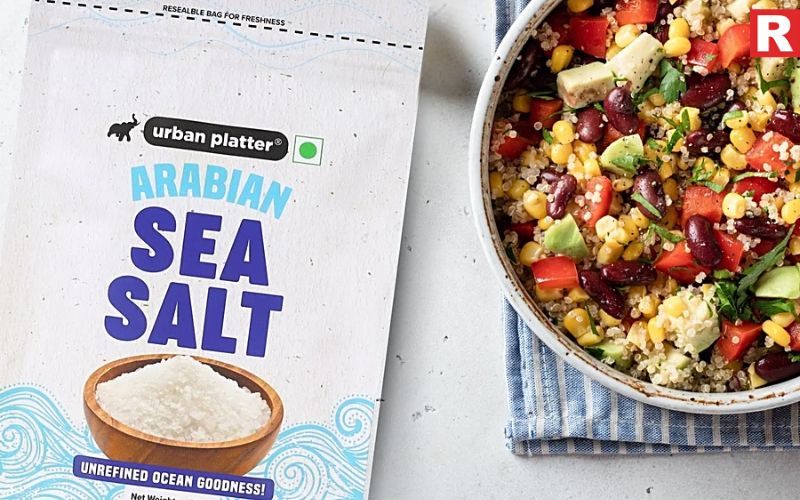
For people who love gourmet cooking or premium ingredients, Urban Platter is a top choice. The brand offers Himalayan pink salt, sea salt flakes, black lava salt, and other specialty salts. These salts are sourced carefully and packed with hygiene.
Urban Platter’s pink salt is known for its mineral richness. Its gourmet varieties add flavour and visual appeal to dishes. This brand is ideal for those who enjoy experimenting in the kitchen or want higher-quality, premium salt products.
Types of Salt You Can Buy in India
Different salts serve different needs. Here are the common types:
- Iodised Salt: Best for everyday cooking. Supports thyroid health.
- Himalayan Pink Salt: Rich in minerals. Gentle flavour. Used in daily cooking and seasoning.
- Rock Salt: Popular during fasting. Comes in larger crystals and mild taste.
- Black Salt: Used in chaats and drinks. Has a tangy, earthy flavour.
- Low-Sodium Salt: Good for people who want to reduce sodium intake.
Health Benefits Worth Knowing
Salt supports many body functions, but the right type matters. Here are key benefits:
- Iodine protects thyroid health
- Minerals like iron and magnesium support wellness
- Low-sodium salt helps manage blood pressure
- Unrefined salts offer trace minerals
- Rock salt supports digestion
Also check: Top Apple Cider Vinegar Brands in Indi
Top 5 Barbecue Sauces for Marinades or Dipping: Smoky, Sweet & Absolutely
Top Bread Brands in India That Define Freshness and Taste
About India’s Salt Industry
- India produces more than 28 million tonnes of salt every year.
- Gujarat alone contributes around three-fourths of the total.
- India exports salt to more than 50 countries.
- The country is one of the top global salt suppliers.
- Most brands source their salt from natural sea beds.
Final Thoughts
Salt may look simple, but it plays a big role in daily health and flavour. With many choices in the market, picking a trusted brand becomes important. A good brand offers purity, steady quality, and safe iodine levels. The seven brands listed above give clean and reliable options for every Indian kitchen. Some families prefer classic iodised salt for everyday meals. Some choose mineral-rich pink salt for added wellness. Others pick low-sodium salt to support heart health. Each option brings its own benefits. These brands focus on clean crystals, careful packing, and steady taste. They fit well into simple home cooking and modern diets. The right salt does more than season food. It supports the body, keeps meals balanced, and adds confidence to daily cooking.
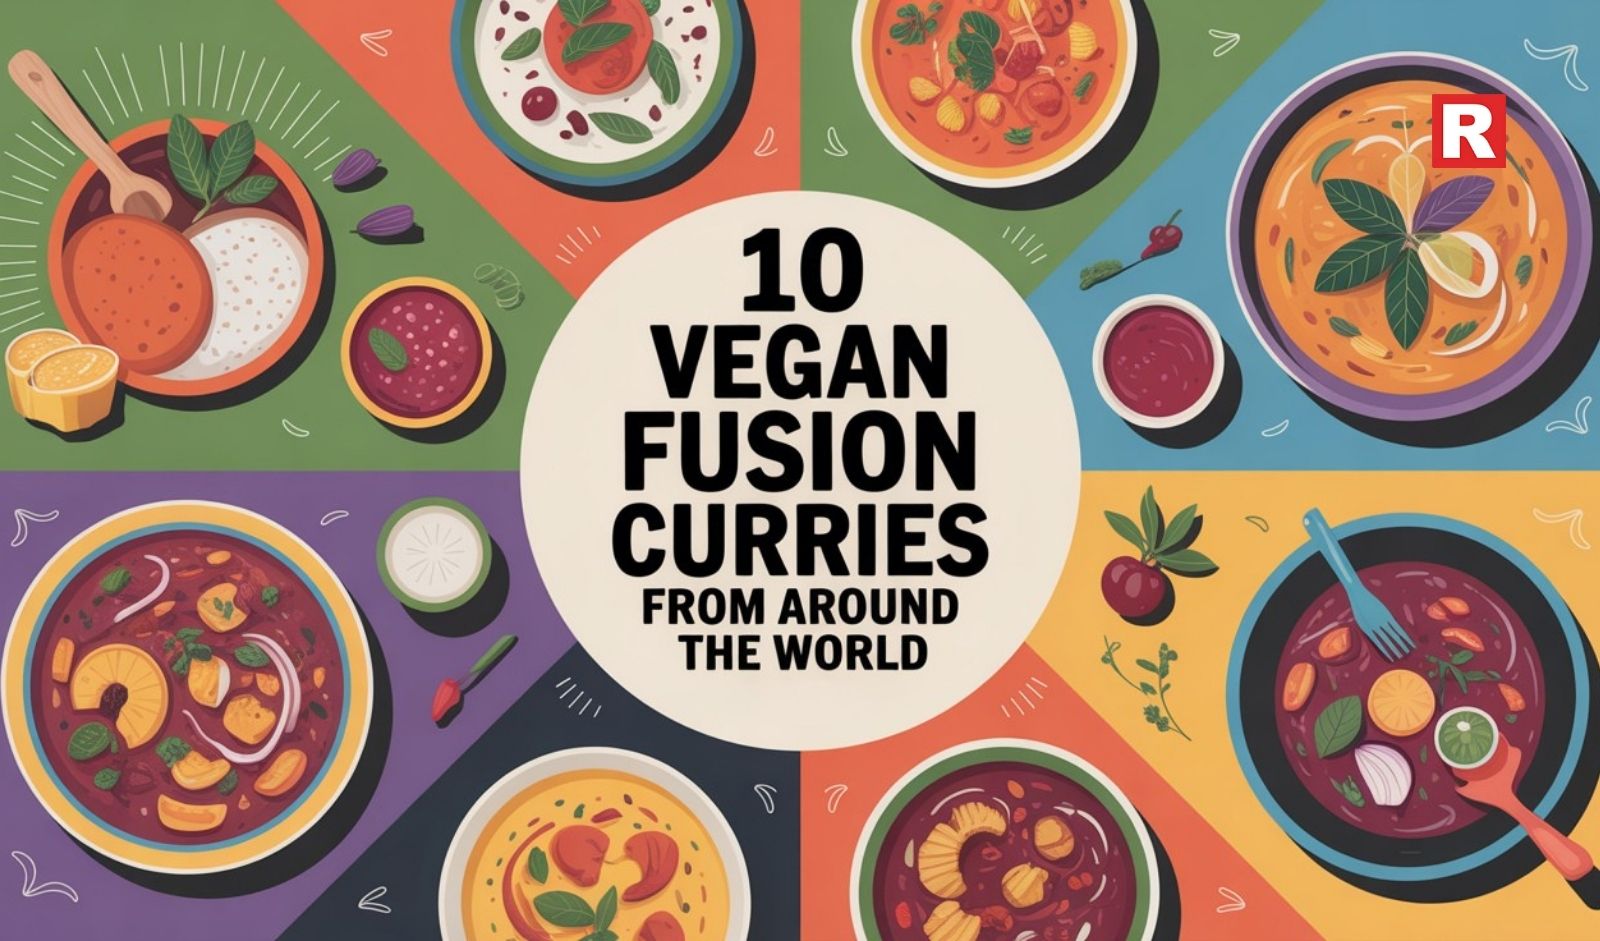
Vegan cooking is not just limited to salads and smoothies. It has become an exciting space where cultures, spices, and ingredients mix to create comforting, bold, and inventively gorgeous dishes. And fusion curries hold the top spot in plant-based cooking. They can embrace flavors from every culture in the world. And with plant-based cooking gaining popularity on every continent, fusion curries are transforming into a modern representation of global culinary fusion.
These fusion curries are not "just" recipes, but instead, stories of spices and stewing pots. They show how very simple vegetables, legumes, and plant-based proteins can be transformed into incredible meals through the fusion of cultures.
In this article, we’re sharing 10 vegan fusion curries that are truly surprising in their cultural pairings, ingredients, and techniques.
Read more: How to Cook Prawns Like a Pro: Restaurant-Style Curry Recipe
Why Vegan Curries Adapt So Well to Fusion
Vegan curries are naturally versatile, allowing them to perform admirably in the fusion cooking space. As plant-based ingredients such as coconut milk, cashews, lentils, tofu, or other hearty vegetables absorb flavors naturally and interact comfortably with different spices from around the world, there is no need for either dairy or meat to be added to the aromatics of garlic, ginger, herbs, and spices that form the backbone of food around the world. From the creamy to the spicy, tangy, or simply earthy, vegan curries have an easy evolution to fusion while remaining wholesome, comforting, and full of fun.
The 10 Vegan Fusion Curries
Below is the list of 10 vegan curries that have different origins, taste profiles but share the same idea of being vegan.
1. Thai Green Coconut Curry With an Indian Masala Twist
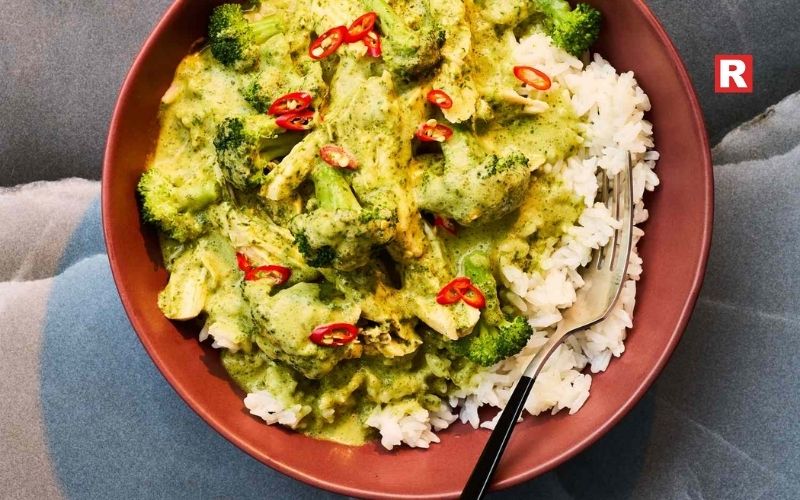
This colorful curry combines the bright flavor of Thai green curry made with lemongrass, basil, galangal, and coconut milk, with comforting Indian spices like cumin, coriander, and garam masala to create a creamy, herb-filled dish complete with veggies such as zucchini, green beans, and tofu. The flavor is bright, mildly spicy, aromatic, and has the layered complexity of both cuisines. Serve it over jasmine rice or with soft rotis for a perfect Indo-Thai fusion.
Know more: Top 10 Vegan Dishes in Asian Cuisine
2. Japanese Katsu Tofu Curry With Caribbean Spice Blend

This curry fuses the comforting richness of Japanese curry with bold Caribbean flavors such as allspice, scotch bonnet pepper, and thyme. Crispy tofu cutlets can be used for katsu, adding texture to the silky coconut sauce. The taste is sweet, spicy, savoury, deeply aromatic, and has notes of tropical warmth. Best served with sticky rice or coconut rice and fresh scallions or pickled ginger for contrast.
3. Moroccan Chickpea Curry With Mediterranean Herbs
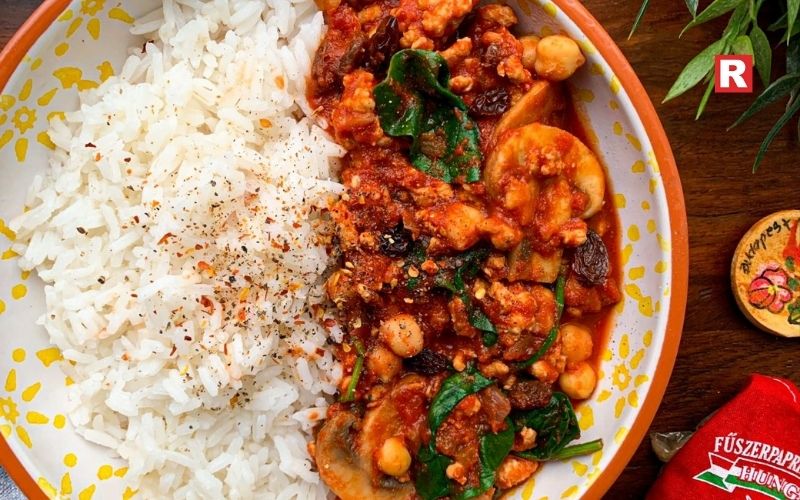
A fragrant mixture of Moroccan spices like cinnamon, cumin, paprika, and saffron is paired with fresh Mediterranean herbs such as rosemary, oregano, and parsley. And to make it hearty, chickpeas and tart tomatoes, and olives are added, creating a tangy and savoury dish. The combination creates a curry that is warm and uplifting, sweet and earthy. Serve with couscous, bulgur, or warm pita for a filling North African-Meets-Mediterranean dish.
4. Ethiopian Berbere Lentil Curry With Italian Tomato Base
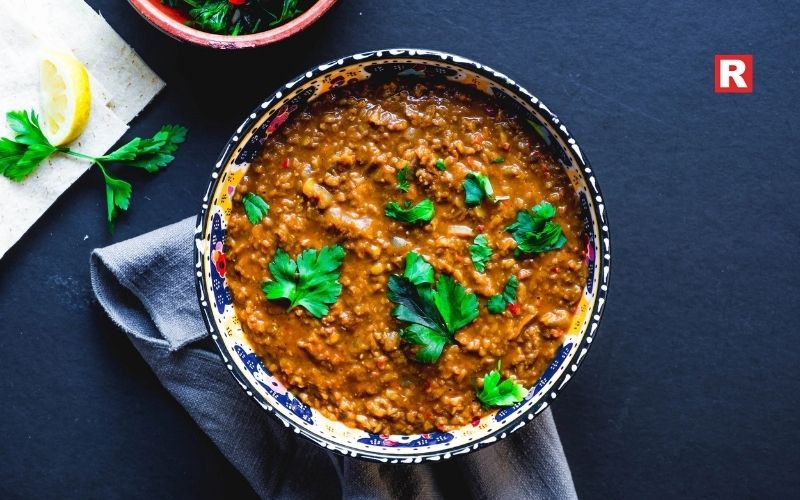
This recipe puts a spin on lentil curry, utilizing Ethiopian berbere spice, a spicy blend of chilli, fenugreek, and warming aromatics combined with a slow-cooked Italian-style tomato base. Instead of lentil curry's typical spiced lentils and seasoned tomato base, this curry is layered with a slow-cooked Italian-style tomato base. These spices yield spicy, smoky, slightly sweet, and incredibly cozy flavours. The red lentils turn into a creamy texture that goes well with polenta, crusty bread, or injera.
5. Mexican Mole-Inspired Vegetable Curry
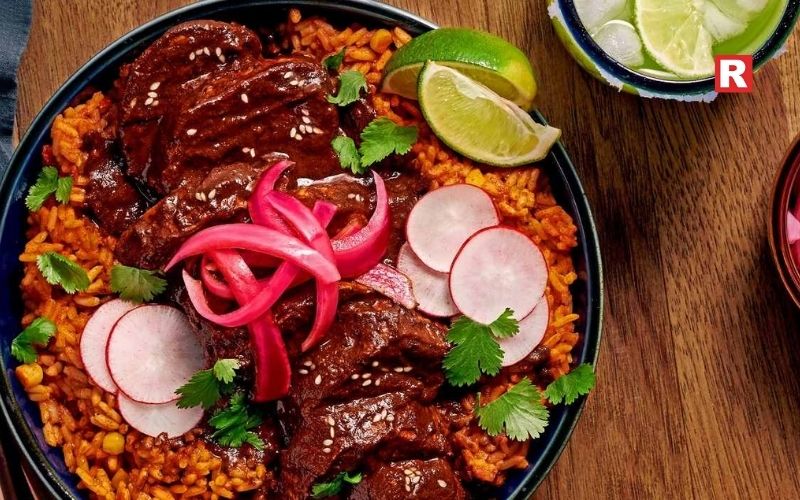
This dish blends Indian curry cooking techniques with the nutty and chocolate flavours associated with Mexican mole, drawing on chilies, nuts, cocoa, and cinnamon along with tomatoes to create a dark and rich sauce. We find that root vegetables and mushrooms soak up the earthy complexity beautifully. The taste is smoky, slightly sweet, and subtly bitter yet wonderfully satisfying. This dish works harmoniously with rice, tortillas, or quinoa to create a whole Latin-Indian fusion feast.
6. Korean Gochujang Coconut Curry
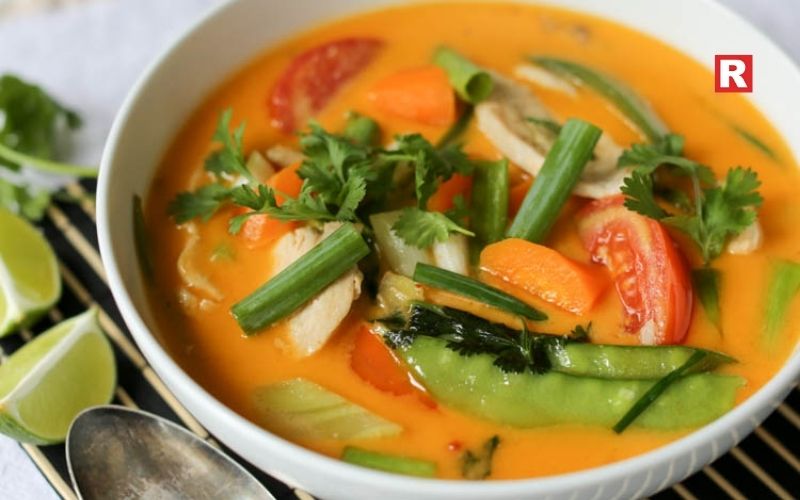
This modern twist on curry utilises Korea’s famous fermented paste, gochujang, for heat and tang, which is added into a smooth coconut milk base. Add texture with mushrooms, bok choy, tofu, or sweet potato. The flavour profile of this dish is spicy, umami-heavy, creamy, and slightly caramelised from the paste. Ladle it over on top of rice noodles or steamed rice sprinkled with sesame seeds and scallions. It is a comforting Asian fusion bowl.
7. Middle Eastern Tahini & Lemon Cauliflower Curry

A creamy tahini sauce is used in place of classic dairy as a substitute, while zesty lemon, cumin, and garlic add a Middle Eastern flair. Roasted cauliflower absorbs the flavours beautifully to make a curry that is nutty, tangy, earthy, and silky with a touch of smokiness. Pair it with couscous, flatbread, or herbed rice, and garnish with parsley or toasted pine nuts if you are feeling fancy.
What's new: Top 10 Vegan Street Foods in India Every Indian Loves
8. Jamaican Jerk Mushroom Curry

Drawing inspiration from the bold flavours of Jamaican jerk seasoning, this curry combines scotch bonnets, allspice, thyme, ginger, and cloves in a rich coconut-based sauce. The mushrooms provide a meaty texture to the dish, yielding hearty comfort without making it feel heavy. The result is a fiery, smoky, aromatic, and slightly sweet taste. It is best paired with coconut rice, plantains, or roti for a tempting Caribbean fusion meal.
9. Sri Lankan-Style Pineapple Curry With Southeast Asian Notes
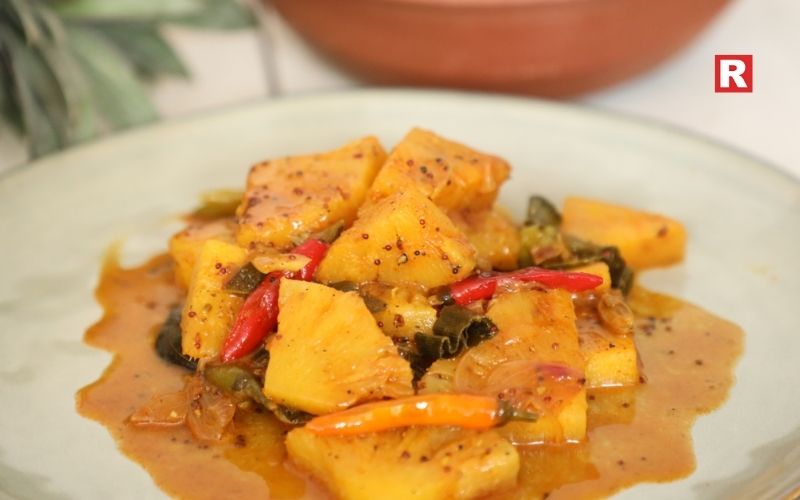
This tropical fusion curry combines Sri Lankan spices (mustard seeds, turmeric, curry leaves) with Southeast Asian components (kaffir lime leaves, lemongrass). The key ingredient is pineapple, which brings a sweet, tangy, and fragrant note to the dish. The bright and citrusy flavours pair well with the richness of coconut milk. Enjoy it with rice or rice noodles for a bright and unique curry experience.
10. French Ratatouille Curry With Indian Spices
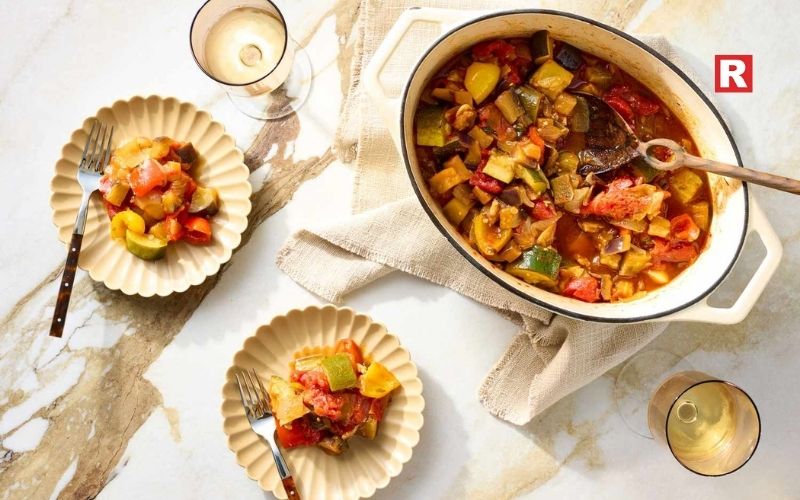
Traditional French ratatouille vegetables like zucchini, eggplant, tomatoes, and bell pepper are cooked down in a flavorful Indian curry base infused with cumin, ginger, turmeric, and garam masala. The mix produces a rustic yet fragrant dish that is hearty, bright, and aromatic in flavor. The texture is soft, stewy, and comforting, with layers of sweetness and heat. The ratatouille can be served with crusty bread, rice, or quinoa for a French-Indian twist.
What Makes Fusion Curries Special
Fusion curries stand out due to their invention. They take the opportunity to take flavors from a variety of cultures to create something new, while still being similar to flavors you may already know. Fusion curries borrow aspects of traditional curry, like slow simmering, layering spices, or creating aromatic bases, and combine them with globally inspired ingredients like gochujang, tahini, mole, or Mediterranean herbs to create complex, multi-dimensional flavours.
The difference between a traditional curry and a fusion curry is that, while traditional curries are associated with one region of origin, fusion curries are limitless and can be adapted for the seasons, dietary restrictions, and modern cooking styles. Fusion curries are compatible with balance, heat, creaminess, acidity, sweetness, and umami that work together in one thoughtful bowl of food. Fusion curries make daily plant-based cooking even more fun, approachable, and inspired by the world.
Check out: 20 Unique Fritter Recipes From Every Corner of the Globe
Best Exotic Fruits to Enjoy This Winter for Taste, Health and Glow
Ingredient Overview
- Coconut Milk around Cashew Cream: Great, dairy-free substitutes for richness.
- Plant Proteins: Add richness to dishes with tofu, chickpeas, lentils, and mushrooms.
- Spice Blends around the world: Gochujang, berbere, za’atar, jerk seasoning, curry pastes.
- Aromatics: The building blocks of flavor, with garlic, ginger, lemongrass, shallots, and onions.
- Acid/Sweeteners: Use lime, vinegar, tamarind, maple syrup, or pineapple juice for balance.
Tips to Make Fusion Curries at Home
- Create an equal balance of flavors: sweet, salty, spicy, sour, and creamy.
- Roasted or charred vegetables will provide a better flavor.
- Toast spices before adding any liquids to add depth of aroma.
- Use herbs and spices from different cultures, but don't mix the most strong and pungent ones.
- Use a vegetable platter instead of water for added flavor.
Learn more: 10 Classic Wine and Cheese Pairings That Taste Luxurious
A World of Flavour in Every Bowl
Fusion curries combine the satisfaction of traditional food and the excitement of new experiences. Each bowl symbolizes a collaboration of cultures, or a blend of ingredients, or an opportunity for creativity. This list of 10 vegan fusion curries shows that cooking with plants can be more than just healthy or ethical; it can also be creative and delicious. You will find something here that you enjoy, either because of the flavours of bold spices, creamy textures, or light tropical flavours. Now go ahead, explore, experiment, and enjoy international flavours from your kitchen.
Indian meals often end with something sweet. It is a habit seen in many Indian homes even today. Families enjoy a small dessert after lunch or dinner because it feels comforting and complete. Desserts are also a big part of Indian festivals, weddings, and celebrations. They are linked with tradition, memories, and family occasions. Every region in India has its own famous sweet. Bengal is known for soft chenna-based sweets. North India loves creamy milk desserts. South India brings rich ghee-based treats. The variety is endless, and each dessert has a story behind it. The ingredients also change from place to place. Some sweets are made with milk. Some use jaggery, nuts, or grains. Each one shows the food culture of that region.
These desserts are simple, warm, and full of flavour. They bring comfort after a meal and leave a happy feeling. People enjoy them at home, in restaurants, and during festivals. This list of desserts brings together some of the most loved sweets from different parts of the country. They are easy to enjoy, and they suit every season. Each one adds a sweet touch to the Indian dining experience.
Here’s the Top Famous Indian Desserts You Can Have After Your Meal
1. Gulab Jamun
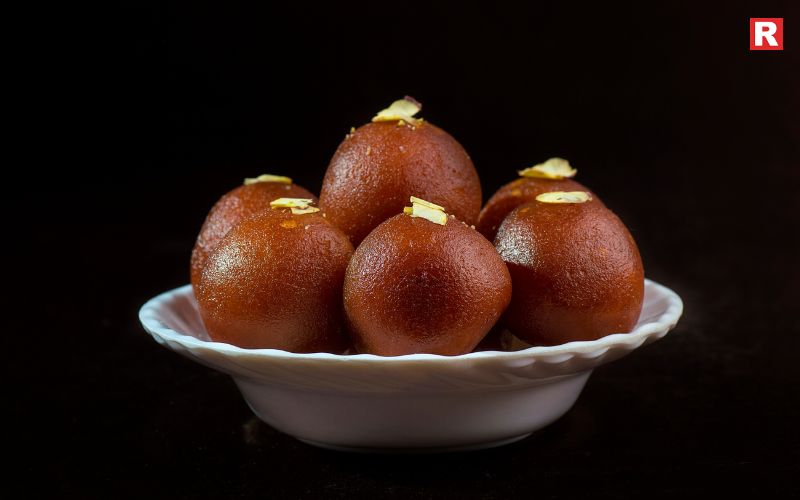
Gulab Jamun is one of the most famous Indian desserts. It is soft, warm, and melts in your mouth. It is made using khoya or milk solids, shaped into small balls, and fried till golden. These balls are soaked in sugar syrup flavoured with cardamom and rose water. Gulab Jamun is perfect after a heavy meal because it gives a rich and satisfying finish. Many Indian families serve it during festivals, weddings, and celebrations. You can enjoy it warm or at room temperature, depending on your preference.
2. Rasgulla

Rasgulla, or Rosogolla, comes from West Bengal and Odisha. It is soft, spongy, and very light. This dessert is made using fresh chenna rolled into balls and cooked in a thin sugar syrup. The syrup keeps it airy and moist. Rasgulla is a great choice after a meal because it tastes refreshing and not overly heavy. It is also one of the oldest sweets from eastern India and is loved across the country.
Read more: Pani Puri Has Different Names in Different Indian States—Know Them All
Top Famous Veg Street Foods in Kolkata That You Must Try Once in Your Life
3. Kheer
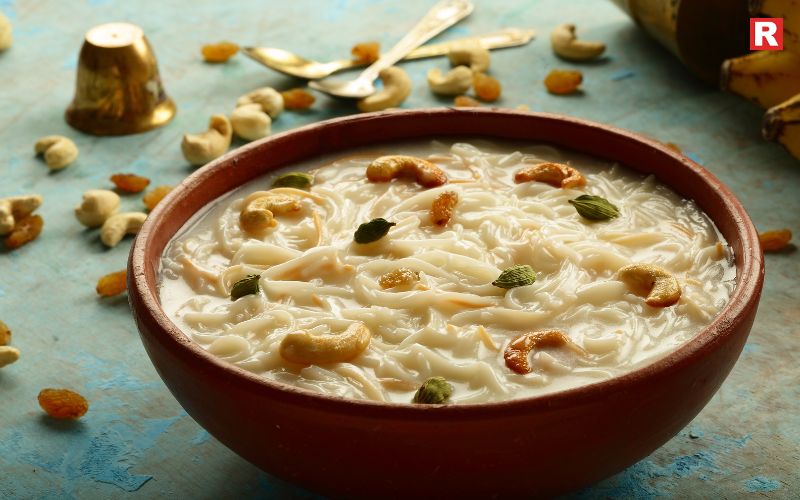
Kheer is one of India’s oldest traditional desserts. It is made with rice, milk, and sugar, and cooked slowly until the milk becomes thick and creamy. Many people add cardamom, saffron, and nuts for extra flavour. Every home in India has its own version of kheer. Some prefer it thick, while others like it lighter. It is especially popular during festivals and family gatherings. It is comforting, simple, and ideal to have after meals.
4. Jalebi
Jalebi is a popular dessert enjoyed across India. It is made using a fermented batter that is piped into hot oil in spiral shapes. The crispy spirals are then dipped in warm sugar syrup. Many people enjoy jalebi after dinner, especially when served hot. It has a crunchy exterior and a soft interior filled with syrup. It is also a common breakfast sweet in some states, but it works perfectly as an after-meal treat too.
5. Gajar Ka Halwa
Gajar Ka Halwa is a winter favourite and a comfort dessert in many Indian homes. It is made using grated carrots cooked in milk, ghee, and sugar. Dry fruits like almonds and cashews are added for a rich taste. The warm flavour and creamy texture make it a perfect dessert after meals. It is especially popular from November to February when fresh red carrots are available. Many people associate this dessert with family warmth and winter gatherings.
Know more: 7 Desi Alternatives to Oatmeal for Weight Loss
6. Rasmalai
Rasmalai is a rich yet light dessert from Bengal. It is made from soft chenna patties soaked in thickened milk called rabri. The milk is flavoured with saffron, cardamom, and nuts. Rasmalai is smooth and creamy, making it a perfect option after meals. It is not too heavy, and the milk base gives a soothing taste. Many Indian restaurants serve rasmalai as a part of their dessert menu because it is widely loved.
7. Kulfi

Kulfi is India’s traditional ice cream. It is denser and creamier than regular ice cream because the milk is cooked for a long time until it thickens. Popular flavours include kesar pista, malai, badam, and mango. Kulfi is refreshing and ideal after a heavy meal, especially during summer. Street vendors often serve it on sticks or in small clay pots called matkas. The slow-cooked milk gives it a rich and unique taste.
8. Phirni

Phirni is similar to kheer but creamier, smoother, and served chilled. It is made using ground rice instead of whole rice. This gives it a rich, pudding-like texture. Cardamom, saffron, and nuts enhance the flavour. Phirni is often served in small earthen bowls that give it a natural aroma. It is a great after-meal dessert because it cools the palate and has a smooth finish. It is especially popular during festivals like Eid.
Also check: 5 Foods to Avoid for Better Cholesterol
9. Mysore Pak
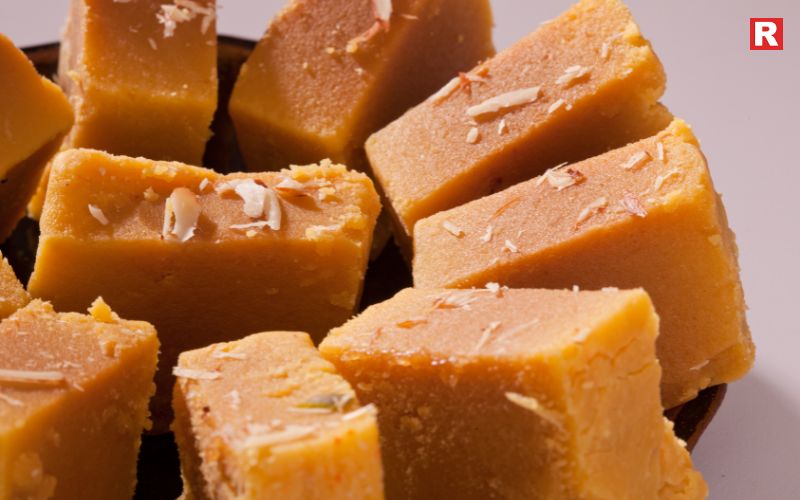
Mysore Pak is a signature dessert from Karnataka. It is made using besan, ghee, and sugar. The texture varies from soft and melt-in-mouth to firm and crumbly, depending on how it is prepared. This dessert has a rich taste because of the high amount of ghee used in it. It is enjoyed in many South Indian households after meals. Its distinct flavour and buttery texture make it a special treat.
10. Sandesh

Sandesh is another famous Bengali dessert made using fresh chenna. It is light, mildly sweet, and often flavoured with cardamom or saffron. Some versions are completely smooth, while others have a grainy texture. It is a good choice after meals because it is easy on the stomach. Sandesh comes in many shapes and flavours, and Bengalis often enjoy it with afternoon tea or after lunch.
11. Shrikhand
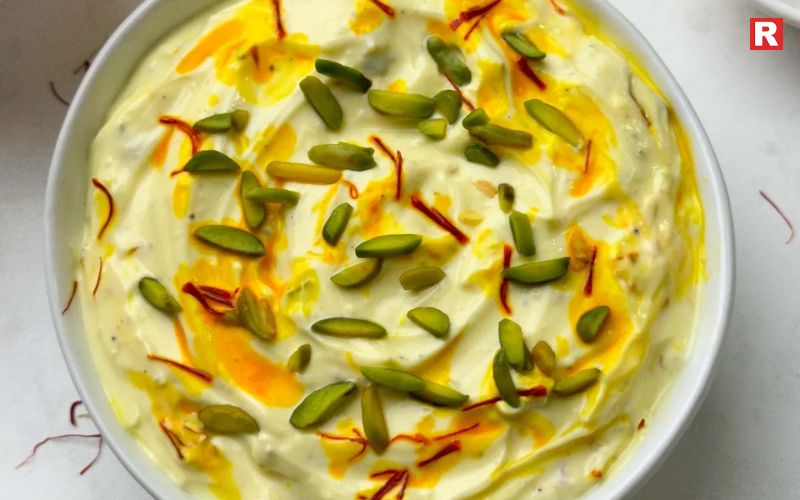
Shrikhand is a creamy dessert made using hung curd. It is flavoured with cardamom, saffron, nuts, or fruits. It is very popular in Maharashtra and Gujarat. This dessert is smooth, cold, and refreshing. Many people prefer shrikhand after meals because it is light yet flavourful. There are also fruit-based versions like mango shrikhand, which are popular during summer.
12. Rabri

Rabri is a classic North Indian dessert made by slowly thickening milk. It becomes creamy and rich, and is often served with jalebi, malpua, or even on its own. Saffron and cardamom add extra flavour. Rabri has a luxurious texture and is ideal after festive or special meals. Many people enjoy it chilled, but it can also be served warm.
Check more: Best Cookie Brands in India: A Complete Guide for Cookie Lovers
8 Famous Vegetarian Dishes of Uttar Pradesh and Their Timeless Legacy
5 Cities That Serve the Best Non-Vegetarian Street Food
Why Indian Desserts Are Perfect After Meals
Indian desserts are rooted in tradition. Many of them use ingredients like milk, jaggery, ghee, saffron, and nuts that support digestion and add natural sweetness. Desserts like kheer, rasmalai, and phirni cool the stomach. Others like gulab jamun and jalebi offer a warm, rich finish.
Each dessert listed here has its own unique flavour, history, and texture. Choosing the right dessert depends on whether you want something warm, cold, light, or rich.
For Sweet Treat!
India’s dessert culture is rich and full of variety. Every part of the country has its own special sweet, made with simple ingredients and strong traditions. Some desserts are syrupy and warm. Some are creamy and cool. Each one brings a different taste and mood to the table. These Indian desserts are perfect to enjoy after a meal. They offer a soft, sweet finish and make the meal feel complete. Many of these sweets have been made in Indian homes for generations. They carry the flavours of family kitchens, festivals, and old recipes. People enjoy these desserts not only during celebrations but also on regular days. A small bowl of kheer or a warm gulab jamun can add comfort to any meal. Each dessert has its own charm and place in Indian food culture. For anyone who loves exploring sweets, India offers endless choices across regions and seasons.

Fritters are one of the world’s favorite comfort foods. They are small, crispy, golden bites that come in dozens of shapes, flavors, and traditions from different cultures across the world. Nearly every culture makes fritters of some form. They often differ from one another due to regional ingredients, climate, and cooking methods.
Fritters can be pan-fried, shallow-fried, or deep-fried, and who doesn't like eating deep-fried foods, especially when they are crispy and delicious. Some fritters can even be steamed first, and then fried. No matter what cooking method you use, a fritter is a delicious representation of the place it originated from.
In this article, we have compiled a list of 20 delicious and unique fritters from around the world, featuring diverse textures, flavors, and cultural traditions.
Read more: 10 Classic Wine and Cheese Pairings That Taste Luxurious
20 Unique Fritters From Around the World
Below are 20 fritters, each featuring their origin country, ingredients, taste, uniqueness, and serving suggestions.
1. Japan: Kakiage (Mixed Vegetable Tempura)
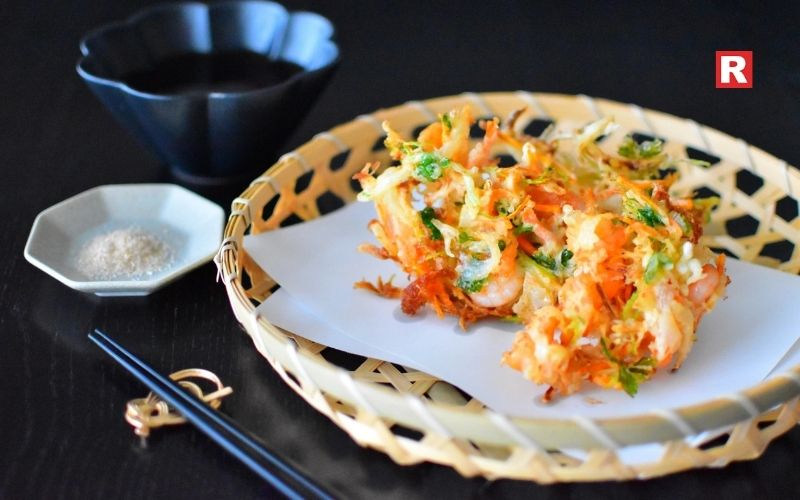
Kakiage is a crispy and light fritter made in Japan that uses thinly sliced vegetables like onion, carrot, burdock, and scallions, mixed in an airy tempura batter. When fried, kakiage develops a pale golden crust and clean flavours that taste like the freshness of vegetables. Seasoned subtly, kakiage is usually served with a soy-based dipping sauce known as tentsuyu or on top of warm soba noodles, giving a flavor profile that is simple and refined.
2. India: Pakora (Vegetable Fritters)

Pakoras are fried and spiced fritters in India made by coating vegetables, herbs, and paneer in a seasoned chickpea flour batter with spices like cumin, ajwain, turmeric, chili, and sometimes other additional spices. Fried to a crisp golden finish, pakoras have bold flavors, with a tender bite. Pakoras are especially enjoyed in the winter and monsoon seasons. They are comforting, versatile, and deeply satisfying. They are served with mint chutney, tamarind sauce, or masala chai.
Know more: Top Vegetarian Foods You Can Include in Your Next Picnic
3. United States: Corn Fritters

Crispy corn fritters are a Southern American staple made by adding whole corn (canned or fresh) into a thick batter of flour, egg, and a little bit of sugar. Fried until golden and puffed into golden discs, corn fritters provide a delicious sweet & savory combo of flavor and a burst of juicy corn in every bite. Often served with honey, maple syrup, or ranch dressing on the side, they make a great breakfast or brunch option.
4. Italy: Frittelle di Mele (Apple Fritters)

Frittelle di mele in Italy are sweet apple fritters made by dipping apple rings in a light batter and frying them to perfection. With a caramelized, soft center and a crispy coating, frittelle di mele are dusted with powdered sugar or cinnamon before serving. Their simple and delicious flavor comes from the apples themselves. Traditionally used as a dessert or on festive occasions, frittelle di mele are often accompanied by vanilla gelato or drizzled with warm honey.
5. Nigeria: Akara (Black-Eyed Pea Fritters)

Akara is a widely consumed street food in Nigeria. It consists of peeled black-eyed peas blended with onion, pepper, and salt, then deep-fried to make a fluffy, golden brown fritter. The fritters have a crunchy outer shell, light airy texture, and mild savory flavor. Akara also has cultural significance, being an everyday breakfast food and ceremonial food. Akara is usually enjoyed with pap (a warm corn-based porridge) or tucked between bread slices.
6. Jamaica: Saltfish Fritters

Jamaican saltfish fritters are savory, fried bites made with flaked salted cod mixed with flour, scallions, thyme, and Scotch bonnet pepper. The fritters have a spicy, strong flavor that is deeply layered and tasty. Their uniqueness comes from the island’s traditional use of preserved fish to make a tasty, easy-to-eat, and comforting bite. Saltfish fritters are usually served with callaloo, plantains, or on their own as a snack with hot sauce.
7. Mexico: Calabacitas Fritas (Zucchini Fritters)
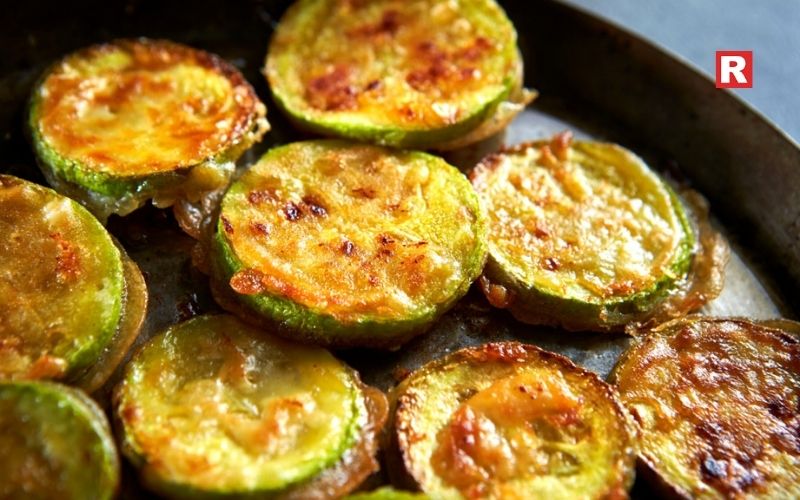
Calabacitas fritas are zucchini fritters from Mexico made by mixing grated zucchini with flour, egg, cilantro, and mild spices. Soft on the inside with a crisp edge, calabacitas fritas highlight the freshness of zucchini, with just a little herb flavor that doesn’t give off an overwhelming taste. The appeal of calabacitas fritas comes from their lightness and versatility. They are excellent with something as simple as Mexican crema or topped with salsa verde, or even wrapped in warm tortillas.
8. Turkey: Mucver (Zucchini & Herb Fritters)

Turkish mucver is a fragrant fritter made with grated zucchini mixed with dill, parsley, mint, and feta cheese to create an herb-flavored savory bite. They are pan-fried zucchini fritters, rather than deep-fried, producing an interior that is soft and moist, and a lightly crisp exterior. Mucver is typically loved for its Mediterranean flavors. It is often served with a garlic yogurt sauce or served as part of a mezze presentation.
9. France: Beignets

Beignets are fluffy French fritters. Basically, they are small pieces of dough fried in deep oil, then covered in powdered sugar. The recipe is simple, yet creates a mildly sweet, pillowyy and melt-in-your-mouth texture. What makes the beignet truly unique is its sophistication and cultural traditions, especially in New Orleans. Beignets are often paired with coffee, making them a go-to breakfast or dessert option.
10. South Africa – Pumpkin Fritters

South African pumpkin fritters are sweet, fluffy bites made by mixing mashed pumpkin with flour, egg, sugar, and spices like cinnamon and nutmeg. Fried into soft-center, golden colored fritters, they taste like warm autumn in every bite. These fritters are popular at family gatherings, often paired with caramel sauce or cinnamon sugar.
11. Indonesia: Bakwan Jagung (Corn Fritters)
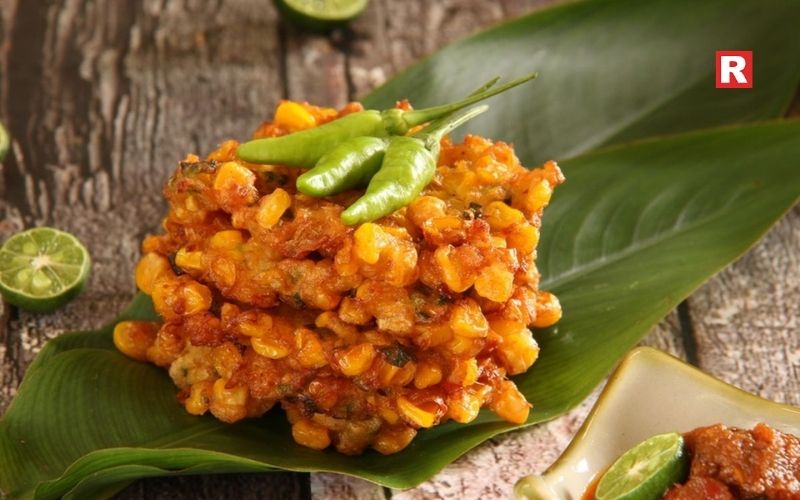
Bakwan jagung is a savory corn fritter from Indonesia made with whole corn kernels, flour, garlic, scallions, and coriander. Crispy on the edges and chewy in the middle, the fritter has mild sweetness and aromatic complexity. It has a particular charm in its unrefined, street-food nature, and it is best served with chili sauce or sambal.
12. Greece: Tomatokeftedes (Tomato Fritters)

Tomatokeftedes originates from Santorini, made with ripe tomatoes mixed with herbs, onion, and flour to create aromatic fritters. They have a crispy outside and a juicy, intensely flavored inside that represents the sun of the Mediterranean region. They are unique in flavor, with their distinct taste of tomato and the use of local produce. They are served with tzatziki or lemon wedges.
What's new: Top 10 Irish Whiskey Brands in India
13. Brazil: Bolinho de Bacalhau (Cod Fritters)

The Bolinho de bacalhau, which has Portuguese roots, is a salted cod fritter made of mashed potatoes, garlic, parsley, and egg. The rounded, small oval fritters are fried into crispy golden snacks with a creamy and flavorful filling. They are special to the Brazilian cuisine due to Brazilians' love of bacalhau and the dish’s deep cultural roots. It is served with lime wedges and cold beer.
14. Philippines: Maruya (Banana Fritters)

The maruya is a Filipino banana fritter made by flattening ripe saba bananas, dipping them in batter, and then frying them until golden brown. Maruya has a lightly sweet flavor, a scent of caramel, and crispness around the edges, making it a nostalgic merienda (snack) for many Filipinos. The maruya is known for the bold banana flavor and crispy, chewy texture. It is commonly dusted with sugar and served warm.
15. Bangladesh: Beguni (Eggplant Fritters)
Beguni is a very popular fritter in Bangladesh, made of thinly sliced eggplant that is dusted with turmeric, salt, and chili before being dipped into a gram flour batter and then deep-fried in oil. The exterior of the fritter is golden and fluffy, while the eggplant inside has a mild, smoky sweetness. Beguni is best enjoyed during iftar, as it is a delicious comfort snack, sometimes served with puffed rice or green chili chutney.
16. Spain: Buñuelos de Bacalao (Cod Fritters)
Spanish buñuelos de bacalao are fluffy, savory fritters made from whipped salt cod mixed with choux-like batter, parsley, and garlic. Once fried, they puff into airy, crispy spheres, filled with intense seafood flavor. Buñuelos de bacalao are served throughout Spanish tapas culture, paired with either aioli or lemon wedges.
17. Thailand: Tod Mun Pla (Thai Fish Cakes)

Tod mun pla are aromatic fish fritters from Thailand made from minced fish, red curry paste, kaffir lime leaves, and long beans. The result is a bouncy, spicy, and aromatic fritter that really pops in the mouth with flavor. The best part is the unmistakable Thai herbs in the fritters. They are served with cucumber relish or sweet chili sauce.
18. Peru: Torrejas de Acelga (Chard Fritters)
Peruvian torrejas de acelga mix chard leaves with eggs, flour, cheese, and herbs to create a hearty fritter. Soft and savory, these fritters are a perfectly rounded, nutritious dish inspired by the Andean region and are typically eaten with rice, salsa criolla, or lime. Torrejas de acelga provide a wholesome, vegetarian-friendly meal for the everyday home cook.
19. Australia: Pumpkin & Herb Fritters
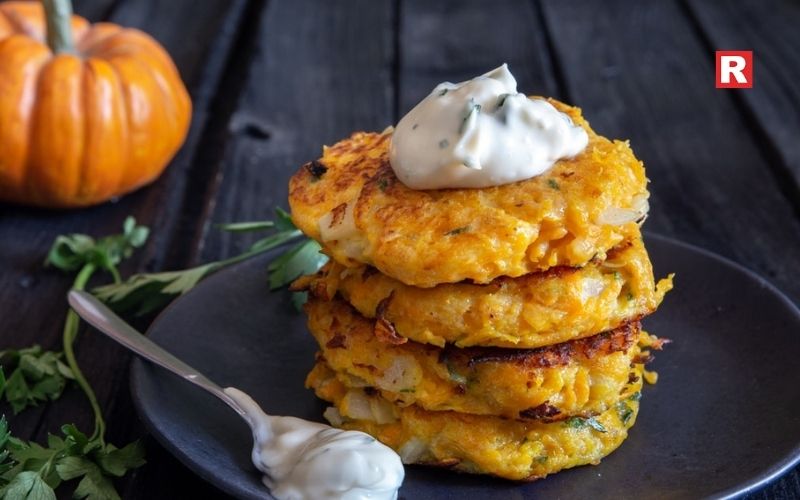
These Australian fritters are made of grated pumpkin mixed with flour, egg, and a combination of herbs such as rosemary and thyme, producing a light, sweet-savory blend. The outer layer is slightly crisp, while the inner is soft and showcases the natural sweetness of pumpkin, with simplicity and robustness in flavor. Serve it warm with sour cream or chili jam.
20. Caribbean: Conch Fritters
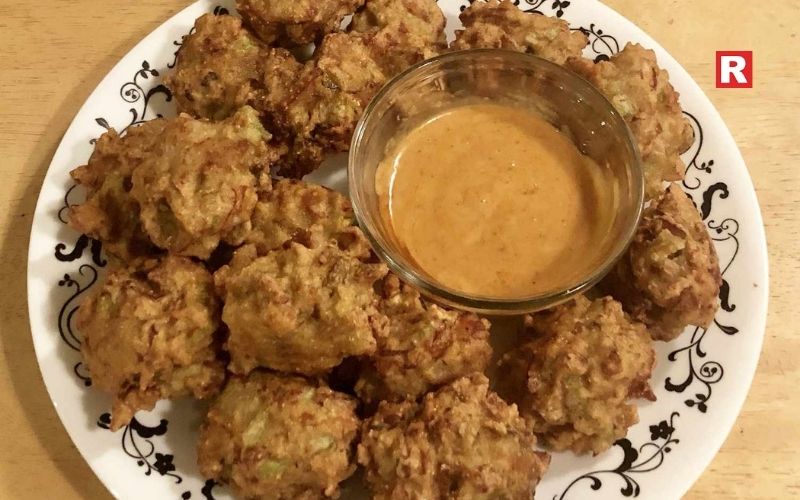
The Caribbean conch fritters are made with ingredients like chopped conch meat combined with peppers, onions, herbs, and seasoned batter. The batter is fried, producing a golden brown round fritter that has a chewy and flavorful interior with a beautiful crisp outside. The uniqueness comes from the tender oceanic flavor of the conch. They pair well with a good dipping sauce or lime mayo.
Check out: 5 Famous Soft Drinks in India, and Are They Safe for You?
12 Foods Like Avocado That Are Creamy, Healthy, and Tasty
Common Ingredients Used In Fritters Around the World
- Chickpea flour in India and Bangladesh
- Rice flour in Japan and Southeast Asia
- Hearty cod in Spain and Portugal
- Tropical foods like banana and plantain in the Philippines and the Caribbean
- Mediterranean herbs in Greece and Turkey
- Sweet corn in the Americas
Fritters are related to local agriculture and cooking traditions, and they are also a great example of global flavors.
Healthier Ways to Enjoy Fritters
- Air-fry the vegetable fritters
- Bake them instead of deep-frying.
- Use whole-grain flour as an alternative.
- Use less batter to make a lighter version.
- Add leafy greens for extra nutrition.
Learn more: 12 Best Winter Season Fruits Every Indian Should Try
A Crispy World on Your Plate
Fritters might look simple, but their global presence represents simple food's place as a meaningful expression of culture. Each region uses simple ingredients like vegetables, seafood, legumes, or grains, and transforms them into a satisfying and crispy snack. While trying all of these 20 different fritters, you're not simply cooking, you're tasting another culture's history and creativity. Whether you like crunchy snacks, hearty meals, or sweet treats, there is a fritter for every taste and occasion. So let's get cooking, explore some new flavours, and bring some of these international fritters into your home kitchen.

Cookies have always been a favourite snack in Indian homes. They are simple, quick, and comforting. Families enjoy them with tea, coffee, milk, or even as a small treat during the day. Over the years, the cookie market in India has grown at a fast pace. With busy lifestyles and changing tastes, people now look for better flavours and better ingredients.Today, Indian shelves are full of choices. There are classic butter cookies that remind people of home. There are rich chocolate cookies for those who love indulgent snacks. There are also healthier options made with oats, nuts, and jaggery. Many brands focus on clean labels and simple ingredients, which attracts both young adults and families.
This wide variety has made cookies more than just tea-time snacks. They have become everyday comfort foods that people can enjoy anytime. The growing interest in flavour, texture, and quality has also encouraged brands to experiment and create new styles of cookies. This guide explores the best cookie brands available in India. The information is clear, authentic, and written for readers who enjoy easy snacking and want to explore new favourites.
The Cookie Market in India: What Makes It Strong
The Indian cookie market is expanding due to changing lifestyles, busy routines, and growing demand for premium snacks. People want better flavours, cleaner labels, and rich ingredients. Earlier, cookies were basic and simple. Today, there are dozens of varieties that match every mood and taste.
Premium, imported, and healthy cookies are also gaining attention. Consumers, especially young adults and families, now prefer products made with nuts, butter, oats, and chocolate. This shift has pushed brands to innovate and offer better, more exciting cookies.
Explore Top 10 Best Cookie Brands in India
1. Britannia Good Day

Britannia Good Day is one of the most trusted cookie brands in India. It has been a part of Indian homes for many years. The cookies have a warm, buttery smell and a crisp bite. Their simple flavours make them ideal for daily snacking. People enjoy them with tea, coffee, or even on their own. The brand offers many variants. The most popular ones are Butter, Cashew, Pista, and Chocochip. Each variant has its own taste and texture. Good Day remains a favourite for those who like light, comforting cookies that feel familiar and satisfying.
Why It Stands Out:
- Light and tasty
- Great for tea time
- Easily available everywhere
- Pocket-friendly
2. Unibic
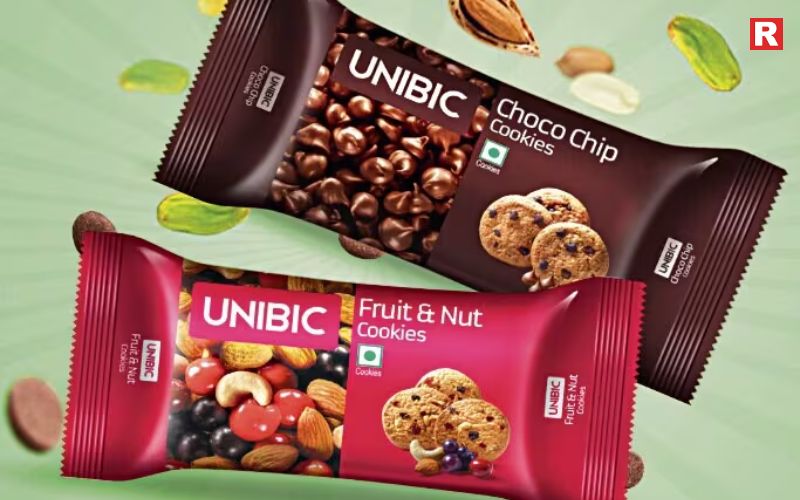
Unibic is known for its soft and chewy cookies. The brand offers a texture that feels close to fresh bakery cookies. Each cookie is dense and rich, which makes it stand out from regular crunchy options. Their choco-chip cookies are a top choice for anyone who enjoys a strong chocolate taste. The cookies are loaded with chips, which gives a full and satisfying bite. Unibic also offers many other flavours, but the chocolate range remains the most popular. People who enjoy indulgent and heavy cookies often prefer Unibic for its quality and consistent taste.
Why It Stands Out:
- Soft, chewy texture
- Loaded with ingredients
- Many flavours like oatmeal, butter, fruit & nut
Read more: 6 Benefits of Drinking Black Coffee
7 Desi Alternatives to Oatmeal for Weight Loss
3. Parle Milano

Parle Milano is a premium cookie range that appeals to those who enjoy richer flavours. The cookies have a smooth texture and a deep chocolate taste. They feel more indulgent than regular biscuits and are often chosen as a special treat. Milano Dark Choco is the most popular variant. It offers a strong cocoa flavour that many chocolate lovers prefer. The brand focuses on quality ingredients and a refined taste. Because of this, Milano has become a top choice for people who want a premium snacking experience without going for imported options.
Why It Stands Out:
- Premium taste
- Smooth texture
- High-quality chocolate
4. Sunfeast Dark Fantasy

Dark Fantasy is known for its soft, molten chocolate centre. The cookie has a crisp outer layer and a gooey filling inside, which makes it feel close to a small dessert. Many people choose it when they want something rich and satisfying. The strong cocoa flavour adds to the experience and makes each bite feel indulgent. These cookies are often enjoyed after meals or during late-night cravings. Dark Fantasy has built a loyal fan base because of its unique texture and taste. It remains a top pick for those who prefer soft, chocolate-filled cookies instead of regular crunchy ones.
Why It Stands Out:
- Gooey centre
- Rich cocoa taste
- Feels like a mini dessert
5. Dukes

Dukes is a brand known for simple and affordable cookies. It offers a wide range of flavours and styles that appeal to many households. The cookies are light, crisp, and easy to enjoy at any time of the day. Budget shoppers often prefer Dukes because it delivers good taste at a lower price. The brand is also easy to find in most stores across India. Whether someone wants a basic butter cookie or a chocolate option, Dukes usually has a variant to match that need. Its mix of value and flavour has helped it maintain a steady place in the market.
Why It Stands Out:
- Value for money
- Good quality
- Large variety
Know more: Best Newly Launched Ice Cream Flavour to Try in 2025
6. Open Secret

Open Secret is a well-known choice for people who want healthier cookies. The brand focuses on better ingredients and simple recipes. Their nutty cookies are made with jaggery, oats, and a mix of nuts, which gives them a rich and crunchy feel. Many parents prefer these cookies because they offer a cleaner option for children. Kids also enjoy the sweet and nutty taste. Open Secret has built a strong image by offering snacks that feel both tasty and slightly better than regular cookies. It is a good option for families who want something flavourful without too many artificial additives.
Why It Stands Out:
- Cleaner ingredients
- Nut-loaded cookies
- Lower sugar options
7. The Whole Truth
The Whole Truth is a brand that focuses on simple and honest ingredients. Its cookies are made without artificial flavours, colours, or preservatives. Each recipe highlights whole foods, which makes the cookies feel more natural compared to regular packaged options. People who prefer clean-label products often choose this brand because they can clearly see what goes into each cookie. The flavours are straightforward and rely on real ingredients rather than additives. The Whole Truth has built its reputation on transparency and quality. It is a popular choice for anyone who wants a pure and wholesome cookie without unnecessary extras.
Why It Stands Out:
- Transparent labels
- No additives
- Great for fitness-focused consumers
8. Britannia Bourbon

Britannia Bourbon is a classic treat that many people in India grew up eating. The cookie has two crunchy chocolate biscuits with a smooth layer of chocolate cream in the middle. This simple mix has made it a lasting favourite for decades. Children enjoy the sweet taste, but adults often reach for it as well because it reminds them of their school days. The flavour is rich but not too heavy, which makes it easy to enjoy at any time. Britannia Bourbon remains a top choice for families who want a familiar and comforting chocolate cookie that never goes out of style.
Why It Stands Out:
- Sweet and chocolatey
- Affordable
- Fun treat for all ages
9. Sunfeast Mom’s Magic
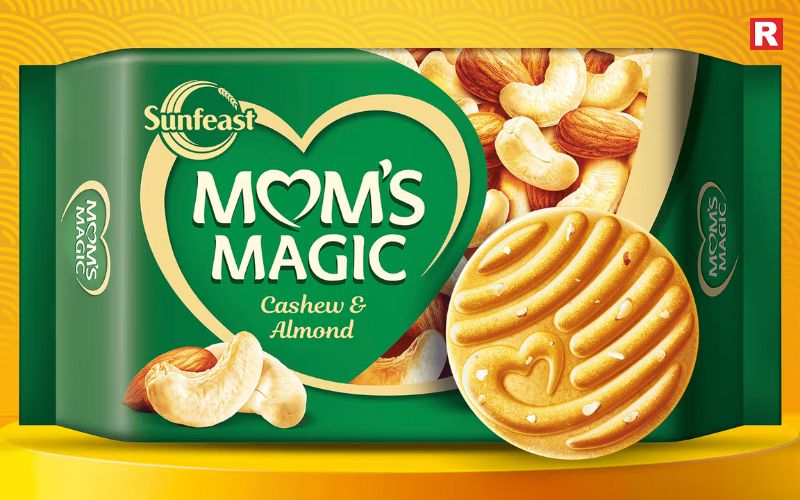
Mom’s Magic is known for its warm and homely flavours. The cookies have a soft and gentle taste that makes them easy to enjoy every day. Many people choose them for tea time or as a light snack during work. The most popular variants are Cashew and Butter, both offering a simple and comforting flavour. These cookies are also affordable and widely available, which adds to their appeal. Mom’s Magic has built a strong following by offering cookies that feel familiar and soothing. It remains a common choice for families who prefer mild, sweet, and home-style snacks.
Why It Stands Out:
- Homestyle taste
- Affordable
- Soft and flavourful
10. Walkers

Walkers is an imported premium cookie brand that is known for its rich taste and pure ingredients. The cookies are made with real butter, which gives them a soft, crumbly texture and a deep, natural flavour. Many people buy Walkers during festivals, holidays, or special occasions because it feels more luxurious than regular cookies. The brand has a long history and a strong reputation for quality. Its simple recipe and smooth texture appeal to those who enjoy classic butter cookies. Walkers continues to be a preferred choice for gifting and for moments when people want something truly indulgent and refined.
Why It Stands Out:
- Rich and premium
- Made with pure butter
- Perfect for gifting
Also check: 5 Famous Soft Drinks in India, and Are They Safe for You?
Top Soup Brands in India That Make Comfort Food Quick, Warm, and Delicious
Types of Cookies You Can Find in India
India has a wide range of cookie types. Some of the most common ones include:
- Chocolate chip cookies: Loaded with chocolate chips.
- Butter cookies: Light, simple, and rich.
- Sandwich cookies: Cream-filled and sweet.
- Healthy cookies: Made with oats, nuts, or jaggery.
- Indian-style cookies: Jeera biscuits, atta biscuits, and coconut cookies.
Each style has its own flavour and experience.
Sweet Treat
India’s cookie market is rich, varied, and growing at a steady pace. Every brand offers something different, which gives consumers a wide range of choices. Some brands focus on chocolate-filled cookies, while others highlight nuts, butter, or healthier ingredients. This variety makes it easy for people with different tastes to find something they enjoy. The rise of clean-label and premium cookies has also added more interest to the market. Families, young adults, and children now look for better flavours and better quality. With so many options in stores, a person can pick a new cookie every week and still come across something fresh. This constant flow of new flavours, textures, and styles keeps the market exciting. It also shows how much Indians enjoy snacking and exploring new tastes. The market continues to grow because there is a cookie for every mood, every occasion, and every type of snacker.

Winter is a great time to enjoy fruits that are fresh, flavourful, and full of nutrients. India already has many winter favourites, but exotic fruits bring a new taste and higher levels of vitamins. These fruits also support immunity, which is important during the cold months when the body becomes more sensitive to infections. Many exotic fruits also help keep the skin soft and healthy, which is useful because winter air often causes dryness. People who enjoy trying new foods find winter the perfect season to add these fruits to their daily diet. The flavours are bright, the colours are rich, and the health benefits are strong. Exotic fruits give natural energy, help digestion, and make meals feel more exciting. They also offer variety, which is helpful when regular winter fruits start to feel repetitive.
Across Indian cities, these fruits are now easy to find in supermarkets and online stores. This makes it simple for families to add them to breakfast bowls, salads, or evening snacks. With their strong nutrient profile and refreshing taste, exotic fruits can lift both health and mood during the colder days. This guide highlights the best ones to enjoy this winter season.
Discover Best Exotic Fruits to Enjoy This Winter
1. Dragon Fruit
Dragon fruit has its roots in Southeast Asia and Central America. It stands out because of its bright colour and striking look. Its taste is mild, sweet, and very refreshing. Many people enjoy it as a morning fruit or as part of a light snack. It is rich in fibre, Vitamin C, and natural antioxidants. These nutrients help strengthen immunity, which is useful in colder months. They also support smooth digestion and keep the stomach comfortable. The fruit is known to improve skin health as well, as its vitamins help the skin stay clear and hydrated. Dragon fruit fits well into salads, smoothie bowls, or simple cut-fruit plates, making it an easy and healthy choice for everyday eating.
- Why it is good in winter: It helps improve digestion, which often slows down in the cold. Its hydrating nature also helps with dry winter skin. You can eat it as a snack or add it to smoothies and breakfast bowls.
2. Passion Fruit

Passion fruit is known for its bold aroma and sharp, tangy taste. It comes from South America, but farmers in India now grow it in many regions with cooler weather. The fruit has a soft pulp filled with seeds and a bright flavour that stands out in any dish. It is rich in Vitamin A, Vitamin C, and fibre, which makes it a strong choice for daily nutrition. These nutrients help the body stay active and support good immunity. Passion fruit also helps digestion because of its natural fibre. Many people use it in juices, desserts, or salad dressings. Its fresh taste and high nutrient value make it a popular pick for those who enjoy unique and refreshing fruits.
Why it is good in winter: It helps boost immunity and supports good skin health. The juice helps soothe the throat, which can be helpful when you get winter irritation. You can add it to juices, desserts, or salads.
Read more: Top Soup Brands in India That Make Comfort Food Quick, Warm, and Delicious
5 Foods to Avoid for Better Cholesterol
3. Kiwi
Kiwi is one of the most popular exotic fruits in India during winter. It reaches the country mainly from New Zealand, Italy, and Iran, where it grows in cool climates. The fruit has a soft green flesh with tiny seeds and a bright, fresh taste. It is high in Vitamin C, Vitamin K, and natural antioxidants. These nutrients help the body fight winter infections and support strong immunity. Kiwi also helps maintain healthy skin and improves digestion. Many people enjoy it as a morning fruit or add it to salads and smoothies. Its sharp flavour and rich nutrition make it a simple and effective addition to any winter diet.
Why it is good in winter: Kiwi helps fight winter infections because of its immunity-boosting nutrients. It also supports good digestion and helps maintain clear skin. I often have a kiwi in the morning during winter because it gives a fresh, sharp taste and lifts my energy.
4. Avocado
Avocado is a popular choice among people who focus on clean and healthy eating. It comes from Mexico and Central America, where the fruit grows well in warm climates. Avocado has a smooth texture and a mild, buttery taste that works well with many dishes. It is rich in healthy fats, fibre, and several important vitamins. These nutrients help the body stay full for longer and support steady energy levels. The healthy fats also keep the skin soft and hydrated, which is helpful during winter. Avocado fits easily into salads, sandwiches, and breakfast bowls. Its simple taste and high nutrition make it a reliable fruit for anyone looking to add more wholesome foods to their daily meals.
- Why it is good in winter: Avocado gives good energy and keeps you full for long. This is helpful when your appetite changes in winter. It also supports skin health because of its natural healthy fats. You can add it to toast, salads, or smoothies.
Know more: What Happens When You Consume 1 Avocado Daily?
5. Blueberries
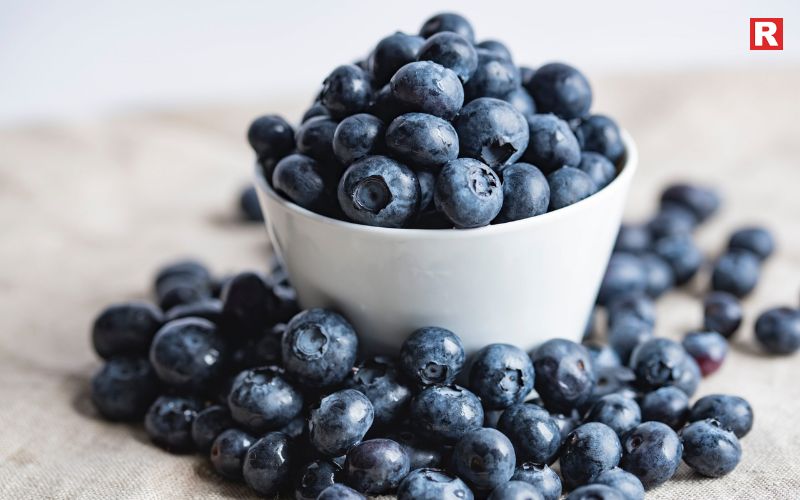
Blueberries come from North America and Europe, where they grow in cool and clean environments. They are small, round, and full of natural juice. Their taste is sweet with a slight tang, which makes them easy to enjoy at any time of the day. Blueberries are rich in antioxidants, fibre, and Vitamin C. These nutrients help the body stay strong and protect it from seasonal infections. They also support heart health and improve digestion. Many people add blueberries to oats, yoghurt, or desserts because they blend well with simple foods. Their bright colour and strong nutrient value make them a popular choice for anyone looking to add more healthy and tasty fruits to their winter meals.
Why it is good in winter: Blueberries help improve brain health and immunity. They also help reduce inflammation, which is useful in winter when the body becomes more sensitive to cold weather. You can add them to cereals, oats, desserts, or eat them as a small snack.
6. Pomelo
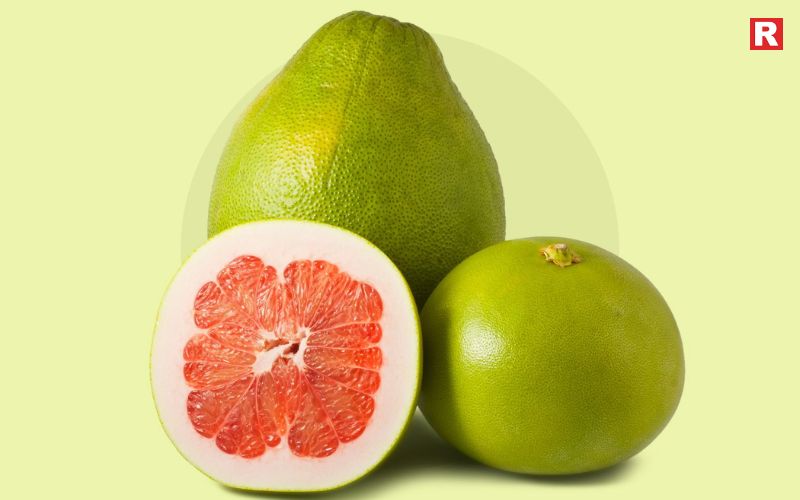
Pomelo is a large citrus fruit that comes from Southeast Asia. It has thick skin and soft, juicy segments inside. Its taste is similar to grapefruit but sweeter and milder, which makes it pleasant for most people. Pomelo is rich in Vitamin C, potassium, and natural antioxidants. These nutrients support strong immunity and help the body stay active during winter. The fruit also helps with digestion and keeps the skin healthy. Many families enjoy pomelo in salads or eat it as a light snack because it feels refreshing. Its clean taste and high nutrient value make it a useful addition to winter meals, especially for those who enjoy citrus fruits with a gentle sweetness.
Why it is good in winter: Pomelo strengthens immunity and helps the body fight cold and flu. It also helps improve digestion and supports healthy skin. Many families in India use pomelo in winter salads for its fresh flavour.
Winter Health Benefits of Exotic Fruits
Eating exotic fruits in winter supports the body in many ways. They help improve immunity, which is very important during cold weather. They keep the skin hydrated, healthy, and glowing. They support digestion and give natural energy. Exotic fruits also bring new tastes, which makes your winter meals more exciting.
If you live in metro cities, you will find these fruits at supermarkets and online grocery platforms. Be sure to buy fresh fruits that feel firm and have natural shine. Always check the skin for bruises or soft spots.
Also check: 7 Desi Alternatives to Oatmeal for Weight Loss
6 Unexpected Benefits of Eating Jackfruit (Kathal) – Nature’s Spiky Surprise!
Six Benefits of Starting Your Day with Okra Water
Tips to Shop and Store Exotic Fruits in India
- Pick fruits that feel firm and fresh.
- Avoid fruits with dark patches or dents.
- Store soft fruits like blueberries in the fridge.
- Keep avocados at room temperature until they ripen.
- Wash fruits well before eating.
- Use airtight containers to keep fruits fresh for longer.
Happy Winters!
Winter is the right season to try exotic fruits because they offer higher vitamins, fresh flavours, and strong health benefits. These fruits help the body stay active and support immunity during the colder months. They also improve skin health, which is useful when the weather becomes dry. Many exotic fruits have bright colours and unique tastes, which bring a pleasant change to daily meals. People who enjoy exploring new foods can add at least one exotic fruit to their winter diet. It is an easy way to make meals more interesting and more nutritious. These fruits also pair well with simple dishes like salads, yoghurt bowls, and smoothies. Their natural sweetness and soft textures make them suitable for all age groups. By adding even one new fruit this season, families can enjoy better taste, better health, and a refreshing change in their winter routine.
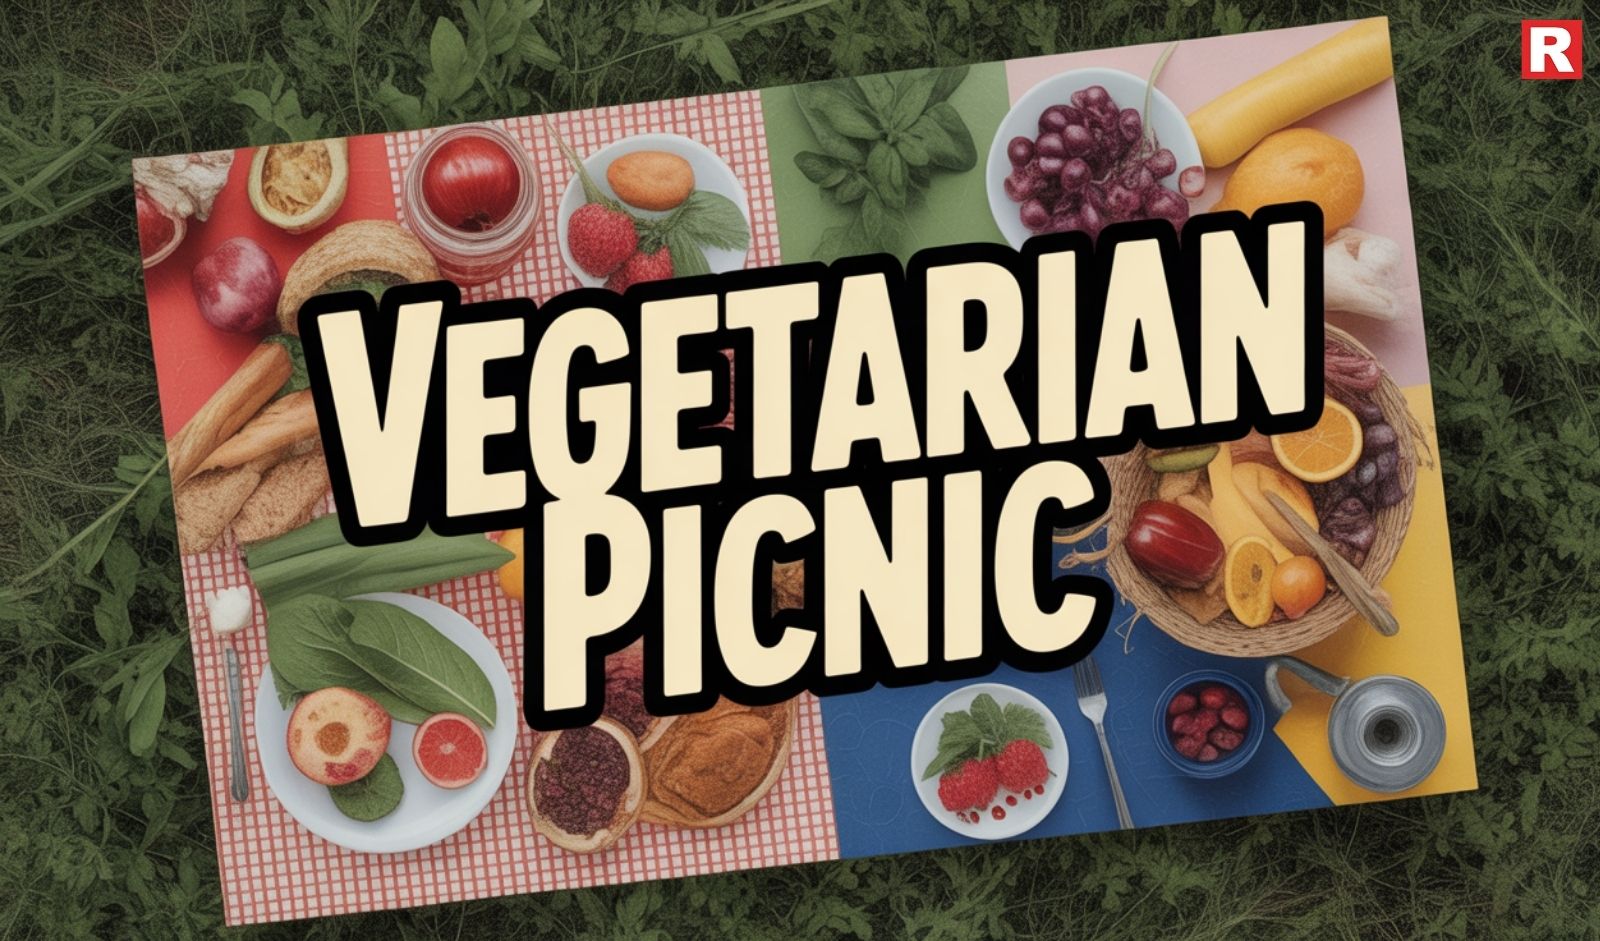
A winter picnic feels special when the food is warm, simple, and easy to carry. In India, families enjoy packing fresh snacks, homemade bites, and classic comfort dishes that stay delicious even in the cold. Vegetarian food works very well for winter picnics because it is light, versatile, and suits people of all ages. It also stays fresh for longer hours in the cool weather. For many, winter picnics bring back memories of long drives, foggy mornings, and food made with care. The person planning the picnic often looks for dishes that do not spill and do not spoil during travel. They prefer food that tastes good even without reheating, as winter outings usually last the whole day.
This season calls for warm parathas, spicy tikkas, soft idlis, and fresh fruit that stays crisp in the cold. A good winter picnic basket is simple, colourful, and full of comforting vegetarian options. These dishes make it easy for everyone to eat, share, and enjoy the day outdoors. This list brings together vegetarian foods that are easy to prepare, easy to pack, and perfect for a winter picnic. They help create happy moments and a smooth picnic experience.
Here are the top vegetarian foods you can include in your next picnic.
1. Vegetable Sandwiches
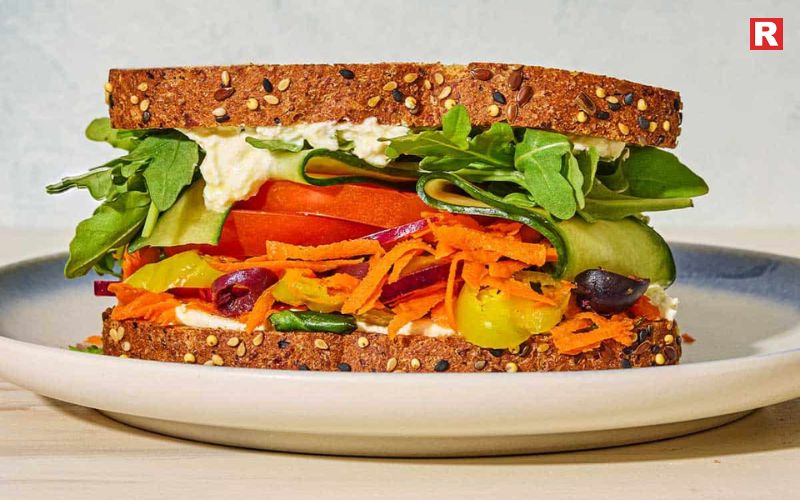
Vegetable sandwiches are a classic picnic choice across India. They are easy to prepare, easy to pack, and everyone enjoys them. You can add fresh cucumber, tomatoes, capsicum, paneer, cheese, or even beetroot. A light spread like green chutney or mayonnaise adds flavour without making the sandwich soggy. They also stay fresh for hours if kept in zip-lock bags or airtight boxes. For people who like simple food, this is always a safe and comforting pick.
2. Paneer Tikka Skewers
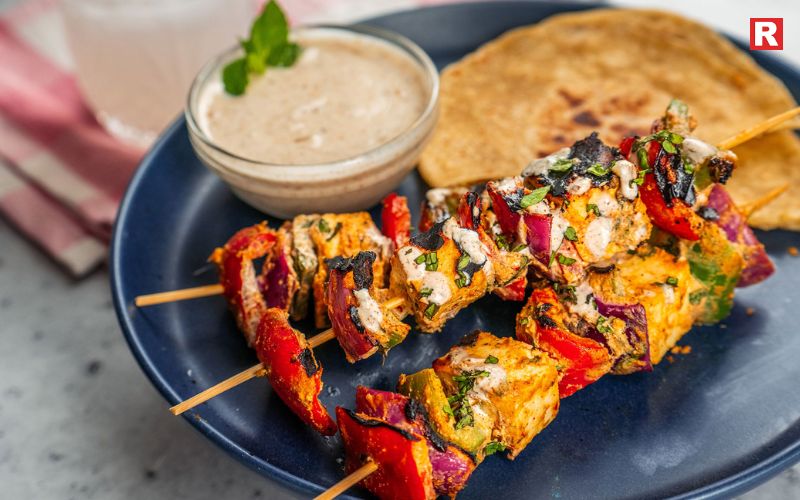
If you want something flavourful and protein-rich, paneer tikka skewers are perfect. Paneer holds its shape during travel, and the spices stay intact. You can grill them at home and pack them in foil. They taste great even when cold or mildly warm. The smoky flavour makes them popular among both kids and adults. Many people prefer a spicy tikka coating with capsicum and onions, which adds colour and crunch. It is a wonderful choice for picnics because it feels premium without much effort.
Read more: Top 10 Vegan Street Foods in India Every Indian Loves
7 Desi Alternatives to Oatmeal for Weight Loss
3. Aloo Paratha Rolls

Aloo parathas are loved across India, and they work very well for picnics. When rolled and wrapped in foil, they become easy to eat without utensils. They stay soft for hours and remain flavourful even at room temperature. Many households pack parathas during long road trips because they are filling and convenient. You can pair them with curd, pickle, or a simple chutney. For families, this is a reliable option that suits all taste preferences.
4. Fresh Fruit Platter or Fruit Cups
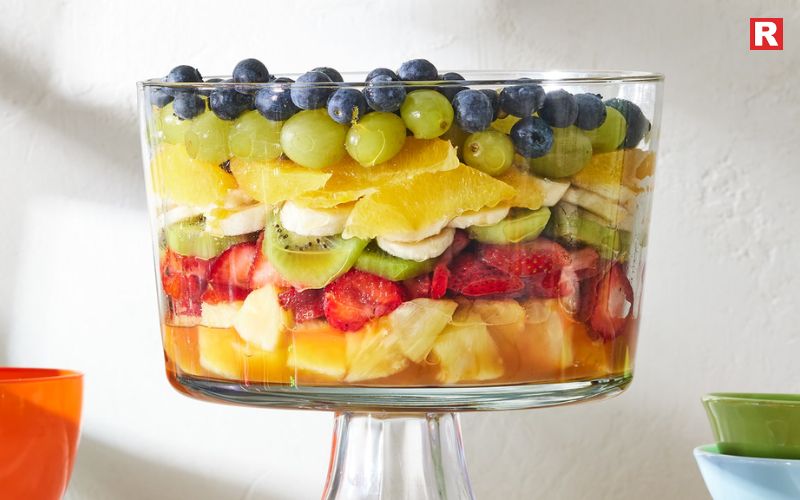
Fresh fruits bring colour and freshness to a picnic meal. They hydrate the body and add natural sweetness. Some fruits like grapes, apples, watermelon, kiwi, and pomegranate travel very well. To make it more interesting, you can sprinkle a little chaat masala. Pack the fruits in small cups or boxes to make serving easier. During summer picnics, fruit cups feel especially refreshing after long outdoor activities.
5. Chana Chaat
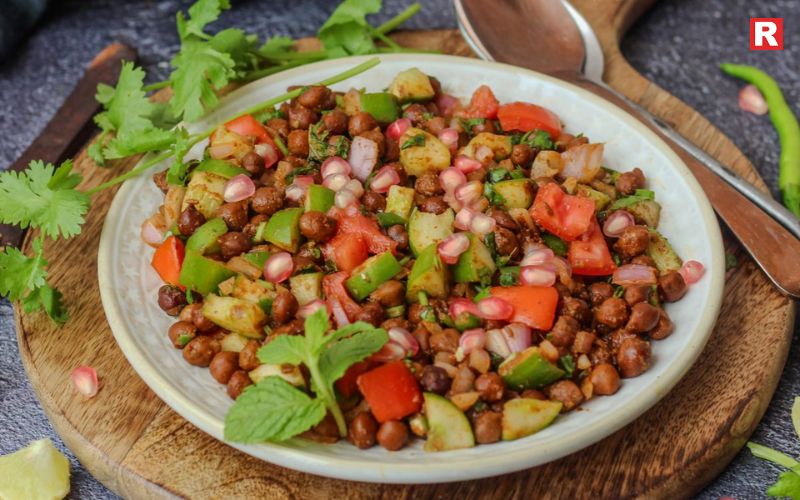
Chana chaat is a tangy, filling, and healthy option that adds variety to your picnic spread. It is rich in protein and keeps you energetic throughout the day. To prevent the vegetables from becoming soggy, pack the dressing separately. Mix the onions, tomatoes, lemon juice, spices, and coriander only when you are ready to eat. This way, the chaat tastes fresh and crunchy. Many people enjoy it because it reminds them of Indian street flavours but in a cleaner and safer form.
Know more: 5 Foods to Avoid for Better Cholesterol
6. Veg Pasta Salad
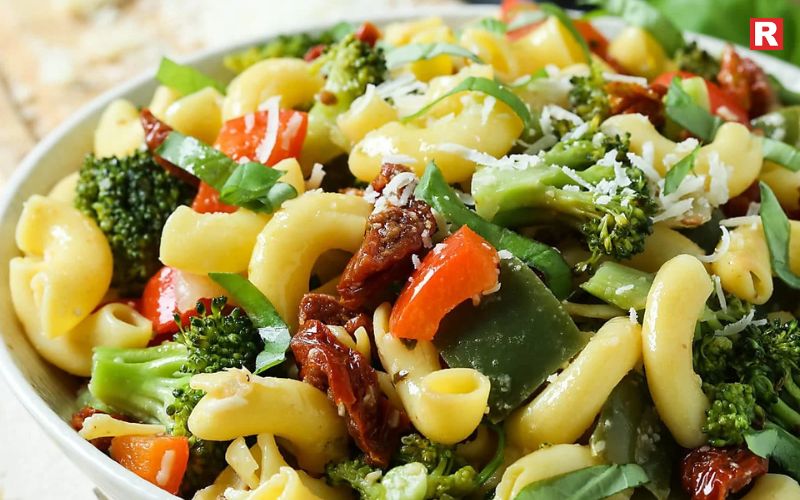
A veg pasta salad is colourful, refreshing, and perfect for Indian weather. It does not spoil easily and tastes good even when cold. Use ingredients like sweet corn, bell peppers, olives, tomatoes, and light Italian dressing. For people who enjoy mild flavours, pasta salad is a great choice. It also fits well in modern picnic baskets because it looks vibrant and feels light. This dish is especially popular in group picnics where everyone likes to try different combinations.
7. Cheese and Crackers Box

If you want something minimal yet classy, a cheese and crackers box is ideal. You can include a mix of cheese cubes, whole wheat crackers, grapes, nuts, and olives. It does not require any cooking. Pack everything neatly in a small box, and it becomes a great sharing platter. Many people prefer this for premium-style picnics, sunset outings, or lakeside gatherings. It is also a good snack for people who want something light between meals.
8. Hummus with Veggie Sticks or Pita
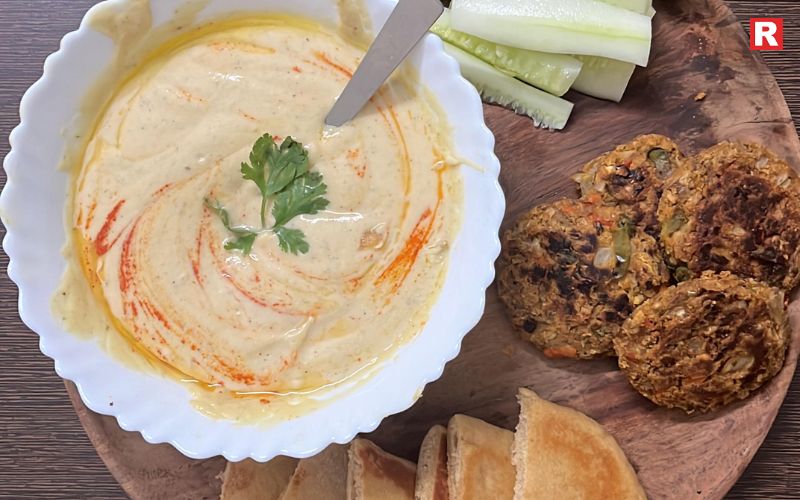
Hummus has become a popular vegetarian snack in India because it is healthy and flavourful. It pairs well with carrot sticks, cucumber sticks, and beetroot sticks. You can also carry small pieces of pita bread. Hummus stays fresh for long hours when kept in a chilled container. It gives your picnic a Middle Eastern touch while still being easy to make or buy from stores. It is also a great option for health-conscious people.
9. Mini Idlis or Masala Idlis

Mini idlis are one of the most travel-friendly Indian snacks. They do not make a mess, and children love them. You can toss them in podi or light masala for extra taste. They are soft, easy to eat, and stay fresh without refrigeration for several hours. Many South Indian families pack mini idlis during long drives because they are light on the stomach and extremely convenient. For picnics, they are a top choice.
10. Muffins or Banana Bread Slices

Every picnic needs something sweet, and muffins or banana bread slices are ideal. They do not melt, spill, or crumble too much. You can bake them at home or buy them from a bakery. Chocolate muffins, blueberry muffins, and banana walnut slices are popular options. These treats feel comforting and are loved by all age groups. They are a simple yet thoughtful addition to your picnic basket.
Also check: 10 Different Types of South Indian Rice Dishes
7 Healthy Chicken Dishes to Maintain Your Diet
8 Cheesy Foods Like Lasagna That Melt in Your Mouth
Tips to Pack Your Vegetarian Picnic Food Smartly
Packing is just as important as choosing the right food. Here are some easy tips:
- Use airtight containers to keep food fresh.
- Pack chutneys, dressings, and sauces separately.
- Carry ice packs if the weather is hot.
- Keep dry and wet foods in different boxes.
- Use insulated bags for fruits and dairy products.
- Carry tissues, wet wipes, and small plates.
These small steps help keep your food safe and enjoyable throughout the day.
Best Drinks to Pair with Vegetarian Picnic Food
A good drink makes a picnic meal complete. Some simple, refreshing choices are:
- Lemonade
- Iced tea
- Fresh fruit juice
- Buttermilk
- Coconut water
These drinks are light and keep you hydrated during outdoor activities.
Happy Eating!
Picnics offer a simple break from daily life. They allow people to enjoy fresh air, open spaces, and calm surroundings. Sharing food in such moments brings families and friends closer. When the picnic basket is filled with the right vegetarian dishes, the day becomes smoother and more enjoyable. Some prefer classic choices like sandwiches, parathas, or fruit. Others like modern options such as hummus, pasta salad, or cheese boxes. Whatever the choice, the food should match the person’s taste and comfort. Packing light and packing smart helps avoid stress during travel. A well-planned picnic lets everyone relax and enjoy the moment. Good vegetarian food adds warmth, colour, and ease to the experience. With the right mix of simple dishes, the next picnic can turn into a day filled with good taste, comfort, and happy memories shared under the open sky.

Soft drinks are a big part of life in India. We enjoy them at birthday parties, office breaks, college canteens, long drives, and especially during the peak summer heat. Many Indian families even keep soft drinks at home for guests. I grew up seeing the same. A chilled bottle often felt like the easiest way to refresh yourself.
But today, more people want to know what is inside these drinks and whether they are actually safe to consume often. This article gives you simple, clear, and authentic information about five famous soft drinks in India and how they affect your health. The goal is not to scare you but to help you make smart choices. You can still enjoy your favourite drinks, but it is good to know what you are drinking.
Discover 5 Famous Soft Drinks in India,
1. Coca-Cola

Coca-Cola is one of the most popular soft drinks in India. People enjoy it for its sweet and smooth taste. It is easy to find in shops, cafés, and restaurants across the country. The drink has become a part of many moments, from family gatherings to festivals and parties. Its familiar flavour makes it a common choice when people want something refreshing. Coca-Cola is also often served with snacks, making it a favourite during celebrations. Over the years, it has become a trusted brand for many Indian households. Its strong presence and consistent taste keep it popular among all age groups.
- Ingredients: Coca-Cola contains sugar, caffeine, caramel colour, phosphoric acid, and carbonation. These are common in most cola drinks.
- Why people love it: The taste is familiar, consistent, and refreshing. It also pairs well with Indian snacks like samosas, pizzas, and burgers.
- Safety angle: The main concern is the sugar content. A regular bottle has a high amount of sugar, which adds calories without any nutrition. The acidity can also weaken teeth over time. Caffeine can cause restlessness if consumed in large quantities.
Safe in moderation. Not safe if consumed daily.
Read more: Top Famous Veg Street Foods in Kolkata That You Must Try Once in Your Life
8 Famous Vegetarian Dishes of Uttar Pradesh and Their Timeless Legacy
2. Pepsi

Pepsi is a popular soft drink in India and is enjoyed by people of all ages. It has a sweeter and lighter taste compared to Coca-Cola, which makes it appealing to many young consumers. The drink is easy to find in shops, food outlets, and movie halls across the country. Its smooth flavour makes it a common choice during meals, parties, and casual outings. Pepsi has built a strong connection with the youth through its taste and brand image. Over the years, it has become a go-to option for those who want a refreshing drink with a slightly sweeter touch.
- Ingredients: Sugar, caffeine, carbonated water, caramel colour, and flavouring agents.
- Why people love it: Pepsi tastes sweeter and smoother. It has a loyal fan base across India. You will often find it in restaurants, multiplexes, and quick-service outlets.
- Safety angle: Pepsi has high sugar content, like most colas. Regular drinking can lead to weight gain, increased hunger, and higher risk of lifestyle diseases. The acidity can harm tooth enamel. Caffeine may disturb sleep if consumed late in the day.
Safe in moderate amounts, but not healthy for regular use.
3. Sprite
Sprite stands out from cola drinks because of its light lemon-lime taste. It feels refreshing, especially during hot and humid days. Many people in India prefer Sprite for its clean and crisp flavour. It does not feel heavy, which makes it a good choice when someone wants a simple and quick refreshment. The drink is widely available in shops, cafés, and restaurants. Sprite is also popular at family gatherings, celebrations, and outdoor events. Its clear taste and smooth fizz make it a reliable option for those who want something light. Over time, it has become a favourite summer drink across the country.
- Ingredients: Carbonated water, sugar, citric acid, natural flavours, and preservatives.
- Why people love it: It has no caffeine. This makes it a popular choice for people who avoid caffeine. The lemony taste also feels refreshing during summer.
- Safety angle: Even though Sprite has no caffeine, it still contains high sugar. Regular consumption can increase the risk of obesity, diabetes, and dental issues. It gives a quick burst of freshness, but no real hydration or nutrition.
Safe when taken occasionally. Not ideal for daily drinking.
Know more: Top 10 Vegan Street Foods in India Every Indian Loves
4. Thums Up

Thums Up is one of India’s most loved cola drinks. It is known for its bold taste and strong fizz, which give it a powerful kick. Many people choose it when they want a stronger cola flavour than regular soft drinks. Thums Up is widely available in shops, restaurants, and roadside stalls. Its unique taste has made it a favourite during meals, outings, and celebrations. The drink connects well with those who enjoy a sharp and lively flavour. Over the years, it has built a loyal fan base across all age groups. Its strong identity keeps it popular across the country.
- Ingredients: Sugar, caffeine, carbonated water, caramel colour, and strong flavouring agents.
- Why people love it: It has a unique desi taste. The flavour feels stronger than Coca-Cola or Pepsi. Many people enjoy it with spicy Indian food.
- Safety angle: Thums Up has more caffeine than many other soft drinks. This makes it unsuitable for children, teenagers, or people with acidity or heart issues. It also has high sugar content and is quite acidic. These can affect weight management and dental health.
Safe only in small amounts and not suitable for frequent consumption.
5. Maaza / Frooti (Mango Drinks)

Mango-based drinks like Maaza and Frooti are popular choices in India, especially during the summer months. People enjoy their thick and fruity flavour, which brings back the taste of mango season. These drinks are easy to find in shops, supermarkets, and small stalls across the country. They are often served at family gatherings, picnics, and school events. Many people pick them when they want a quick and sweet refreshment. The familiar taste makes them comforting for both children and adults. Over time, these mango drinks have become a regular part of India’s summer traditions and continue to be loved by many.
- Ingredients: Mango pulp, sugar, water, stabilizers, and preservatives.
- Why people love it: They taste like mangoes and feel satisfying. These drinks are also heavily marketed as family favourites.
- Safety angle: Even though they contain fruit pulp, the sugar levels are high. Many people mistake them for healthier options, but they are not equal to fresh mango juice.
Preservatives and stabilizers make them shelf-stable, but they add no nutrition.
Safe if taken occasionally. Not a replacement for real fruit.
What Makes Soft Drinks Unsafe?
Soft drinks become unsafe mainly when consumed regularly. These are the most common concerns:
1. High sugar: Most soft drinks contain extremely high amounts of sugar. This leads to weight gain, blood sugar spikes, and increased risk of diabetes.
2. Empty calories: Soft drinks do not offer vitamins, minerals, or fibre. They add calories without giving proper nutrition.
3. Acidity: The acids used in soft drinks can weaken tooth enamel and cause acidity issues.
4. Artificial colours and flavours: Some people may be sensitive to these additives.
5. Caffeine: Colas contain caffeine, which may interrupt sleep, increase heart rate, and cause headaches when consumed too often.
Are Soft Drinks Safe for You?
Soft drinks are safe only when consumed occasionally. Here is a simple way to understand it:
- Drinking a soft drink once in a while is fine
- Drinking them every day is harmful
- Children, diabetics, and people with acidity should avoid them
- Fizzy drinks can never replace water
Healthier Indian Alternatives
If you want refreshing options that are better for your body, here are simple and easily available choices:
- Nimbu pani
- Coconut water
- Aam panna
- Fresh fruit juice
- Jaljeera
- Sugar-free sparkling water
- Homemade iced tea
These drinks hydrate your body, offer better nutrition, and still taste great.
Also check: 6 Benefits of Drinking Black Coffee
Top Soup Brands in India That Make Comfort Food Quick, Warm, and Delicious
Stay Healthy!
Soft drinks continue to hold a strong place in India’s food and social culture. They taste good, spark memories, and add a sense of fun to celebrations and gatherings. Many people across the country enjoy them during festivals, meals, or casual outings. But soft drinks are not meant for everyday use. They offer flavour but not real nutrition. Drinking them too often can affect health over time. It is better to enjoy them occasionally and not turn them into a daily habit. Natural options like coconut water, nimbu pani, or fresh juices are healthier for regular hydration. These choices support the body and provide better energy. By keeping soft drinks as an occasional treat, people can enjoy the taste they love without worrying about long-term effects. This simple balance helps maintain both enjoyment and well-being in the long run.
Disclaimer: Soft drinks should be consumed responsibly. This article offers general guidance and is not a medical opinion. Individuals with health conditions should consult a doctor or nutrition expert before making dietary choices.
Avocado has become so immensely popular that it has a cult following internationally. And for the right reasons. Its creamy, soft texture, rich flavor, and nutrient-dense profile make it one of the most versatile and enjoyable foods on the planet. Whether smashed on toast, blended in smoothies, or sliced in salads, an avocado offers unparalleled creamy satisfaction. What often goes unnoticed is how many foods exist with a similarly creamy and luxurious texture and nourishing power.
Across cultures, kitchens have relied on naturally creamy foods that are sweet, savory, plant-based, dairy, and everything in between. These foods bring warmth, body, and richness to food that can elevate common dishes to soul-satisfying comfort food. So, if you love an avocado or simply love creaminess, then this article is your guide to exploring 12 delicious, healthy foods that have the same satisfying experience as an avocado.
Read more: 9 Budget-Friendly Foods Like Maggi for Late-Night Hunger
12 Creamy, Healthy & Delicious Foods Like Avocado
So, let’s take a look at the tastiest, healthiest, and creamiest alternatives to avocado to try.
1. Banana: Soft, Sweet, and Naturally Creamy

Bananas are among nature's smoothest fruits. When fully ripe, their flesh becomes unbelievably silky and almost melt-in-your-mouth. The creaminess of bananas mimics avocados perfectly in smoothie blends, desserts, and breakfast bowls. They are also full of potassium, fibre, and natural sugars that will give you fast energy. You can choose to blend them into shakes, freeze them as "ice cream," or mash them onto toast. The banana's mild sweetness adds body, texture, and velvetiness to any dish it is added to.
2. Mango: Buttery, Juicy, and Irresistibly Rich
There is a reason mango is called the “King of Fruits.”Few fruits can compete with the lusciousness of a perfectly ripe mango. Mango is the tropical cousin of the avocado in many ways. It is soft, fragrant, and creamy when scooped fresh. Packed with vitamins A and C, antioxidants, and its natural sweetness, mango works as a rich and dessert-like element to blends and bowls. Its texture makes it perfect for mashing into purées, chutneys, or salad dressings. When mango is in season, the buttery flesh can enhance any meal that calls for creaminess.
Know more: 12 Delicious Foods Like Dumplings From Asia You Must Try
3. Papaya: Smooth and Silky
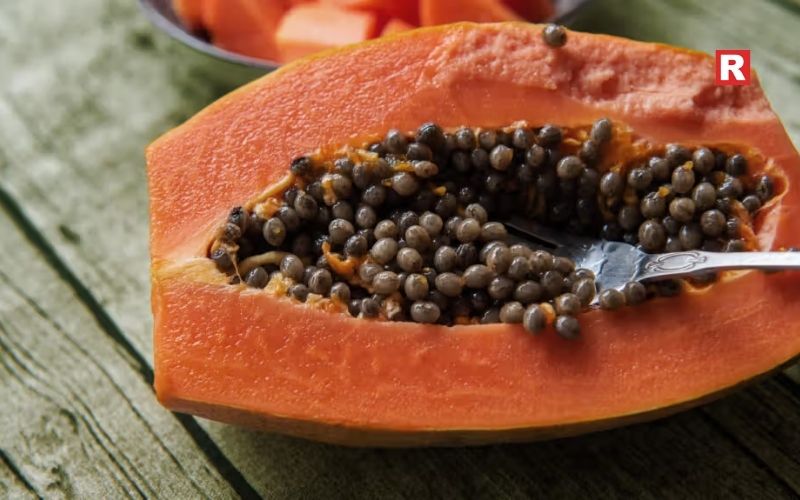
When ripe, papaya surprises many with how soft and creamy its texture becomes. Slightly musky, naturally sweet, and sometimes a bit bland, papaya is also filled with digestive enzymes. It can be blended into smoothies, mixed with lime, or even served as a creamy breakfast bowl base. With a good amount of vitamins A and C, it is good for your skin and digestion, not to mention the spoon-soft texture avocado lovers enjoy.
4. Silken Tofu: A Plant-Based Cream Dream
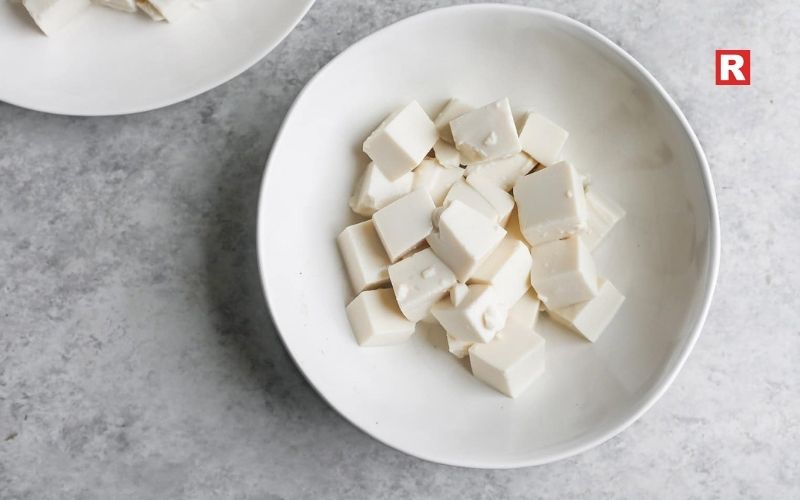
If avocado had a vegan cousin, it would surely be silken tofu. Silken tofu has a smooth custard-like texture and is incredibly versatile. It can be blended into dips, sauces, soups, or desserts easily. It has a mild taste that simply disappears into recipes, allowing spices, herbs, or sweeteners to shine. Silken tofu is high in protein, low in calories, and completely dairy-free, making it easy to create creamy textures without fat-heavy ingredients. There’s tofu mousse, tofu smoothies, tofu dressings, and many more dishes you can make with this vegan wonder.
5. Greek Yogurt: Thick, Tangy, and Protein-Rich

Greek yogurt has a silky thickness and cooling tang that makes it the creamiest food available. Its consistency makes it almost spreadable, very similar to mashed avocado. Probiotic-rich, calcium-packed, and protein-dense, Greek yogurt is easy on the stomach and keeps your stomach full for hours. Use it as a base for dips, whip it into dressings, drop it into smoothie bowls, or spread it on toast with a bit of honey. There are many ways to play with its richness. The sweet and bright tartness of Greek yogurt pairs beautifully with fruit and grains, making it a wonderful staple in the world of healthy eating.
6. Nut Butters: Rich, Velvety, and Full of Healthy Fats
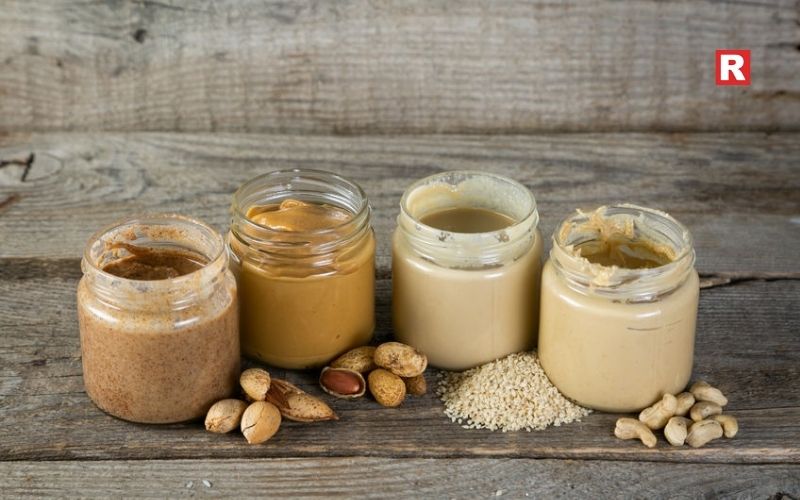
Peanut and almond butter, as well as cashew butter, provide an ultra-smooth texture that gives an instant upgrade to any dish. Like avocado, they are thick and silky and loaded with healthy fats. Spread them on toast, add to oatmeal, into a smoothie, or drizzle them over fruit. Nut butters provide a nutty aroma and deep comfort. Of all the nut butters, cashew butter is especially delicate as it can easily mimic the buttery softness of avocado.
7. Tahini: Smooth Sesame Luxury
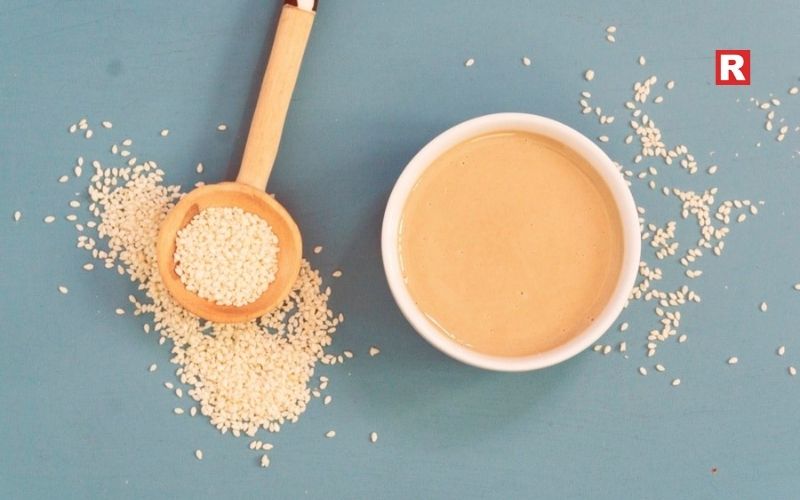
Tahini is a simple sesame seed paste, which is a nutty, creamy, pourable substance that deepens both sweet and savoury recipes. It is rich in calcium, healthy fats, and plant-based minerals. Drizzle it over roasted vegetables, whisk it into dressings, or add it to hummus to make an extra creamy dip. Tahini also has a similar “smooth coating” texture in the mouth that avocado is known for, making it a must-try food for creamy-food lovers.
What's new: 8 Cheesy Foods Like Lasagna That Melt in Your Mouth
8. Hummus: Smooth, Savoury, and Spreadable
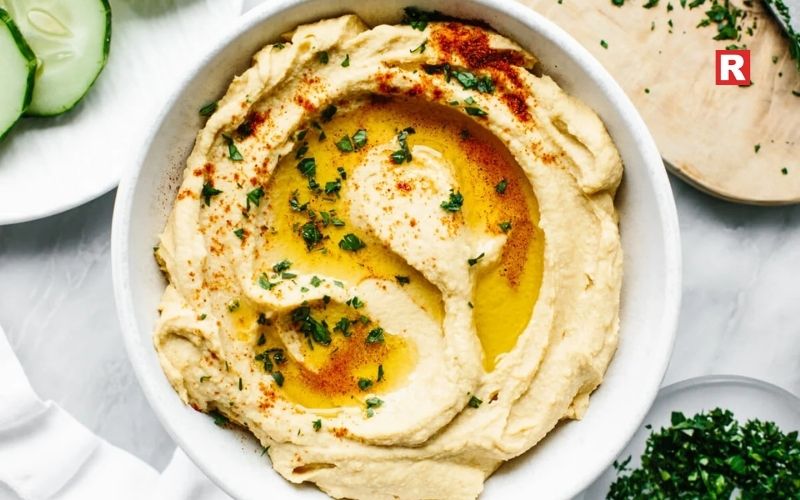
Hummus is made from chickpeas, tahini, olive oil, and lemon. It is a creamy and nutrient-dense food. Similar to avocado, it has easy spreadability and velvety smoothness as a topping on toast, as a dip, or as a creamy pasta sauce. High in fibre and protein, hummus will fill you up without weighing you down. Use it as a dip, spread, or even as a pasta sauce. Hummus adds rich, savoury creaminess to any meal, making it a comforting bowl of food.
9. Ricotta or Cottage Cheese: Soft, Fresh, and Delicately Creamy
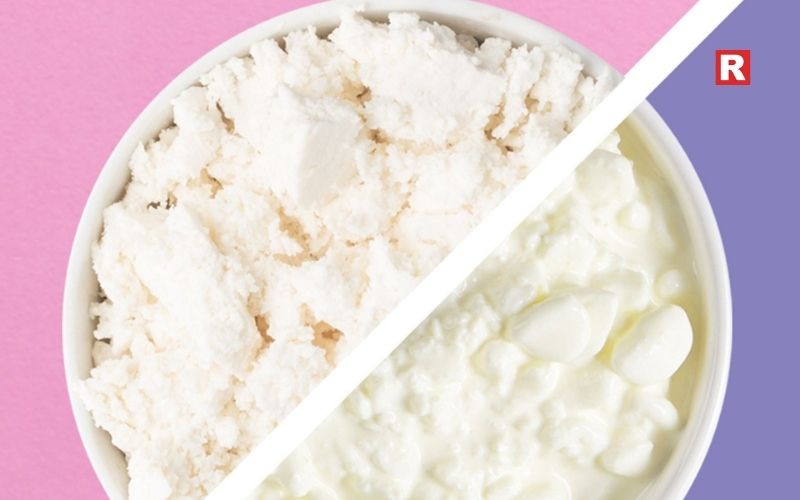
Both ricotta and cottage cheese are soft, milky, and just a little fluffy, which is a nice substitute for avocado. They’re not as dense as avocado, but they deliver that satisfying creamy bite in salads, grain bowls, wraps, or breakfast dishes. They are high in protein and calcium, and they add both nutrition and softness. Spread ricotta on toast and drizzle with honey, add cottage cheese to fruit, or fold into pancake batter for extra tenderness.
10. Coconut Flesh: Naturally Buttery and Tropical
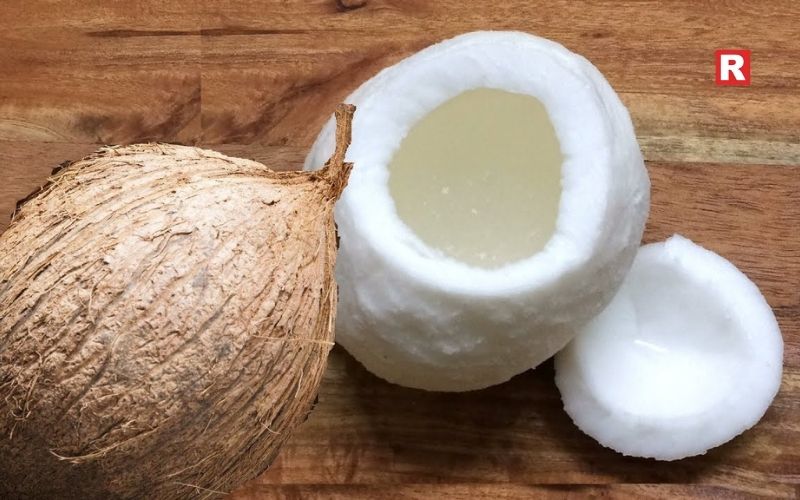
The flesh of fresh coconut, especially when it’s young and tender, is smooth, slightly sweet, and incredibly creamy. It has a delicate, tropical aroma and a soft chew that feels totally satisfying. Coconut flesh is a rich source of healthy fats, fibre, and minerals, making it an ideal ingredient in smoothies, curries, desserts, or a snack. Blend it into coconut milk or coconut cream and you’ll get a richness that rivals avocado’s buttery texture.
11. Pumpkin Purée: Silky, Sweet, and Comforting
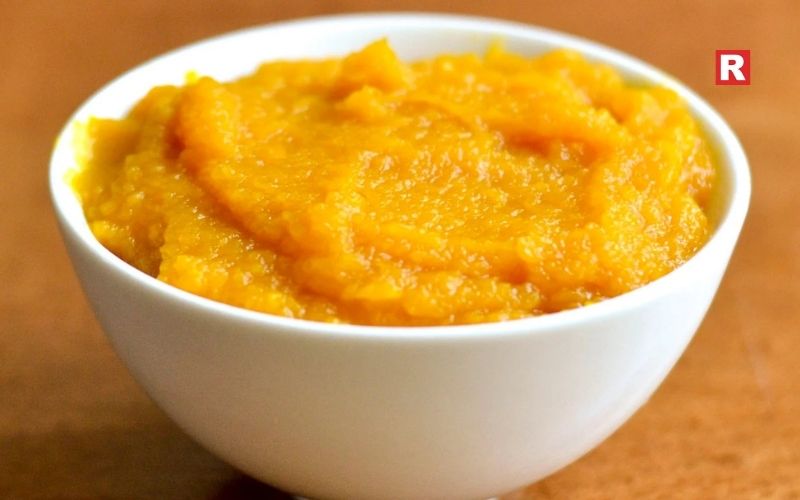
When pureed, pumpkin has a dense, smooth, and velvety consistency and blends well into both sweet and savoury dishes. Pumpkin will add body to soups, sauces, pies, and smoothies while naturally tasting sweet and maintaining its warm orange colour. Packed with vitamin A, antioxidants, and fibre, pumpkin provides a nutritious alternative to avocado. If you are looking for a comforting creaminess for your winter dishes, puréed pumpkin is one of the top choices.
12. Sweet Potato: Soft, Buttery, and Nutrient-Dense
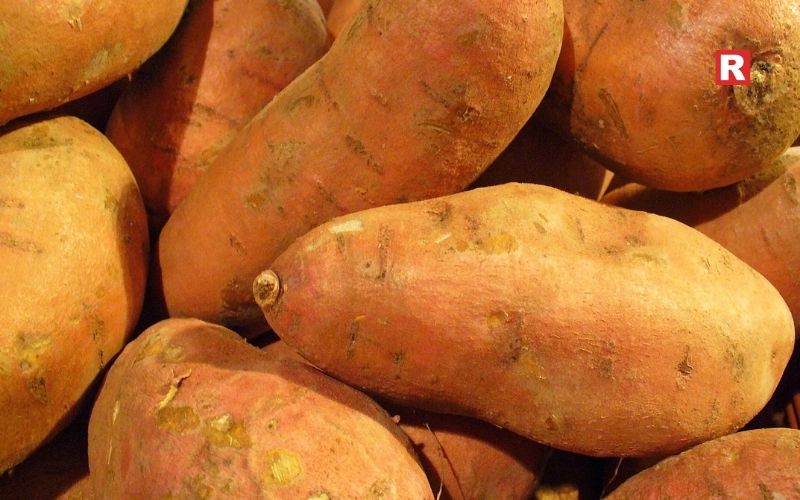
Sweet potato, when steamed or roasted, becomes very creamy, nearly as smooth as avocado when mashed. Sweet potatoes taste sweet, have a vibrant orange colour, and are a good source of vitamins A and C. Sweet potatoes bring both sweetness and creaminess to bowls, spreads, and dips. Try mashing sweet potatoes on toast, blending them in smoothies, or making them into a velvety purée for wraps and burritos. Their buttery texture and an additional nutritional kick make them a wholesome alternative.
Check out: 12 Instant Foods Like Maggi You Can Make With 3–4 Ingredients
10 Anti-Inflammatory Foods to Add to Your Diet
How These Foods Compare Nutritionally
While avocado is known for its healthy monounsaturated fats, this list includes foods rich in:
- Potassium (banana, coconut)
- Antioxidants (papaya, pumpkin, mango, sweet potato)
- Protein (Greek yogurt, silken tofu, hummus, cottage cheese)
- Healthy fats (nut butters, tahini, coconut)
Depending on how you use these food items, whether to make smoothies, spreads, snacks, or cook, you will find several options that will capture avocado's creaminess and nutritional benefits.
How to Use These Foods as Avocado Substitutes
Here are some swap ideas:
- For toast: peanut butter, hummus, ricotta
- For smoothies: banana, mango, tofu, coconut flesh
- For creamy dips: pumpkin purée, hummus, tahini
- For bowls & salads: cottage cheese, sweet potato, mango
- For baking: mashed banana or sweet potato as a butter substitute
These alternatives let you enjoy creamy textures anytime, even when avocado isn’t available.
Learn more: 10 Indo-Japanese Fusion Foods You Must Taste
A Creamy Finish
It's a known fact that creamy foods can provide comfort and make meals feel more satisfying. Avocado is certainly not the only ingredient with this effect on food. You might also enjoy the silky sweetness of mango, the smoothness of hummus, or the lavish richness of nut butter. While the list will include several options, each has its own flavor, story, and healthy properties. Exploring these creamy, healthy, and delicious food options can help to diversify meals, nourish the body, and find new foods that can provide the same comforting experience as avocado does, or in some cases, even better.
Bhutan is known for its calm mountains, fresh air, and warm people. But the country has much more to offer than its scenic views. It also has a food culture that is simple, earthy, and full of comfort. Many Indian travellers think Bhutanese food is mainly non-vegetarian, but that is not the case. The country has many vegetarian dishes that are flavourful, healthy, and gentle on the stomach. These dishes use fresh vegetables, local cheese, buckwheat, mushrooms, and red rice. The flavours are clean and natural. They suit all kinds of palettes. Travellers who enjoy mild food will find good options. Those who like spice will also find dishes that match their taste.
This guide brings together the top vegetarian dishes that visitors should try on their next trip. Each dish has its own story and its own mix of local ingredients. Together, they reflect Bhutan’s deep connection to its land and its traditions. They show how the country values wholesome cooking and fresh produce. Anyone visiting Bhutan will discover that its vegetarian food adds a rich and memorable layer to the travel experience.
Why Vegetarian Food in Bhutan Feels Special
Bhutanese cuisine is simple and connected to nature. Most ingredients come fresh from farms. There is very little use of oil. The focus is on natural taste. Dishes are usually warm, creamy, and perfect for the cold climate. Ingredients like yak cheese, chillies, buckwheat, mushrooms, and red rice add a unique touch that you will rarely find anywhere else.
The country’s food culture also values sharing meals. When you visit local cafés, homestays, or small restaurants, you will notice that the food feels homely. This makes the entire experience even more memorable.
Explore Top Veg Dishes in Bhutan
1. Ema Datshi – Bhutan's National Dish
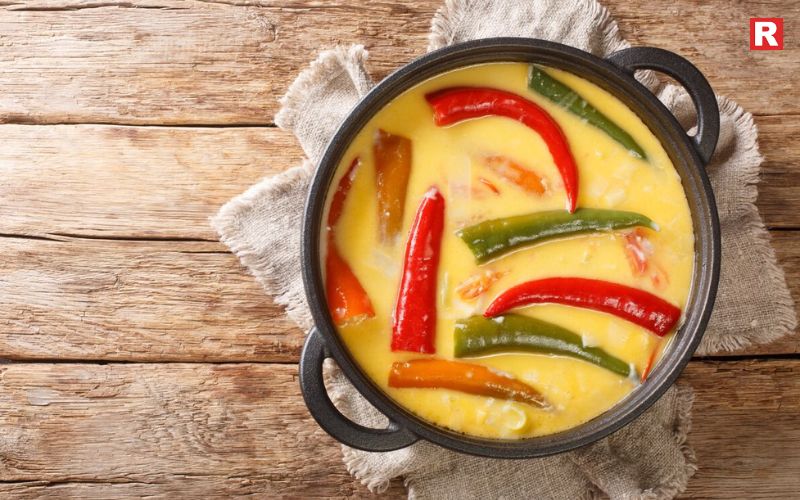
If there is one dish you cannot leave Bhutan without tasting, it is Ema Datshi. It is the national dish and a symbol of the country’s love for chillies and cheese. The dish is made with green or red chillies cooked in a thick cheese sauce. It is spicy, creamy, and very comforting. In most restaurants, you can request a veg-only version without any meat broth. Indian travellers often enjoy it with red rice to balance the heat. It melts differently and creates a rich flavour that stays with you. It is simple but unforgettable.
2. Kewa Datshi – Potatoes in Cheese
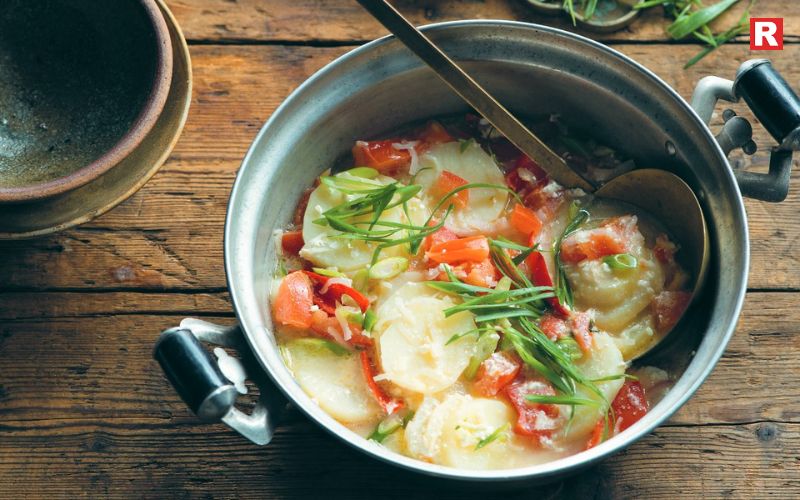
Kewa Datshi is perfect for people who want something mild and filling. It is made with potatoes cooked in cheese and a light mix of chillies. The dish is warm and smooth, making it ideal for cold evenings in places like Paro or Thimphu. Indians who prefer less spicy food usually enjoy Kewa Datshi the most. It pairs well with both red rice and buckwheat pancakes. Many cafés also add onions and tomatoes to make it even richer.
Read more: 8 Famous Vegetarian Dishes of Uttar Pradesh and Their Timeless Legacy
10 Awadhi Cuisine Classics You Must Try at Least Once
3. Shamu Datshi – Mushrooms in Cheese
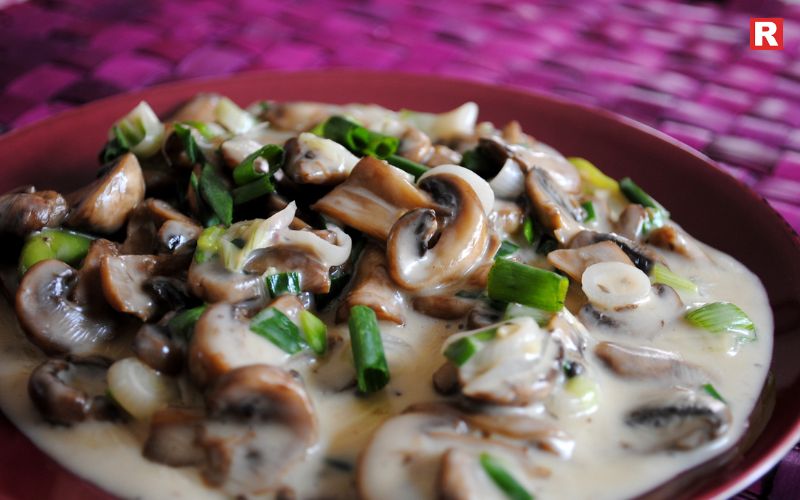
Bhutan has many varieties of mushrooms that grow fresh in the mountains. Shamu Datshi uses local mushrooms cooked with the country’s signature cheese base. The result is earthy, creamy, and full of natural flavours. This dish is especially popular in summer and during mushroom harvest season. You will find it in most cafes and homestays. If you love mushrooms, this will become one of your favourites.
4. Red Rice – Bhutan’s Nutritious Staple

Red rice is a must-try when you are in Bhutan. This rice grows only in the Paro Valley, where the water is glacier-fed. It has a light reddish colour, a nutty taste, and is rich in fibre. Red rice is soft yet slightly chewy. It goes well with all Datshi dishes, vegetable curries, and stews. Many travellers bring a small packet back home because it is healthy and unique.
5. Veg Version of Paa Dishes
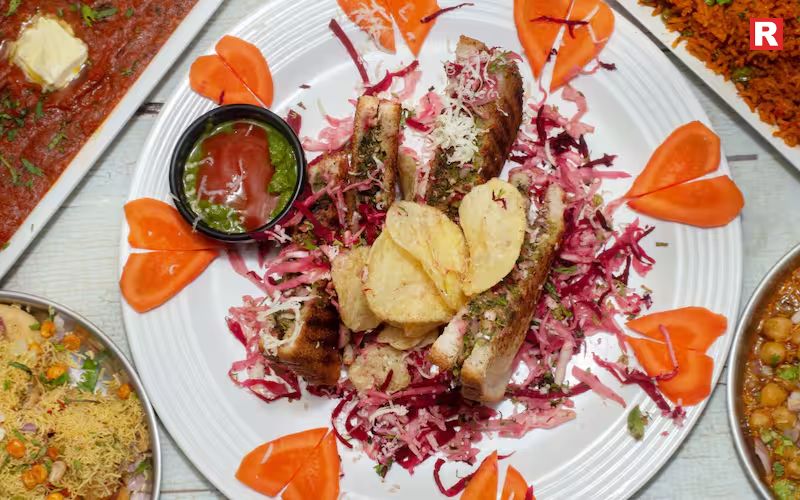
Bhutan has many dishes called “Paa,” which are usually stir-fried with chillies. The traditional versions include meat, but many restaurants now prepare vegetarian variations for visitors.
These veg versions use ingredients like:
- Radish
- Spinach
- Dried chillies
- Beans
- Seasonal vegetables
The taste is spicy, smoky, and very satisfying. The dish is usually served with rice and tastes even better in cold weather.
Know more: Top Famous Veg Street Foods in Kolkata That You Must Try Once in Your Life
6. Puta – Buckwheat Noodles
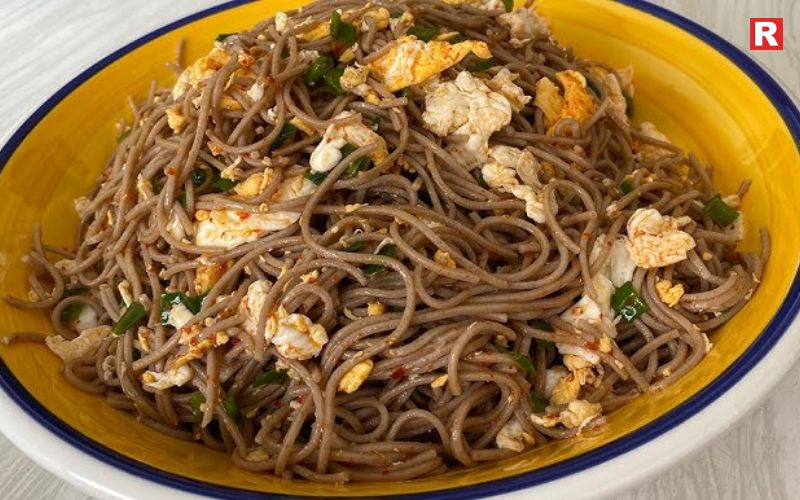
Puta is a traditional noodle dish from the Bumthang region of Bhutan. It is made from buckwheat, a grain that grows well in cold, high-altitude areas. The noodles are boiled first and then lightly stir-fried with oil, garlic, and spring onions. The dish has a clean, rustic taste and suits people who prefer simple, natural flavours. Since buckwheat is rich in fibre, Puta keeps a person full for long and supports good digestion. It is a completely vegetarian and wholesome meal.
7. Khuley – Buckwheat Pancakes
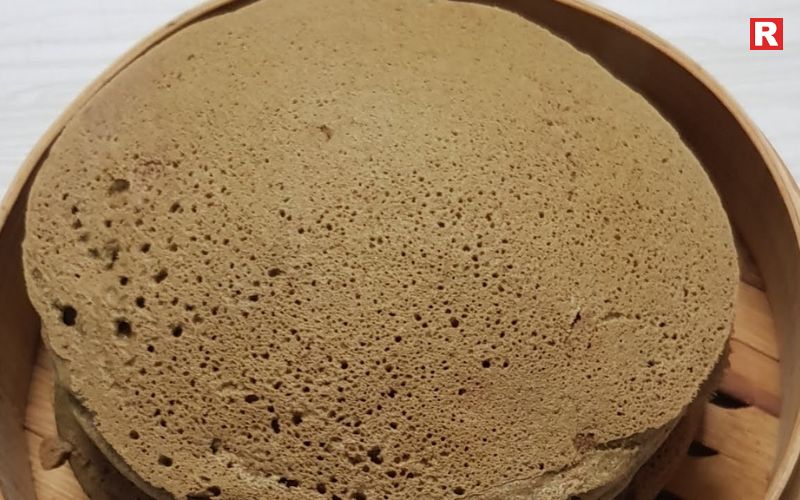
Khuley is a soft buckwheat pancake enjoyed mainly in central Bhutan. The pancake is warm, light, and perfect for breakfast in the mountains. Many people eat it with butter, cheese, or a mild serving of Ema Datshi. Travellers who prefer simple, homestyle food find Khuley very comforting. Several local farmhouses also serve it with fresh homemade cheese, which adds a rich flavour. The dish reflects Bhutan’s use of local grains and its love for clean, hearty meals made with care.
8. Hoentay – Bhutanese Veg Dumplings

Hoentay is a traditional dumpling from the Haa Valley and is often compared to momos. The main difference is the dough, which is made from buckwheat instead of wheat. The filling usually contains spinach, turnip leaves, cheese, and roasted flour, giving the dumpling a rich, earthy taste. Hoentay is chewy, wholesome, and very satisfying. It is mostly steamed but can also be fried when requested. Visitors who enjoy momos will find Hoentay a pleasant, flavourful, vegetarian twist.
9. Suja – The Famous Butter Tea
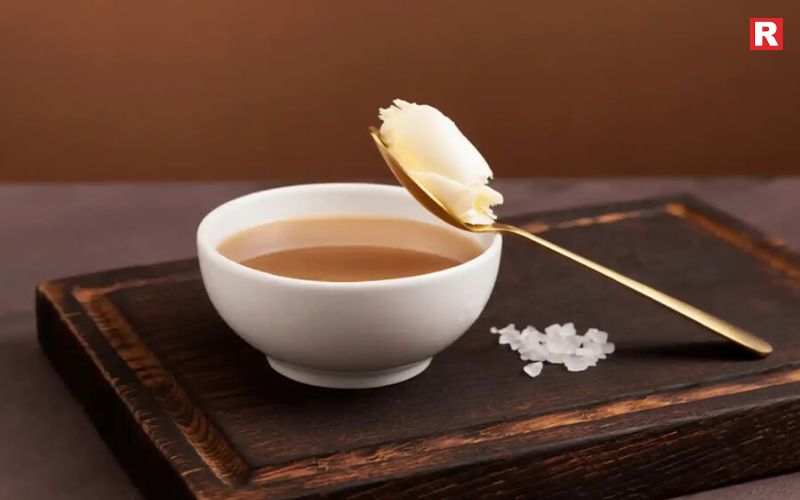
Suja is Bhutan’s well-known butter tea, made with tea leaves, yak butter, and a pinch of salt. Its flavour is very different from Indian tea, but it offers strong warmth and comfort in the cold mountain weather. The drink is vegetarian and holds cultural importance during gatherings and festivals. Many travellers try it to understand local traditions better. Suja reflects the lifestyle of people living in high altitudes, where rich and warming drinks play an important role in daily life.
10. Zow Shungo – A Delicious Zero-Waste Dish

Zow Shungo is a simple Bhutanese dish made by mixing leftover rice with fresh vegetables. It is popular in households because it prevents food waste and creates a light yet tasty meal. The dish often includes mild spices and seasonal produce, giving it a soft, homely flavour. It is ideal for people who prefer gentle tastes and healthy food. Zow Shungo shows how Bhutanese families value sustainability, mindful eating, and the smart use of everyday ingredients in their cooking.
Also check: 7 Desi Alternatives to Oatmeal for Weight Loss
Top A2 Ghee Brands in India to Keep You Warm & Healthy This Winter
Where to Try These Dishes
During your Bhutan trip, you can enjoy these dishes at:
- Thimphu: Ambient Café, Folk Heritage Café
- Paro: Champaca Café, Sonam Trophel
- Punakha & Bumthang: Local farmstays with home-cooked meals
Farmstays are especially recommended if you want to taste food made with fresh, organic ingredients straight from the fields.
Final Thoughts
Bhutan’s vegetarian food reflects the calm and simple way of life in the mountains. Every dish feels warm and fresh, made with ingredients that come straight from local farms. The flavours are mild, clean, and full of comfort. They show how closely Bhutanese people live with nature. Travellers who explore Bhutan often find that its vegetarian dishes add a new layer to their journey. From cheese-based stews to soft buckwheat pancakes, the food helps them understand the country’s culture in a deeper way. Each meal tells a story of tradition, local produce, and mindful cooking. These dishes do more than satisfy hunger. They create a sense of belonging. They bring visitors closer to the people, the farms, and the valleys that shape everyday life in Bhutan. Anyone visiting the country should taste these simple yet iconic vegetarian foods to truly experience its flavour and spirit.
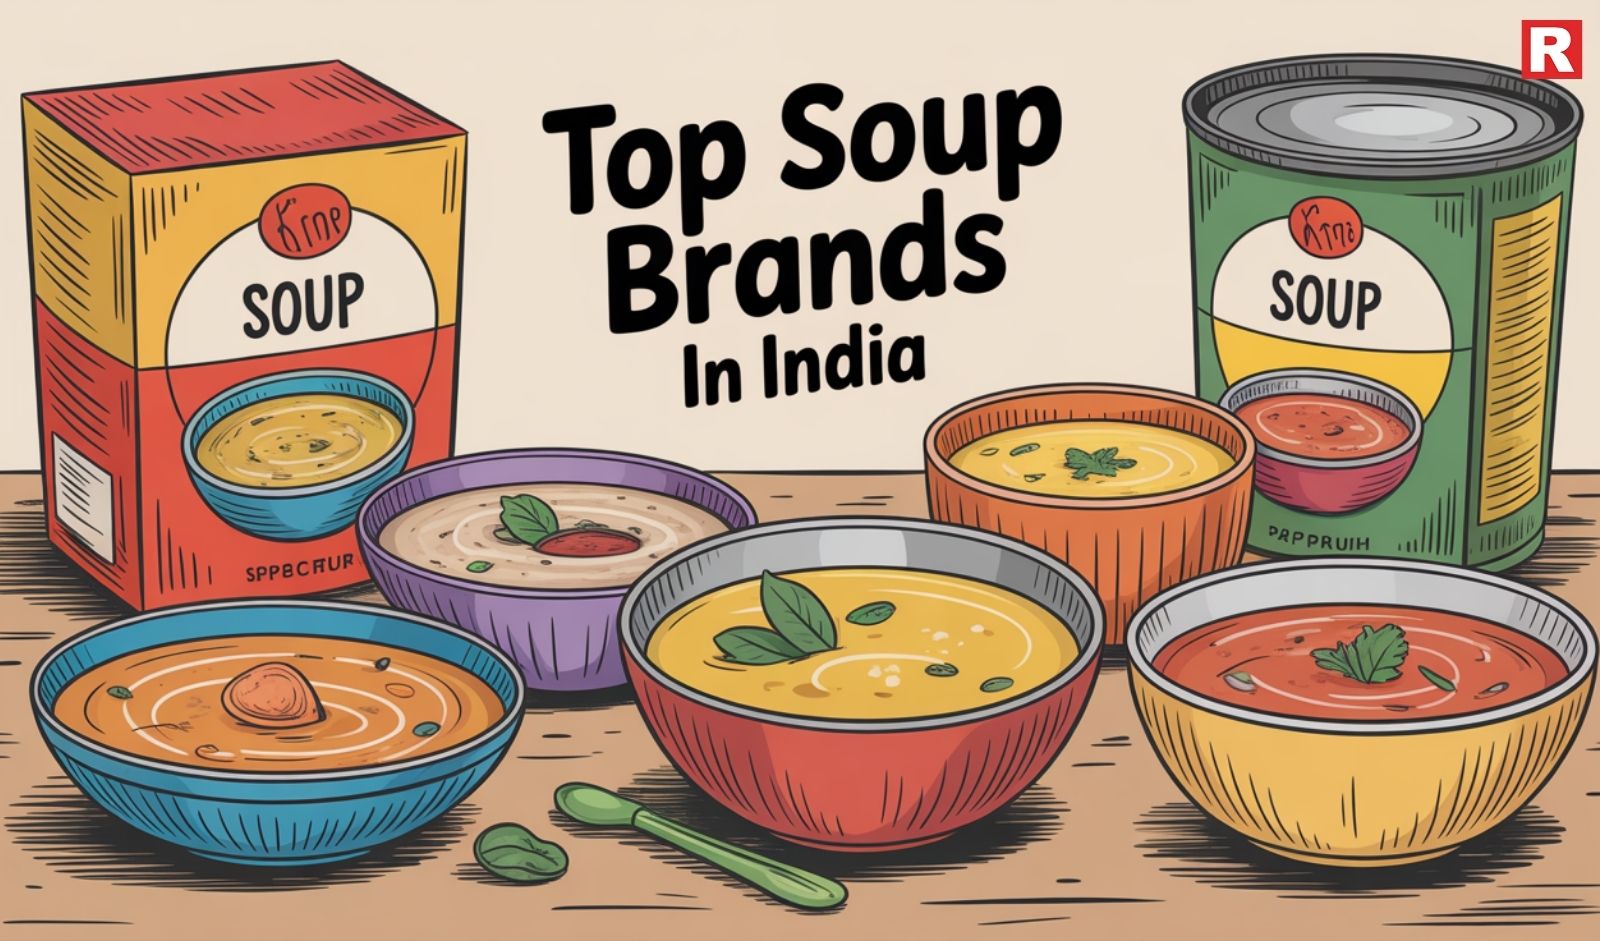
Soup has long been a familiar comfort in Indian households. Families reach for it on cold evenings, during quiet moments after work, or when someone needs something light and soothing. It is simple to prepare and fits easily into daily routines, which is why it has remained such a dependable meal over the years. As lifestyles change, the appeal of soup has only grown stronger. India’s soup market is expanding quickly because people now want food that is quick, affordable, and healthier than the usual snacks. The rise of instant mixes and cleaner, ingredient-focused options has made the category even more exciting.
Many brands are now offering soups that suit different tastes, from spicy bowls inspired by street-style flavours to soft, creamy ones that feel Western and rich. Others focus on clean, natural ingredients for those who prefer lighter meals. This variety gives consumers many choices for different moods and occasions. For anyone who enjoys soup or wants to try new favourites, exploring the top brands in the country can be a great start. Each brand brings its own style, making it easy to find a bowl that offers warmth, flavour, and comfort at any time of the day.
India’s Soup Market: A Quick Look
The demand for ready-to-make soups is rising every year. Urban lifestyles, busy work schedules, and the shift towards quick meals have boosted this category. More people now want healthier choices too, so brands are adding low-sodium, organic, and preservative-free options.
Instant soups are especially popular in winter and monsoon seasons. Families look for warm, filling, and easy-to-cook meals, and soups fit perfectly into this lifestyle. With modern flavours, new-age brands, and affordable pricing, soup has become both a comfort food and a smart meal choice.
Here’s a List Of Top Soup Brands in India
1. Knorr
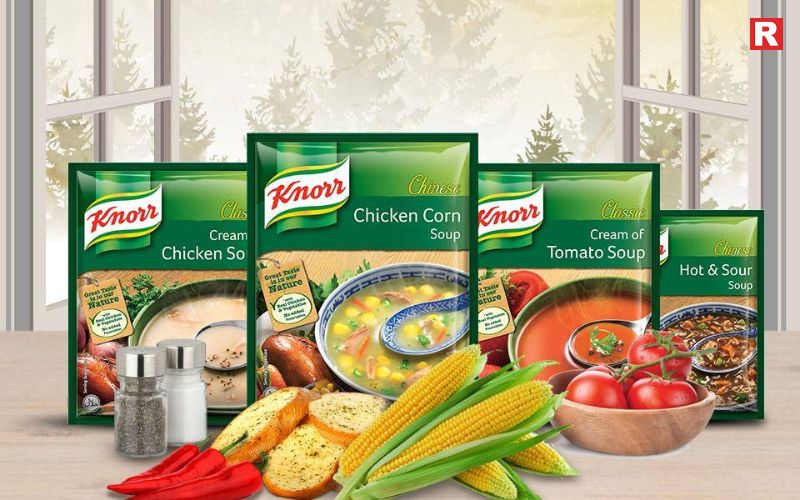
Knorr has built a strong place in Indian kitchens by offering soups that match local tastes and daily needs. The brand focuses on flavours that feel familiar yet exciting for families. Its soups blend easily with hot water and cook quickly, which makes them a reliable choice for busy homes. Knorr also pays attention to texture, ensuring that every bowl feels smooth and satisfying. Many people choose the brand because it delivers the same flavour each time, no matter who prepares it. Knorr’s soup range fits well into Indian routines, whether it is a quick evening snack or something warm before dinner. Its long presence in the market has made it a trusted name for all age groups.
Why people love it:
- Large variety of flavours
- Reliable taste
- Easy-to-make mixes
- Widely available in small and family packs
Read more: What is Kimchi? Top Veg Kimchi You Can Try at Home
7 Desi Alternatives to Oatmeal for Weight Loss
2. Ching’s Secret
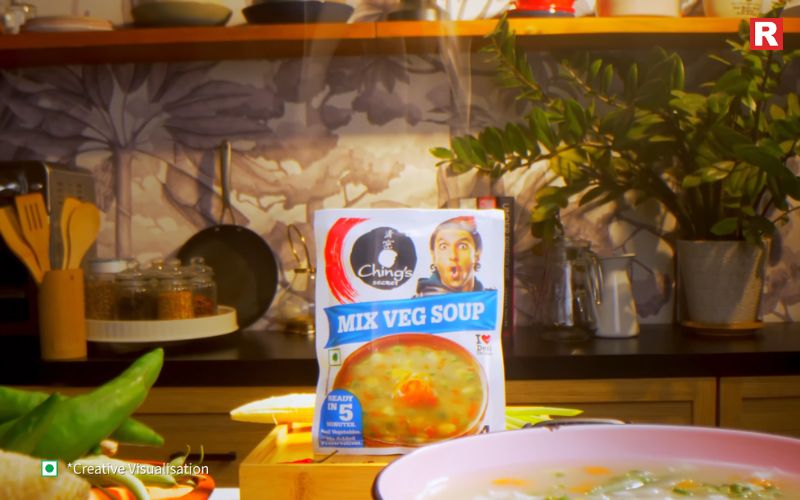
Ching’s Secret has become popular in India by bringing bold flavours that remind people of their favourite street-side Chinese stalls. Its soups carry a strong kick, which appeals to those who enjoy sharp and lively tastes. The brand focuses on fast cooking, allowing anyone to prepare a flavourful bowl within minutes. Ching’s also experiments with spice levels, giving customers choices that range from mild warmth to deep heat. Its soups pair well with simple home meals and often serve as a quick replacement for restaurant-style cravings. Young consumers enjoy the brand because the flavours feel energetic and fresh. With its distinct taste style, Ching’s Secret has created a niche of its own in the soup segment.
Why people love it:
- Strong, restaurant-style Indo-Chinese taste
- Affordable price range
- Perfect evening snack for spicy food lovers
3. Maggi
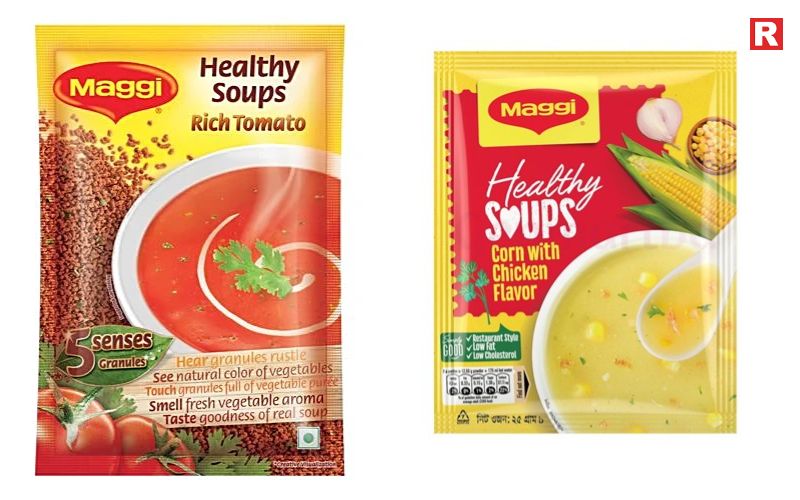
Maggi has earned a familiar place in Indian homes, and its soups reflect the same warm, homely touch that people associate with the brand. Each soup is built around gentle, comforting flavours that work well for both children and adults. The preparation process is simple and suits everyday schedules, especially for families looking for quick evening bites. Maggi’s soups blend smoothly when cooked and offer a light, pleasant texture. The brand maintains a soft flavour profile, which makes it suitable for those who prefer mild taste over strong spice. Its widespread reach also helps it stay a common pantry item across the country. Over the years, Maggi has continued to be a dependable option for simple and soothing soup bowls.
Why people love it:
- Simple flavours that suit all age groups
- Trusted brand
- Pocket-friendly
4. Campbell’s

Campbell’s brings an international feel to India’s soup market, offering flavours that feel rich and layered. The brand uses ingredients that create a deeper taste, giving each soup a more premium character. Campbell’s focuses on creating an experience rather than just a quick snack, which appeals to consumers who enjoy Western-style meals. The consistency of the soups feels thick and wholesome, making them suitable for late dinners or relaxed weekend meals. Many Indians prefer the brand when they want something different from regular instant mixes. Its long global history adds to its appeal and makes customers more confident about the quality. With its smooth balance of flavour and texture, Campbell’s stands out among premium soup choices in India.
Why people love it:
- Gourmet taste
- Creamy and hearty options
- Long-standing global reputation
Know more: Top Bread Brands in India That Define Freshness and Taste
5. Halo Soups
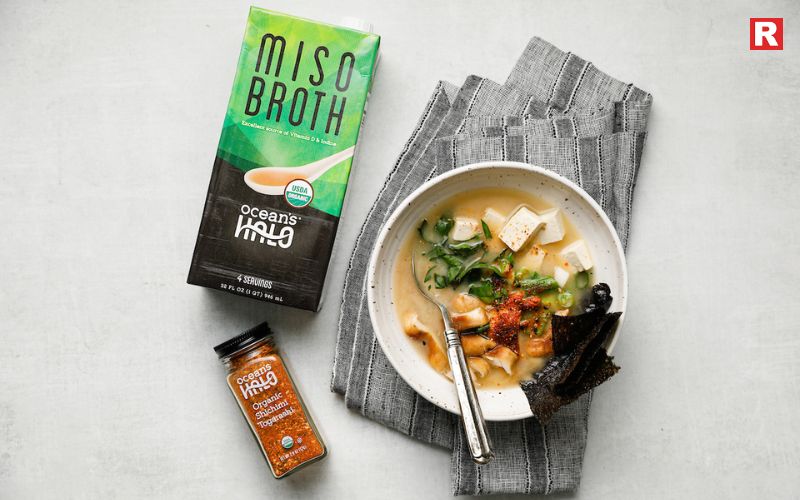
Halo Soups has become popular among people who are shifting towards cleaner and more natural food habits. The brand focuses on ingredients that feel close to homemade cooking, giving each bowl a fresh and honest taste. Halo avoids unnecessary additives, which makes its soups suitable for those who want lighter and more mindful meal options. The flavours are gentle yet full, offering a comforting blend without overwhelming spices. Many customers choose Halo when they want something healthy but still warm and filling. The packaging is also simple and modern, appealing to consumers who prefer clarity in what they eat. With its focus on purity and straightforward ingredients, Halo Soups has earned a loyal following in the wellness-food space.
Why people love it:
- Clean-label products
- No preservatives
- Nutritious ingredients
Types of Soups Indians Prefer
India’s soup preferences have changed a lot over time. Here are the most popular categories today:
- Instant Soups: Quick to prepare, pocket-friendly, and perfect for busy schedules.
- Creamy Soups: People love creamy Tomato, Mushroom, and Sweet Corn soups for their rich texture.
- Clear Soups: These are popular among fitness-conscious people and those wanting something light.
- Indo-Chinese Soups: Manchow and Hot & Sour remain top favourites, especially among students and young adults.
- Organic & Preservative-Free Soups: Growing awareness around health has boosted this segment significantly.
Also check: Top 10 Vegan Street Foods in India Every Indian Loves
8 Famous Vegetarian Dishes of Uttar Pradesh and Their Timeless Legacy
Top 10 Easy Soup Recipes for You to Try This Winter
For Your Comfort Meal!
Soup has always been a trusted comfort meal in India, and the new range of brands has only made it more enjoyable and easier to bring home. Today, the soup aisle is filled with choices that suit every kind of eater. Some people like strong Indo-Chinese flavours, while others prefer creamy, Western-style bowls. Many also look for cleaner and lighter options that feel close to homemade cooking. These brands understand different tastes and offer soups that fit busy schedules without losing quality. They focus on flavour, quick preparation, and ingredients that appeal to modern families. For anyone planning to stock up for winter evenings or simple weekday meals, these soup brands provide dependable and tasty options. Each bowl brings warmth, ease, and a little comfort to everyday life.

While pizza may be a gift from Italy, its concept is much older and more widely spread throughout the world than most people are aware. Before pizza had taken root in our hearts and stomachs, cultural traditions already existed around the world where baked and grilled bread or fried flat bread were topped with a variety of ingredients and flavors. Each piece of bread has its own history, ingredients, and soul, but they all share the same basic concept: a crispy or fluffy shell with savory toppings, and a choice to either tear, cut, or share the bread around a communal table of family and friends. Somewhere across continents, you can find foods related to pizza in both form and feeling. They are savory, comforting, shareable, customized, and tied deeply to their native regions.
In this article, we will be looking at 10 dishes from different kitchens and markets around the world that could be classified as pizza-style. They may not be generally referred to as pizza, but none deserve to be missed from your food bucket list.
Read more: 10 Pizza Without Onion and Garlic
10 Dishes That Share the Same Concept as Pizza
1. Lahmacun (Turkey)
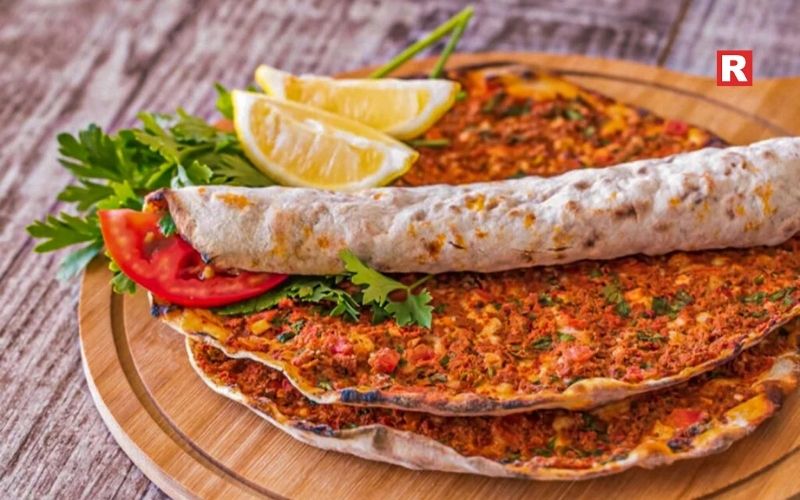
Lahmacun is often referred to as "Turkish pizza." It is a thin, round flatbread topped with a mix of minced lamb, onions, tomatoes, garlic, and parsley. The spices, cumin, paprika, and chili flakes bloom as it bakes, and the kitchen is filled with warmth and smoky aroma. When cooled slightly, Lahmacun is typically rolled up with fresh herbs, lemon juice, and sometimes crunchy pickles to be eaten. In Turkish culture, it is one of the ultimate informal meals. It is quick to prepare, satisfying, and completely wrapped in character. It has a lighter flavor profile than pizza, is crisp around the edges, and is filled with a tangy and spicy flavor often accompanied by a sensation of something that feels ancient yet modern.
2. Khachapuri (Georgia)

Khachapuri is the iconic cheese-stuffed bread of Georgia, a dish loved so greatly that it almost represents the country itself. The most well-known version is Adjaruli Khachapuri, which resembles a golden plank boat overflowing with molten cheese. Whipped out of a wood-fueled fire, all that's seen are the crust crackling, cheese bubbling, and an unused egg yolk sitting in the middle that swirls in last. It creates a creamy, stretchy, buttery experience unlike many others. Khachapuri isn't topped like classic pizza, but somehow the combination of dough, cheese, heat, and ritualized eating transforms it into one of the world's most indulgent pizza family options.
Know more: Slice of Happiness: The Best Domino’s Pizzas You Need to Try
3. Flammkuchen / Tarte Flambée (Germany & France)

Flammkuchen (or "tarte flambée") comes from the Alsatian region of the France–Germany border and is a humble creation of farmers and bakers. It was traditionally used to test the heat of wood-fired ovens. If the Flammkuchen cooked quickly, the oven was warm enough for bread. Its paper-thin base is topped with crème fraîche, caramelized onions, and lardons of smoky bacon. When cooked, it bakes to lightly crisp edges and the crème fraîche melts into a tangy, creamy base. Flammkuchen is lighter and crisping than classic pizza, combining the German earthiness with the French delicacy and skills.
4. Okonomiyaki (Japan)
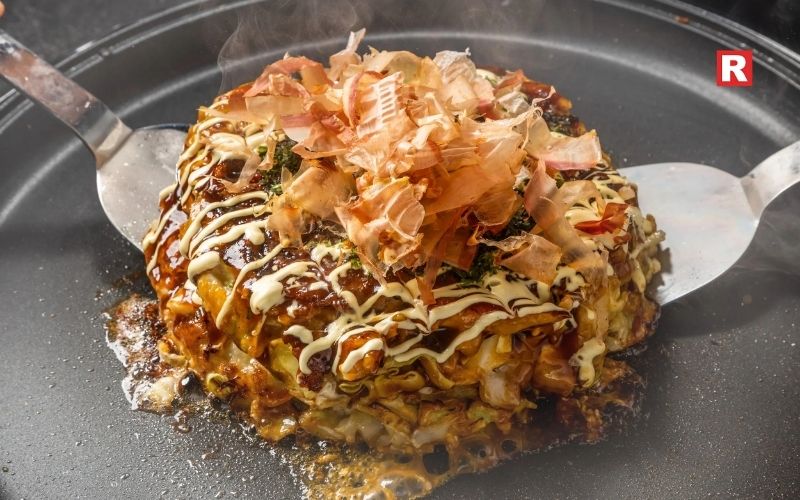
Commonly called "Japanese savory pancake," Okonomiyaki copies pizza's adaptability. The name literally translates to “grilled as you like it.” Shredded cabbage, flour, and eggs are used to make a batter that sizzles on a hot iron plate until the edges crisp. Toppings can include prawns, pork belly, cheese, and bonito that will dance with heat, and the perfect drizzle of creamy Japanese mayo and sweet-savory okonomiyaki sauce to complete the masterpiece. Like pizza, you share it in communal bites, have layered flavors, and enjoy watching it cook in front of you on street stalls or teppan grills.
5. Manakish (Lebanon)
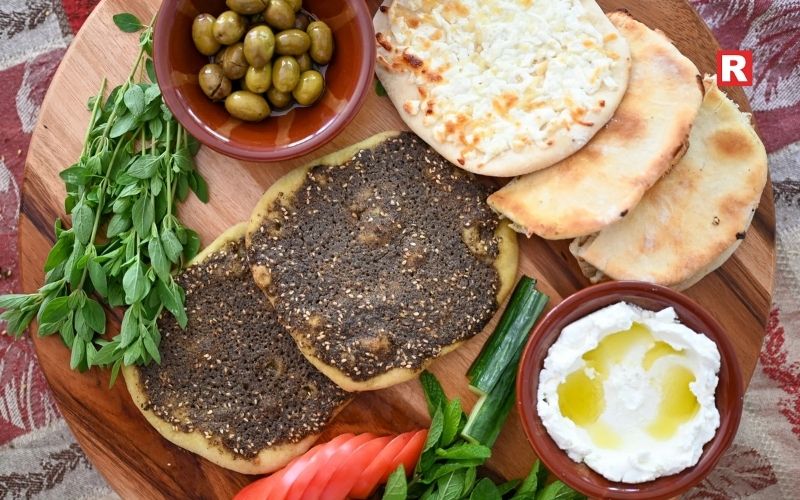
Manakish is the heart of Levantine breakfast culture. This Lebanese flatbread is served with fragrant za’atar, a combination of thyme with sesame seeds and sumac mixed with olive oil to make a rich, earthy paste. Some versions include cheese or minced meat, though za’atar remains the classic. The smell of manakish baking is irresistible: herbal, tangy, and warm. It is the cousin of pizza but with a Middle Eastern personality, which is rustic and comforting, and something to eat with morning tea or share with friends.
6. Sfiha / Arab Pizza (Middle East)

Sfiha, otherwise known as “Arab pizza,” is a soft flatbread shaped square or round, topped with spiced minced meat. While “pizza” means oozy melted cheese, Sfiha’s flavors are bright, lemony, and savory with pomegranate molasses, parsley, onion, and pine nuts. The meat topping, often as lean and tangy as Italian, gives Sfiha a refreshing aromatic quality. In Lebanon, Syria, and Jordan, Sfiha at times is served as a snack or appetizer, often paired with yogurt or pickled vegetables. Picture it as pizza’s more vibrant and spiced sibling.
What's new: 9 Budget-Friendly Foods Like Maggi for Late-Night Hunger
7. Arepas with Toppings (Venezuela & Colombia)
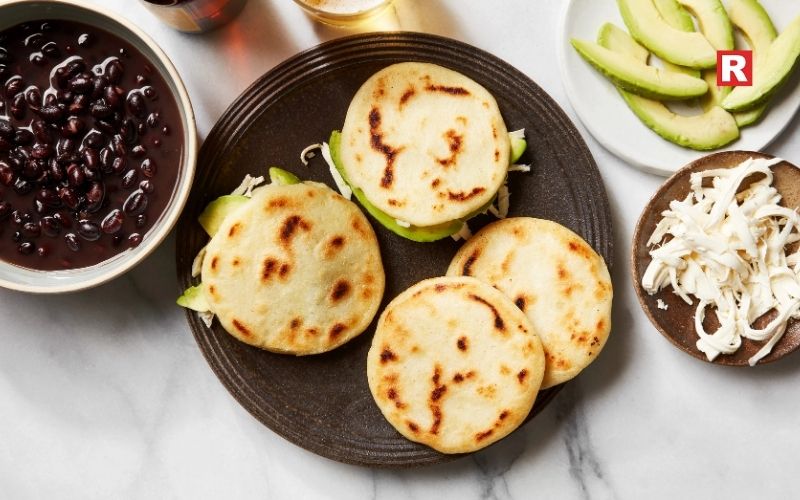
At first glance, Arepas might not resemble a pizza, but the idea is clearly the same. These thick corn cakes, which are crunchy on the outside, soft and steamy on the inside, are cut or sliced open and stuffed with savory filling. Anything from cheese, beans, shredded beef, eggs, avocado, and plantains can be added, making the arepa a customizable dish. Like pizza, arepas are casual, satisfying, and deeply regional. Vendors sell them piping hot off the street, generously stuffed with authentic flavor that spills out everywhere.
8. Fugazza & Fugazzeta (Argentina)

In Argentina, Italian immigrants arrived with their traditions of pizza-making, and the locals took those traditions and mixed them with their own. Fugazza is a thick, focaccia-style bread generously topped with caramelized onions and oregano. Fugazzeta, which is even more indulgent, adds even more cheese and onions to an already cheese-stuffed base. There is no tomato sauce, and there is no traditional mozzarella, just pure, onion-flavored comfort that is an Argentinianese cultural twist. Both Fugazza and Fugazzeta have some pizza-like characteristics, not just by the structure of the food, but culturally too. They are supposed to be shared, they are satisfying, and they have an immigrant-food history.
9. Paratha Pizza-Style (India/Pakistan)

"Pizza-style parathas are a street food that shows creativity at its best." A base of flaky, layered paratha is heated on the tawa until golden and crisp. The vendor then decorates it with toppings, including cheese, vegetables, tandoori chicken, paneer, or spiced chutneys, all of which are then folded or cut into wedges for consumption. The paratha has a delicious, buttery bread flavor, while the garnishes offer a fun, cheesy, heartwarming comfort. It's rich, it's messy, it's bold, and it's truly addictive, especially when you have tangy sauces on the side.
Check out: 12 Delicious Foods Like Dumplings From Asia You Must Try
8 Cheesy Foods Like Lasagna That Melt in Your Mouth
10. Coca de Recapte (Spain)

Coca is a Catalan flatbread enjoyed throughout Spain. This flatbread has a slightly chewy, thin base, which is topped with roasted vegetables such as bell pepper, onion, and smoked eggplant; occasionally, anchovies, sausage, or similar garnishes. This dish is usually made with the provisions that were left in the kitchen. Hence the name “recapte,” which means “provisions.”The aromas are smoky, Mediterranean, showing the dish’s simplicity. It resembles pizza but is rooted in a centuries-long Spanish talent and tradition. In Catalonia, Coca is a popular dish during festivals and family gatherings and represents a love of simply prepared food, which prioritizes ingredients.
What Makes These Dishes “Pizza-Style”?
Despite their differences in shape, texture, and ingredients, these dishes all clearly show similarities to pizza:
- A bread-like base: it can be either thin and crunchy or thick and soft.
- Layers of different toppings: including meats, vegetables, cheeses, and sauces.
- Communal eating: often sliced or broken apart to be enjoyed with friends or family.
- Similar cooking methods: such as using wood-fired ovens, hot griddles, or hearths.
- Comfort-food appeal: bold flavors on warm bread.
Each dish puts a unique spin on the main idea of toppings on a flat bread according to its local culture.
Learn more: 12 Instant Foods Like Maggi You Can Make With 3–4 Ingredients
The Bites of Comfort
These pizza-inspired dishes highlight the deep connections between various global food cultures. Each dish has its own story, whether it comes from the vibrant streets of Beirut or the bustling markets of Osaka. They all share a common theme: the delightful experience of warm bread filled with flavors from around the world. All these dishes show that pizza is not merely an Italian staple; it's a universal idea celebrated in many tasty ways.
For those who are adventurous food lovers, travelers, or enthusiasts of fusion cuisine, these dishes present a mouthwatering perspective on how different cultures define comfort food. Consider tasting them while traveling, attempting to make them at home, or simply enjoying their rich stories.
When hunger strikes after midnight, most Indians turn to one familiar favourite — Maggi. That warm, slurpy bowl of noodles has become a symbol of comfort for generations. It’s quick, tasty, and always hits the right spot. From college study sessions to long work nights, Maggi has been the easiest fix for sudden cravings.
But there are days when people want a change. Sometimes, even Maggi can feel too familiar after the third bowl in a week. The good news is that there are many other budget-friendly foods that are just as satisfying. These quick options are perfect for students, night-shift workers, and anyone who loves a late snack. From the lightness of poha to the cheesy comfort of instant pasta, every dish offers something unique. Most can be made in under ten minutes using simple ingredients already in the kitchen.
Find 9 Budget-Friendly Foods Like Maggi for Late-Night Hunger
1. Poha – Light and Comforting
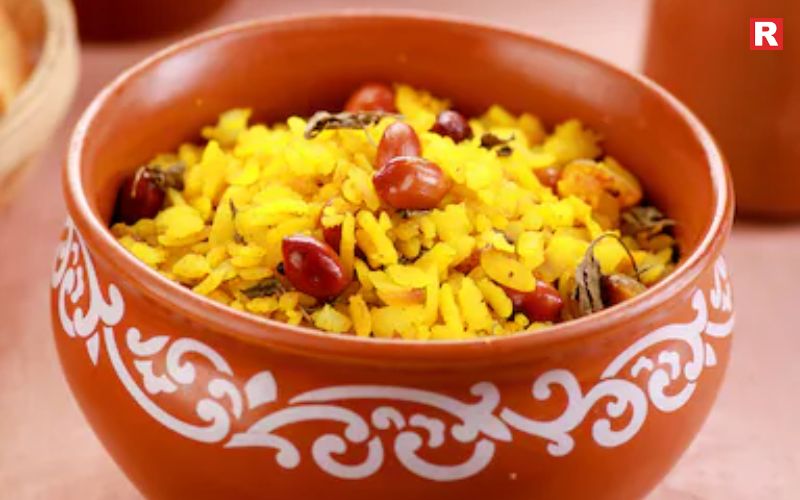
If you grew up in India, poha probably reminds you of home. Made with flattened rice, onions, and mild spices, poha is not only easy to make but also filling. It takes less than 10 minutes to prepare, making it a perfect late-night snack. Poha is known for its lightness. It won’t make you feel heavy even if you eat it late at night. You can add peanuts, vegetables, or even a sprinkle of lemon for extra flavor. It’s inexpensive, quick, and satisfies hunger in the healthiest way possible.
Read more: Top A2 Ghee Brands in India to Keep You Warm & Healthy This Winter
5 Cities That Serve the Best Non-Vegetarian Street Food
2. Upma – South Indian Comfort in a Bowl
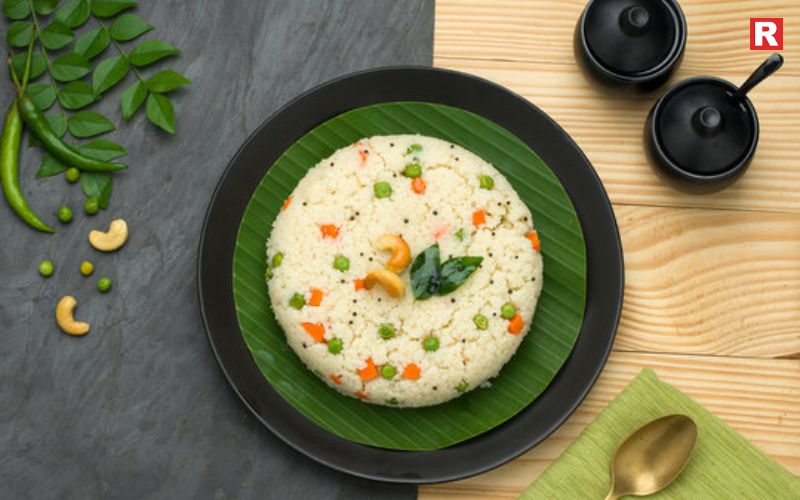
Upma is another simple, hearty dish that can compete with Maggi’s convenience. Made with semolina (sooji), mustard seeds, and curry leaves, this savory porridge can be ready in under 10 minutes. It’s warm, comforting, and has that homely taste we all crave at night. You can make it plain or add chopped onions, tomatoes, and a handful of peanuts for crunch. The ingredients are cheap, easy to find, and last long — ideal for hostel kitchens and bachelors.
3. Bread Omelette – A Classic Indian Quick Fix

The humble bread omelette has been a go-to snack for decades. With just two eggs, a couple of bread slices, and basic spices, you can make a filling meal in minutes. The best part? It’s protein-rich and gives you an energy boost. If you’re too tired to cook, this is your best option. Add cheese, onions, or a dash of green chutney to elevate the taste. It’s budget-friendly, wholesome, and perfect for those late-night hunger pangs when you need something warm and satisfying.
4. Instant Pasta – Maggi’s Stylish Cousin
Instant pasta is like Maggi’s trendy cousin. It’s available in ready-to-cook packs, comes in various flavors, and takes less than 10 minutes to make. Whether it’s masala, cheese, or tomato-flavoured pasta, the convenience level is the same as noodles. Brands like Sunfeast Yippee! and Knorr offer small packs that fit easily into a tight budget. Add some extra veggies or cheese to make it more filling. Instant pasta is perfect for those nights when you want comfort food that feels a little fancy.
Know more: What is Kimchi? Top Veg Kimchi You Can Try at Home
5. Ramen or Cup Noodles – Global Comfort, Indian Twist

Cup noodles are an instant hit among students and working professionals. Just pour hot water, wait for a few minutes, and your meal is ready. It’s the quickest way to satisfy hunger without turning on the stove. You can find dozens of Indian flavors like masala, curry, or spicy paneer. Ramen, too, has found its way into Indian kitchens, offering rich broth and chewy noodles. These are perfect for those nights when you crave something warm and flavorful without much effort.
6. Masala Oats – Healthy Yet Tasty
If you want something light but healthy, masala oats are your best bet. They’re not just for breakfast anymore. Many brands like Saffola and Quaker offer flavored versions that cook in just 3–5 minutes. Masala oats are packed with fiber, which keeps you full longer and helps digestion. You can add vegetables, chopped chillies, or even leftover curry to make it more interesting. It’s a guilt-free way to satisfy your cravings without compromising on taste or health.
7. Suji or Besan Chilla – Indian Pancakes for Late Nights

A chilla is India’s answer to a quick, savory pancake. Made from suji (semolina) or besan (gram flour), these can be whipped up in no time. Just mix water, salt, and spices into a batter and cook it on a hot pan. You can add onions, tomatoes, or coriander for flavor. Chillas are light on the stomach but heavy enough to fill you up. Plus, they’re inexpensive and don’t require fancy ingredients — just what you need for a midnight meal.
Also check: 5 Ways to Use Garden Cress Seeds (Halim) for Stronger Hair and Bones
5 Foods to Avoid for Better Cholesterol
12 Delicious High-Protein Foods to Eat Daily for a Healthier You
8. Leftover Fried Rice – The Ultimate Hack
When you’re too lazy to cook but too hungry to sleep, leftover rice becomes a blessing. Just toss it in a pan with some oil, onions, and soy sauce — and you’ve got yourself a plate of fried rice. It’s quick, tasty, and helps you use up leftovers creatively. You can add eggs, vegetables, or even paneer to make it more exciting. This dish is ideal for those who love experimenting with flavors and don’t want to spend extra on takeout.
9. Peanut Butter Toast or Banana Sandwich – No Stove Needed
For nights when even boiling water feels like too much work, this one’s a savior. Peanut butter toast or a banana sandwich is the easiest no-cook option out there. All you need is bread, peanut butter (or any spread), and a banana or honey if you like it sweet. It’s affordable, quick, and surprisingly filling. The protein and natural sugars keep you full while giving your body a little energy boost before bed.
Late Night Saver!
All these foods have one thing in common — they are quick, easy, and full of comfort. They can be made with simple ingredients found in almost every kitchen. There is no need for fancy recipes or long cooking hours. Each dish brings warmth and satisfaction after a tiring day. Late-night hunger is something everyone experiences, but how one chooses to fix it shows creativity. Some prefer a quick bowl of noodles, while others enjoy toasting bread or stirring up some poha. Students, office-goers, and night owls all find comfort in these simple meals.
These dishes are not just about filling the stomach; they bring a sense of calm and care. They remind people of home-cooked food and quiet moments. Sometimes, the best meals are not planned or fancy — just something warm, easy, and made with love, even if it’s in the middle of the night.

Ghee has always been an essential part of Indian kitchens, especially during the winter months. It adds richness to food, keeps the body warm, and supports overall health. More than a cooking ingredient, ghee represents a tradition rooted in Indian culture and Ayurveda. In recent years, A2 ghee has become the preferred choice for those seeking purity and nutrition. It is made from the milk of indigenous cow breeds such as Gir, Sahiwal, and Tharparkar. Unlike regular ghee, A2 ghee contains the A2 beta-casein protein, which is easier to digest and rich in healthy fats, vitamins, and antioxidants.
Nutritionists and Ayurveda experts recommend A2 ghee for its ability to improve digestion, boost immunity, and nourish skin during cold weather. It also helps maintain body warmth and provides long-lasting energy. With the growing focus on health and traditional eating, several Indian brands now offer high-quality A2 ghee made through the ancient Bilona method. As the winter season begins, choosing the right A2 ghee can be the simplest way to stay healthy, warm, and connected to India’s timeless food heritage.
What Makes A2 Ghee Perfect for Winters
A2 ghee is derived from milk that contains the A2 beta-casein protein, found in indigenous Indian cow breeds. This protein is easier to digest than the A1 variant present in milk from hybrid or foreign cows. The result is a ghee that’s richer in omega-3 fatty acids, vitamin A, antioxidants, and good cholesterol.
During winter, A2 ghee acts as a natural shield against the cold. It keeps the body warm, supports joint lubrication, and prevents skin dryness. Ayurveda also recommends adding ghee to your diet during the colder months, as it helps balance the body’s internal heat and strengthens immunity. In short, A2 ghee isn’t just a cooking ingredient — it’s nature’s way of preparing your body for winter.
Find Top A2 Ghee Brands in India
1. Two Brothers Organic Farms A2 Ghee
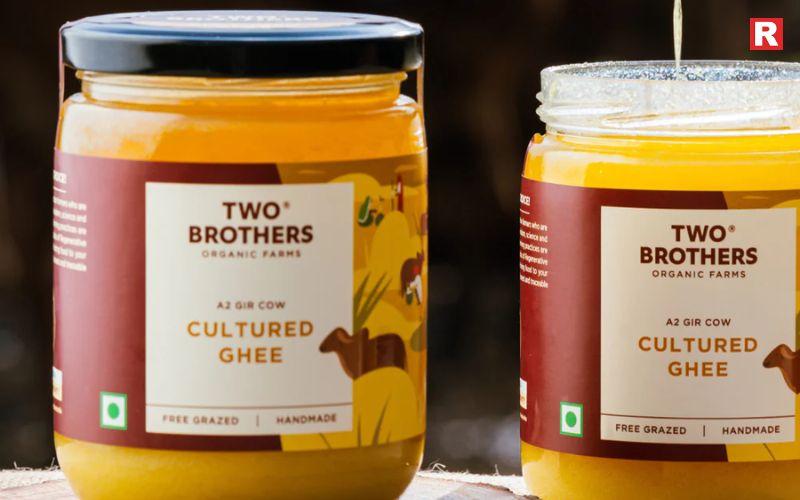
Two Brothers Organic Farms, based in Maharashtra, is one of the most trusted names in the organic food space. Their A2 ghee is made from the milk of Gir cows using the traditional Bilona churning method, where curd is hand-churned to extract butter, which is then slowly heated to produce ghee. This slow-cooking process gives the ghee a rich golden colour, nutty aroma, and granular texture. It’s 100% organic, free from preservatives, and perfect for those who prefer authentic, farm-to-table products. Many nutritionists recommend it for daily consumption due to its high nutrient retention.
Read more: Top 10 Vegan Street Foods in India Every Indian Loves
7 Desi Alternatives to Oatmeal for Weight Loss
2. GirOrganic A2 Cow Ghee
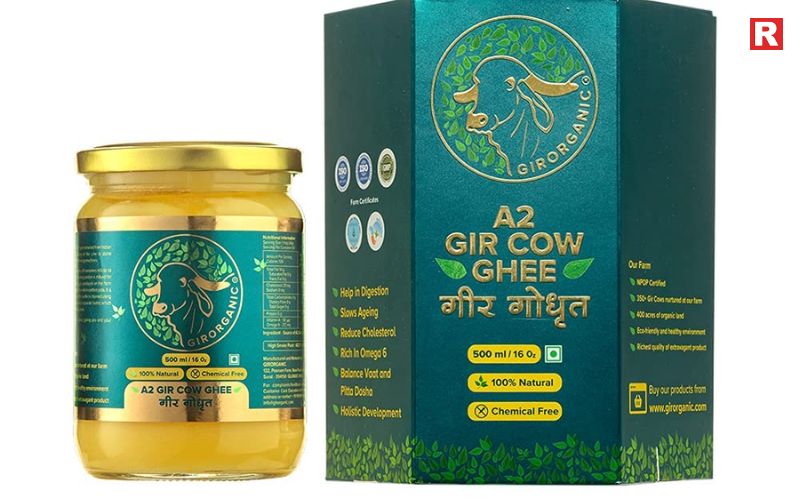
GirOrganic sources its milk from Gir cows that are grass-fed and raised in stress-free environments. The brand follows a traditional, slow-cooking process that preserves the ghee’s nutrients and flavour. GirOrganic A2 ghee is known for its purity and pleasant aroma, making it ideal for cooking, spreading, or even consuming raw with warm milk. The brand is certified organic and transparent about its sourcing, making it a reliable choice for families looking to switch to chemical-free ghee.
3. Kapiva A2 Desi Ghee

Kapiva is known for combining ancient Ayurveda with modern wellness. Its A2 Desi Ghee is made from the milk of grass-fed Gir cows from Gujarat. The Bilona method ensures that the ghee retains its original aroma and taste while maintaining all essential nutrients. Kapiva’s A2 ghee is rich in vitamins A, D, E, and K. It helps improve metabolism and immunity and is suitable for those with lactose intolerance. It’s also popular among people following Ayurvedic diets or ketogenic lifestyles.
4. Vedic Ghee
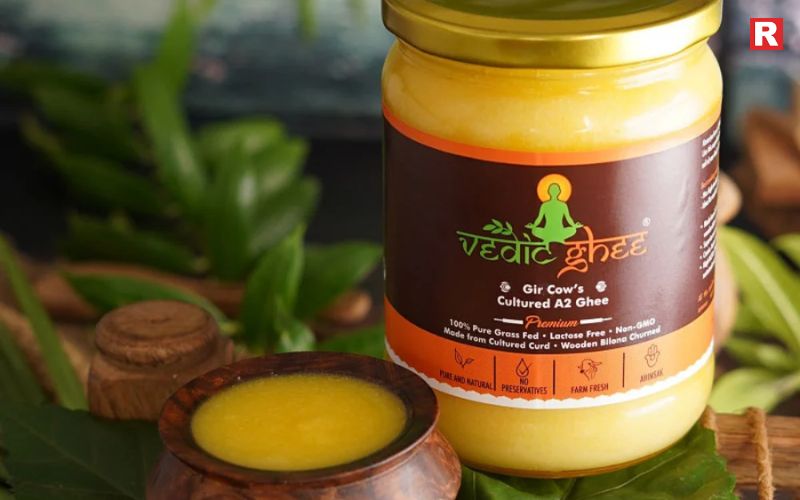
Vedic Ghee takes inspiration from ancient Ayurvedic texts to create pure, hand-churned A2 ghee. The brand uses milk from local Indian cow breeds raised on natural fodder. Each batch is made in small quantities using the Bilona process. The ghee has a deep, earthy flavour and a rich golden hue. It’s particularly favoured by those looking for an Ayurvedic option to support digestion, mental clarity, and vitality. The brand’s commitment to sustainability and traditional practices makes it a standout choice.
Know more: 12 Delicious High-Protein Foods to Eat Daily for a Healthier You
5. Anveshan A2 Ghee

Anveshan A2 Ghee has gained immense popularity among young consumers for its traceable sourcing and commitment to quality. Each jar of ghee comes with a QR code that allows you to trace the farm and cow breed it came from. Made using the Bilona process, Anveshan A2 Ghee retains all essential nutrients and offers a natural aroma and rich texture. It’s perfect for everyday cooking, skin nourishment, and Ayurvedic consumption. The brand’s transparency and clean packaging have made it a preferred option among modern Indian households.
6. Patanjali A2 Cow Ghee
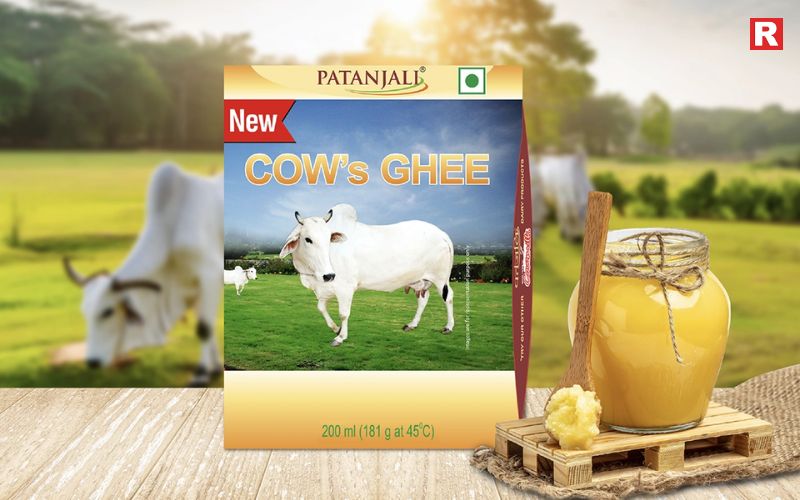
Patanjali, one of India’s largest Ayurvedic brands, offers an affordable and widely available A2 cow ghee. Made from the milk of Indian cow breeds, it is a reliable option for those seeking purity on a budget. The ghee is aromatic, rich in essential fatty acids, and ideal for cooking traditional Indian meals. Being FSSAI-certified and easy to find in stores, it’s a practical choice for families across India.
7. Baidyanath A2 Ghee
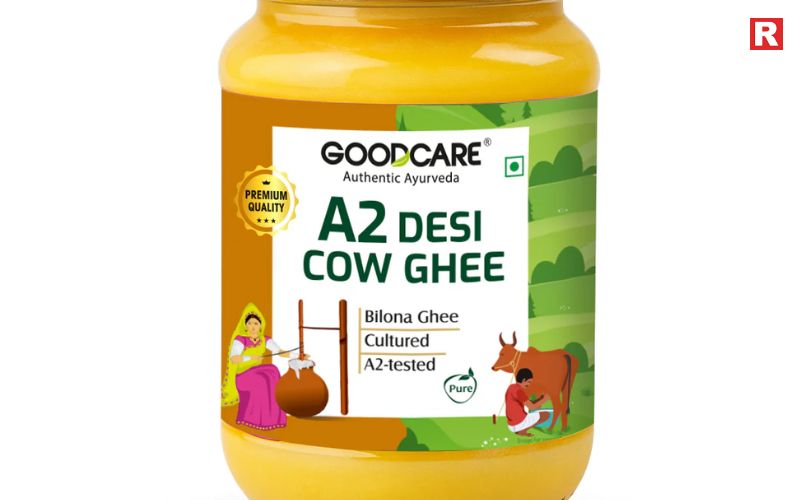
Baidyanath, a heritage Ayurvedic brand with over a century of experience, offers a high-quality A2 ghee crafted for holistic health. Made from the milk of indigenous cows, this ghee is processed traditionally to retain its medicinal value. It’s known to boost immunity, improve digestion, and enhance overall strength — all essential benefits during the winter months. The brand’s Ayurvedic expertise makes it a trusted name for those who value purity and authenticity.
Also check: Top 5 States With the Spiciest Food in India
7 Healthy Chicken Dishes to Maintain Your Diet
8. Amrutam A2 Cow Ghee

Amrutam’s A2 Cow Ghee is produced in small batches using fresh milk from grass-fed Indian cows. The ghee is made through slow cooking over wood fire, which gives it a smooth texture and a natural, nutty aroma. It’s ideal for skincare, cooking, and traditional remedies. Many users prefer it for its luxurious taste and the brand’s eco-conscious packaging. Amrutam ghee brings together purity, craftsmanship, and heritage in one jar.
9. Bharat Vedica A2 Gir Cow Ghee

Bharat Vedica’s A2 Gir Cow ghee transforms everyday cooking into a luxurious winter ritual. Made using the traditional Bilona method and stored in a PVD-coated stainless steel jar, that comes along with a complimentary customised name-engraved ghee pot. Its golden richness and velvety texture bring warmth and wellness to your meals. Ideal for winter soups, parathas, or even a simple drizzle over steamed vegetables, it’s comfort in its most elegant form.
Benefits of Consuming A2 Ghee in Winter
Including A2 ghee in your winter diet offers multiple health benefits.
- It keeps the body warm and active by maintaining internal heat.
- Regular consumption helps improve digestion and gut health.
- A2 ghee strengthens immunity, helping you fight common colds and infections.
- Its healthy fats keep the skin soft and hydrated, preventing winter dryness.
- It also supports joint health and acts as a natural lubricant for the body.
- Rich in vitamins and omega-3s, A2 ghee enhances brain function and memory.
For generations, Indian households have trusted ghee not only for cooking but also as medicine — and A2 ghee continues that legacy beautifully.
Ways to Add A2 Ghee to Your Winter Diet
A2 ghee blends easily with Indian food traditions.
- Add a spoonful to dal, khichdi, or rotis for a richer taste.
- Use it in halwas, laddoos, or parathas for added warmth.
- Drink a teaspoon of ghee in warm milk every morning for energy.
- Apply a few drops on lips and skin to prevent dryness.
- Try using it for oil pulling or nasal drops (as recommended in Ayurveda).
These simple habits can make your winter healthier and more balanced.
Stay Healthy!
A2 ghee is a wellness choice to return to India’s traditional way of healthy living. Made from the milk of indigenous cows, it connects modern lifestyles with age-old food wisdom. As winter approaches, A2 ghee becomes a must-have in every Indian kitchen. It keeps the body warm, boosts energy, and supports overall health.\ From heritage brands like Baidyanath to newer names like Anveshan, every jar of A2 ghee reflects purity, authenticity, and care. Its rich texture and natural aroma remind people of the simplicity and nourishment of home-cooked food.Adding a spoonful of A2 ghee to daily meals can improve digestion and add flavour while keeping the body strong through cold weather. This winter, A2 ghee stands as a symbol of warmth and wellness — a simple, natural way to enjoy good health and the authentic taste of India.

There's something universal in food that hides treasures within, a filling nested between layers of dough, rice, and leaves. Dumplings may be Asia's most famous wrapped food, but they are certainly not alone. Throughout Asia, you'll find dozens upon dozens of foods that share the same concept: a flavorful filling enveloped in a delicate casing and steamed, fried, or wrapped into something special.
From busy street-side markets to quiet home kitchens, Asian cooks have mastered the technique of layering textures like crisp and tender, fragrant and spicy, light and hearty. What they all have in common is the craftsmanship put into every fold, roll, or wrap.
If you’re into dumplings, here are 12 food items from Asia that carry the same spirit that dumplings do, along with their own varieties and preparation methods.
Read more: Top 10 Vegan Dishes in Asian Cuisine
12 Must-Try Foods Like Dumplings Across Asia
1. Onigiri (Japan)
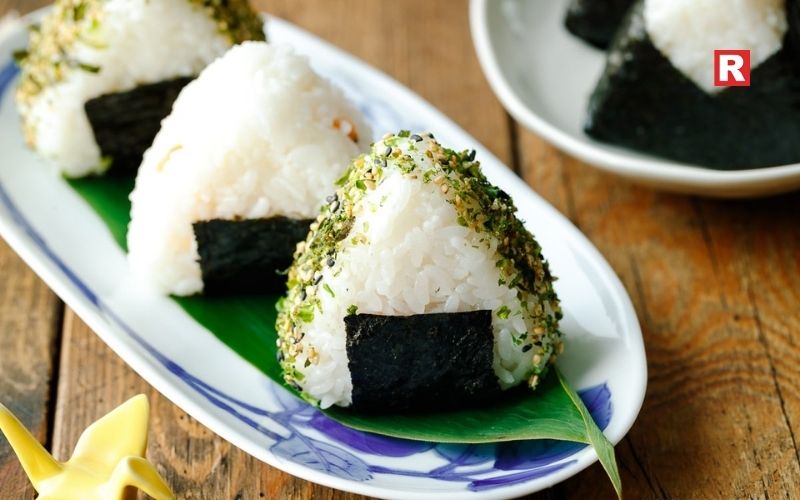
Onigiri is a simple dish made in Japan. A ball of rice is shaped into a triangle or oval, wrapped in a crisp sheet of seaweed. But bite into it, and there’s always a surprise inside. You can find fillings like salted salmon, tart pickled plum, or creamy tuna mayo nestled in the soft, sticky rice. For a lot of Japanese folks, onigiri is pure comfort food. It’s portable, wholesome, and doesn’t require much effort. You’ll find it everywhere on the shelves at convenience stores, tucked into lunchboxes, or sold at train stations. There’s something about the mix of warm rice, savory filling, and that snap of seaweed that just feels right. It’s the kind of food that feels like home.
2. Zongzi (China)

Every year when the Dragon Boat Festival comes around, families in China get together to make zongzi, which are sticky rice parcels shaped like pyramids and wrapped in bamboo or lotus leaves. Inside, you’ll find all sorts of fillings like marinated pork belly, mung beans, chestnuts, or maybe a bright orange salted duck egg yolk. Once they’re steamed, the leaves’ scent seeps into the rice, so every bite tastes earthy and almost floral. Unwrapping a zongzi feels a bit like opening a present. Just peel back the shiny leaves and there’s your glutinous, savory treat. It’s soft, rich, and a little sweet. More than just food, zongzi is a family tradition wrapped up in a leaf, a taste of celebration, and old memories.
Know more: 8 Cheesy Foods Like Lasagna That Melt in Your Mouth
3. Bánh Bèo (Vietnam)
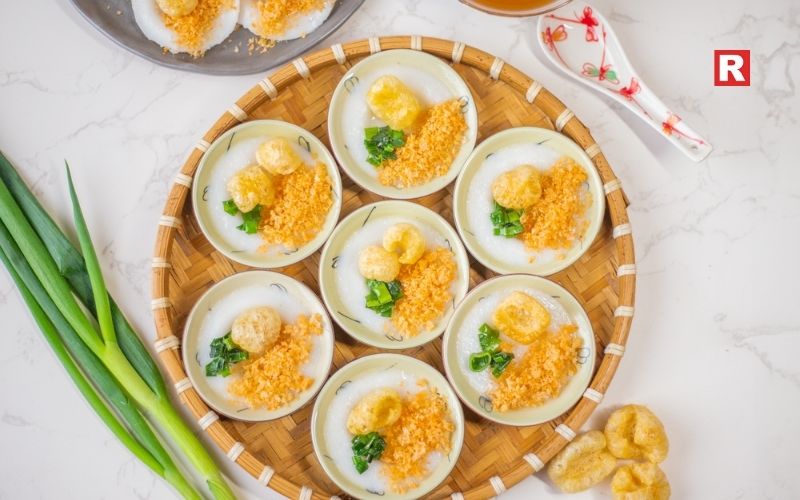
Bánh bèo are tiny, delicate steamed rice cakes that are light as air and always served in little clusters. Each one is topped with a scatter of minced shrimp, scallions, crispy shallots, and a splash of bright fish sauce. They’re bouncy and soft, and they melt when you eat them, except for the little crunch from the toppings and the salty-sweet taste from the dipping sauce. You eat them from dainty porcelain dishes, one after the other. Down in southern Vietnam, bánh bèo is more than a snack. It’s a fun, fragrant ritual, something you share with friends, light and easy but never boring.
4. Gimbap (Korea)
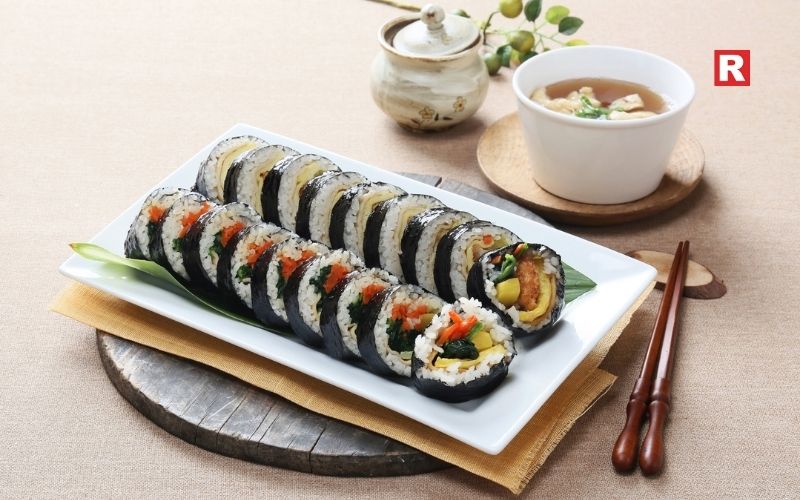
Gimbap is Korea’s rolled version of comfort. Each gimbap, rolled with steamed rice, sesame oil seasoned, vegetables, and usually egg and bulgogi beef, is rolled tightly in gim (seaweed) and sliced into little pieces. It’s a colorful mix of chewy rice, crunchy vegetables, and the nutty essence of sesame. Unlike dumplings, gimbap is enjoyed cold, making it great for picnics and road trips. For a lot of Koreans, it’s pure nostalgia, the flavor of childhood, summer outings, and homemade care.
5. Bánh Cuốn (Vietnam)
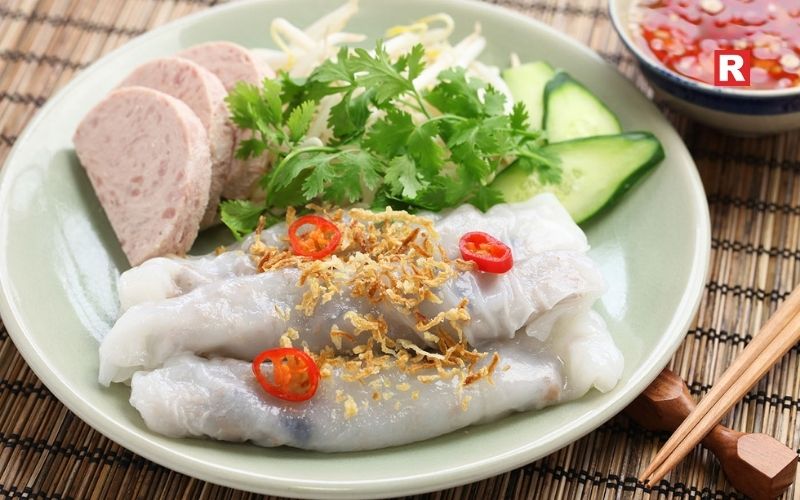
Soft, slippery, and incredibly fragrant, bánh cuốn are thin, steamed rice sheets rolled around minced pork, wood ear mushrooms, and shallots. They’re served warm, garnished with fried onions, and served with some sweet and sour fish sauce for dipping. The rice crepe is so thin that it is translucent, similar to a dumpling wrapper, but silkier. As you slice into the crepe, steam releases a delicious aroma of shallots and fish sauce. Bánh cuốn is a favorite breakfast in northern Vietnam. It is so light yet satisfying, proving that simple is sophisticated.
6. Lumpia (Philippines & Indonesia)

Crunchy, golden, and utterly addictive, Lumpia is Southeast Asia’s version of a spring roll. The wrap is thin paper with minced meat, carrots, and cabbage tightly rolled for frying. In the Philippines, lumpia is a must-have at celebrations. The sound of the crackling of each lumpia and the gust of savory steam when you bite is pure ecstasy. Paired with sweet chili sauce or some garlic vinegar, lumpia brings people together. These are truly crunchy bites filled with warmth and laughter.
7. Murtabak (South Asia & the Middle East)
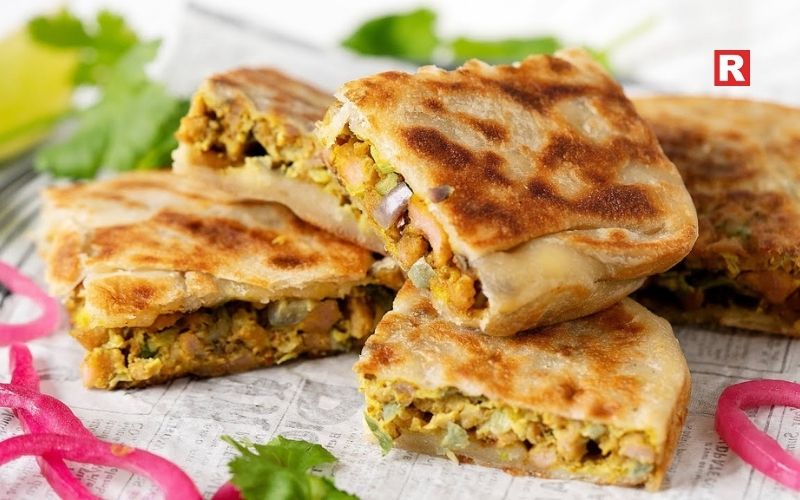
Murtabak is a stuffed pancake that is famous and enjoyed in diverse places in India, Malaysia, and Indonesia. Layers of folded, incredibly thin dough carry mild, spiced minced meat, scrambled egg, and onions, which are folded and then pan-fried to a golden brown. Once cut open, the layers reveal a fragrant blend of curry, herbs, and sizzling juices. Murtabak is something that fills you up and comforts you at the same time. Usually, it’s served fresh off the griddle with tangy pickled onions or a bowl of curry for dunking.
What's new: 12 Instant Foods Like Maggi You Can Make With 3–4 Ingredients
8. Paratha Rolls (India & Pakistan)
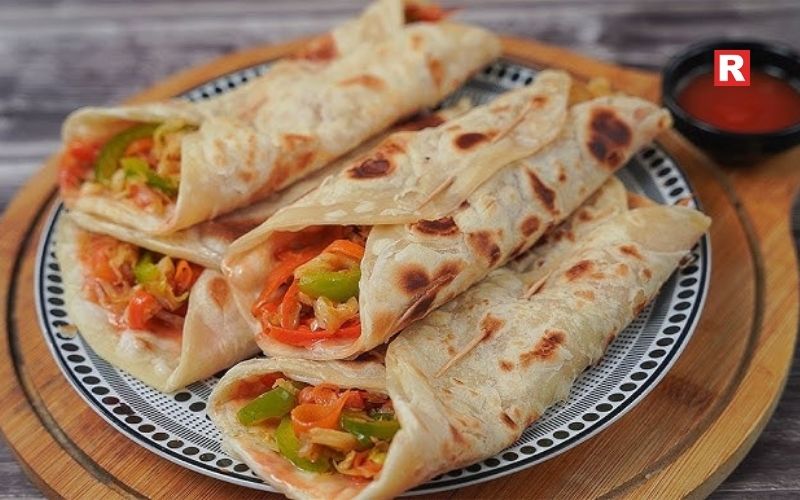
Flaky, buttery, and flavorful paratha rolls share the same filled-food concept as dumplings, but with a South Asian twist. The dough, which is crisped on a griddle with a generous amount of ghee, wraps around spicy fillings such as potato, paneer, or minced lamb (or keema). Roll one up, smother it with mint chutney or yogurt, and enjoy this warm and comforting street food with bold and exciting flavor. Paratha rolls are the street-side representation of love in a wrapped container. It is fast, flavorful, and deeply satisfying.
9. Curry Puffs (Malaysia & Singapore)

Curry puffs are flaky pastries that contain curried potatoes, chicken, and boiled egg. Basically, flavor packed in a golden parcel. Take a bite, and the pastry shatters, butter flakes everywhere, and suddenly you’ll smell turmeric and spice everywhere. They can be found at bakeries, hawker stalls, and train stations. If dumplings are gentle and soothing, curry puffs are their wild, crunchy cousin. And you won’t stop after just one piece.
10. Nasi Lemak Packets (Malaysia)
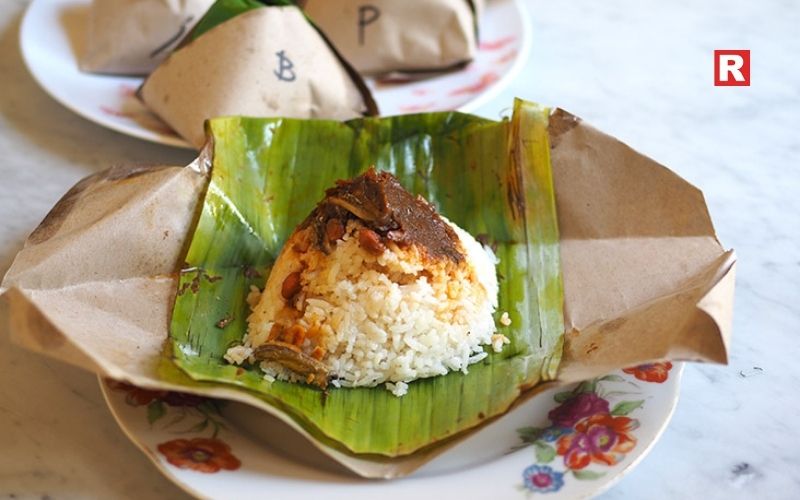
Nasi lemak, while not wrapped in dough, captures the element of surprise that defines dumplings. Coconut rice, sambal chili, fried anchovies, boiled egg, and peanuts are all bundled up tight in banana leaves. Peel one open, and the fragrance of coconut and pandan leaves fills the air. The combinations of textures from the creamy rice, spicy sambal, and crunchy nuts make the dish hard to resist. People usually eat it for breakfast, but it can be eaten whenever you feel like it. It proves you don’t need fancy wrapping; a banana leaf does the job with style and a little poetry.
Check out: How to Make Momo at Home for a Healthy Treat
7 Korean Alcohols That Prove There’s More to Korea Than Just Soju
11. Samosas (India)
Crispy, triangular, and totally satisfying, samosas have quickly become one of India's favorite snacks. This golden shell holds yummy spiced potatoes, peas, and in non-veg versions minced meat, seasoned with cumin, chili, and coriander. The result is a crunchy, warm, and spicy bite of perfect balance. Even though they are deep-fried instead of steamed, samosas give off the same comforting, wrap-like feeling as dumplings. This is a food to be enjoyed together, passed around, and slowly, deliciously eaten with tangy tamarind chutney.
12. Chakin Sushi (Japan)
Chakin sushi are pouches made from sushi rice wrapped in delicate egg crepes, often tied up with a small piece of nori or scallion, and filled with seasoned rice, vegetables, or seafood inside. The texture is soft and silky, the taste a gentle mix of sweet egg and vinegared rice. They are usually served at festive occasions, as their sunny color is a symbol of good luck and happiness.
Learn more: 10 Munchies Ideas for You to Try at Home
A Bite of Culture in Every Pocket
When you look across Asia, it’s clear that everyone loves wrapped food that also provides comfort. Whether it’s bamboo leaves or pastry shells, steamed or fried or rolled, these dishes are about creativity and making something special out of simple things. Each one, zongzi, lumpia, and the rest, carries the flavors and stories of the people who make them. They’re not all dumplings, but they’ve got the same heart: food that feeds you and brings you together. In the end, wrapping food isn’t just about cooking. It’s about sharing where you come from.

There is something truly comforting about cheese. Its creamy texture, golden crust, and rich aroma have a way of making any meal feel special. Around the world, cheese has become more than an ingredient—it’s a feeling of warmth and indulgence. Among all cheesy dishes, lasagna stands out as a timeless favourite. With its soft pasta layers, tangy tomato sauce, and thick blanket of melted cheese, it’s the kind of meal that makes people slow down and savour every bite. It’s a dish that reminds many of home-cooked comfort and family dinners.
But lasagna is only one chapter in the world of cheesy delights. From the silky texture of mac and cheese to the crisp pull of a mozzarella stick, there are endless ways to enjoy cheese. Every culture has found its own way to melt, bake, or stuff it into something irresistible. These dishes, simple yet rich, prove that when cheese melts, it doesn’t just fill plates—it fills hearts.
Find 8 Cheesy Foods Like Lasagna
1. Mac and Cheese – The Classic Hug in a Bowl

Nothing says comfort quite like a bowl of creamy mac and cheese. This American classic blends soft elbow macaroni with rich, gooey cheddar and a buttery sauce that coats every bite. It’s simple, yet incredibly indulgent. While traditional recipes use only cheese and milk, many now add ingredients like garlic, parsley, or even caramelized onions for extra flavour. Some prefer the baked version, with a crunchy top layer that gives every bite a satisfying contrast. Others love the stovetop version — silky, creamy, and quick to make. In India, mac and cheese has found its way into cafes and home kitchens alike, often served with a desi twist of spices or jalapeños.
Read more: What is Kimchi? Top Veg Kimchi You Can Try at Home
Domino’s 4-Course Meal— The Ultimate Lunch Deal You Can’t Miss
2. Cheese Fondue – The Swiss Dip of Dreams

If you love the idea of dipping bread into molten cheese, fondue is the perfect indulgence. Originating in Switzerland, this communal dish brings people together around a pot of warm, melted cheese mixed with white wine and garlic. Traditionally made with a blend of Gruyère and Emmental, cheese fondue is served with cubes of bread, roasted potatoes, or steamed vegetables. It’s more than just food — it’s an experience. In India, high-end restaurants and alpine-themed cafés have started offering fondue nights, making it a favourite for winter evenings and cozy get-togethers.
3. Pizza Margherita – Italy’s Melty Masterpiece

Pizza Margherita is proof that simplicity can be extraordinary. With its thin crust, tomato sauce, mozzarella cheese, and fresh basil leaves, it captures the essence of Italian comfort food. The key lies in the quality of ingredients — especially the cheese. When fresh mozzarella melts over a wood-fired base, it creates that stretchy, satisfying texture that pizza lovers crave. India’s love for pizza has evolved beyond fast food chains. Today, local pizzerias and artisanal bakeries across cities like Mumbai, Delhi, and Bengaluru offer authentic Neapolitan pizzas baked to perfection.
Know more: 10 Awadhi Cuisine Classics You Must Try at Least Once
4. Quesadillas – The Cheesy Mexican Delight

Quesadillas are Mexico’s answer to a quick and delicious cheesy fix. Made with soft tortillas filled with melted cheese and optional fillings like beans, chicken, or veggies, they are crisp on the outside and oozing with cheese on the inside. Traditionally cooked on a flat griddle called a “comal,” they’re served with salsa, guacamole, or sour cream. What makes quesadillas special is their versatility — you can stuff them with anything you like and still end up with something comforting. Indian cafés have embraced quesadillas as part of their Tex-Mex menus, often adding paneer, bell peppers, or tandoori seasoning for a local touch.
5. Cheese-Stuffed Garlic Bread – The Pull-Apart Fantasy

There’s something irresistible about warm garlic bread stuffed with melted cheese. Every pull reveals a long, stretchy string of mozzarella that makes it hard to stop at one piece. A mix of Italian and American flavours, cheese garlic bread has become a global comfort food favourite. Whether served as a side with pasta or enjoyed on its own, its buttery crust and rich filling make it a hit across all age groups. In India, pizza chains like Domino’s and local bakeries have made it a regular menu item — proof that the cheese pull is universally loved.
6. Spinach and Cheese Cannelloni – A Creamy Italian Comfort

For those who love lasagna but want something lighter, spinach and cheese cannelloni is the perfect choice. Cannelloni are large pasta tubes filled with a creamy mix of ricotta cheese, spinach, and herbs, then baked in a tomato or white sauce until bubbly. The result is rich, delicate, and deeply satisfying. The addition of spinach adds freshness, balancing the richness of the cheese. In India, Italian restaurants often feature this dish for diners who want a comforting yet slightly healthier alternative to lasagna. It’s elegant, wholesome, and absolutely delicious.
7. Cheese Soufflé – The Elegant Melt

A cheese soufflé is proof that cheesy dishes can also be refined. This French classic combines beaten egg whites with a cheesy base, usually Gruyère or cheddar, to create a light, airy, and perfectly golden dish. It’s soft inside, crisp on top, and melts in your mouth with every bite. Making the perfect soufflé takes skill — it must rise evenly without collapsing. Yet, when done right, it’s a dish that feels both indulgent and delicate. In India, you’ll find cheese soufflés on menus at upscale restaurants and patisseries, where they’re served as a gourmet treat rather than an everyday meal.
Also check: Top 10 Vegan Street Foods in India Every Indian Loves
7 Desi Alternatives to Oatmeal for Weight Loss
8. Mozzarella Sticks – The Crunchy Gooey Snack

Few things compare to biting into a mozzarella stick — that crisp coating giving way to molten, stringy cheese inside. Coated with breadcrumbs and fried until golden, these snacks are perfect for parties or evening cravings. Served with marinara or spicy sauces, mozzarella sticks are the ideal balance between crispy and creamy. In India, they’ve become a popular fast-food item, loved by both kids and adults. Many cafés now serve them alongside fries and nachos, making them a staple of modern comfort dining.
Cheesy Trends in India’s Food Scene
Cheese has become more than just a topping in India — it’s now a culinary star. From cafés to fine dining, chefs and home cooks are pushing boundaries with creative cheese-based dishes. Truffle mac and cheese, baked brie, fondue nights, and spicy Indian twists like chili cheese naan are redefining comfort food. The growing presence of artisanal cheese brands offering varieties such as Gouda, brie, and Feta has made gourmet cheese accessible to many households.
This growing fascination isn’t just about taste — it’s also backed by science. Cheese is rich in umami, the savoury flavour that makes food deeply satisfying. It also stimulates serotonin, the brain’s “feel-good” chemical, creating a natural sense of comfort and pleasure. That’s why every bite feels indulgent, whether it’s a slice of pizza, a creamy pasta, or a crispy cheese toast. As social media trends like “cheese pull” videos and “loaded fries” continue to dominate, one thing is clear — India’s love for cheese is only getting stronger, and it’s here to stay.
Cheesy Treat!
Cheese has a way of bringing comfort and joy to every table. It can turn a simple meal into something special and unforgettable. From the layered richness of lasagna to the crisp bite of a mozzarella stick, cheese adds warmth and indulgence to every dish. Around the world, it takes many forms—baked, melted, or stuffed—yet always brings the same sense of satisfaction. Dishes like creamy mac and cheese or a golden cheese soufflé prove that cheese has no limits. It connects cultures, traditions, and tastes with one common thread—comfort. Whether shared with family or enjoyed alone, cheesy food has a charm that never fades. It reminds people of home, warmth, and celebration. Because when cheese melts, it does more than please the palate — it melts hearts too.
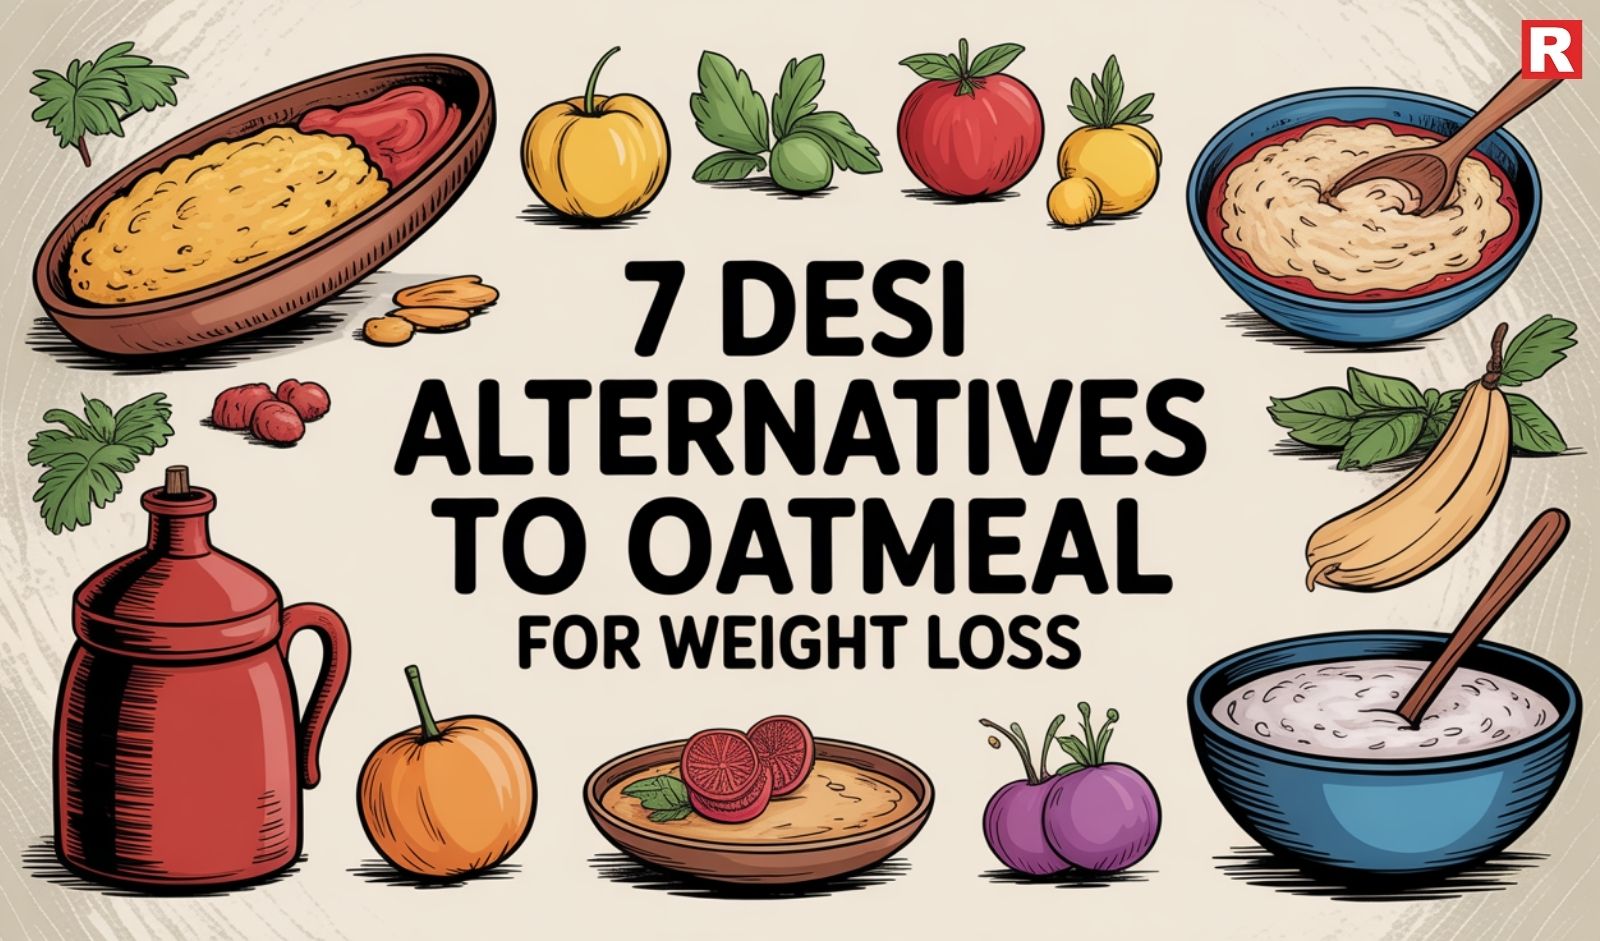
Oatmeal is often seen as the ultimate healthy breakfast, but Indian kitchens have long offered their own powerful alternatives. Traditional Indian breakfasts are filled with grains, lentils, and local ingredients that are rich in nutrients and naturally support weight loss. From hearty millets to light poha, these desi dishes combine taste with wellness.
Each meal offers something unique. Millets and daliya are high in fibre, keeping the stomach full for longer. Ragi provides essential minerals like calcium and iron, while besan chilla adds a good dose of protein. Poha and idli are light, easy to digest, and ideal for those looking for a low-calorie start to the day. Even a simple bowl of upma can give balanced nutrition when cooked with vegetables and minimal oil. These Indian breakfast options not only promote better metabolism but also suit local climates and lifestyles. They are affordable, easy to make, and deeply rooted in Indian food traditions. Choosing these homegrown alternatives proves that one doesn’t need imported oats to stay healthy, fit, and energetic every morning.
Why Indian Superfoods Work Better Than Imported Ones
India’s local grains and ingredients are not just healthy—they’re also naturally suited to our bodies and climate. While oats come from cooler regions and require longer digestion times, Indian foods like millets, daliya, and poha are lighter and more compatible with our digestive systems.
They’re also easier to source, more affordable, and have a smaller carbon footprint. Unlike imported grains, these native options support local farmers and preserve India’s traditional food heritage. By choosing desi superfoods, you’re not only eating healthy but also promoting sustainable living.
Find Your 7 Desi Alternatives to Oatmeal for Weight Loss
1. Daliya (Broken Wheat) – The Desi Cousin of Oatmeal
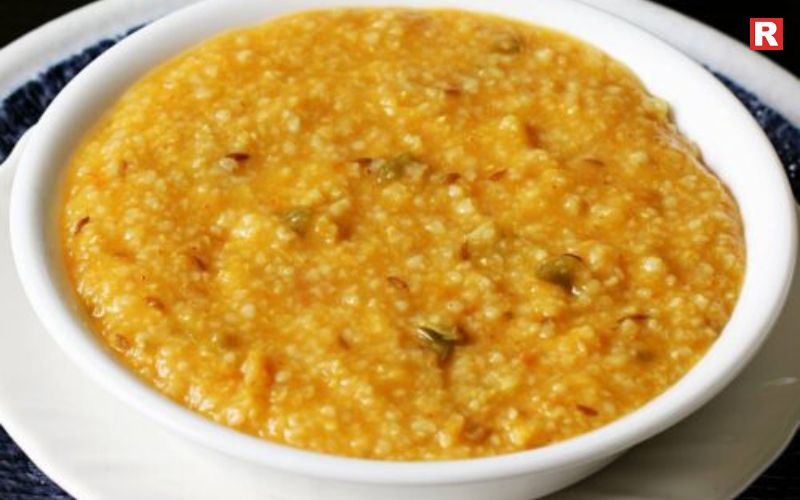
If you’re looking for a warm, hearty breakfast that’s similar to oatmeal but truly Indian, daliya is your answer. Made from broken wheat, it’s rich in fibre and low in fat, making it a great choice for those trying to shed extra kilos. Daliya keeps you full for a long time, preventing mid-morning cravings. It also aids digestion and helps in maintaining stable blood sugar levels. You can prepare it in two ways — sweet or savoury. For a sweet version, cook it with milk, cardamom, and jaggery. For a savoury bowl, sauté vegetables in minimal oil and cook them with daliya for a fibre-packed meal.
Read more: Top 10 Vegan Street Foods in India Every Indian Loves
Power-Packed Mornings: 8 Protein-Rich Vegetarian Indian Breakfast Ideas
2. Poha – Light, Comforting, and Low in Calories
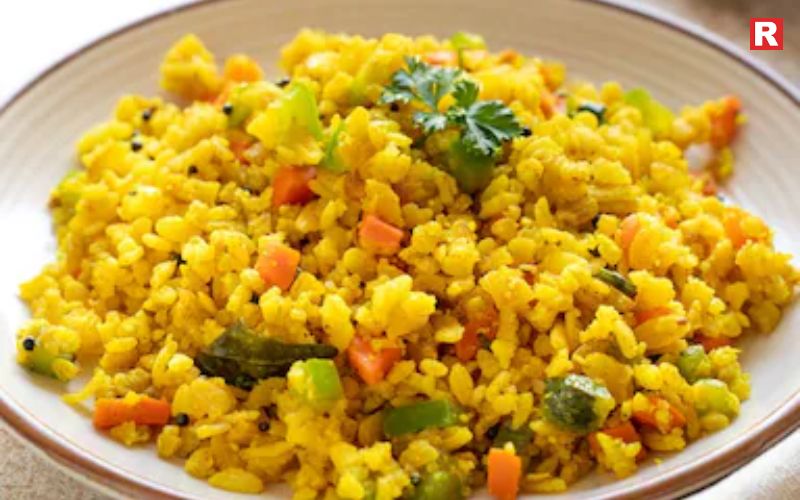
Poha, or flattened rice, is one of the easiest and quickest Indian breakfasts to make. It’s light on the stomach, rich in iron, and low in calories — a perfect combination for anyone watching their weight. A bowl of vegetable poha with peanuts provides a balance of carbohydrates, protein, and good fats. The trick to making it healthier lies in using minimal oil and adding plenty of vegetables like peas, carrots, and capsicum. You can also add a dash of lemon juice for vitamin C, which enhances iron absorption. Poha’s simplicity and quick cooking time make it ideal for busy mornings.
3. Ragi Porridge – The Iron-Rich Super Grain
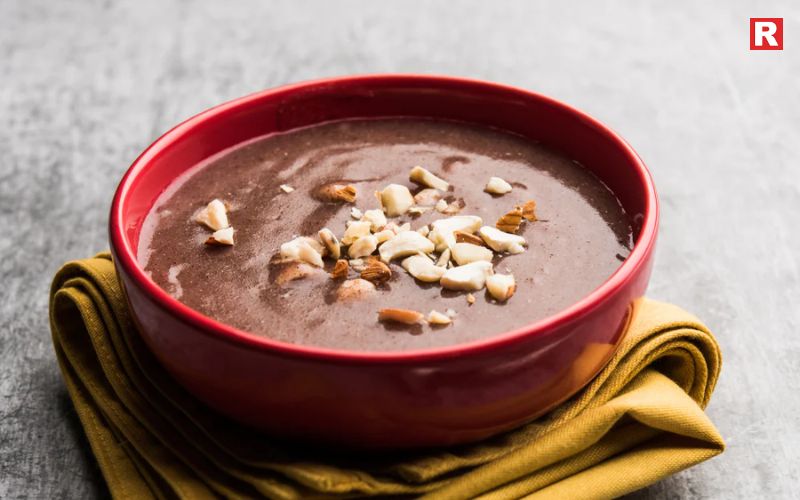
Ragi, also known as finger millet, is one of India’s most powerful superfoods. It’s gluten-free and rich in calcium, fibre, and iron—all essential nutrients for maintaining a healthy weight. Ragi keeps you fuller for longer, controls hunger pangs, and stabilises blood sugar levels. To make ragi porridge, mix ragi flour with water or milk and cook until thickened. You can sweeten it naturally with jaggery or add fruits like bananas for extra fibre. Many fitness enthusiasts prefer ragi over oats because it’s indigenous, easy to digest, and suited to Indian climatic conditions.
4. Besan Chilla – Protein-Packed Morning Boost
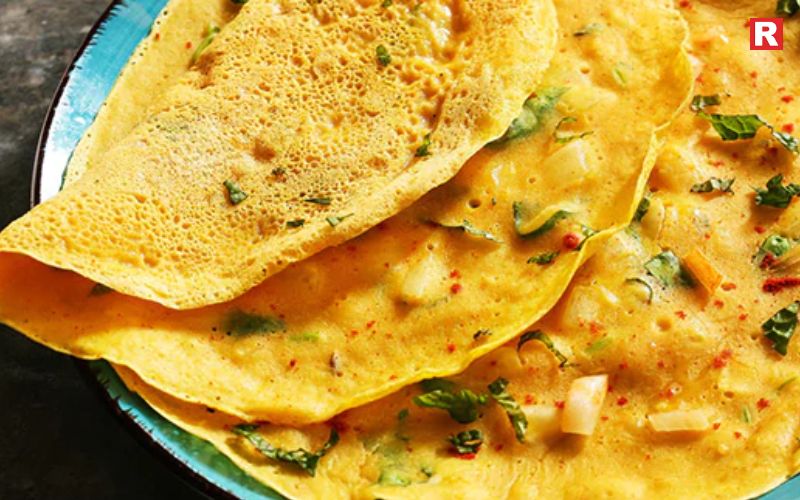
For those who love savoury breakfasts, besan chilla is an excellent option. Made from gram flour, it’s high in protein and fibre, which are key nutrients for weight management. Chilla helps you feel full without adding unnecessary calories. To prepare it, mix besan with chopped onions, tomatoes, green chilies, and spices. Cook it on a non-stick pan with minimal oil. You can even add spinach, grated carrots, or paneer for an extra nutritional punch. When paired with mint chutney, it becomes a delicious yet healthy start to your day.
Know more: 5 Foods to Avoid for Better Cholesterol
5. Idli – Steamed & Gut-Friendly
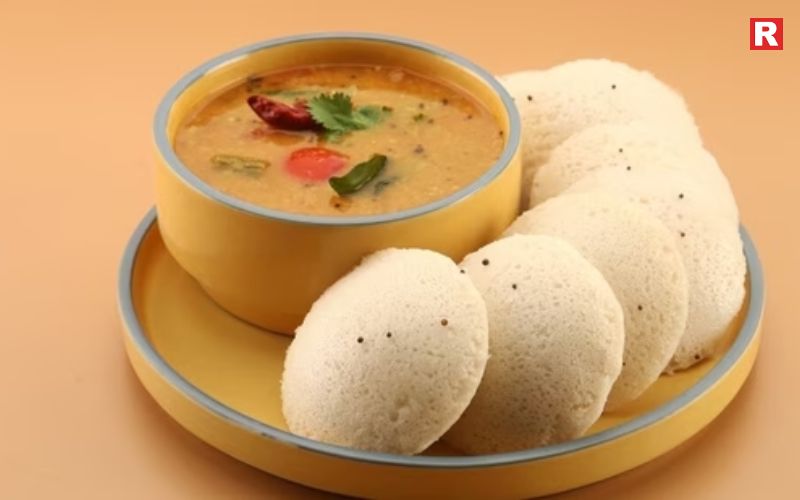
Soft, fluffy idlis are a South Indian staple, and they make a great alternative to oatmeal for weight loss. Since they are steamed, idlis are low in fat and easy to digest. The fermentation process enhances gut health by promoting beneficial bacteria, which aids digestion and metabolism. Made from rice and urad dal, idlis are also rich in carbohydrates and proteins. You can pair them with sambar and coconut chutney for a wholesome breakfast that keeps you energized for hours. For an even healthier twist, try using millets or brown rice instead of white rice.
6. Upma – A Balanced Mix of Carbs and Protein
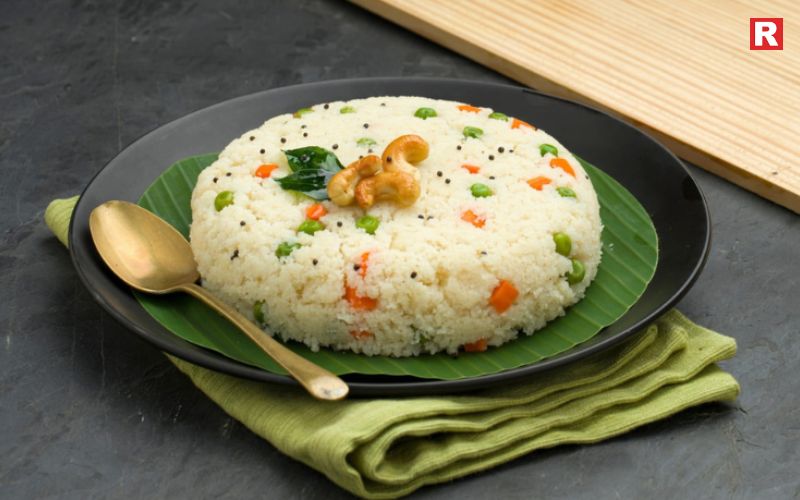
Upma, made from semolina (sooji), is another classic Indian breakfast that offers both comfort and nutrition. It’s low in calories yet filling enough to keep you satisfied till lunch. You can enhance its nutritional value by adding vegetables like beans, carrots, and peas, or topping it with roasted nuts and seeds. Upma contains a balance of carbohydrates, proteins, and dietary fibre, making it an ideal meal for those looking to maintain or lose weight. A small drizzle of ghee can also help in better nutrient absorption without compromising health.
7. Millet Porridge – The Ancient Indian Superfood
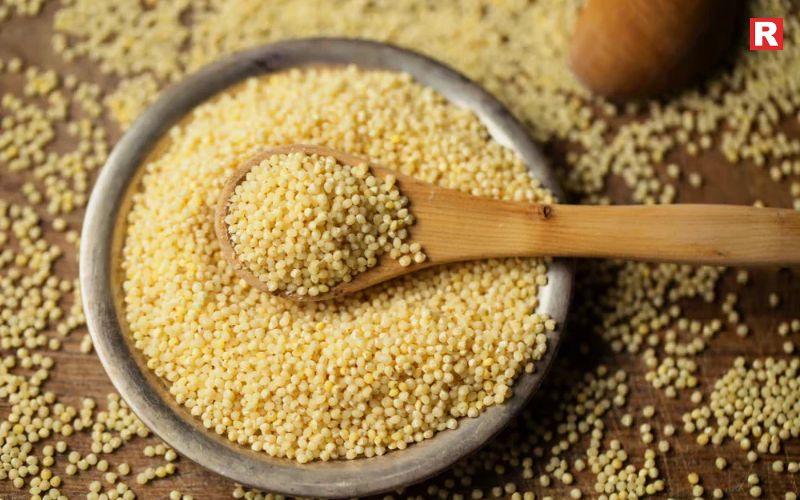
Millets like foxtail, jowar, and bajra have been part of Indian diets for centuries. They are rich in fibre, minerals, and antioxidants, making them one of the best replacements for oatmeal. Millet porridge can be made sweet or savoury. The sweet version uses milk and jaggery, while the savoury one includes vegetables and spices. What makes millets great for weight loss is their low glycaemic index, which helps control blood sugar spikes and promotes steady energy release. Regular consumption of millets also improves digestion and boosts metabolism.
Keep It Varied and Balanced
Weight loss is not about eating the same thing every day. It’s about maintaining a balanced diet that provides all essential nutrients. You can rotate these Indian breakfast options through the week to ensure variety and balance. For example, have daliya on Monday, besan chilla on Tuesday, poha on Wednesday, and ragi porridge on Thursday. This way, you’ll enjoy diverse flavours while meeting your health goals.
Always remember that portion control and cooking methods matter. Avoid deep frying, use minimal oil, and try steaming or sautéing instead. Pair your breakfast with a cup of green tea or warm lemon water for an added detox effect.
Also check: 10 Different Types of South Indian Rice Dishes
7 Healthy Chicken Dishes to Maintain Your Diet
Go Local, Stay Fit
Healthy eating does not depend on imported oats. India’s traditional ingredients offer the same, if not better, nutrition for those looking to stay fit. Local foods like besan chilla, ragi, poha, and daliya are packed with fibre, protein, and essential nutrients that keep the body active and strong. These dishes are simple to cook, affordable, and perfectly suited to Indian tastes and weather. They help in maintaining energy levels, improve digestion, and support healthy weight management. Millets, in particular, are a powerhouse of fibre and minerals, while besan chilla and idli provide the right mix of protein and carbs for lasting fullness. Choosing local foods is not just a healthy decision; it’s a way to stay connected with India’s culinary roots. So, instead of oats, one can always rely on traditional Indian breakfasts that are wholesome, nourishing, and proudly desi.
Disclaimer: This article is for general informational purposes only. It is not intended as medical or dietary advice. Individuals should consult a qualified healthcare professional or nutritionist before making significant dietary changes, especially if they have existing health conditions, allergies, or are on prescribed medication.

Bread has become a part of everyday life in India. It is no longer just a breakfast choice but a quick meal for any time of the day. From morning toast to school lunch sandwiches and late-night snacks, bread fits every occasion. It has earned a permanent place in Indian kitchens. Over the years, bread in India has evolved from the simple white loaf to a range of healthier and tastier options. Today’s consumers are more health-conscious and prefer choices that combine flavor with nutrition. Multigrain, brown, and whole wheat breads are becoming household favorites. Many also look for preservative-free and high-fiber options that support a balanced lifestyle.
India’s bread market reflects this growing awareness. Established brands continue to dominate store shelves, while new artisanal bakeries attract urban consumers with fresh, handcrafted loaves. From affordable daily breads to premium gourmet options, the variety has never been wider. With its convenience, versatility, and comfort factor, bread remains one of the most loved and essential foods across the country.
What Makes a Good Bread Brand?
When choosing a bread brand, freshness is key. A good loaf should feel soft but not doughy, with a pleasant aroma and balanced texture. The use of natural ingredients and minimal preservatives also defines a quality brand.
Nutrition is another important factor — the best breads provide a balance of fiber, protein, and essential nutrients while keeping refined flour to a minimum. Packaging plays a crucial role too, as it maintains freshness and prevents moisture. The top brands in India continue to evolve to meet these standards while offering taste and convenience.
Explore Top Bread Brands in India
1. Britannia Bread
Britannia is one of the oldest and most trusted bakery brands in India. Known for quality and consistency, Britannia Bread is a staple in many households. The brand offers a wide range of options such as Whole Wheat Bread, Brown Bread, and Multigrain Bread. Britannia stands out for its soft texture and freshly baked aroma. Its breads are ideal for sandwiches, toast, or even simple butter spreads. With strong distribution across India, Britannia ensures freshness in every pack. The brand continues to innovate with healthier variants to meet modern dietary preferences.
Read more: 21 Different Types of Indian Breads and Their Benefits
Top 10 Vegan Street Foods in India Every Indian Loves
2. Modern Bread
Modern Bread has been a part of Indian breakfast tables for decades. Known for its reliability and affordability, it offers a variety of options like Milk Bread, Sandwich Bread, and Hi-Fibre Brown Bread. The brand has recently updated its packaging and improved its production quality to ensure longer freshness. Modern Bread combines traditional baking expertise with new technology to deliver soft and nutritious loaves. It remains a trusted name among both urban and semi-urban consumers.
3. Harvest Gold
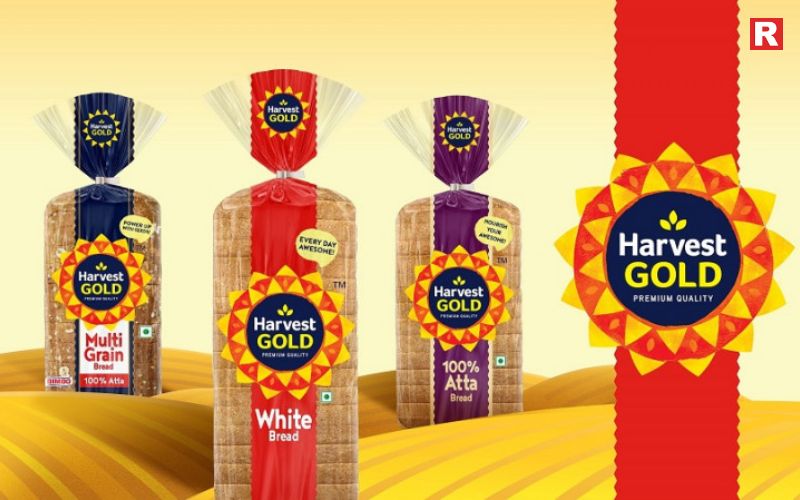
Harvest Gold is another leading name in India’s bread segment. Established in 1993, it has built a strong reputation for quality and freshness. The brand offers several variants like Atta Bread, Multigrain Bread, and Sandwich Bread. Harvest Gold’s breads are known for their soft texture and wholesome taste. The brand maintains strict quality standards and has a wide distribution network, especially in North India. It’s the go-to brand for families who value both taste and nutrition in their daily meals.
4. English Oven

English Oven, a premium bread brand by Mrs. Bector’s Food Specialities, has gained massive popularity in recent years. The brand is loved for its oven-fresh quality and rich texture. English Oven offers a range of products such as Brown Bread, Garlic Bread, Sandwich Bread, and Multigrain Bread. Each loaf is baked with precision to retain softness and natural flavor. Its thick slices make it perfect for gourmet sandwiches and hearty breakfast meals. English Oven focuses on hygiene, freshness, and taste — making it a top choice for quality-conscious consumers.
Know more: Best Instant Noodles Brands in India That Make Every Slurp Worth It
5. Bonn Bread
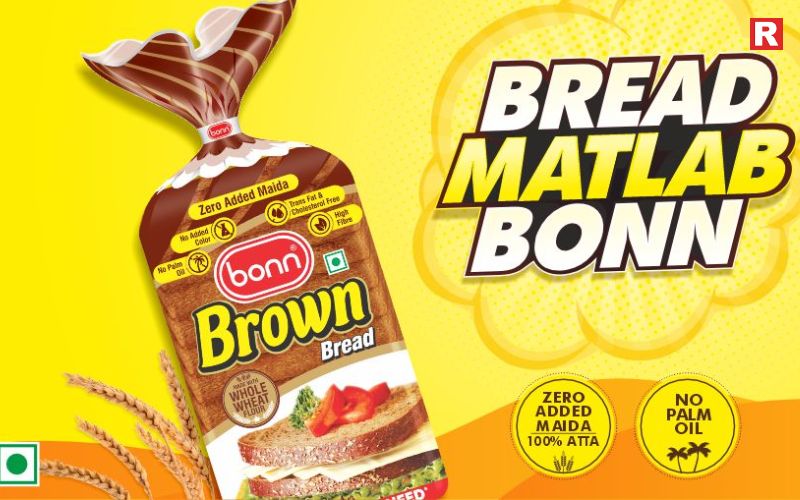
Bonn is a well-known brand from Punjab with a strong presence in North India. It offers a variety of healthy options including Whole Wheat, Atta, and Multigrain Bread. The brand is ISO-certified, ensuring top-notch quality and hygiene standards. Bonn has positioned itself as a health-focused bakery, offering products that combine traditional taste with modern nutrition. Its bread is soft, flavorful, and ideal for daily consumption. Bonn’s innovation in healthy bakery products has helped it stand out in a competitive market.
6. The Baker’s Dozen

The Baker’s Dozen represents the rise of artisanal bread culture in India. This Mumbai-based brand focuses on natural, preservative-free, and freshly baked breads. It is popular among urban consumers who prefer authentic European-style loaves. Their range includes Sourdough, Rye Bread, Baguettes, and Gluten-Free options. Each loaf is made using slow fermentation techniques that enhance flavor and texture. The brand emphasizes craftsmanship and uses high-quality ingredients. For those who love fresh, artisanal baking, The Baker’s Dozen brings a touch of authenticity to the Indian bread scene.
7. Daily Bread (by Britannia)
Daily Bread is Britannia’s premium bakery brand, known for fresh loaves, buns, and European-style breads. The brand focuses on using quality ingredients and traditional baking techniques. From soft baguettes to crusty loaves, Daily Bread offers a range of products that appeal to those who enjoy gourmet experiences at home. It is particularly popular in metro cities, where demand for premium and freshly baked products is on the rise.
Also check: How to Make Momo at Home for a Healthy Treat
Top Flavour Coffee Brands in India That Every Coffee Lover Must Try
Health Trends Shaping the Indian Bread Market
Health trends are driving innovation in the Indian bread industry. Consumers are becoming more aware of ingredients and nutritional content. The popularity of whole-grain, multigrain, and millet-based breads has grown significantly.
Many brands now offer vegan and gluten-free options for consumers with specific dietary needs. There’s also a noticeable rise in demand for breads labeled “no maida,” “high fiber,” and “no added sugar.” As more Indians seek healthier alternatives, brands are experimenting with flours like oats, ragi, and quinoa to create nutritious and delicious options.
Quick Treat!
Bread holds a special place in India’s diverse food culture. From Mumbai’s bun maska to Delhi’s bread pakora and Bangalore’s toast sandwiches, it appears in every region’s favorite dishes. India consumes more than 1.5 million tonnes of bread each year, and the demand keeps rising. Its simplicity and versatility make it fit into both Indian and global cuisines — from buttered pav to hearty continental toasts.
Over time, India’s bread market has grown from basic white loaves to a wide range of healthy and premium options. Brands such as Britannia, Modern, Harvest Gold, English Oven, Bonn, The Baker’s Dozen, and Daily Bread have changed how Indians enjoy bread today. Whether it’s a soft slice for breakfast or a crisp sourdough with soup, these brands offer freshness and flavor in every bite. With a growing focus on health and taste, India’s love for good bread continues to rise.

We’ve all seen the days when we’re too tired to cook but also too hungry to sleep. It’s during these times that Maggi saves the day. You can make it within minutes, and devour it in even less. But what if you’re out of Maggi, or just want to have something different that can be made instantly with just a minimum of ingredients?
Here’s the thing: there are plenty of other quick, cozy instant foods you can make in under 15 minutes. With just three or four ingredients available in your pantry, you can make something to happy your mood and your stomach both.
Whether you’re a student in a hostel, a busy office worker, or just someone who loves lazy-day meals, these 12 instant food ideas prove comfort doesn’t need a long recipe list.
Read more: 6 Unique Maggi Recipes You’ve Never Tried Before
12 Instant Foods You Can Make in Minutes
Every one of these recipes needs just 3 or 4 ingredients, takes less than 15 minutes, and guarantees flavor without much effort.
1. Instant Garlic Butter Noodles

If Maggi had a fancy sibling, this would be it. Garlic butter noodles are the simplest dish to make comfort food and they taste like any restaurant-ordered dish. Just grab a packet of your preferred noodles, some butter, garlic cloves, and chili flakes. Boil the noodles for a few minutes, sizzle the butter, fry up the garlic until it smells amazing, and toss it all together. Sprinkle on some chili flakes for a little heat. In under 10 minutes, you’ll be slurping up buttery, garlicky noodles that are hard to stop eating. And if you want to make it fancier, then throw in some grated cheese or a splash of soy sauce.
2. Cheesy Egg Scramble

Nothing beats soft, cheesy scrambled eggs. Crack two eggs into a bowl, add a spoonful of milk and a pinch of salt, then whisk. Pour the mix into a hot pan, stir gently, and add a generous amount of grated cheese. A few minutes later, you’ve got a creamy, rich scramble that’s perfect for breakfast or late-night cravings. Spread it on toast for a quick sandwich, or just eat straight from the pan. No one’s judging.
Know more: Top 10 Easy Soup Recipes for You to Try This Winter
3. Masala Potato Stir Fry
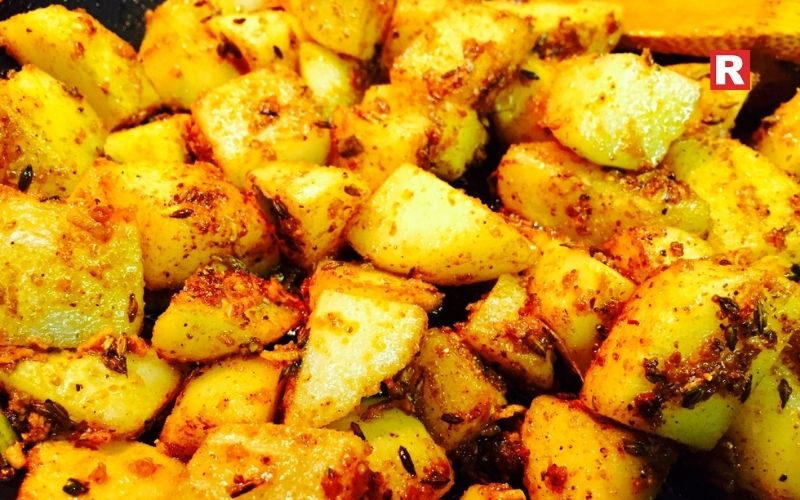
Nothing in the pantry except a few potatoes? You’ve got your dinner sorted out. Cube some boiled potatoes and toss them in a hot pan with a little oil, salt, and your favorite masala: garam, chaat, or even leftover Maggi masala. The potatoes get golden and crisp in minutes, soaking up all that spice. Each bite is crispy outside, soft inside, and totally hits the spot. Squeeze on some lemon, maybe toss in coriander, and you’ve got a snack or side dish that goes perfectly well with a cup of chai.
4. Fried Rice in a Flash
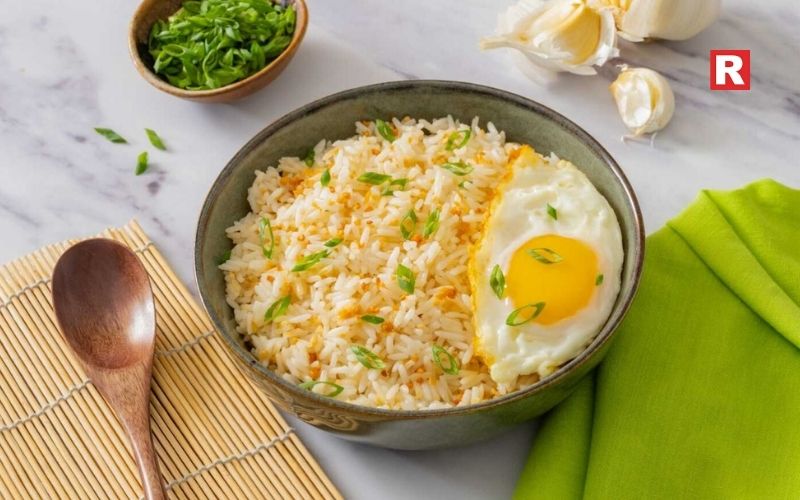
Have leftover rice in your fridge? Don’t let it go to waste. Heat some oil in a pan, add chopped onion, and scramble an egg right in there (egg is optional). Toss in your rice, drizzle with soy sauce, and stir until grains are coated in the mixture. That’s it. You get a savory, umami-packed meal that’s good on its own, or alongside whatever sauces you find in the fridge. You can add chili sauce or a splash of vinegar if you want your rice to feel like a takeout meal. It’s comfort food at its simplest, minus the wait.
5. Three-Ingredient Mac and Cheese

No fancy ingredients. No baking. Just the good stuff. Boil your pasta, then stir in milk and a load of cheese until you get a creamy, gooey sauce. In minutes, you’ll have a 3-ingredient mac and cheese that’s simple but seriously satisfying. The sauce thickens up and clings to every piece of pasta. Sprinkle on pepper or herbs if you want, but honestly, it’s perfect just as it is. It just feels like a warm hug in a bowl.
6. Instant Pizza Wrap

Are you longing for pizza, but don't feel like waiting (or preheating the oven)? This instant pizza wrap is the five-minute solution you've been waiting for. Simply take a roti or tortilla, spread a generous layer of tomato ketchup, top with a healthy amount of cheese, and then pile on as many veggies as you can find (even leftover sabzi!). Fold it in half and toast it in a pan until the cheese is melted and the base is crisp. Then, the first bite into the gooey, cheesy pull and the tangy bite, without the wait. It's a great snack for immediate satisfaction with no mess.
What's new: How to Make Momo at Home for a Healthy Treat
7. Banana Peanut Butter Toast
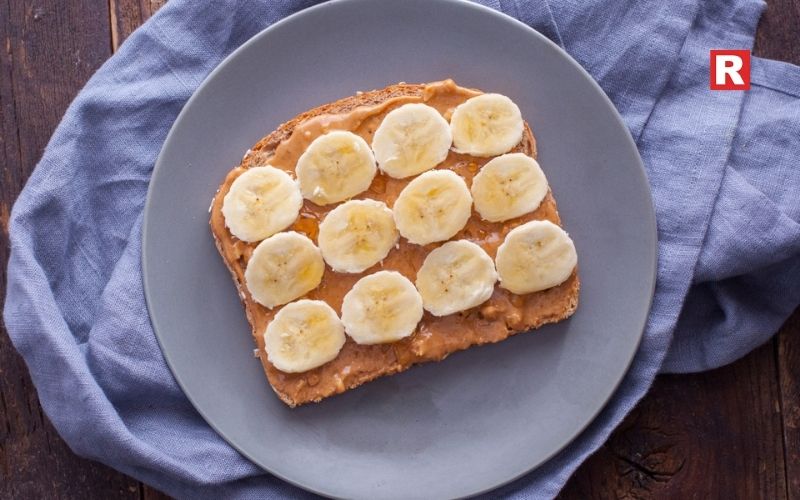
Sometimes, it's the basics that make us the happiest in life. This banana peanut butter toast is a perfect example of that. Start by toasting a slice of your favorite bread until golden brown, then slather on some creamy peanut butter. Add on some banana slices and drizzle a small amount of honey over them all. And just like that, in under five minutes, you have a delicious, sweet, nutty, and energizing snack that can be both a breakfast or an afternoon snack. The banana provides delicious natural sweetness, and the peanut butter adds richness. Both of which together seem like they were made for each other. You could even sprinkle some cinnamon or crushed nuts on top if you want an added 'fancy' café-style touch.
8. Butter Masala Corn

Nothing feels cozy like a mug of butter masala corn. Boil some corn kernels, stir in melted butter, a pinch of salt, and a big sprinkle of chaat masala. Mix it up and eat it while it’s hot. It’s simple, quick, and that perfect sweet-spicy balance keeps you coming back for more. Add a squeeze of lemon or a handful of grated cheese if you're feeling fancy. It’s street food-style comfort, but in your cozy home.
9. Instant Soup Hack
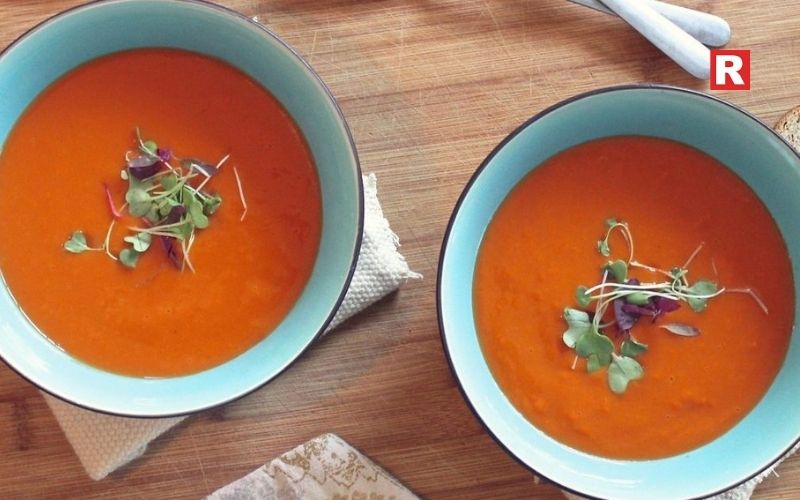
Sometimes you just need something warm and soupy, fast. Simply prepare your favorite instant soup mix, and season it with a small handful of boiled veggies. Carrots, peas, or perhaps corn to give the soup some depth. Add some chili flakes or pepper, and don’t be surprised when your soup starts to feel like something you made yourself instead of just adding the powder from a bag. If you want to feel really cozy, add some leftover rice or even noodles, which will make it an even more hearty meal. It’s the perfect rainy day option, comforting, flavorful, and ready in minutes.
10. Tomato Basil Pasta
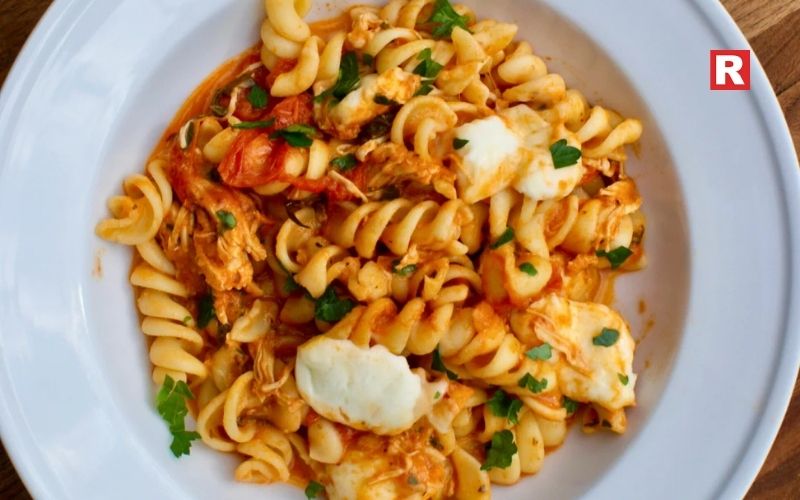
This tomato basil pasta brings back the nostalgia, and it is quick and easy to prepare. Simply boil your favorite pasta, drain it, then toss it in a pan with melted butter, some spoons of tomato ketchup, and a sprinkle of dried basil or mixed herbs. The ketchup is a surprisingly tangy sauce, especially after it is combined with the butter, creating a sweet and savory combination. You will have a bowl of warm, cozy pasta in just a couple of minutes. If you want to elevate this dish a little, feel free to sprinkle grated cheese or chili flakes on top.
11. Chocolate Mug Cake
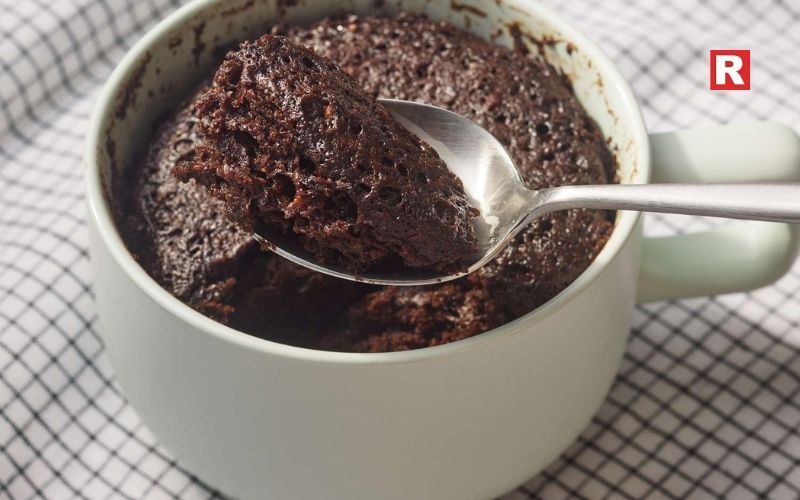
If you are in the mood for dessert but don’t want to bake, this chocolate mug cake is the perfect solution for you. In a mug, mix a few spoonfuls of flour, cocoa powder, sugar, and milk and whisk until smooth. Microwave it for about a minute, and you will see it puff into a soft, fudgy cake. The best part is that you can eat it from the mug. It is warm, tasty, with a rich chocolate flavor. And if you really want to treat yourself, put a little piece of chocolate in the center of the mug before you microwave it, and you will uncover liquid lava once you take your first bite. This is comfort dessert at its best.
Check out: 10 Munchies Ideas for You to Try at Home
7 Korean Alcohols That Prove There’s More to Korea Than Just Soju
12. Dalgona-Style Coffee

This Dalgona coffee was once super popular on the internet, and it is still delightful. In a small bowl, whisk equal parts of instant coffee, sugar, and hot water until it turns thick and frothy, just like a creamy cloud. Spoon it over hot or cold milk (your preference) and gently stir to combine. The result is café-style coffee with rich aroma and smooth finish, all made in just minutes. It feels fancy enough for self-care yet simple enough to whip up before a work meeting. You could add cocoa powder for mocha or add ice cubes for summer coffee.
Quick Tips to Elevate Instant Meals
- Add herbs and spices: A pinch of chili flakes, oregano, or masala can make the simplest meal pop. Make sure you always have them stocked up.
- Use leftovers smartly: Yesterday’s rice, cooked veggies, or even dal can be the base for your next instant snack.
- Balance the texture: Creamy with crunchy, spicy with sweet; that’s how you keep things interesting.
- Prep ahead: Keep boiled eggs, corn, or cooked pasta handy in the fridge for instant meals.
Healthy Instant Alternatives
Instant doesn’t have to mean junk. Here’s how to keep things balanced:
- Use whole wheat or millet noodles when you can.
- Use olive oil or ghee instead of processed butter for lighter and healthier meals.
- Add some protein (eggs, paneer, tofu) or fiber (corn, spinach, sprouts) to fill your stomach.
- For dessert, try banana-based snacks or a homemade mug cake instead of grabbing something packaged.
Just a few changes turn a five-minute snack into a mini wholesome meal
Learn more: How to Make Tasty Quick Recipes with Bell Pepper
The Magic of Instant Food
Instant meals aren’t just for emergencies anymore. These days, they’re a survival skill. With work, deadlines, and Netflix taking over, most people don’t have the time or patience to spend hours cooking. But actually, good food doesn’t have to be complicated.
With a handful of ingredients, a few minutes, and a little imagination, you can make something incredibly delicious. So the next time you're hungry, don't open your delivery app. Just go to your own kitchen cabinet instead. Because sometimes the best meal just requires heart, a heat source, and hunger, not hours.

Instant noodles have become a part of daily life in India. For many Indians, a hot cup of noodles brings back moments from college nights, family picnics, and quiet evenings at home. It is the taste that reminds them of simple joys and shared laughter.
What started as an easy snack has grown into a favourite food for all age groups. Children love its fun flavours, while adults enjoy its quick convenience. From the classic taste of Maggi to the rich spices of Ching’s and the healthy touch of millet-based noodles, there is a flavour for every mood. Today, instant noodles are found in almost every kitchen. They are easy to cook, affordable, and endlessly customizable. Whether eaten plain or mixed with vegetables, eggs, or cheese, instant noodles continue to bring warmth and satisfaction with every bite.
The Instant Noodle Market in India
The instant noodles market in India is currently valued at over ₹6,000 crore and continues to grow each year. With changing lifestyles, long working hours, and a growing need for convenient food, instant noodles have found a permanent place in Indian kitchens. The market is not just about speed anymore; it’s about variety, flavour, and health.
Many brands are now experimenting with healthier alternatives — introducing millet, oats, and whole wheat noodles to meet the needs of health-conscious consumers. From spicy masala to fusion flavours like schezwan and curry, there’s an option for every craving.
Discover Best Instant Noodles Brands in India
1. Maggi
When you think of instant noodles in India, the first name that comes to mind is Maggi. A product of Nestlé, Maggi has been a household name for decades. Its signature Masala flavour is loved for its perfect blend of spices and comforting aroma. Over the years, Maggi has evolved with exciting variants like Maggi Chicken, Maggi Hot Heads, and even healthier options like Maggi Oats and Maggi Millet Noodles. It’s quick, affordable, and familiar — a brand that defines the essence of instant noodles in India.
2. Sunfeast Yippee!
Sunfeast Yippee! from ITC brought a fresh twist to the instant noodle segment. Known for its long, non-sticky noodles and vibrant masala flavours, Yippee! has gained immense popularity among children and young adults. Its Magic Masala and Classic Masala flavours are top choices, and the brand often launches limited-edition packs with regional spice profiles. Yippee! also has a range of tricolour noodles made from wheat, spinach, and tomato, appealing to both taste and nutrition.
Read more: 8 Famous Vegetarian Dishes of Uttar Pradesh and Their Timeless Legacy
What is Kimchi? Top Veg Kimchi You Can Try at Home
3. Top Ramen
Top Ramen by Nissin brings an Indo-Japanese fusion to the noodle bowl. With its slightly thicker noodles and unique seasoning, it offers a different texture and taste from the usual options. Top Ramen Curry and Masala variants are favourites among Indian consumers. The brand also offers Top Ramen Atta Noodles, a healthier alternative made with whole wheat, catering to those who want to indulge without guilt.
4. Wai Wai
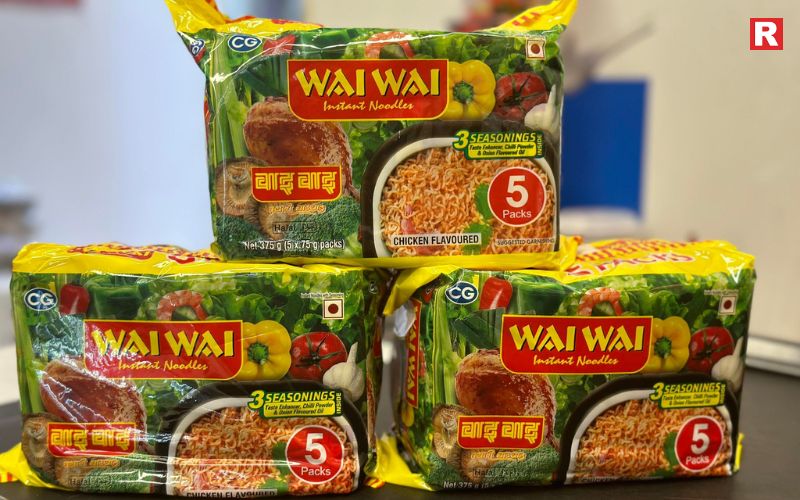
Wai Wai, originally from Nepal, has created its own loyal fan base in India. What makes it different is that it can be eaten straight from the packet — no cooking required. The noodles are pre-cooked, fried, and seasoned, giving them a crunchy texture and tangy flavour. Available in flavours like Chicken, Veg Masala, and Schezwan, Wai Wai is perfect for those who want a quick snack without the wait. It’s also a favourite among travellers and students for its ready-to-eat convenience.
Know more: How to Make Momo at Home for a Healthy Treat
5. Knorr Soupy Noodles
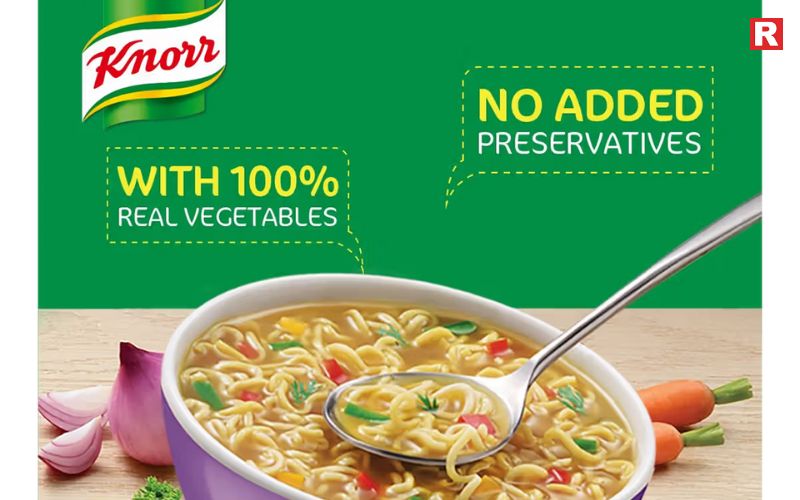
Knorr, known for its soups and seasonings, offers Soupy Noodles — a creative blend of soup and noodles. It’s ideal for those who love thick, flavorful broths with a noodle twist. The Masala and Chicken flavours are especially comforting on cold or rainy days. Knorr Soupy Noodles provide the satisfaction of both soup and noodles in one delicious bowl, making them a unique choice among instant noodle lovers.
6. Patanjali Atta Noodles
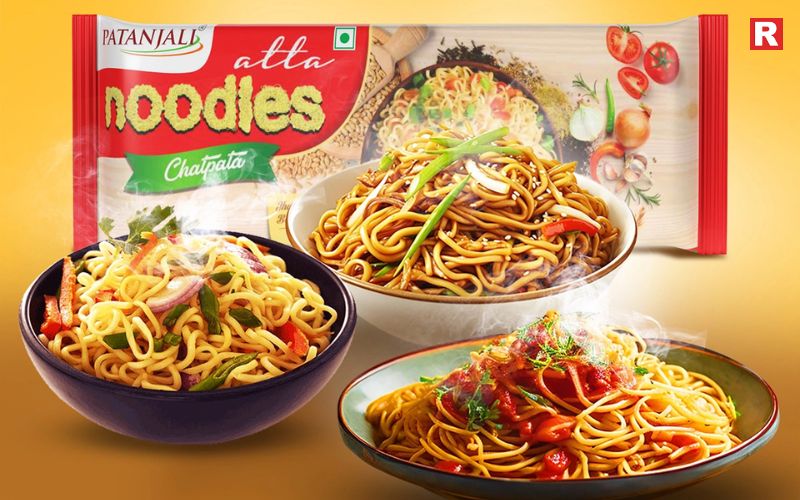
For those looking for a healthier and more traditional choice, Patanjali Atta Noodles are a great option. Made with whole wheat, they are a fibre-rich alternative to maida-based noodles. The flavouring is mild yet full of Indian spices, offering a homely taste. It appeals to consumers who want to enjoy instant noodles without compromising on health or nutrition.
7. Nissin Cup Noodles
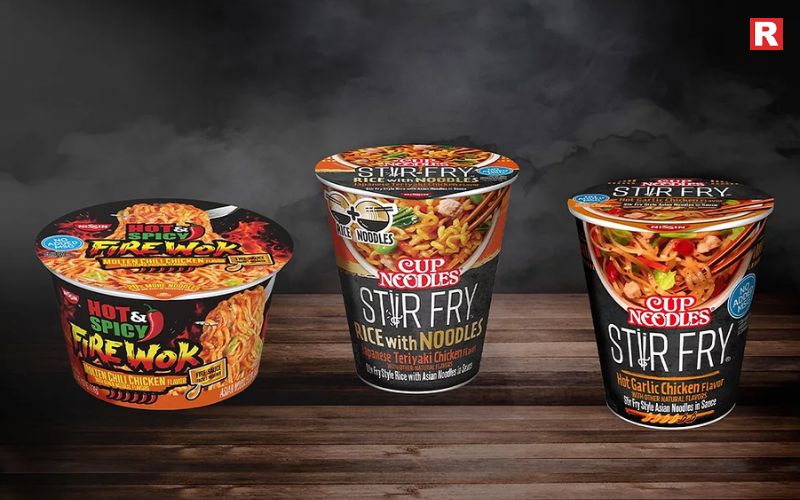
A global favourite, Nissin Cup Noodles offers convenience like no other. Just pour hot water into the cup, wait for three minutes, and your meal is ready. The brand’s flavours — Masala, Spicy Chicken, and Veggie Manchow — cater perfectly to the Indian taste palette. The packaging makes it ideal for travel, offices, and students living in hostels.
Also check: Best Ramen Brands in India That Bring Japan to Your Bowl
8. Ching’s Secret
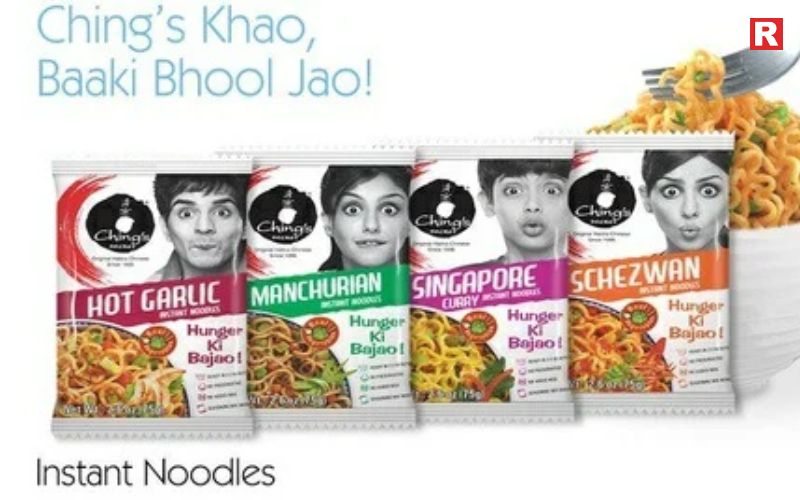
If you love spicy Indo-Chinese flavours, Ching’s Secret is your go-to brand. With flavours like Schezwan, Manchurian, and Hot Garlic, it brings restaurant-style Chinese flavours into your kitchen. Ching’s Secret is famous for its bold seasoning and punchy taste. Many people also use its noodles as a base for homemade street-style chowmein, adding their own veggies and sauces for a fuller meal experience.
9. Slurrp Farm Millet Noodles
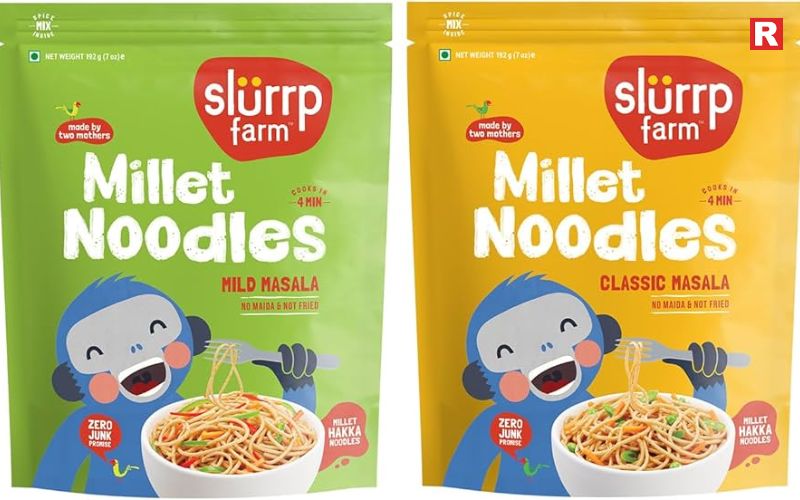
For parents and health enthusiasts, Slurrp Farm offers a guilt-free noodle experience. Made with millets, lentils, and natural ingredients, these noodles are completely free from maida and preservatives. They are ideal for kids and adults alike, offering both taste and nutrition. Available in flavours like Cheese Tomato and Masala, Slurrp Farm Noodles prove that healthy food can be just as delicious.
10. Smith & Jones Hakka Noodles
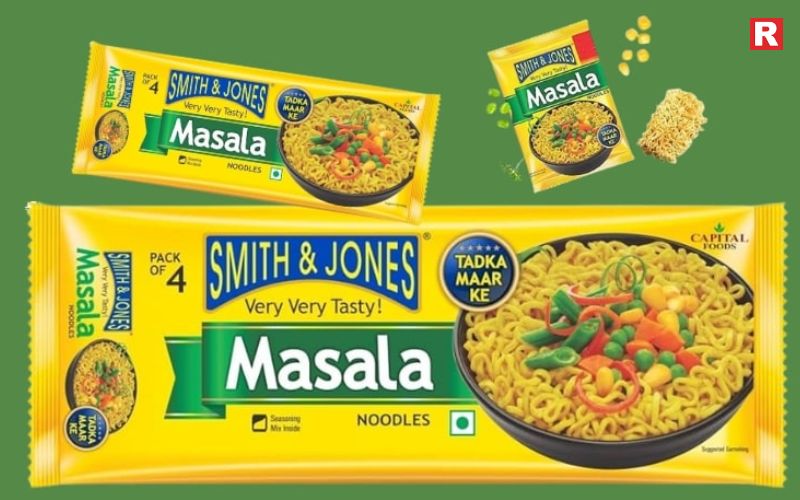
Smith & Jones brings the authentic restaurant-style Hakka noodle experience home. While not your traditional instant noodle, it cooks quickly and is perfect for those who prefer a Chinese-style stir fry. Paired with their ready-to-cook sauces, Smith & Jones Hakka Noodles give you that perfect street-style taste without stepping out.
Why Indians Love Instant Noodles
Instant noodles have a special place in every Indian kitchen. They’re quick, affordable, and endlessly customizable. Add an egg, some vegetables, or even cheese, and you can create your own version in minutes.
From midnight cravings to emergency meals, noodles have become the go-to option for every mood. Their adaptability across regions — from spicy South Indian versions to tangy North Indian mixes — makes them universally loved.
Check more: Top Apple Cider Vinegar Brands in India That Add the Perfect Tang to Your Taste
Top Soya Sauce Brands in India You Must Try
The Healthier Side of Instant Noodles
The modern consumer is more aware of what goes into their food, and brands have started responding to that shift. Many now offer noodles made from millets, oats, and whole wheat, reducing MSG and using natural seasonings.
If you want to make your bowl healthier, try adding boiled eggs, tofu, sautéed vegetables, or paneer. This not only adds nutrition but also enhances the flavour.
- Maggi was briefly banned in 2015 but returned stronger than ever, proving its emotional connection with Indian consumers.
- India ranks among the top five instant noodle-consuming countries in the world.
- Localised flavours such as Andhra Spicy, Kolkata Masala, and Himalayan Salt have made instant noodles even more diverse.
Instant Treat!
Instant noodles have become more than just a quick bite in India. For many, they are a reminder of college nights, family evenings, or a simple comfort after a long day. From the ever-loved Maggi to the spicy kick of Ching’s or the wholesome goodness of Slurrp Farm, each brand brings its own flavour and story. Across generations, noodles have found a place in every kitchen, adapting to tastes and moods. They are fast, tasty, and easy to make — the perfect solution for sudden hunger. With a few vegetables, cheese, or an egg, anyone can turn them into a meal that feels homemade. Instant noodles continue to connect people through simple joy and shared taste. Sometimes, happiness truly comes in a bowl of hot noodles, ready in just two minutes.
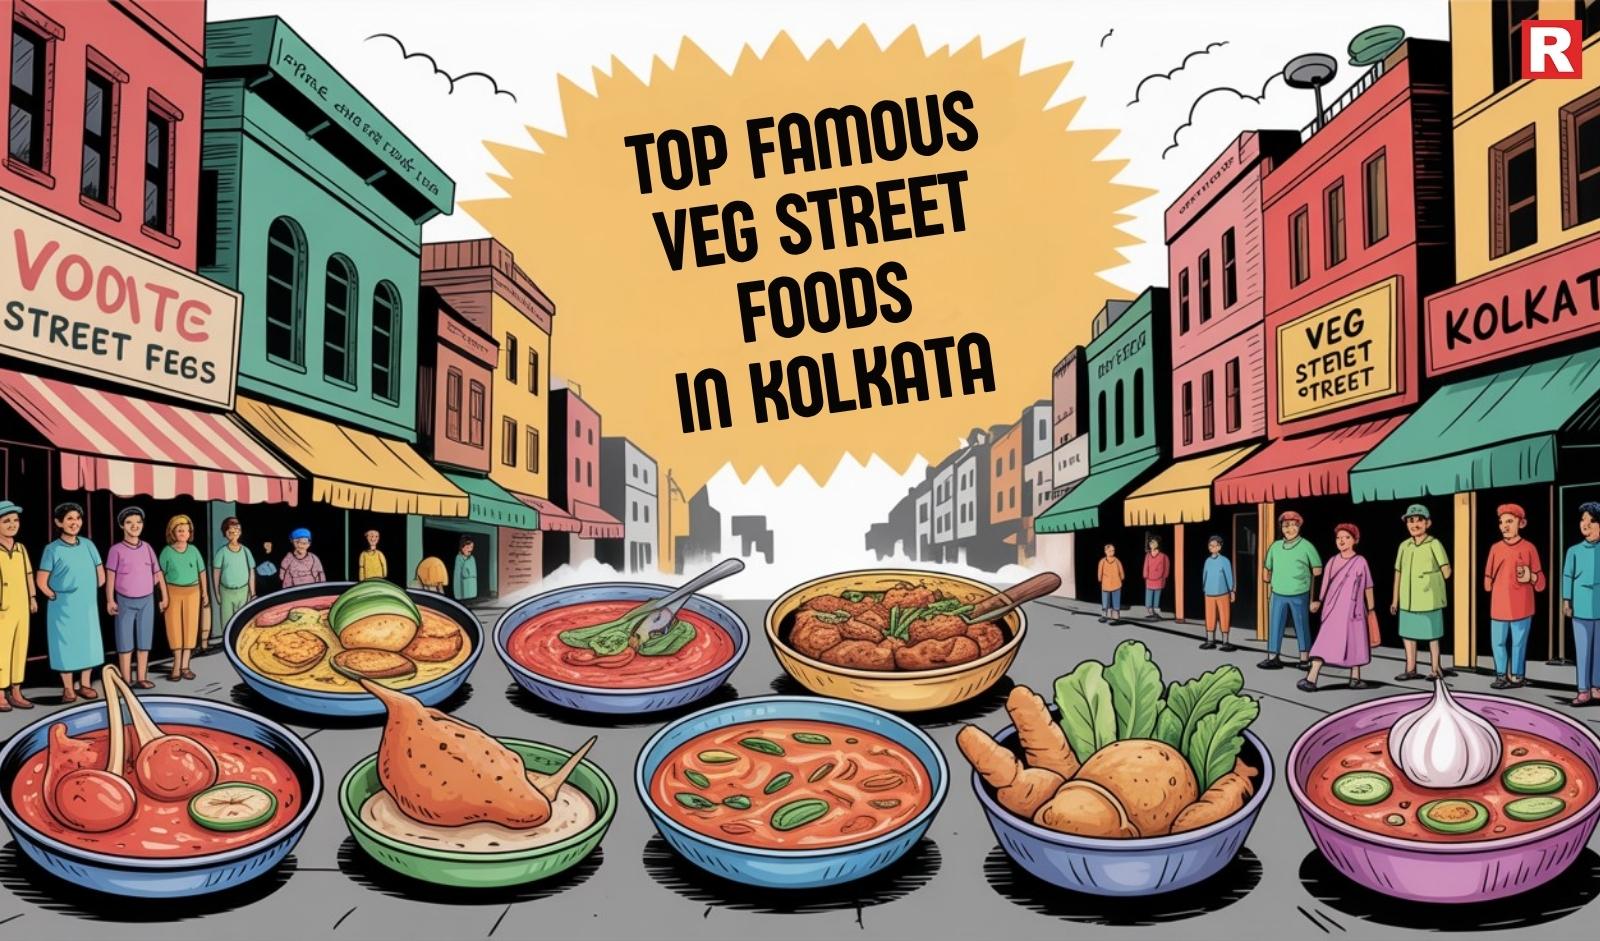
Kolkata is more than a city; it is an emotion wrapped in flavours, culture, and warmth. Known as the “City of Joy,” it welcomes every food lover with open arms. While many associate Kolkata with fish curries and sweets, its vegetarian street food tells a story of its own. Every lane, every corner, hides a food stall that serves something unforgettable. From the spicy crunch of phuchkas to the soft comfort of ghugni chaat, the city celebrates food in its purest form. Vendors set up their stalls as the sun goes down, and the aroma of frying kachoris and telebhajas fills the air. Crowds gather around with plates in hand, ready to enjoy the city’s timeless flavours.
The recipes have been passed down through generations, and each bite carries that legacy. For those who seek authentic Indian flavours, the streets of Kolkata promise a journey of spice, texture, and joy. It’s a paradise for anyone who believes good food can touch the soul.
Explore the Top Famous Veg Street Foods in Kolkata
1. Phuchka – Kolkata’s King of Street Food
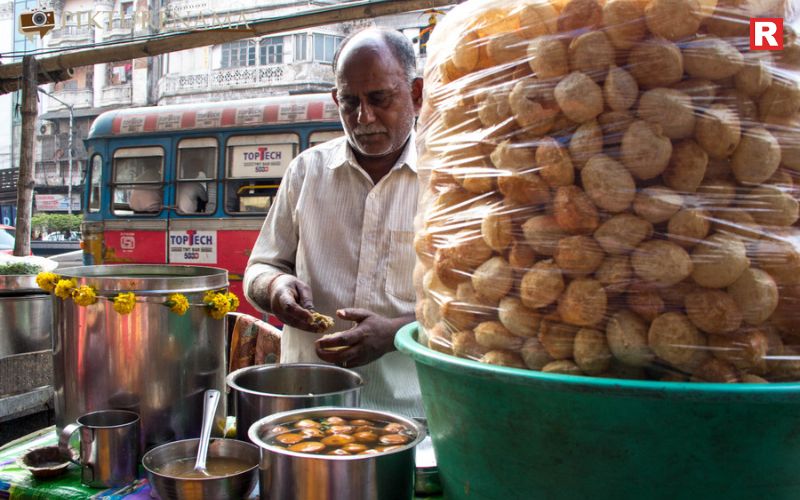
If there’s one snack that defines Kolkata, it’s phuchka. Known elsewhere as pani puri or golgappa, phuchka stands out for its sharp, tangy flavour. The crisp shells are filled with mashed potatoes, tamarind water, and a mix of spices that tingle your taste buds instantly. What makes Kolkata’s phuchka special is the spice blend — fiery, sour, and perfectly balanced. Locals often argue about who makes the best phuchkas, but popular spots like Vivekananda Park, Southern Avenue, and Gariahat always top the list. If you love spice, ask for “extra teekha pani.” That’s when you truly experience the magic of Kolkata’s phuchkas.
2. Jhalmuri – The Snack That Never Fails
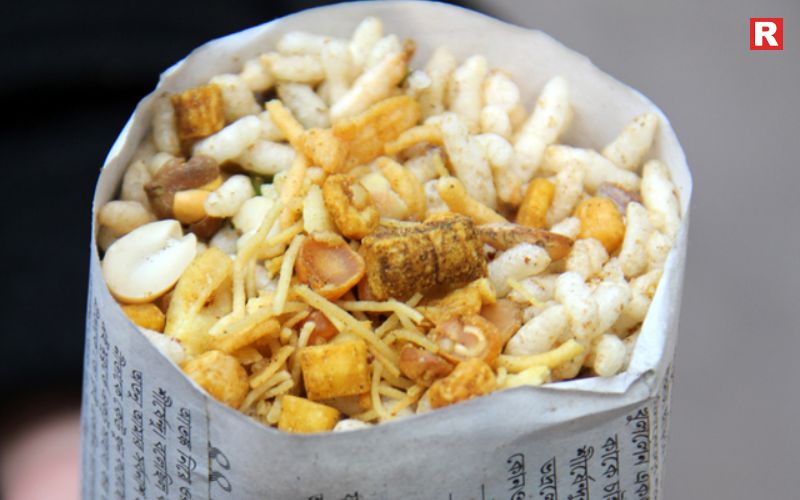
Jhalmuri is Kolkata’s answer to the classic chaat — light, quick, and full of texture. It’s made from puffed rice mixed with mustard oil, chopped onions, chillies, roasted peanuts, and a sprinkle of masala. Served in a newspaper cone, it’s the city’s most convenient snack on the go. The strong aroma of mustard oil gives it a distinct Bengali flavour. You’ll often find vendors near Howrah Bridge, Esplanade, or College Street, mixing jhalmuri right in front of you. One bite, and you’ll understand why this humble snack has fans across generations.
Read more: 8 Famous Vegetarian Dishes of Uttar Pradesh and Their Timeless Legacy
5 Cities That Serve the Best Non-Vegetarian Street Food
3. Kathi Roll – The Iconic Kolkata Wrap
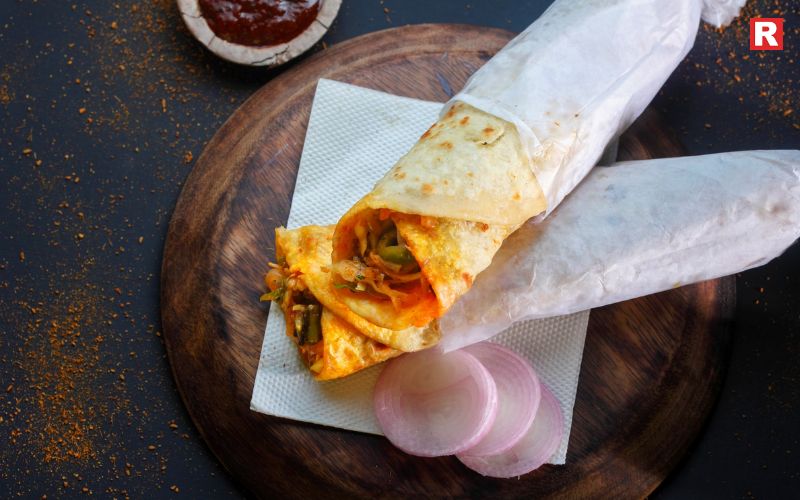
Born in the famous Nizam’s restaurant, the kathi roll is a Kolkata invention that conquered India. Originally non-vegetarian, it now has delicious vegetarian versions made with paneer, potatoes, and mixed vegetables. Soft, flaky parathas wrap around spicy fillings and are layered with sauces, onions, and sometimes a dash of lemon. It’s a complete meal by itself — tasty, filling, and easy to eat on the go. From Park Street to Gariahat, every roll shop adds its unique twist. The paneer roll, with its perfect mix of spice and creaminess, remains a favourite among vegetarians.
4. Telebhaja – The Crispy Rainy-Day Treat
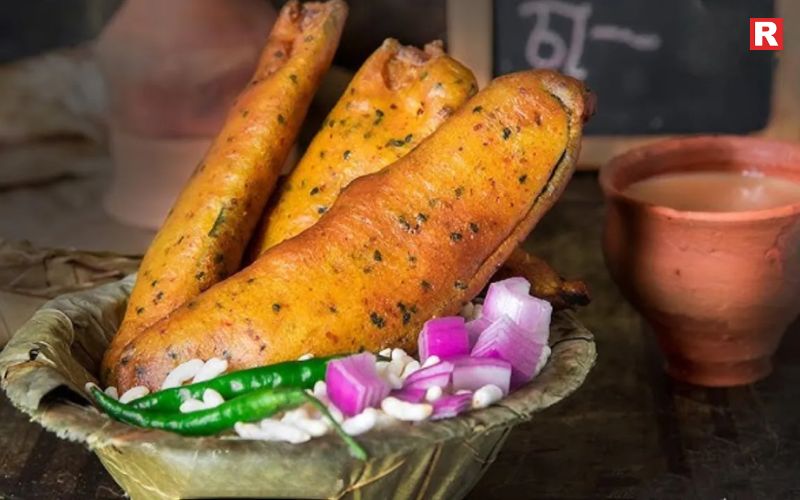
Nothing beats the joy of biting into a hot telebhaja on a rainy Kolkata evening. Telebhaja means “fried in oil,” and it includes a variety of fritters made from onion, potato, brinjal, or even raw banana. Served with puffed rice and green chillies, these crispy delights are the perfect companion to a cup of chai. You’ll find telebhaja stalls near office areas, markets, and especially College Street, where students often gather for evening snacks. It’s comfort food in its simplest form — fried, spicy, and irresistibly good.
Know more: Top 10 Vegan Street Foods in India Every Indian Loves
5. Ghugni Chaat – Comfort in a Bowl
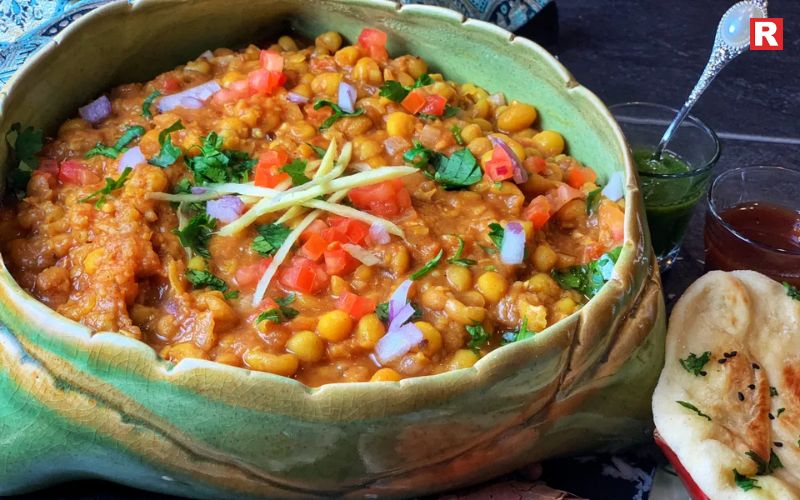
Ghugni chaat is one of Kolkata’s most popular vegetarian dishes. It’s made with yellow or white peas cooked in a thick, spicy gravy and served with chopped onions, coriander, and lemon juice. High in protein and full of flavour, ghugni is both wholesome and satisfying. Whether you have it for breakfast or as an evening snack, it never disappoints. You’ll find the best ghugni chaat at small roadside stalls across North Kolkata and Burrabazar. Add a squeeze of lemon, and the taste becomes unforgettable.
6. Kachori Sabzi – A Classic Morning Favourite

For many Kolkatans, a perfect morning begins with hot kachori sabzi. This traditional breakfast dish combines crisp kachoris filled with lentils or spices, served with spicy potato curry. The aroma of frying kachoris fills the streets early in the morning, especially in Burrabazar, Kalighat, and Hedua Park. Pair it with a cup of chai, and you have a meal that feels like home. It’s a dish that reflects Kolkata’s cultural mix, influenced by North Indian flavours but made distinctly Bengali in style.
7. Chowmein and Veg Momos – The Indo-Chinese Obsession
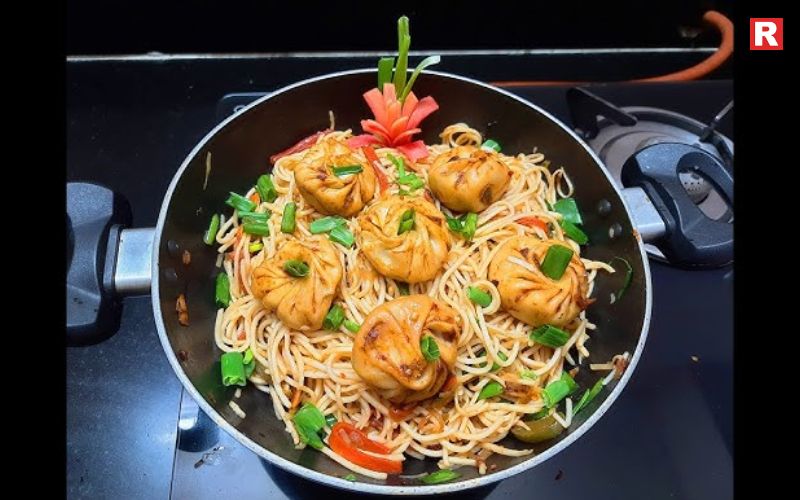
Kolkata’s love for Chinese food is legendary. The city has developed its own Indo-Chinese style, with dishes that are bold, spicy, and full of flavour. Street-side chowmein, crispy Manchurian, and steamed veg momos are among the most popular vegetarian options. You’ll often see students and office-goers lining up at stalls near Tiretta Bazaar, Lake Market, and South City. These dishes represent Kolkata’s evolving food culture — traditional yet open to global influences.
Also check: Pani Puri Has Different Names in Different Indian States—Know Them All
Top Vegetarian Delicacies from Coastal Karnataka
8. Mishti – The Sweet Ending
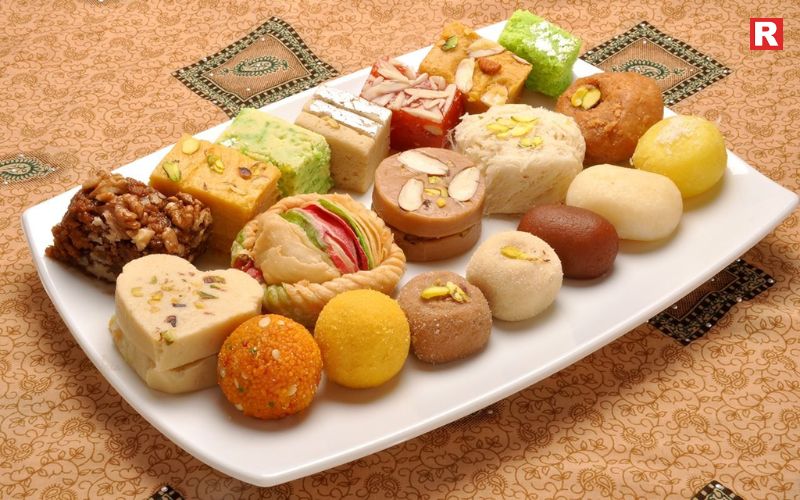
A food journey in Kolkata is never complete without something sweet. The city’s vegetarian sweets are world-famous. From the soft and juicy Rosogolla to the creamy Sandesh and the cool Mishti Doi, every bite feels like a celebration. Traditional sweet shops such as Balaram Mullick & Radharaman Mullick, Bhim Chandra Nag, and KC Das have been perfecting these treats for decades. Most of these sweets are made using pure milk and sugar, keeping them completely vegetarian.
Why Kolkata Is a Food Lover’s Paradise
Kolkata’s street food culture is about more than just taste. It’s about connection — people from all walks of life sharing food and stories. The city’s mix of Bengali, Chinese, Marwari, and Mughlai influences makes its vegetarian street food vibrant and diverse. Food stalls here aren’t just businesses; they are institutions that have stood the test of time. Generations of families have run them, serving the same recipes that locals swear by.
Evenings are the best time to explore Kolkata’s street food. The city comes alive as vendors light up their stalls and the aroma of fried snacks fills the air. Winter months, from November to February, are particularly delightful as the weather adds a festive charm to the experience. If you want to try everything, plan a food walk through Esplanade, New Market, or College Street — all hubs for authentic street flavours.
- Always eat from popular stalls that have regular customers.
- Carry cash, as small vendors rarely accept digital payments.
- Don’t miss trying chai served in clay cups, known as bhar, for a truly local touch.
- Stay open to experimenting—Kolkata’s charm lies in its variety.
Taste of Bengal!
Kolkata’s vegetarian street food is bold yet comforting, reminding one of the city’s simple joys. From the fiery taste of phuchkas to the crisp bite of telebhaja and the creamy sweetness of mishti doi, every snack captures Kolkata’s essence.
The city’s streets are alive with the sound of sizzling pans and the chatter of hungry crowds. Food here is not just eaten; it is shared, celebrated, and cherished. Each stall has its own charm, each recipe its own memory. For anyone visiting Kolkata, following the aroma of these street foods is like discovering the city’s soul. Because in Kolkata, food is not only a meal—it is an experience, a feeling, and a beautiful reminder of the city’s timeless joy.
 Growth in food industryBy 2025, the restaurant industry hasn’t just bounced back—it’s transformed.
 KitchenwareCommercial stoves play a key role in every professional kitchen in India. They influence the taste of the food, the speed of service, and the overall…
-
Food and BeverageMexican cuisine blends colour, warmth, and long history in every dish. Each bite offers new textures and bold flavours. These seven dishes give…
 Alcohol industryWhether it is a house party, a relaxed evening, or a special occasion, grain whisky fits comfortably into the lifestyle of Indian consumers.
Copyright © 2009 - 2025 Restaurant India.