


Coconut is the fruit of wonders! Be it the auspicious bursting a coconut or a refreshing delight of ‘naariyal paani’ or just a soothing coconut oil ‘chumpy’, coconut has its magic in many aspects of our life. With all these things, this ambrosial fruit is also the ‘soul’ of our much loved south Indian cuisine.
Below are some coconut based recipes that are not only healthy, but are also full of delight! Reading through, will surely give your taste buds an imaginary South Indian expedition! So, make sure to give all a try! You’ll love them.
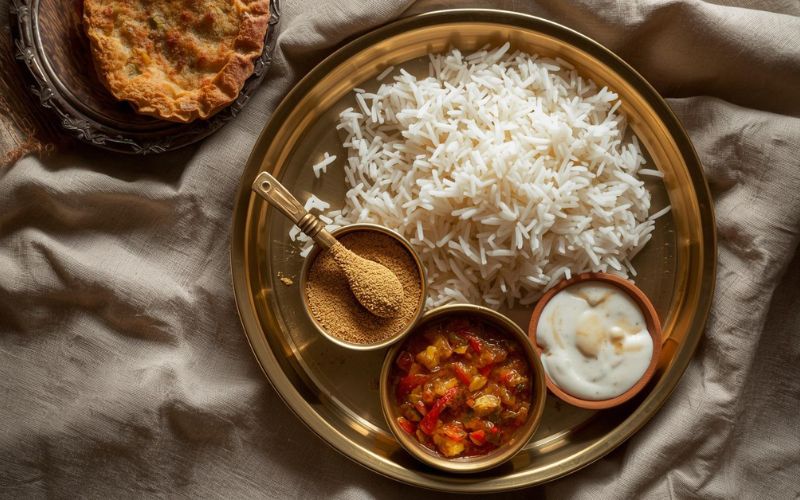
Kerela style Coconut Stew
A savoury blend of coconut milk, vegetables and spices, the ‘Kerela’ sty Coconut stew is a regular part of the South Indian breakfast generally served with appam. Here’s the recipe (for 2 cups):
Ingredients:
- 1 Cup coconut milk
- 2 Tbsp oil
- ½ cup finely chopped onions
- 2 cardamoms (elaichi)
- 2 cloves (laung)
- 1 stick cinnamon (dalchini)
- 1 green chilli
- Salt to taste
- 1 tsp corn flour dissolved in 2 tbsp water
- 1.5 cups boiled mixed vegetables (carrots and French beans cut diagonally)
Appam (for serving)
Method
- Heat the oil in a broad non-stick pan, add the onions and sauté on a medium flame for 1 to 2 minutes.
- Add cardamom, cloves and cinnamon, mix well and sauté on a medium flame for a few seconds.
- Add the coconut milk, green chilli and salt, mix well and cook on a medium flame for 1 minute.
- Add the corn flour-water mixture and mixed vegetables, mix well and cook on a medium flame for 2 to 3 minutes, while stirring continuously.
- Serve hot with appam.
Coconut Pie
There is perhaps no easier way of making a pie. With of course a flavor of our best friend…. Coconuts!
Ingredients
- 1 cup flaked or shredded coconut
- ¾ cup sugar
- ½ cup cake mix
- ¼ cup butter
- 2 cups milk
- 1.5 teaspoons vanilla
- 4 eggs
Method
- Heat oven to 350 F. Grease 9-inch pie plate with shortening or cooking spray.
- In medium bowl, stir all ingredients until blended. Pour into pie plate.
- Bake 50 to 55 minutes or until golden brown and knife inserted in the centre comes out clen. Cover and refrigerate. Enjoy!
No bake Coco-candy
This easy No Bake coconut candy recipe goes together in minutes and is perfect sweet bite for your loved ones. Especially for somebody who does not know cooking but want to impress someone special! This candy is an example of sheer craftiness and has nothing to do with your cooking skills.
Ingredients
- Sweetened flaked coconut
- Powdered sugar
- Melted butter
- Flavoured (chocolate/ strawberry/ pineapple etc) spread
Method:
Well it’s super easy! Just mix the butter and sugar together. Then add in the coconut and mix it together. Form into balls and just lightly press a little dent in the center. Decorate it with your favourite flavoured spread and enjoy. Done! And here’s the best part. You can store them airtight up to 1 week.
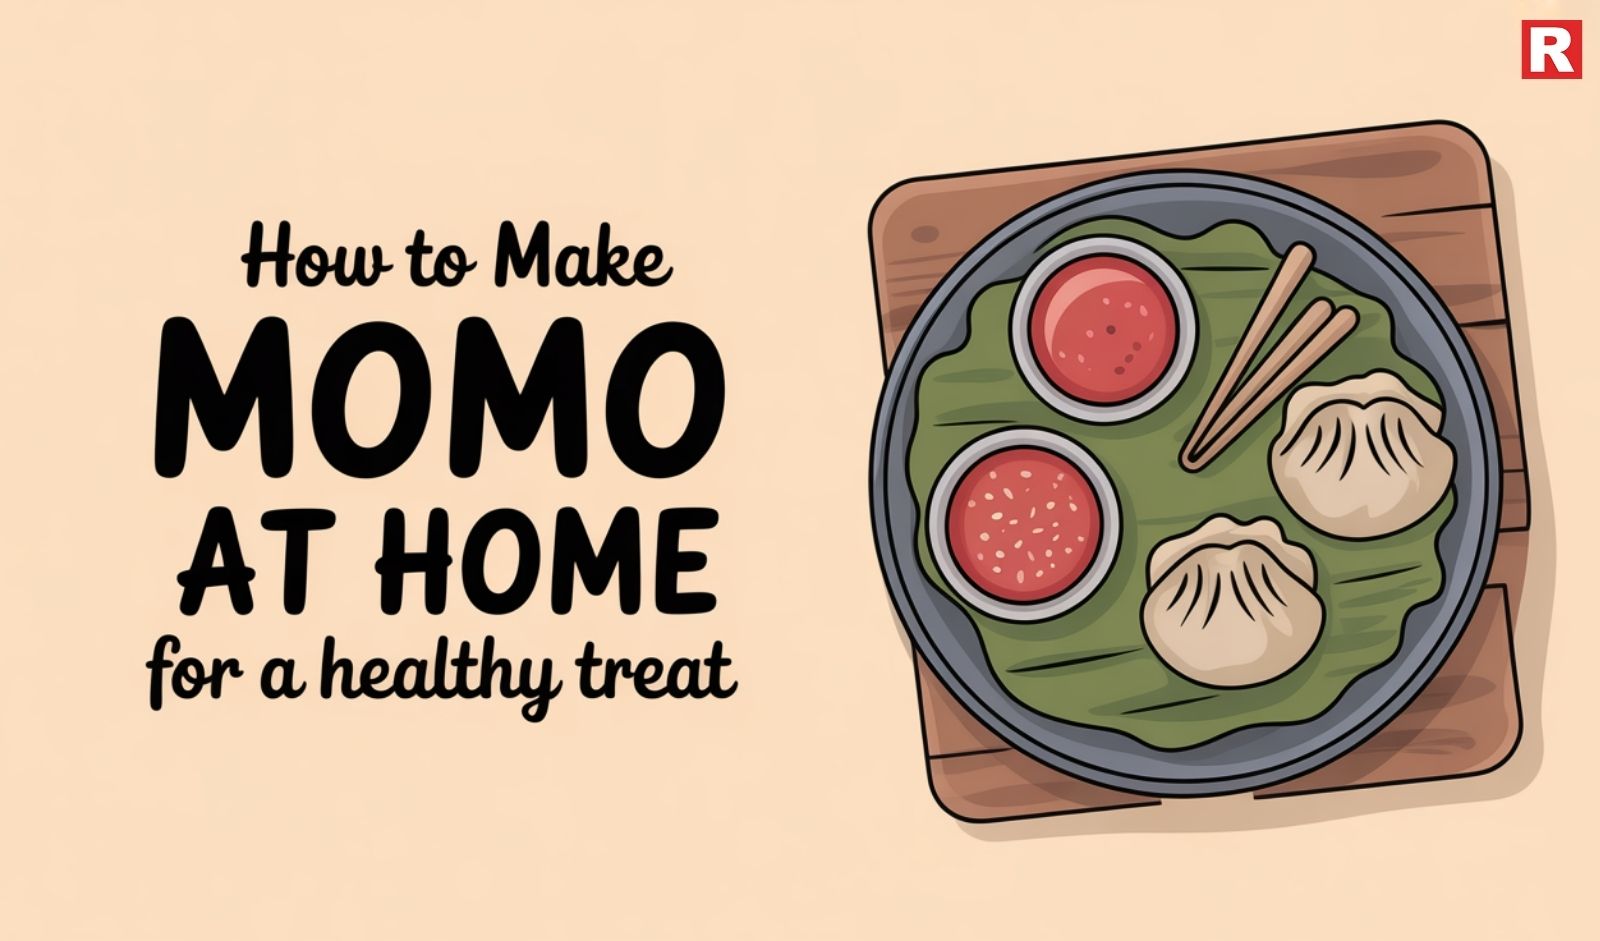
There’s something magical about momos. Soft on the outside, flavorful on the inside, and often served piping hot with a spicy dip — they’ve become one of India’s favourite street foods. Whether you find them at a small roadside stall or a fancy café, momos always bring comfort with every bite.
But what if you could enjoy that same taste at home — fresher, healthier, and completely guilt-free? Making momos at home is easier than it seems, and with a few smart choices, you can turn this popular snack into a wholesome meal. Let’s explore how to make momos at home for a healthy treat that doesn’t compromise on flavour.
The Momo Story: From the Himalayas to Your Kitchen
Momos trace their origins to Tibet and Nepal, where they were once a humble meal prepared using barley flour and yak meat. Over time, traders and travellers carried them across borders, and India gave them a unique twist — with fillings like paneer, vegetables, and spicy chutneys.
Today, every region in India has its version of the beloved momo. From steamed veg momos in Delhi to tandoori momos in Mumbai, the dish has evolved beautifully while retaining its comforting essence. The best part? You can recreate that same warmth at home — with healthier ingredients and no compromise on taste.
Why Homemade Momos Are the Healthier Choice
When you prepare momos at home, you know exactly what’s going in. You can skip refined flour, avoid excess oil, and pack them with fresh, nutrient-rich fillings. Here’s why homemade momos are a great choice:
- No preservatives: Freshly made dough and filling mean zero artificial additives.
- Less oil: Steam or air-fry instead of deep-frying to reduce fat content.
- Nutritious fillings: Choose lean meats or fibre-rich vegetables for a balanced meal.
- Custom flavours: Adjust seasoning and spice according to your taste.
Interestingly, traditional Tibetan momos were made using barley flour instead of refined flour—a reminder that even centuries ago, wholesome ingredients were at the heart of great food.
Read more: What is Kimchi? Top Veg Kimchi You Can Try at Home
Top 10 Vegan Street Foods in India Every Indian Loves
Ingredients You’ll Need
For the Dough:
- 2 cups whole wheat flour or multigrain atta
- A pinch of salt
- Warm water for kneading
For the Filling:
You can experiment with different fillings, but here’s a basic healthy version:
- 1 cup finely chopped cabbage
- ½ cup grated carrot
- ½ cup finely chopped spring onions
- 1 teaspoon minced garlic
- 1 teaspoon grated ginger
- ½ cup tofu or boiled chicken mince (optional)
- Salt and pepper to taste
- 1 teaspoon olive oil or sesame oil
For the Chutney:
- 2 ripe tomatoes
- 3–4 dried red chillies
- 1 teaspoon roasted sesame seeds
- 1 tablespoon vinegar
- Salt to taste
Blend all chutney ingredients together and cook lightly until it thickens. This dip adds the authentic punch every momo lover craves.
Step-by-Step Guide to Making Perfect Momos
Step 1: Prepare the Dough
Mix whole wheat flour and salt in a bowl. Gradually add warm water and knead into a soft, smooth dough. Cover it with a damp cloth and let it rest for about 20 minutes. Resting helps the dough become more elastic and easier to shape.
Step 2: Make the Filling
In a pan, heat a teaspoon of oil. Add garlic and ginger, sauté briefly, then add all chopped vegetables (and protein if using). Stir-fry for a few minutes on high heat until the veggies are just tender. Add salt and pepper, mix well, and let it cool.
Step 3: Shape the Momos
Divide the dough into small balls and roll each into thin circles. Place a spoonful of filling in the center of each circle. Gently fold and pinch the edges to seal — either in a crescent or round pouch shape. Don’t worry if it’s not perfect; with practice, you’ll get the folds right.
Step 4: Steam to Perfection
Line your steamer with a light brush of oil or cabbage leaves to prevent sticking. Place the momos inside, leaving some space between them. Steam for 10–12 minutes until they turn slightly glossy and translucent.
Know more: Pani Puri Has Different Names in Different Indian States—Know Them All
Healthy Cooking Tips
- Steam instead of fry: This keeps the calorie count low and makes momos light on the stomach.
- Use whole grains: Replace maida with whole wheat or multigrain atta for extra fibre.
- Add lean protein: Chicken, tofu, or paneer are great options for muscle-friendly meals.
- Make your chutney at home: It avoids the excess sugar and preservatives found in packaged sauces.
- Go easy on salt and oil: A small change can make a big difference in overall nutrition.
If you love crispy food, try air-fried momos. Brush them with a touch of oil and air-fry until golden brown. You’ll get the crunch you love without deep-frying.
Variations to Try at Home
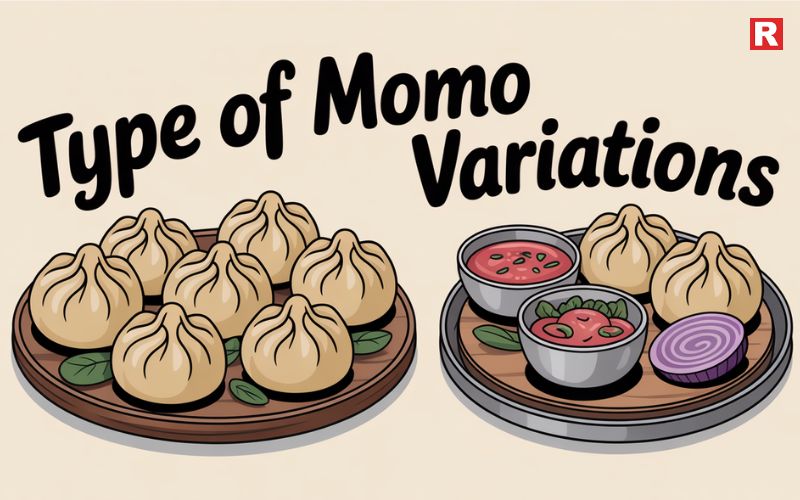
1. Tandoori Momos Smoky, spicy, and irresistibly flavourful — tandoori momos are a hit among foodies. Coat steamed momos in yogurt and tandoori masala, then grill them in an oven or tandoor until slightly charred.
2. Whole Wheat Veg Momos Perfect for fitness lovers. These momos are light yet filling, thanks to the fibre from the whole wheat dough. Pair them with a tangy tomato chutney for a satisfying snack.
3. Jowar or Oats Momos If you’re gluten-sensitive, try momos made from jowar flour or oats powder. They’re rich in nutrients and add an earthy flavour to the dish.
4. Soup Momos A comforting combination of momos served in a hot, aromatic broth. This version is ideal for rainy days or when you’re craving something nourishing and warm.
Nutritional Value of Homemade Momos
A plate of steamed vegetable momos made with whole wheat flour provides roughly:
- Calories: 180–200 kcal
- Protein: 6–8 g
- Fat: 3–5 g
- Carbohydrates: 30–35 g
This makes them an excellent light meal or evening snack. Compared to fried momos, which can exceed 400 calories per plate, steamed ones are far more balanced and nutritious.
Also check: Famous Street Food to Try in Chandni Chowk
Dubki Kadhi: Uttar Pradesh’s Soulful Comfort Dish You’ll Fall in Love With
Pairing Momos for a Complete Meal
You can pair momos with a side of clear soup for a wholesome dinner or serve them as appetizers during gatherings. For fitness enthusiasts, adding a salad or protein shake makes it a complete post-workout meal.
For those who love experimenting, momos can even be turned into fusion dishes — momo bowls, momo wraps, or even momo stir-fry. Their mild flavour makes them a versatile base for various culinary ideas.
A Treat You Can Feel Good About
Cooking momos at home is more than just preparing food — it’s an experience. From kneading the dough to folding each piece, it brings creativity and care into your kitchen. Every bite reflects freshness, flavour, and the joy of eating something truly homemade. The next time you crave momos, skip the food stall and make your own batch. You’ll discover that homemade momos are not only delicious but also nourishing. They’re proof that healthy eating doesn’t have to be boring — it can be warm, flavourful, and deeply satisfying. So, tie your apron, get your steamer ready, and let the aroma of freshly steamed momos fill your kitchen. Because nothing beats the taste of a healthy treat made with your own hands.

Munchies are small, bite-sized snacks that can be easily eaten between meals. They can be either savory or sweet, baked or fried, gourmet or healthy; the combinations are truly endless. And the best part? You don’t need to be a professional cook to make these munchies. With a handful of ingredients and some imagination, you can easily turn your kitchen into a mini snack shop.
In this article, we’re going to share 10 munchies ideas that are easy to prepare, filled with flavor, and great for snacking at home. Whether you are in the mood for spicy, cheesy, or guilt-free healthy munchies, you are bound to find your next favorite snack here.
Read more: 10 Easy Air Fryer Snacks You Can Make at Home
Why Homemade Munchies Are the Best
Although there is nothing wrong with buying chips or cookies from the grocery store, homemade munchies are far superior for a few reasons:
- Healthier control: You control the amount of oil, salt, and sugar that goes in.
- Budget-friendly: You can create munchies from affordable ingredients instead of purchasing expensive packaged snacks.
- Fresh and flavorful: You cannot beat the smell of fresh, warm snacks from the stove or oven.
- Customizable: You can reduce the meals with spice, change ingredients to suit your liking, and make it exactly how you want.
So tie on your apron and get ready to crunch, munch, and enjoy.
Know more: 10 Best Snacks without Onion and Garlic you can order today
10 Delicious Munchies Ideas to Try at Home
All of these recipes are convenient, easy to prepare with ingredients you already have at home, and absolutely delicious.
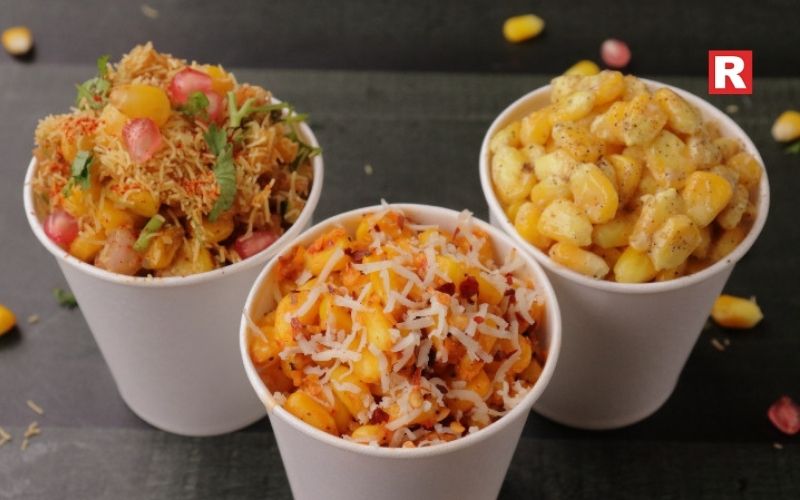
1. Masala Corn Cups
Masala Corn is one of the kinds of snacks that makes you smile from ear to ear. It’s warm, buttery, tangy, and bursting with flavor. Start by bringing a cup of sweet corn kernels to a boil until tender, draining off the water, and then adding a generous amount of butter while the kernels are still hot. Season with some salt, red chili powder, and sprinkle with chaat masala to get that street-style flavor, followed by a squeeze of lemon juice for that taste of freshness. Finish it with a sprinkling of freshly chopped coriander to add color and freshness. Serve the corn mixture in small paper cups or bowls: it gives your snack an aesthetic. You can, of course, take it to the next level by adding minced cheese or diced onions and tomatoes to make it a heart-filling dish. It is the perfect munchie for rainy days, movie nights, or whenever you want to quickly make something spicy and comforting.
2. Bread Pizza Bites

When you're craving pizza but don't have enough dough or time, you can resort to bread pizza bites. This quick recipe will transform your normal bread into mini pizzas with lots of flavor. You can take fresh, unsliced, or leftover slices of bread and cut them into small pieces that make the perfect bite-sized portions. You will want to cover each piece with a layer of pizza or tomato sauce, and finely chopped crunchy veggies like onions, bell peppers, or corn. Sprinkle shredded mozzarella cheese on top and bake or air fry at 180 degrees Celsius (356 degrees Fahrenheit) until the cheese melts and the edges are golden. The pizza bites can be served as a starter for parties, a snack for kids, or even as a tea-time snack for adults.
3. Homemade Banana or Potato Chips

Making your own banana or potato chips at home is easier than you think, and way fresher than store-bought. To start, slice up a raw banana or potato paper-thin using a slicer. Soak the slices in cold water for ten minutes to get excess starch out. Pat the chips dry very well. Get some oil hot in a pan and deep fry the slices on a medium flame until crisp and lightly golden. You can use whichever seasoning you want, whether salt, pepper, or peri-peri powder, while they’re still hot, so the seasoning gets absorbed perfectly. Or, for a lighter version, toss in a bit of oil and air-fry until crisp.
4. Paneer or Tofu Popcorn

Paneer or tofu popcorn is a hit at any party or casual get-together; they are bite-sized, crispy, and perfectly spiced. To make them, cube the paneer or tofu. Blend in a little salt and chili powder, and one teaspoon of garlic paste. Add a spoonful of cornflour to coat lightly to ensure the coating is crisp. Roll the cubes in breadcrumbs and fry them in a shallow layer of oil until golden brown. You will have a crunchy exterior, with a soft, creamy center that melts in your mouth. Serve while warm with mint chutney, ketchup, or spicy mayo for dipping. You can even toss them in a honey-chili glaze for a fusion twist that tastes like a regular café.
What's new: Beyond Toast: 10 Deliciously Easy Bread-Based Snacks
5. Roasted Makhana (Fox Nuts)

For a snack that is both healthy and guilt-free but also fulfills your craving for crunch, there is nothing better than roasted makhana. This Indian traditional snack is so simple to make and can be prepared in less than 10 minutes, with a light and satisfying crunch. Just heat a teaspoon of ghee in a pan (or olive oil), add a couple of cups of makhana, and roast over a low flame, stirring constantly. You will know they are ready when they have turned slightly golden and they have a beautiful crunch to them. Add salt, turmeric, or black pepper to flavour them, or try modern varieties like peri-peri, cheese powder, or cinnamon sugar. Makhanas are not just a light snack; they are also high in protein and fiber, making them a perfect mid-day or after-dinner snack. And if you make them and put them in a sealed jar, you will have prepared a crunchy, healthy snack that will last for several days.
6. Spicy Nacho Mix

If you enjoy snacking while binging on movies, this spicy nacho mix is an essential dish to have on hand. Spread a layer of tortilla chips on an oven-safe plate or baking tray. Then, add spoonfuls of salsa, jalapeño slices, olives, and grated cheese on top. Bake or microwave just until the cheese melts. Finish with fresh coriander, diced tomato, or a drizzle of sour cream. You can even add some beans or corn if you want to make it more fulfilling. Or if you want more local flavor in your version, swap the nachos for khakra or baked pita chips, and use papad crisps.
7. Garlic & Herb Popcorn
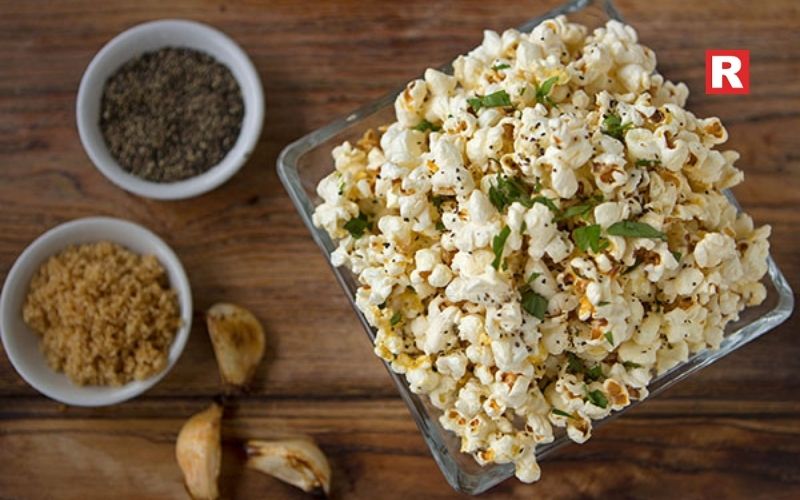
Popcorn is a classic snack that is simple, satisfying, and endlessly customizable. You can transform plain corn into something much more interesting and a little more gourmet with just adding a little garlic-herb. Start with a fresh batch of popcorn in a bit of oil or butter. In another bowl, melt two tablespoons of butter, add garlic powder, oregano, and a tiny sprinkle of salt, mix well, and pour that over the popcorn. Toss the popcorn until all kernels are coated, and you’ll have a deliciously warm snack that is aromatic, perfect for a movie night. And if you want something a little sweeter, you can switch the spices for a little cinnamon sugar or some caramel glaze to make a dessert version.
8. Aloo Chaat
Aloo chaat is one of those classic Indian street foods that always hits the spot. Crispy potatoes coated in spicy chutneys and spices, it's a mixture of textures and flavors in every bite. To start, either boil or shallow-fry the diced potatoes until they are golden brown. In a bowl, add the potatoes and mix with chopped onions, tomatoes, coriander, and a green chili or two if you prefer it spicy. Add some chaat masala, black salt to taste, and a squeeze of lemon juice for a feel of tang. For a richer version, add a little tamarind chutney or drizzle some curd on top. Aloo chaat is versatile enough that you could serve it as an appetizer or even as a light meal. It is easy to make, colorful, and a great go-to for someone craving a punchy, street-style snack at home.
Check out: 6 High-Protein Soya Snacks You Can Make In Minutes
7 Mouth-Watering Snacks Made with Sooji (Semolina)
9. Mini Veg Cutlets
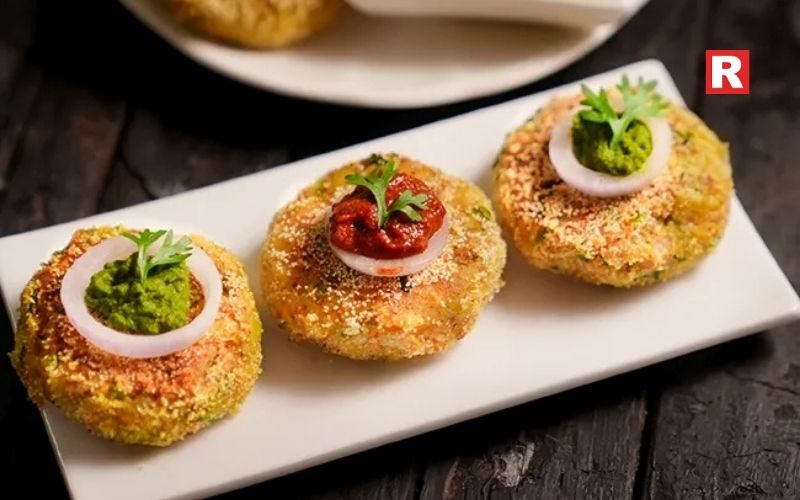
Mini veggie cutlets are a fantastic combination of crispy texture and filling, perfect for serving at tea time or as a starter at get-togethers. To make them, mash boiled potatoes along with finely chopped carrots, peas, and beans. Add salt, chili powder, garam masala, and breadcrumbs to bind the veggies together. Shape the mixture into mini-patties or ovals. Then dip each cutlet in a slurry made of flour and water, followed by a roll in breadcrumbs for the very crisp texture. Shallow fry until golden and crisp on both sides. Serve hot with ketchup or green chutney. You can even make a big batch and freeze it ahead of time. They reheat easily in an air fryer or pan and are the perfect munchie any day of the week.
10. Oats & Peanut Butter Energy Bites
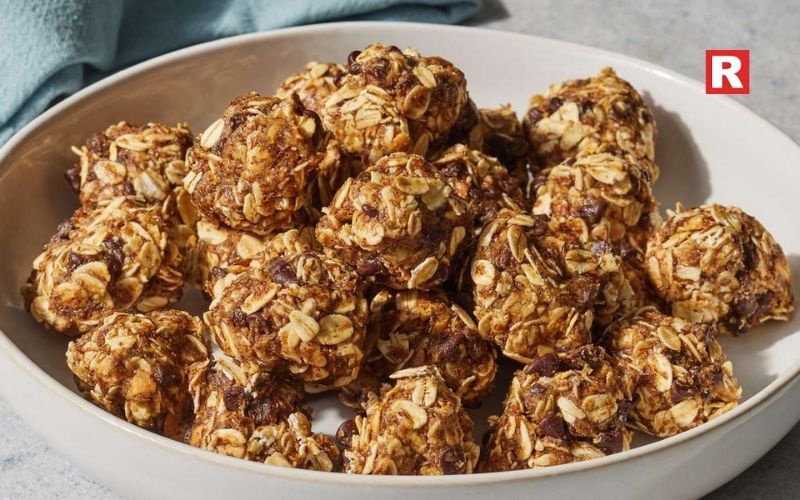
If you're someone who enjoys a delicious, yet healthy option for snacking, these oats and peanut butter bites are perfect for you. The recipe is simple: combine rolled oats, peanut butter, honey, and your choice of nuts or chocolate chips, then roll into balls. Place them in the fridge for fifteen minutes, and they’re ready. These no-bake bites are chewy, nutty, slightly sweet, and make for the best snack energy boost. They contain a good amount of fiber and protein, which makes them a great choice over cookies or chocolates. If you want to customize, you can try adding cocoa powder, shredded coconut, or raisins. And since they are no-bake, you can store them in the fridge so you always have a snack ready for when you have a sweet tooth.
Learn more: 10 Genius Ways to Peel Garlic Like a Pro
Munchies for Every Mood
Homemade snacks are evidence that delicious food can be simple. From quick roasted makhana to cheesy bread pizzas, every recipe on this list can be prepared with as little effort as you can muster, all while delivering maximum flavor. Whether you are working late, binge-watching a show, or just in the mood for something crunchy, these ideas will be your best bets.
So when hunger strikes at an unexpected time, do not reach for a bag of chips; get creative and use one of these ideas for a homemade snack from what you have in your pantry. You will never think the same about snacking again.
There is something timeless about food that brings the warmth of home. Among India’s many regional dishes, Dubki Kadhi from Uttar Pradesh holds a special place. It is simple, soulful, and full of flavour. This dish has been part of UP’s food traditions for generations.
In many homes, it is a reminder of slow cooking, family meals, and the comforting aroma that filled the kitchen. The recipe may look simple, but its taste is unforgettable. It reflects the beauty of Indian home cooking — using few ingredients to create something deeply satisfying. Whether served with hot rice or soft rotis, Dubki Kadhi offers warmth and nostalgia in every bite. It is not just a dish from Uttar Pradesh; it is a memory served on a plate.
What is Dubki Kadhi?
Dubki Kadhi is a traditional North Indian dish, especially popular in Uttar Pradesh. The word “dubki” literally means “to dip,” which describes the process of adding small gram flour dumplings into a tangy curd-based curry. Unlike the Punjabi Kadhi Pakora, which is thick and full of fried pakoras, Dubki Kadhi is thinner, smoother, and lighter.
This dish uses very few ingredients — mainly curd, besan (gram flour), and Indian spices — yet delivers deep flavour. The kadhi has a mild tanginess from the curd and a subtle earthy note from the roasted besan. It’s a wholesome dish that pairs beautifully with rice or roti, especially on days when you want something simple but satisfying.
Why Dubki Kadhi is Special
Every Indian state has its own version of kadhi, but what makes the UP-style Dubki Kadhi unique is its minimalism. It’s a no-onion, no-garlic recipe, which makes it perfect for fasting days or light vegetarian meals. The texture is smooth, the aroma is comforting, and the taste is a perfect mix of sour and spicy.
What also sets it apart is its emotional connection. In many households across Uttar Pradesh, Dubki Kadhi is made during family gatherings, festive occasions, or lazy Sunday lunches. It’s one of those dishes that doesn’t rely on fancy ingredients — it simply celebrates the beauty of homemade food.
Ingredients You’ll Need
Here’s what you’ll need to make an authentic Dubki Kadhi at home:
For the Kadhi:
- 1 cup curd (preferably slightly sour)
- 3 tablespoons besan (gram flour)
- ½ teaspoon turmeric powder
- 1 teaspoon red chilli powder
- Salt to taste
- 3 cups water
For the Tempering:
- 2 tablespoons mustard oil or ghee
- 1 teaspoon mustard seeds
- 1 pinch asafoetida (hing)
- 6-8 curry leaves
- 2 dried red chillies
For the Dubki Pakoras:
- 1 cup besan
- ½ teaspoon red chilli powder
- Salt to taste
- 1 pinch baking soda (optional, for softness)
- Water as needed
- Oil for shallow or deep frying
These are ingredients you’ll likely already have in your kitchen, which is why Dubki Kadhi is a favourite among home cooks who love simple, wholesome meals.
Read more: How to Make Tasty Quick Recipes with Bell Pepper
10 Awadhi Cuisine Classics You Must Try at Least Once
Step-by-Step Recipe for Dubki Kadhi
Step 1: Prepare the Kadhi Base
In a large bowl, whisk together curd, besan, turmeric, salt, and red chilli powder. Add water gradually and mix until smooth. The mixture should be lump-free and slightly thin in consistency.
Step 2: Prepare the Tempering
Heat mustard oil in a pan. Once hot, add mustard seeds. When they start to crackle, add asafoetida, curry leaves, and dried red chillies. Stir for a few seconds to release the aroma.
Step 3: Cook the Kadhi
Pour the whisked curd-besan mixture into the pan. Keep stirring continuously so that the curd doesn’t curdle. Once it starts to boil, reduce the heat and let it simmer for 20–25 minutes. Stir occasionally until it thickens slightly and the raw smell of besan disappears.
Step 4: Make the Dubkis (Dumplings)
In another bowl, mix besan, red chilli powder, salt, and a pinch of baking soda. Add water gradually to form a thick batter. Heat oil in a small pan. Drop small spoonfuls of the batter into the hot oil. Fry lightly until golden brown — the dumplings should stay soft and airy, not crispy.
Step 5: Add the Dubkis to Kadhi
Once the kadhi is ready, gently drop the dubki pakoras into it. Let them simmer together for 5–10 minutes on low flame so the dumplings absorb the kadhi’s flavours.
Serving Suggestions
Serve Dubki Kadhi hot with steamed basmati rice or jeera rice. It also pairs beautifully with soft phulkas or plain parathas. For that authentic touch, drizzle a teaspoon of ghee on top before serving and garnish with fresh coriander leaves.
In many UP households, Dubki Kadhi is served with a side of aloo ki sabzi, papad, and achar for a complete traditional meal.
Know more: 5 Cities That Serve the Best Non-Vegetarian Street Food
Tips for Perfect Dubki Kadhi
- Whisk well: The curd and besan mixture should be smooth — no lumps.
- Stir while boiling: Keep stirring the kadhi for the first 10 minutes to prevent curdling.
- Don’t over-fry the dubkis: They should stay soft so that they can soak up the tangy kadhi.
- Use slightly sour curd: This gives the kadhi its signature tang.
- Simmer slowly: The longer you simmer, the richer the flavour becomes.
The Roots of Dubki Kadhi
Dubki Kadhi has its origins in Awadh, a region in Uttar Pradesh known for its royal cuisine. While Awadhi food is famous for its biryanis and kebabs, it also has vegetarian gems like Dubki Kadhi. Traditionally, it was made during fasting days when people avoided onion and garlic but still wanted something wholesome and flavorful. Over time, it became a comfort dish — served in both royal kitchens and humble homes. Today, it remains a beloved part of UP cuisine, often made during festivals like Navratri or Holi, when families come together to share a meal filled with warmth and nostalgia.
Apart from its taste, Dubki Kadhi is also light on the stomach and rich in protein. The combination of curd and besan makes it easy to digest, while spices like turmeric and asafoetida aid in gut health. Because it’s cooked with minimal oil and uses yogurt as the base, it’s a perfect dish for those looking for something nutritious yet delicious. If you’ve only tasted Punjabi Kadhi, you’ll find Dubki Kadhi refreshingly different. It’s lighter, tangier, and full of subtle flavours. Plus, it’s a great way to experience authentic Uttar Pradesh cuisine. You don’t need fancy ingredients or hours of preparation — just curd, besan, and love. So the next time you crave something homely yet special, try making Dubki Kadhi. You’ll understand why this humble dish from UP continues to win hearts across generations.
Also check: 8 Famous Vegetarian Dishes of Uttar Pradesh and Their Timeless Legacy
What is Kimchi? Top Veg Kimchi You Can Try at Home
Final Thoughts
Dubki Kadhi shows that food does not need to be fancy to bring comfort. With only a few simple ingredients, it turns into a meal that feels warm, homely, and full of flavour. This dish reflects the heart of Indian cooking — honest, soulful, and satisfying. It is a perfect example of how tradition and taste can come together beautifully. The curd, gram flour, and spices blend to create a smooth and tangy curry that calms the mind and fills the stomach. Every spoonful carries the charm of slow cooking and family meals shared with love. Over the years, Dubki Kadhi has remained a favourite in many Indian homes. It continues to remind people of their roots and the joy of simple food. More than a recipe, it is a story of warmth, tradition, and togetherness — served in a humble bowl of golden kadhi.
Bell peppers, known as capsicums in India, are among the most colourful and versatile vegetables found in kitchens. They add brightness, crunch, and flavour to almost any dish. From stir-fries and pasta to wraps and curries, bell peppers fit in effortlessly. Their quick cooking time makes them perfect for busy days when one wants something simple yet tasty. Beyond their looks, bell peppers are loaded with nutrients. They are an excellent source of Vitamin C and antioxidants, helping boost immunity and skin health. They are also low in calories, making them a smart choice for healthy eating.
Bell peppers come in a variety of colours — green, red, yellow, and orange — each offering a slightly different taste. Green peppers are earthy and slightly bitter, while red ones are sweet and rich. Yellow and orange peppers have a mild, fruity flavour that adds balance to dishes. From spicy Indian curries to creamy Italian pastas, bell peppers adapt beautifully to every cuisine. They make food look vibrant, taste better, and feel more wholesome — all with minimal effort.
Why Bell Peppers Are Perfect for Quick Cooking
Bell peppers are among the quickest vegetables to cook. They soften in just a few minutes while keeping their crunch if cooked on high heat. You can sauté them, grill them, roast them, or even eat them raw in salads. Nutritionally, bell peppers are a powerhouse. They are loaded with Vitamin A, C, and E. Red bell peppers are the sweetest and most nutrient-rich because they ripen fully on the plant. Green peppers have a slightly bitter taste and go well in Indian curries, while yellow and orange peppers add a mild, fruity sweetness to your dishes. Whether you’re preparing breakfast, lunch, or dinner, bell peppers can easily fit into your plan. You can make a simple stir-fry, a cheesy sandwich, or even a filling wrap in under 10 minutes.
Quick and Tasty Bell Pepper Recipes
1. 5-Minute Bell Pepper Stir-Fry
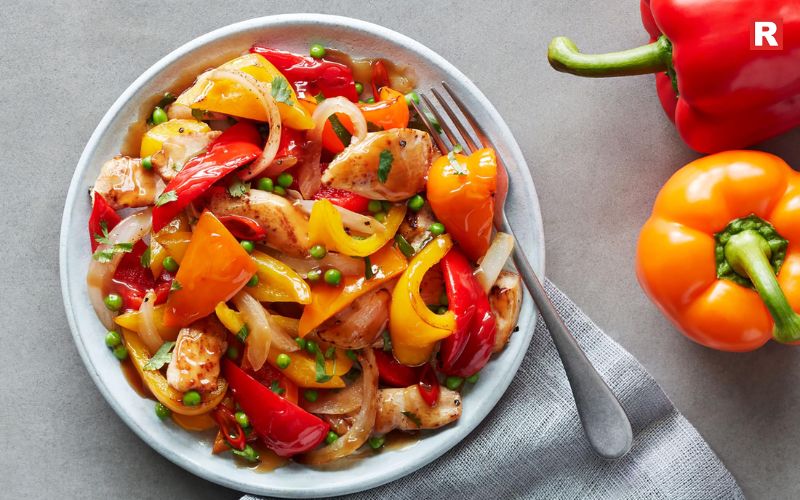
This simple and colourful dish works well as a side or even as a light main course with rice or noodles. It combines fresh bell peppers, garlic, and a touch of soy sauce for a mix of crunch and flavour. The peppers stay crisp, while the garlic adds a warm aroma. It’s quick to make and full of nutrients. Perfect for anyone looking for an easy, tasty, and healthy meal that feels both fresh and satisfying.
Ingredients:
- 1 cup mixed bell peppers (red, yellow, and green)
- 2 cloves garlic, chopped
- 1 tbsp olive oil
- 1 tsp soy sauce
- Salt and pepper to taste
Method: Heat olive oil in a pan on high flame. Add garlic and sauté for a few seconds. Add bell peppers and toss quickly for about 3–4 minutes. Add soy sauce, salt, and pepper. Mix well. Serve hot.
Tip: Sprinkle sesame seeds or crushed peanuts for a crunchy twist.
Read more: Kootu Curry Recipe: Traditional Kerala-Style Curry for Your Festive Menu
Bruschetta Recipe: How to Make Authentic Italian Bruschetta at Home
2. Cheesy Bell Pepper Sandwich
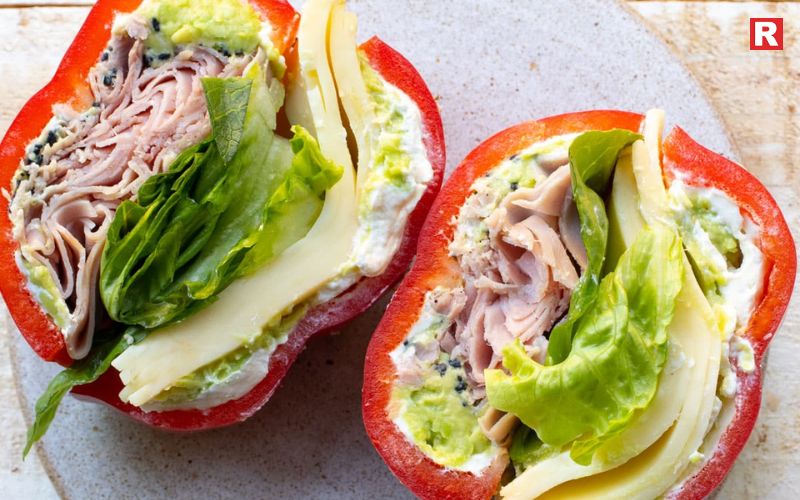
The cheesy bell pepper sandwich is perfect for a quick breakfast or a light evening snack. It combines the crunch of bell peppers with the creaminess of melted cheese. The peppers add colour and freshness, while the cheese gives a rich, comforting taste. Toasted to golden perfection, it feels just like a café-style treat made at home. Simple to prepare and ready in minutes, it’s a delicious way to start the day or enjoy a warm evening bite.
Ingredients:
- ½ cup finely chopped bell peppers
- 1 tbsp butter
- 2 slices of multigrain bread
- 1 tbsp grated cheese
- A pinch of oregano and chilli flakes
Method: Sauté bell peppers in butter for a minute. Add oregano, chilli flakes, and cheese. Spread the mix between bread slices. Toast until golden brown.
Tip: Add a slice of tomato or onion for extra flavour.
3. Bell Pepper Paneer Wrap
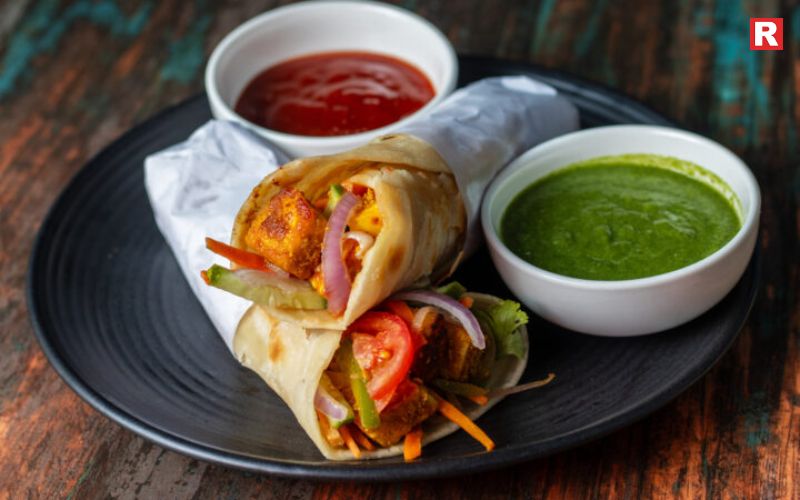
The bell pepper paneer wrap is a filling and wholesome meal, ideal for lunch boxes or a quick dinner. It blends the softness of paneer with the crunch and sweetness of bell peppers. Lightly tossed in spices, it delivers rich flavour in every bite. Wrapped in a warm roti or tortilla, it’s both satisfying and easy to carry. This simple dish is full of protein, colour, and taste, making it a favourite for busy days or healthy meals.
Ingredients:
- 1 cup sliced bell peppers
- ½ cup paneer cubes
- 1 tsp oil
- 1 tsp red chilli powder
- 1 roti or tortilla
Method: Heat oil in a pan. Add bell peppers and sauté for 2–3 minutes. Add paneer, chilli powder, salt, and toss well. Place this filling on a roti, roll it up, and serve warm.
Tip: Add a spoon of mint chutney or mayonnaise for a flavourful twist.
4. Bell Pepper Pasta Toss

The bell pepper pasta toss is a light and flavourful dish that comes together in just a few minutes. It combines the sweetness of bell peppers with the aroma of garlic and herbs. The colourful peppers add freshness and crunch, while olive oil gives a smooth finish. Each bite feels warm, comforting, and perfectly balanced. Simple yet elegant, this pasta works well for both lunch and dinner, offering a healthy and tasty option for quick home-cooked meals.
Ingredients:
- 1 cup boiled pasta
- 1 cup sliced bell peppers
- 2 cloves garlic
- 1 tbsp olive oil
- 1 tsp oregano
- Salt and pepper to taste
Method: In a pan, heat olive oil and sauté garlic until golden. Add bell peppers and stir for 2 minutes. Add pasta, oregano, salt, and pepper. Mix well and serve hot.
Tip: Add lemon juice before serving for a fresh, zesty finish.
Know more: Lasagna Recipe – Easy, Traditional, and Authentic Italian Styles
5. Stuffed Bell Peppers (Microwave Version)
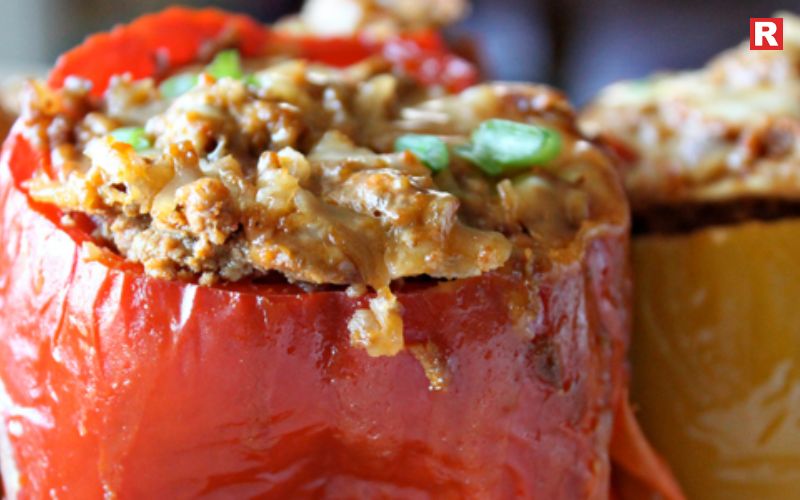
The stuffed bell pepper recipe is quick, easy, and looks impressive on the plate. It takes less than ten minutes to prepare in the microwave. Fresh bell peppers are filled with a mix of rice, corn, cheese, and simple spices. As they cook, the cheese melts beautifully, giving a soft and creamy texture. The peppers stay tender yet firm, adding a lovely crunch. It’s a colourful and wholesome dish that feels special but requires very little effort.
Ingredients:
- 2 medium bell peppers
- ½ cup cooked rice
- 2 tbsp corn
- 2 tbsp grated cheese
- Salt, pepper, and herbs to taste
Method: Cut the tops off the bell peppers and remove seeds. Mix rice, corn, cheese, and seasoning in a bowl. Stuff the mixture inside the bell peppers. Microwave for 5 minutes or until the peppers are soft and the cheese has melted.
Tip: For extra flavour, top with a spoon of tomato sauce before microwaving.
Pro Tips to Make Bell Pepper Dishes Tastier
- Don’t overcook them. Bell peppers taste best when they are slightly crisp.
- Mix colours. Combining red, yellow, and green peppers not only looks appealing but enhances the overall flavour.
- Roast for smokiness. Roasted bell peppers add a delicious smoky flavour to sandwiches and salads.
- Add citrus. A few drops of lemon juice or vinegar bring out their natural sweetness.
- Use minimal oil. Bell peppers release natural moisture while cooking, so a small amount of oil is enough.
Pairing Ideas
Bell peppers go well with almost everything. You can pair them with grains like quinoa, brown rice, or couscous for a healthy bowl. They taste amazing with proteins such as paneer, tofu, eggs, or grilled chicken.
For Indian-style dishes, mix them with spices like cumin, coriander, or garam masala. If you prefer a continental taste, go for olive oil, oregano, and a sprinkle of cheese. You can even toss them into your omelette or noodles for a quick upgrade.
Also read: 8 Famous Vegetarian Dishes of Uttar Pradesh and Their Timeless Legacy
What is Kimchi? Top Veg Kimchi You Can Try at Home
Nutritional Value and Health Benefits
Bell peppers are among the healthiest vegetables you can add to your diet. They are low in calories but high in nutrients, making them perfect for those watching their weight.
- Rich in Vitamin C: Strengthens immunity and supports glowing skin.
- High in antioxidants: Helps fight free radicals and improves overall health.
- Good for digestion: Their fibre content aids gut health.
- Heart-friendly: Bell peppers contain potassium, which helps maintain healthy blood pressure.
Including them regularly in your meals can improve both taste and nutrition without adding extra calories.
The Colour on Your Plate
Bell peppers are more than just vegetables; they bring colour, freshness, and energy to every meal. Their natural crunch and mild sweetness can turn the simplest dish into something that looks and tastes special. From stir-fries and sandwiches to pastas and wraps, they fit beautifully in every recipe. These bright vegetables don’t just make food look vibrant but also add a layer of rich, refreshing flavour. Cooking with bell peppers is an easy way to make everyday meals more exciting. They blend well with Indian spices, Italian herbs, or even simple salt and pepper. Each colour — red, yellow, or green — brings a unique taste and appeal. Once someone starts using bell peppers regularly, they quickly realise how versatile they are. With just a few ingredients and minutes in the kitchen, bell peppers can make home-cooked food feel colourful, creative, and full of life.
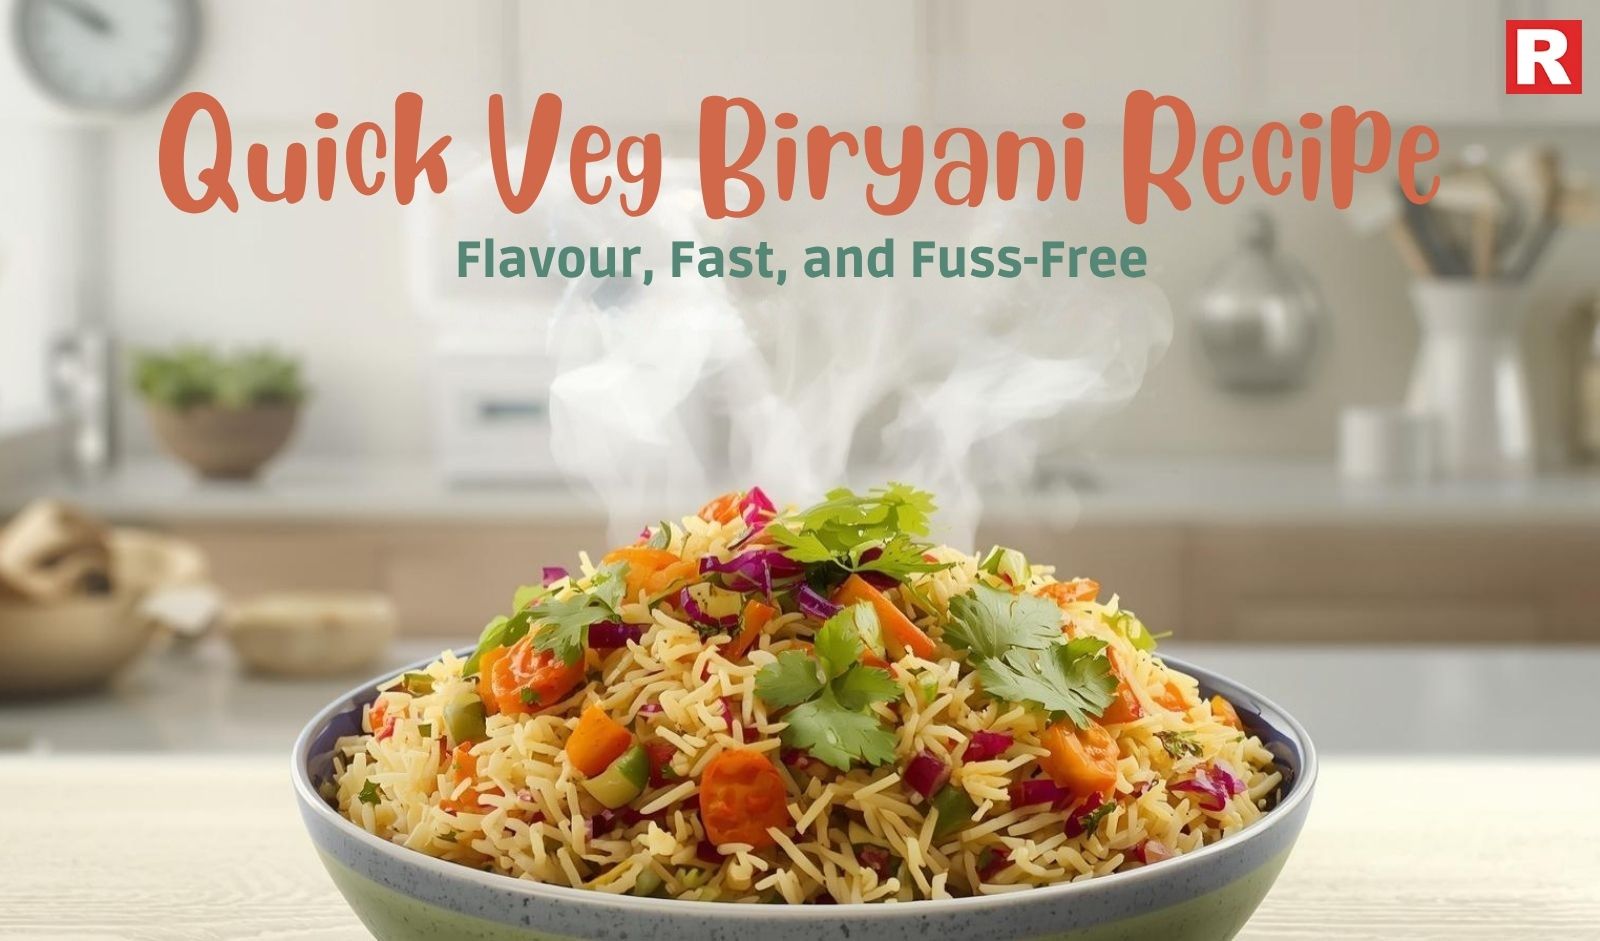
Biryani is one of India’s most loved dishes. Its aroma, flavors, and colorful presentation make it a favorite for festivals, family dinners, and special occasions. But let’s be honest — traditional biryani takes hours. Washing rice, marinating vegetables, preparing masalas, and layering everything for the perfect “dum” can be overwhelming, especially on busy days. That’s why we are sharing a quick veg biryani recipe that brings all the taste of traditional biryani in less than 40 minutes.
This recipe is perfect for beginners, working professionals, and anyone craving a wholesome, flavorful meal without spending hours in the kitchen. It uses simple, everyday ingredients and a few smart cooking tricks.
Read more: 8 Famous Vegetarian Dishes of Uttar Pradesh and Their Timeless Legacy
10 Awadhi Cuisine Classics You Must Try at Least Once
Ingredients You’ll Need
For this quick veg biryani, you only need a handful of vegetables and spices. Here’s what you’ll need:
Vegetables:
- 1 cup carrot, diced
- ½ cup beans, chopped
- ½ cup peas
- 1 capsicum, chopped
- 1 medium potato (optional), diced
Rice:
1.5 cups basmati rice (soaked for 15–20 minutes)
Spices & Aromatics:
- 1 large onion, thinly sliced
- 1 tomato, chopped
- 1-inch ginger, grated
- 3–4 garlic cloves, crushed
- 2–3 green chilies, slit
- ½ tsp turmeric powder
- 1 tsp red chili powder
- 1 tsp garam masala
- 1 tsp biryani masala
- ½ tsp cumin seeds
- 2–3 bay leaves
- 2–3 cloves, 1 small cinnamon stick
- Salt to taste
Other Ingredients:
- 3 tbsp cooking oil or ghee
- Fresh coriander leaves for garnish
- Fresh mint leaves for garnish
- Cashews or fried onions (optional, for topping)
Step-by-Step Cooking Instructions
Follow these steps to make your quick veg biryani. Each step is designed to save time while keeping flavors intact.
Step 1: Prepare the Rice
- Wash and soak basmati rice for 15–20 minutes.
- Boil water with a pinch of salt and a few drops of oil.
- Add soaked rice and cook until 70% done. Drain and set aside.
Step 2: Sauté the Aromatics
- Heat 2 tbsp oil or ghee in a deep pan.
- Add cumin seeds, bay leaves, cloves, and cinnamon. Fry for a few seconds.
- Add sliced onions, grated ginger, and crushed garlic. Sauté until golden brown.
- Add green chilies and chopped tomatoes. Cook for 2–3 minutes until soft.
Step 3: Cook the Vegetables
- Add carrots, beans, peas, capsicum, and potatoes (if using).
- Sprinkle turmeric, red chili powder, and salt.
- Stir well and cook for 5–6 minutes. The vegetables should be slightly tender but not mushy.
Step 4: Layer the Biryani
- In the same pan, reduce heat to low.
- Spread half of the partially cooked rice over the vegetables.
- Sprinkle garam masala and biryani masala evenly.
- Add the remaining rice on top.
- Drizzle a teaspoon of ghee for extra aroma.
Know more: 7 Healthy Chicken Dishes to Maintain Your Diet
Step 5: Dum Cooking (Optional but Recommended)
- Cover the pan with a tight lid.
- Let it cook on low heat for 8–10 minutes. This step allows the flavors to blend.
- If short on time, you can skip dum and still enjoy a flavorful biryani.
Step 6: Garnish and Serve
- Open the lid carefully.
- Gently fluff the rice with a fork.
- Garnish with fresh coriander, mint leaves, and optional fried onions or cashews.
- Serve hot with raita, pickle, or a simple salad.
Tips for Maximum Flavor in Minimal Time
Even if you are short on time, these tips will give your quick veg biryani a restaurant-like taste:
- Use Basmati Rice: Its long grains and aroma elevate the biryani instantly.
- Pre-made Spice Mixes: Keep a ready-to-use biryani masala in your pantry for fast cooking.
- Add a Touch of Ghee: A teaspoon of ghee at the end enhances aroma and richness.
- Cook Vegetables Separately: If you like very soft vegetables, pre-cook them before layering.
- Layer Carefully: Even layering helps distribute spices and flavors evenly.
- Optional Nuts: Cashews or fried onions add a subtle crunch and make it visually appealing.
Why You’ll Love This Quick Veg Biryani
- Fast and Easy: Ready in under 40 minutes. Perfect for weekday dinners.
- Flavorful: Every bite is aromatic and well-spiced.
- Customizable: Use any vegetables you have at home.
- Healthy: Packed with vegetables and minimal oil.
- Kid-Friendly: Mildly spiced but aromatic enough for adults.
This recipe is perfect if you want comfort food without the long wait. The aroma of spices and ghee, combined with soft rice and tender vegetables, makes it a wholesome meal for family and friends.
Also check: Seafood: 5 Crab Dishes You Must Try
11 State Bhawan Canteens in Delhi to Enjoy Authentic Flavors of Indian Cuisine
7 Famous Vegetarian Dishes of Madhya Pradesh You Must Try
Serving Suggestions
- Pair with cool cucumber raita or tomato-onion salad.
- Add a side of pickle for extra tanginess.
- Leftovers can be stored in the refrigerator for 1–2 days. Reheat gently on the stove or microwave.
Quick Variations to Try
- Paneer Veg Biryani: Add cubes of paneer while cooking vegetables.
- Mixed Nut Biryani: Add cashews, almonds, or raisins for a festive touch.
- Spicy Version: Add extra green chilies or red chili powder for a kick.
- One-Pot Biryani: Cook rice and vegetables in the same pan to save time and dishes.
Final Thoughts
This quick veg biryani recipe proves you don’t need hours to enjoy authentic Indian flavors. It’s a perfect combination of taste, aroma, and ease. Whether it’s a busy weekday or a weekend craving, this biryani will satisfy your hunger and impress your family.
Give it a try and see how a few smart tricks can create a delicious, wholesome meal in under 40 minutes. Once you master this quick recipe, you can experiment with spices, vegetables, and garnishes to make it truly your own. Biryani is more than food; it’s comfort, aroma, and a celebration on a plate. And now, with this recipe, it’s also fast, easy, and ready whenever you crave it.
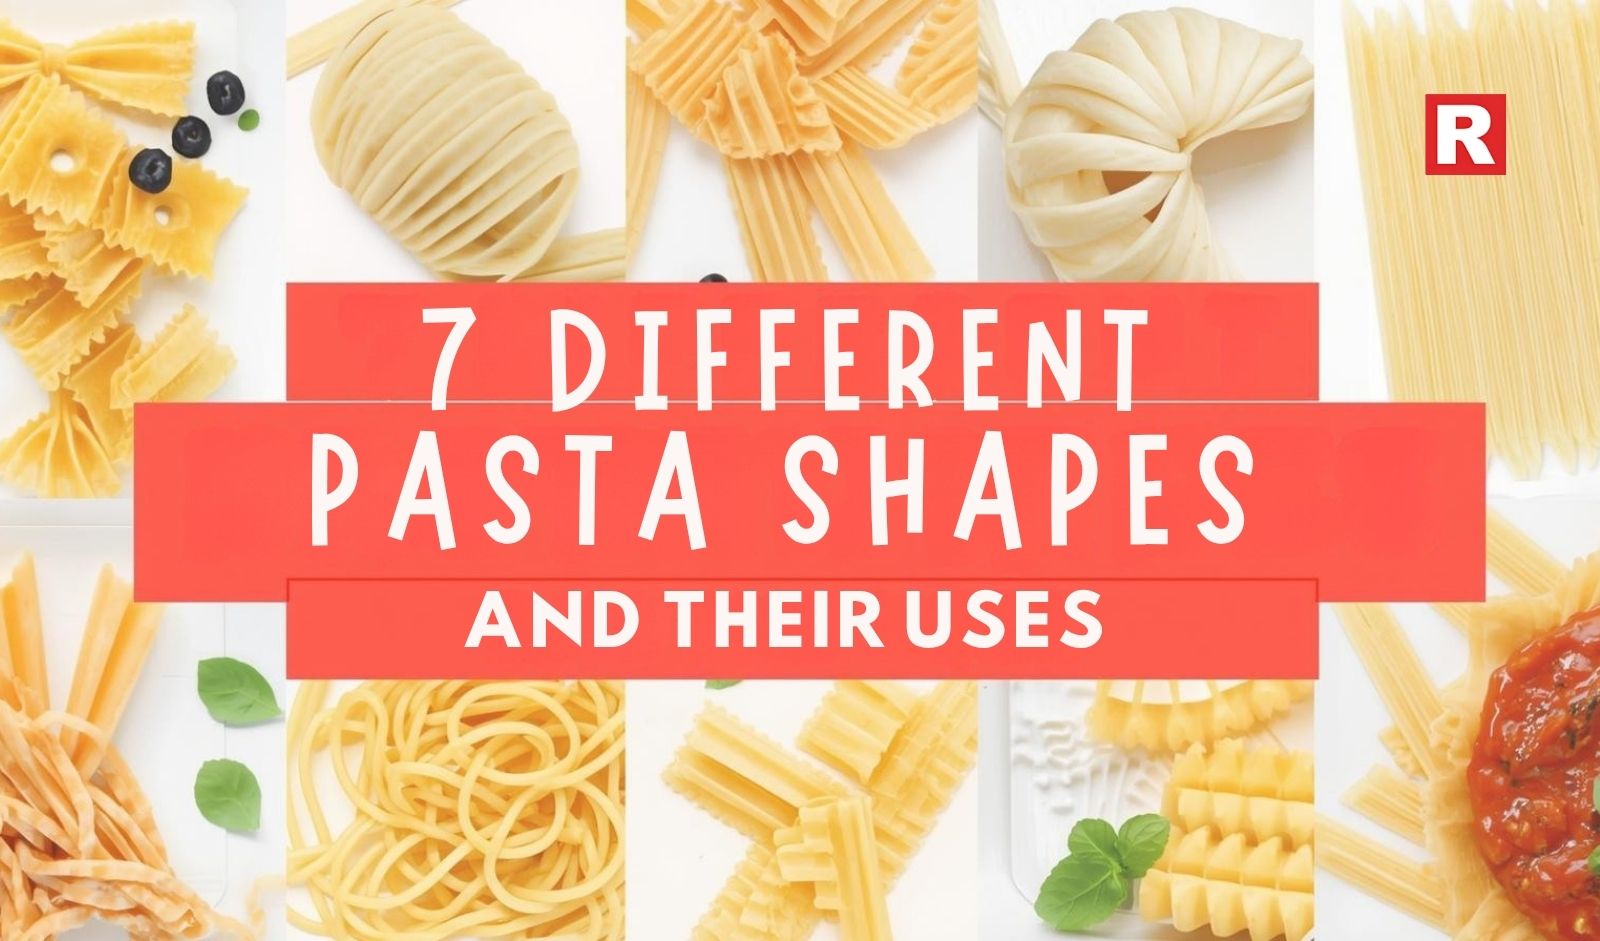
Pasta has taken over the hearts of millions of people. And why not? Pasta is a versatile, healthy, and easy-to-cook ingredient that only needs to be boiled and adorned with a mixture of bases to become a wonderful dish. You can eat pasta anywhere, whether it is in a high-end restaurant or the comfort of your home. Truly, an awesome dish. And this doesn’t end here. Several types of pasta shapes exist that may be made from the same ingredient, but give a different taste when cooked.
Meanwhile, in India, pasta may be famous, but most people only know a few pasta shapes. And even then, the most used and cooked pasta shapes are macaroni and rotini. Therefore, we will be guiding you through some of the most famous and easily available pasta shapes in India. We will also give you some tips on how to cook these pasta types so you get the best flavor. So keep your hunger at bay while you read this article, because after that, you will be running to the supermarket to buy a bag of pasta.
Read more: Best Whole Wheat Pasta Brands in India
1. Spaghetti: The Timeless Classic
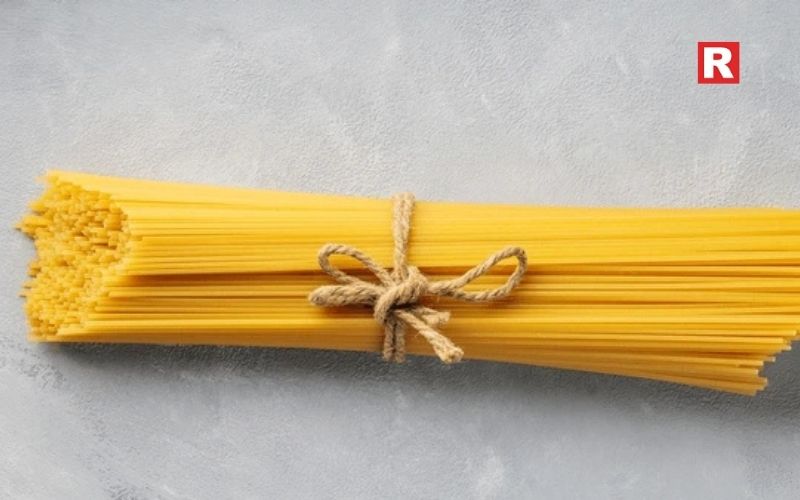
This is the most common pasta shape in the world. It has long, thin, solid cylindrical rods. Its name comes from the Italian word "spago," meaning "twine" or "string."
Spaghetti is all about simplicity. Its smooth surface and uniform shape offer a quite empty canvas. The magic happens when you learn to twirl it properly around a fork, creating a perfect, sauce-laden bite. Spaghetti’s sleek surface is best suited for light, oily, or tomato-based sauces that are fluid enough to coat each strand evenly. Make sure that the sauce is cooked enough to stick to every strand of the pasta.
- The Indian Pairing: Indian-style Aglio e Olio. Sauté loads of garlic, red chili flakes, and a pinch of hing (asafoetida) in olive oil. Toss in the spaghetti and finish with fresh coriander. It’s simple, fiery, and fantastic.
- High-end Dining Recipe: Spaghetti alle Vongole (with clams). The light, briny sauce made from white wine, garlic, olive oil, and fresh clams clings delicately without overwhelming the pasta.
- Avoid: Very chunky, heavy, or thick cream-based sauces. They tend to slide off, leaving you with bare pasta and a puddle of sauce at the bottom of the bowl.
2. Penne: The Sauce Pocket
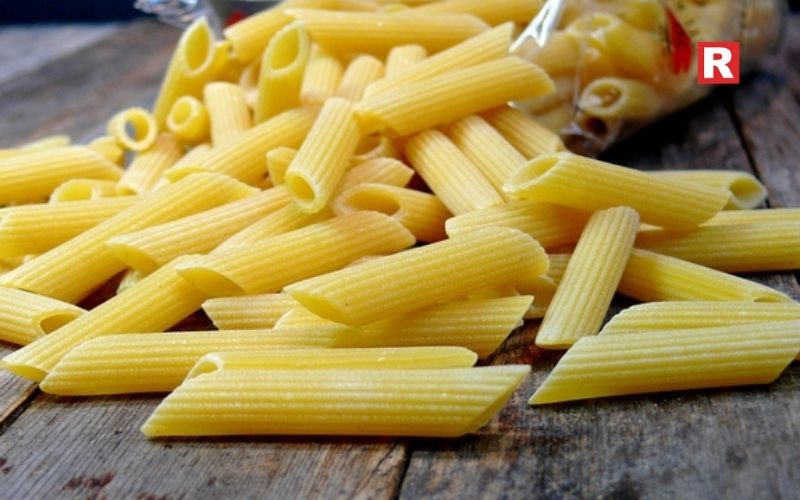
It’s a short, tube-shaped pasta that is cut on the diagonal. "Penne" means "quills" or "pens" in Italian, which its shape resembles. It comes in two main varieties: penne lisce (smooth) and penne rigate (with ridges).
This shape is a prime example of food engineering. The diagonal cut creates a pointy end that’s easy to spear with a fork. The hollow tube (or lumen) is perfect for capturing small bits of sauce, meat, and vegetables. The ridged version (rigate) is much better, as the textured surface grabs onto sauces even more effectively. Penne is the master of the pasta world, incredibly versatile and perfect for chunkier, thicker sauces.
- The Indian Pairing: Penne in a Creamy Palak Paneer Sauce. The blended spinach and cream coat the ridges, and tiny cubes of paneer get trapped inside the tubes. It’s a match made in heaven.
- High-end Dining Recipe: Penne all’Arrabbiata. The spicy, chunky tomato sauce, studded with bits of garlic and chili, gets trapped inside the tubes and clung to by the ridges.
- Avoid: It’s hard to go wrong with penne, but very light, brothy sauces won't have much to hold onto.
Know more: From Royal Kitchens to Tribal Feasts: 7 Famous Foods of Chhattisgarh You Must Try
3. Fettuccine: The Rich Ribbon
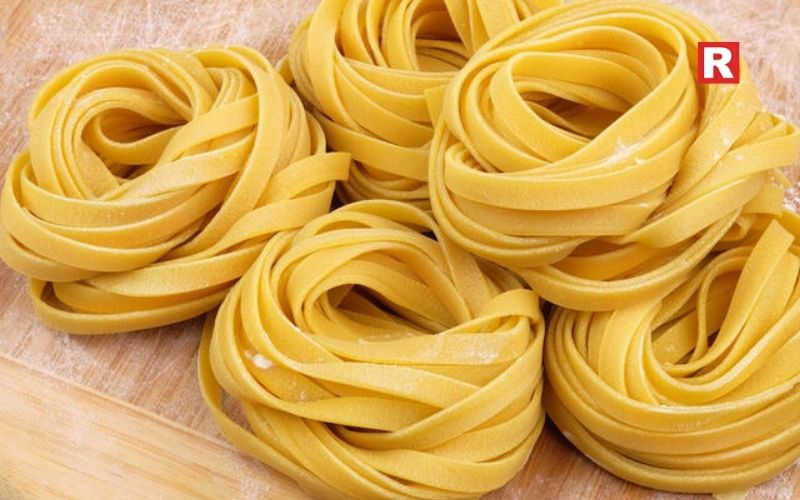
This one is a long, flat, ribbon-shaped pasta. The name comes from the Italian word "fettuccia," meaning "little ribbon." Fettuccine’s broad, flat surface provides ample space for rich, creamy sauces to cling to. When combined with heavier ingredients, its texture provides a satisfying chew. This shape is the best for creamy, rich, and luxurious sauces.
- The Indian Pairing: Fettuccine with a Shahi Paneer Makhani Sauce. The wide ribbons are ideal for carrying the thick, creamy, cashew-and-tomato-based gravy. It’s pure dining pleasure.
- High-end Dining Recipe: Fettuccine Alfredo. The classic, luxurious combination of butter, heavy cream, and Parmigiano-Reggiano (a type of cheese) creates a velvety sauce that coats every millimeter of the broad ribbon.
- Avoid: Light, oily sauces like a simple aglio e olio. They would be lost on such a heavy noodle.
4. Farfalle: The Playful Bow-Tie
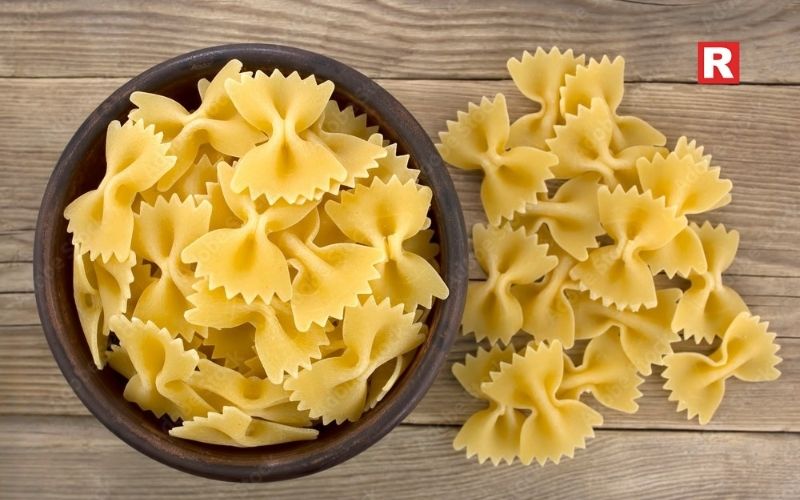
Farfalle is rectangular or oval pieces of pasta that are pinched in the middle, creating a distinctive "bow-tie" or "butterfly" shape. "Farfalle" also means "butterflies" in Italian.
Farfalle is a textural wonder. It offers three different experiences in one bite: the thicker, chewy pinched center, the softer, wider "wings," and the ruffled edges that are excellent for trapping tiny ingredients. Its unique shape makes it ideal for chunky vegetable sauces or cold pasta salads.
- The Indian Pairing: Farfalle with Corn, Capsicum, and Paneer in a Creamy Tomato Sauce. The colourful veggies and paneer cubes get caught in the ruffles, ensuring a flavourful bite every time.
- High-end Dining Recipe: Pasta with peas, prosciutto, and a light cream sauce. The chunks of ham and peas get caught in the ruffles and the center, while the cream sauce coats the wings.
- Avoid: Completely smooth and pureed sauces. You’ll miss out on the textural benefits that farfalle provides.
What's new: 10 High-Protein, Low-Calorie Foods to Conquer Cravings
Fast Food: 7 Most Fiery Street Foods in India
5. Orecchiette: The Little Ear
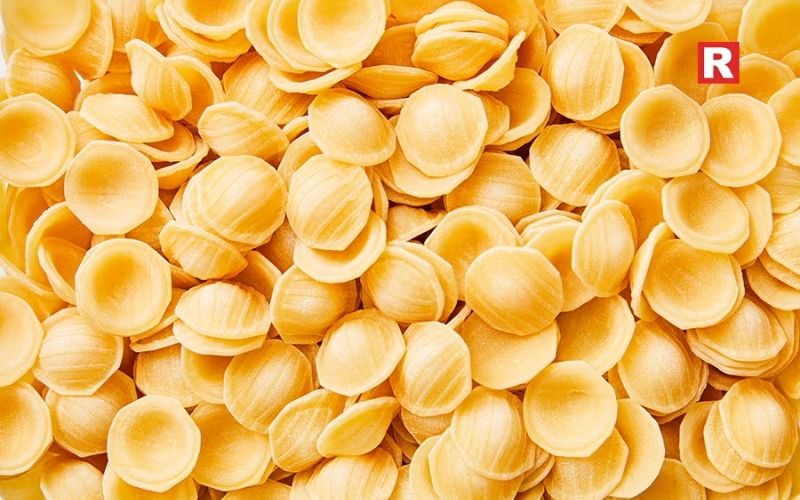
Orecchiette is a small, disc-shaped pasta that is curved inward, resembling a small ear. "Orecchiette" translates directly to "little ears." It is a signature shape from the Puglia region of Italy.
The main characteristic of orecchiette is its cup-like structure. The slightly thicker center provides a satisfying chew, while the concave shape acts as a tiny edible bowl, perfect for holding up sauces, small vegetables, and bits of meat. This shape is designed for rustic, chunky sauces where the components are roughly the same size as the pasta itself.
- The Indian Pairing: Orecchiette with Soya Keema or Kheema. The tiny granules of the spiced mince nestle perfectly into each "little ear," ensuring a burst of flavour in every single bite. A tadka of mustard seeds and curry leaves takes it to the next level.
- High-end Dining Recipe: Orecchiette con Cime di Rapa (with broccoli rabe and sausage). The crumbled sausage, garlic, and small pieces of bitter broccoli rabe nestle perfectly into each "little ear."
- Avoid: Smooth, runny sauces. They will simply drain out of the cups, failing to utilize the shape's unique design.
Check out: Top 10 Healthiest Breakfast Bowl Fruits
6. Pappardelle: The Broad Canvas
These are just long, broad, flat ribbons. They are the widest of the ribbon-shaped pastas, often about an inch across. The name comes from the Italian verb "pappare," meaning "to gobble up."
Pappardelle is a strong, hearty pasta. Its wide, flat surface is like a blank canvas, demanding an equally bold and hearty sauce. Its broad shape provides a wonderful, silky mouthfeel. This is the pasta for rich, long-simmered meat sauces. It needs a partner that can stand up to its glory.
- The Indian Pairing: Pappardelle with a Nihari or Laal Maas Gravy. The wide, silky ribbons are the perfect vehicle for these robust, meaty, and intensely flavoured sauces. Each strand of the pasta will get draped in the rich gravy.
- High-end Dining Recipe: Bolognese ragù. The wide ribbons are sturdy enough to be coated in and support the weight of the thick, chunky, and intensely flavorful meat sauce.
- Avoid: Any delicate or light sauce. They would be completely overwhelmed by the pasta's size and texture.
7. Rigatoni: The Heavy Tube
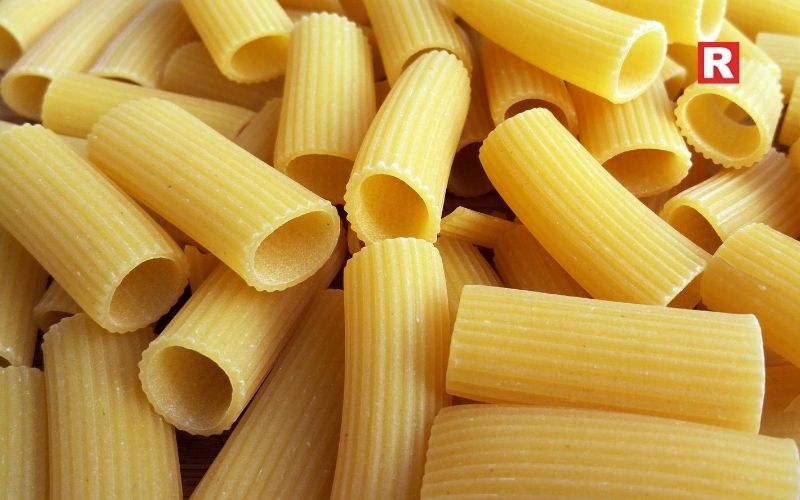
Rigatoni are short, wide tubes that are larger than penne and cut straight, not diagonally. The name "rigatoni" comes from the Italian word "rigato," meaning "ridged" or "lined."
Rigatoni is the total sauce-carrying vessel. Its large diameter and straight cut create massive openings for sauce to flood into. The visible ridges on the outside provide excellent grip, while the smooth interior allows the sauce to slide through. Rigatoni is built for the heaviest, chunkiest, and most heavy sauces. It’s a structural powerhouse.
- The Indian Pairing: Rigatoni with a Lamb or Chicken Kheema Masala. The large tubes get stuffed with the flavourful minced meat, creating an incredibly satisfying experience.
- High-end Dining Recipe: Amatriciana (a Roman sauce with guanciale, tomato, and pecorino). The large chunks of cured pork and the tangy tomato sauce get trapped inside the tubes and cling to the ridges.
- Avoid: This shape is too heavy for light, brothy, or delicate sauces.
Learn more: 10 Leading Burger Chains With the Most Outlets in India
The Final Tadka
The goal of understanding pasta shapes is to create harmony in your bowl, not to stick to specific requirements. It’s the difference between a sauce that just sits on the pasta and a sauce that becomes one with the pasta.
Therefore, consider your sauce first the next time you're feeling like having a desi-style pasta night. Is it a chunky keema or a creamy, smooth makhani? Next, pick your shape carefully. Your hard work will be rewarded by not just any "pasta," but a restaurant-worthy masterpiece that is expertly balanced and prepared in your own kitchen.
Quinoa has become a popular food in Indian kitchens because it is high in protein, fiber, and low in calories. If you want to lose weight, this is a healthy alternative to rice and other refined carbs. Quinoa is special because it goes well with Indian spices and dishes like khichdi, dosas, and pulao. These 10 Indian quinoa recipes for weight loss are very detailed. Each one comes with information about its health benefits, nutrition, and how to serve it.
10 Indian Quinoa Recipes for Weight Loss
Quinoa Khichdi
Quinoa khichdi is a healthy, comforting dish that can be made in one pot and is great for lunch or dinner. When you mix quinoa with moong dal, onions, tomatoes, and light spices, it tastes like traditional khichdi but has more protein and fiber. It takes a long time to digest, which keeps you full longer and stops you from snacking when you don't need to. It has a lot of magnesium and iron, and it helps your body use energy, which is important when you're on a diet that limits calories. A bowl of quinoa khichdi with curd on the side is a filling meal that won't make you feel bad.
Lemon Quinoa
Using quinoa instead of rice makes this dish healthier while still keeping the flavor of South Indian lemon rice. It is both refreshing and filling because it has mustard seeds, curry leaves, green chilies, and turmeric in it, and it is finished with fresh lemon juice. Lemon quinoa has a lot of vitamin C, which helps the immune system and detoxify the body. It is also low in fat and calories. The citrus flavor makes it less heavy, which makes it a great light lunch choice in the summer. Adding a bowl of sautéed vegetables to it makes it taste better and is better for you.
Quinoa Upma
Quinoa upma is a filling breakfast that gets your day off to a good start. It has a lot of vegetables in it, like carrots, beans, and peas. It also has antioxidants, fiber, and carbs that take a long time to digest. Quinoa is a better source of protein than rava, which is important for losing weight. It also makes the dish gluten-free. It has the right mix of flavors and nutrients, so it's great for diabetics too. It becomes a full, filling, and healthy South Indian-style breakfast when served with coconut chutney or sambhar.
Quinoa Dosa
Quinoa dosa is a healthy and crunchy twist on the classic dosa. It is made by fermenting quinoa with urad dal and fenugreek. This makes a batter that is light but full of protein. Quinoa dosa has a lower glycemic index than rice-based dosa. This helps keep blood sugar levels stable and stops fat from building up. It has a lot of amino acids, which help repair muscles. This is especially helpful for people who are trying to lose weight and work out at the same time. For a filling and healthy meal, serve it with tomato chutney or sambar.
Quinoa Idli
Soft, fluffy, and steamed to perfection, quinoa idlis are one of the healthiest breakfast options. Since they are steamed and oil-free, they are naturally low in calories but high in nutrition. Quinoa idlis provide protein, calcium, and iron, which help maintain energy levels throughout the day. They also aid digestion due to their light texture and high fiber. Best enjoyed with sambhar and chutney, they make an excellent meal prep option for those who want quick, healthy breakfasts without compromising taste.
Quinoa Pulao
Quinoa pulao is a tasty and healthy meal that is great for lunch or dinner. When you cook it with onions, tomatoes, carrots, beans, and peas, it gives you a good mix of vitamins and minerals along with the protein from quinoa. This version of rice pulao has fewer calories but fills you up more, which is great for losing weight. Adding ginger-garlic and garam masala makes the food taste better and helps with digestion. When you eat it with curd or raita, it makes a healthy, balanced Indian meal that will keep you going for hours.
Quinoa Poha
Quinoa poha is a lighter version of the well-known flattened rice poha. It tastes a lot like the classic, but it has a lot more nutrients because it has curry leaves, onions, turmeric, lemon juice, and coriander in it. Quinoa poha is a great breakfast or snack choice for people who are trying to lose weight because it is high in fiber and low in oil. It cooks quickly, which is great for busy mornings, and it has a lot of protein, so it will keep you full until your next meal. Adding peanuts or sprouts can make it crunchier and give it more protein.
Quinoa Chilla
Quinoa chilla, which is also known as a savory pancake, is a flexible dish made with quinoa flour, besan, and chopped vegetables like onions and tomatoes. It is a great snack or light meal for losing weight because it is high in protein, low in gluten, and low in calories. Adding fresh vegetables to your diet increases your fiber intake, which helps with digestion and makes you feel full. It's a great choice for busy professionals or fitness fans who want a quick but healthy snack because it can be made in less than 15 minutes. Add mint chutney to it for a fresher taste.
Quinoa Vegetable Soup
Quinoa vegetable soup is a great dinner choice, especially for people who like to eat light meals at night. It has a lot of vitamins, minerals, and antioxidants because it is full of vegetables like carrots, beans, and spinach. Because it has quinoa in it, this soup is more filling than a regular vegetable soup. It helps with digestion, keeps you hydrated, and helps you control your late-night cravings. It is low in fat and calories. Adding a little black pepper and lemon juice improves flavor and speeds up metabolism.
Quinoa Salad with Indian Flavors
Quinoa salad is a cool, crunchy choice that makes a great lunch or side dish. When you mix it with cucumber, tomato, onion, carrot, lemon juice, coriander, and a little bit of chaat masala, it adds an Indian twist to the idea of a quinoa salad. It has a lot of fiber, antioxidants, and lean protein, so it's a good choice for people who want a meal that is low in calories but high in nutrients. This salad is especially good for cleaning out the body and speeding up the metabolism, which helps you lose weight naturally.
Also read: Benefits of Drinking Black Coffee
These 10 Indian quinoa recipes for weight loss show that eating healthy doesn't have to be boring or bland. Quinoa fits right in with Indian food, whether it's in khichdi, dosa, or salad. Every meal is full of nutrients, protein, and fiber, and is meant to keep you full while helping you burn calories more quickly. If you switch out one rice-based meal for quinoa every day, you will see a big difference in your weight and health.
Disclaimer: This article is intended for general informational purposes only and should not be considered a substitute for professional medical advice, diagnosis, or treatment. Readers are advised to consult a qualified healthcare professional before making any dietary, health, or lifestyle changes.
People love the simple, tasty, and healthy Maharashtrian dish metkut. You can mix this roasted spiced powder with rice, ghee, or curd to make a healthy and filling meal. This dish is very important in Maharashtrian homes, especially when someone is sick, fasting, or needs something light but filling. You can call it paramparik metkut (traditional metkut) or just metkut powder.
This article will cover everything you need to know about metkut, including its ingredients, how to make it, different ways to use it, and its health benefits.
Read also: Sattu Paratha Recipe
What is Metkut?
Metkut is a fine, roasted powder made from lentils (like chana dal, urad dal, and moong dal), rice, and spices like cumin, coriander, turmeric, and asafoetida. The mixture is roasted until it is dry and then ground into a fine powder. It is one of the healthiest comfort foods in Maharashtrian cuisine and is usually served with hot rice and ghee.
Metkut is a light and easy-to-digest food that kids, older people, and people who are sick love.
Ingredients for Metkut Recipe
Here are some ingredients that are often used:
- Rice, chana dal, urad dal, moong dal, and wheat are all grains and lentils.
- Cumin seeds, coriander seeds, black pepper, mustard seeds, turmeric powder, hing (asafoetida), and fenugreek seeds are all spices.
- For more smell, you can add curry leaves.
Read also: Kootu Curry Recipe | Bruschetta Recipe
Step-by-Step Method for Metkut Recipe
Making metkut at home may seem easy, but the secret is in the right way to roast the ingredients and the right amount of each one.
- Start with rice and lentils (chana dal, urad dal, and moong dal) and dry roast them. Roast each one on a medium flame until it turns a little golden and smells like nuts. This step is very important because lentils that aren't roasted enough will taste raw, and lentils that are roasted too much will make the powder taste bitter.
- Roast the spices next. Roast the cumin seeds, coriander seeds, fenugreek, and black pepper until they smell good. At the very end, add hing (asafoetida) and turmeric. These spices release their flavor quickly.
- Cool the Right Way: Put the roasted foods on a plate to cool all the way down. When you grind warm spices, the powder can stick together.
- Grind to a Fine Powder: A good grinder will make the texture smooth. People in traditional households often sift the powder once to make sure it is fine.
- Store Airtight: Put the metkut powder in a clean, dry glass jar. It stays fresh for 3 to 4 months if you store it right.
Pro Tip: Always roast on low to medium heat to get the best flavor and even cooking.
How to Eat Metkut
Depending on your mood, health, and the time of year, you can enjoy metkut in a variety of ways:
- Classic Comfort Food: The most common way to eat metkut is to mix 1–2 teaspoons with hot steamed rice and top it with a spoonful of ghee. This mix is light but filling, especially after a long day.
- With Curd or Buttermilk: In the summer, people mix metkut with curd rice or buttermilk to make a meal that cools the stomach and is full of probiotics.
- As a Healing Meal: Plain metkut rice with not too much ghee is a natural food that helps people get better after they have a fever or an upset stomach.
- On the Go: Many families from Maharashtra take metkut with them when they travel. It only takes hot rice or even water to make a meal that fills you up right away.
Metkut is like "comfort in a bowl" for India: it's simple, healthy, and always there when you need it.
Popular Variations of Metkut Recipe
Families make metkut in different ways, depending on their tastes and traditions.
- Mild Metkut has less black pepper and chili, so it's good for kids and older people with sensitive stomachs.
- Spicy Metkut has more pepper and sometimes a little bit of red chili powder for people who like things to be spicy.
- Multigrain Metkut has lentils, wheat, jowar, or bajra in it, which makes it more nutritious and fiber-rich.
- MadhurasRecipe Style – This version is popular with foodies because it combines old-fashioned flavors with modern presentation. It often goes viral online.
- Regional Twists: Some families add curry leaves or sesame seeds to the roasting process to give it an earthy, nutty flavor.
Each version shows how one recipe can change over time to fit the tastes and traditions of different families.
Uses of Metkut Powder
Metkut powder can be used on more than just rice. It's surprisingly flexible:
- Instant Meal Maker: If you don't want to cook, mix it with rice, ghee, and pickles for a quick and healthy meal.
- For Khichdi or Dal, add a spoonful of this topping to soft khichdi or plain dal to make it taste better.
- Food for travel— It's light, doesn't go bad, and is easy to carry, so it's great for train rides and picnics.
- Baby and Elderly Food: A lot of families start giving it to their kids early on and serve it to older people who like soft, mild food.
- Soup Base: To make a quick, digestive soup, add a little metkut to hot water or buttermilk with a pinch of salt.
Metkut shows that you can turn simple ingredients into a food that goes with everything.
Health Benefits of Metkut
Not only is metkut delicious, but it also has a lot of health benefits that make it a classic recipe:
- Spices like hing, cumin, and fenugreek are natural digestive aids that can help with bloating and indigestion.
- Lentils in metkut are high in protein and fiber, which is good for your gut health.
- Light on the Stomach: Metkut is light, unlike oily curries, so it's great for recovering from illness or as a detox meal.
- Cooling in the summer: When mixed with curd or buttermilk, it cools the body naturally.
- Spices like turmeric and black pepper can help your immune system by reducing inflammation and killing bacteria.
- Safe for Everyone – It works for people of all ages, from toddlers to seniors, because it is both healthy and gentle.
Metkut vs Paruppu Podi: Are They the Same?
While Metkut (Maharashtrian) and Paruppu Podi (South Indian) are similar roasted lentil powders, they differ in taste and spice profile. Metkut is milder, focusing on digestion and light meals, whereas paruppu podi usually has a stronger, spicier flavor with garlic or curry leaves.
Metkut is more than just a recipe; it's a tradition that has been passed down through the years. This Maharashtrian classic is still the best for comfort food, quick meals, or as a natural way to help with digestion. Make some homemade paramparik metkut powder if you haven't already. You'll taste the true taste of simplicity.

As diverse cultures of the world unite through the globalization of food habits, traditional food habits seem to have lost their appeal. India too has become entangled in this big web of the globalization process, imitating the food habits of various parts of the world, while its rich and original recipes threaten to slowly fade away from the memory of the natives.
With Instant recipes and processed foods taking over India, people seldom feel the need or desire to prepare any dish that requires a significant amount of time and effort. This has led to a decrease in the popularity of several dishes that were earlier used to create a buzz for their authentic preparation styles. However, it becomes a crucial factor to observe that native recipes of India are dissolving over time or if not dissolving, getting replaced by some quick and different style of cooking method.
And when talking about restaurants, they are capitalising on the demand, refusing to risk on creating more awareness towards what the original food of India was, even before Independence, before invasions, or when India was a large nation with neighbouring countries as part of one nation.
“People don’t have the time to invest in long-winded recipes anymore,” says Amit Ghosh founder of Lost and Rare Recipes, who grew up in a joint family with its varied members constantly trying their hand at different dishes ranging from Cabbage Soup to Bijoya Mishti. Ghosh’s grandmother found innovative vegetarian dishes to make for the family, which she would always serve with rice. Subhajit himself was cooking by the age of 11, his first dish being Aloo Tikia.
He shared his inclination towards Chingri Korola Purpuri, which no one talks about. This dish has its origins in the Natore district of Bangladesh. It’s the first in his Bangladesh series, which includes 12 dishes from 11 districts. He uses video as a medium to educate people about the recipes less talked about.
Similarly, Mughals brought Persian, Turkish and Central Asian cuisine into India. Most of the dishes that were cooked during Mughal-era have survived except some. Khichdi Dawud Khani is one of such lost Mughal recipe that had meat, moong dal, pureed spinach, egg, cinnamon, cloves, cardamom, saffron, onion, ginger, coriander, garlic, oil and salt as ingredients. Half the meat was prepared as yakhni (meat broth) and rest was minced and cooked separately. Later, the meat was combined and cooked in a sealed pot (dum dahad).
“While the charm of some traditional recipes faded away because of their lengthy cooking time and elaborate styles, others found a way to remain on our menus through some makeovers. One such dish is the Murgh Zamin Dos, another Mughal era dish, mentioned in the Ain-i-Akbari, the historic chronicle of Akbar's reign. Arguably the favourite dish of Akbar, Murgh Zamin Dos (literally meaning 'inside earth') involved three main ingredients- murgh (chicken), rumali roti, and mud,” said Rituparna Goswami, storyteller at ThisDay by Ekank Technologies.
Garlic or Benami kheer was a popular dessert in the House of Mewar. Such was the craze of this dessert that the royal cooks purposefully called the kheer 'benami' (without a name) because they did not wish to reveal the secret ingredient.
In fact, one of the many reasons why some traditional recipes got lost over time was because the creators refused to share or pass on their recipes, perhaps a desire to remain different and unique. This was the fate of the Kabishambardhana Barfi, a highly personal recipe created by Rabindranath Tagore’s niece. This sweet was a special gift to the great poet for his 50th birthday. The primary ingredient of the barfi is cauliflower or Phool gobi, which is flavoured with saffron, cardamom powder, etc., and mixed with milk.
Dr R. Ravichandar, managing director and founder of Nandhana Palace Group took the initiative to promote one such lost recipe from the state of Andhra Pradesh in his restaurants. “One of the lost recipes from Andhra is bamboo chicken. It is not served by many restaurants but we have introduced it at Nandhana. You will be surprised to know how we revived it. We actually sent our chefs to the forests of Andhra and recreated the recipe at Nandhana,” he commented.
Another such name from the restaurant industry is Osama Jalali. The natural inheritor of the culinary legacy has led him to carry out extensive research on lost Indian cuisines, meticulously recreating and perfecting age-old recipes. His quest to bring back these forgotten flavours has taken him across the country and he also runs a group called the 'Lost Recipes of India'. His mother, Nazish Jalali, who hails from the princely estate of Rampur, collected rare recipes during the years she spent in the Walled City.
He has brought famed classic dishes like Anjeer Mewe ke Kebab, Kulliya Chaat, Chitta Murgh Tikka Makhni and Ghilafi Seekh to restaurants that were never talked about.
Indian food is not just about food from the north and south anymore. There are a lot more businesses taking things back to their roots, maybe with a contemporary spin. But the flavours that should be incorporated should be true to their nature. The food we eat has to strike a chord and evoke some kind of nostalgia. There was a lot of clutter, even a loss of identity a few years ago in the food scene of India, but now, a lot of people have realised that recipes must be showcased as it is, so that our true native food does not get lost in the web of world cuisine.

Hold on! Is that even possible? Tasty and easy- to-cook food is a foodie’s most frequent day dream. But that relishing bite of glutton enters your body with its own set of un-healthy conspiracies. So yes, we have to restrict our senses of taste to some levels. Or we resort to making unrealistic diet plans, which we end ignoring. If you can relate with the thought, I have for you a bunch of selected recipes that are not only ‘fast’ but also ‘healthy’.
Wrap it up! (20 Minutes)
A Wrap or Role kind of food is the most portable, customizable and handy kind of food. Below is just an idea for the healthy fast foodies. You can always add your own food-fervour to it.
Ingredients
- 1 Large gluten free lavash wrap (or any wrap/ tortilla of choice)
- 3 large egg whites or eggs or mixture of both.
- Pinch sea salt
- Pinch pepper
- ½ cup fresh spinach
- 3-4 sun dried tomatoes
- Crumbled feta (Feta is a kind of cheese which is considered to be the healthiest cheese, you can add any other form of cheese or chicken or soya)
Instructions
- Coat a frying pan with oil on medium heat.
- When hot, add your egg whites, salt and pepper and whisk roughly until fully cooked. Remove from pan and set aside.
- Add fresh spinach & cover for 1-2 minutes, until wilted.
- Open the lavash and fill the whole preparation into it.
- Wrap it, cut it into half and serve.
Sweet- Potato- Roast! (15 Minutes)
The easiest and the most delicious way of having a sweet potato is this!
Ingredients
- Sweet potato
- Salt & pepper
- Parseman Cheese/soya
- Sauces
- Herbal garnishing
Instructions
- Take a sweet potato and pierce it several times, leaving all the cuttings attached at the end.
- Microwave it for 6-7 minutes (depending upon the size of your sweet potato). Keep on turning it every two minutes.
- Once the potato has been cooked, cut it into half. Cut it into squares, leaving the whole thing in its original shape.
- Take very thin slices of butter and put them in between some of the squares.
- Garnish, serve and savour!
Banana Dips
- Cut a banana into 1 inch chunks
- Spread each of them with ½ spoon peanut butter.
- Decorate with favourite dry fruits and enjoy!
Moglet (Omlete in a mug)
- Spray the inside of a cup with the non-stick cooking spray
- Whisk together 2 large eggs, 2 tablespoons frozen mixed vegetables, 1 tablespoon low fat shredded cheese, some salt & pepper.
- Microwave for 1 minute. Stir & microwave for 45 seconds to 1 minute.

Mother's Day is the perfect occasion to show your mom how much you appreciate and value her. It is one such day when you get to say a 'Big Thank You' to your moms for all that they have done for you. It is a day when you want them to feel absolutely pampered and blessed. So this Mother's Day, restaurants have come up with various options to spend priceless moments with your mom and shower her with a delightful bouquet of offerings.
‘Dil’ ki deal
Restaurants like The Westin Gurgaon, The Imperial, Fresco, Yautacha and Zamozza amongst others are bombarding customers with exciting offers to take their mother out on a food treat this special day.
Guppy by Ai located at Lodhi Colony, Delhi, is offering a special summer menu, with gift vouchers and welcome cocktails to celebrate the day. FresCo at Janpath, CP and Ambience Mall, Delhi, has something to make your mother feel more special. FrescCo will be serving complementary assorted cupcakes (Strawberry/Lemon/ Chocolate/ Kiwi) with ‘Mom’ written over it. The Mother’s Day buffet menu is priced at Rs 1,500 plus taxes. The customers can also rejoice motherhood over a delightful gastronomic extravaganza at Rodeo, CP, Delhi, as Rodeo brings a delightful array of food, fun-filled ambience and excellent services to host a special lunch and dinner.
Not only this, five-star hotels, are also not far away in welcoming the parent-sibling duo with luxurious offers. 1911, the all-day dining restaurant at The Imperial is offering a Brunch Buffet priced at Rs 3,200 plus taxes featuring Roasted vegetable lasagna with ricotta and olive quenelles, Marinated sole with grain mustard and chilli flakes and Zucchini and artichoke roulade with pesto rosso while you feel satiated that you are at the right place to make her feel spoilt for choice and the list goes on. The buffet would be thematically designed by the team of chefs with lots of candles for a feminine touch to celebrate the occasion and make all the mothers present, feel special.
On the other hand, Westin Gurgaon has something more than the buffet, the special Sunday brunch with gourmet cuisines and unlimited champagne along with a 50 per cent discount on any one treatment of their choice at The Heavenly Spa by The Westin Gurgaon. Customers can also make their mother’s day special with everlasting memories with Le Meridien Delhi consisting of an elaborate brunch, a marvelous live band, an enthralling cooking competition and a sketch artist to engrave her on paper. And one can also indulge in the exquisite cuisine offered at Zamozza, World Kitchen & Bar by getting 50 per cent discount to make the day special for all the moms.
It’s all about MOTHERS this Sunday at Le Meridien Gurgaon. As a tribute to mothers and in a bid to make the day unforgettable for them, Le Meridien Gurgaon has announced a fabulous Sunday Brunch dedicated to them.
The sumptuous brunch will include a wide variety of cuisines, 200 dishes to be specific, along with beverages that will appeal to varied taste buds of mothers. The Sunday Brunch is priced at INR 2450 plus taxes but complimentary for all mothers.
Apart from delectable Sunday Brunch, Le Meridien Gurgaon is also offering 20% discount on any spa or salon treatment at the Le Meridien Spa for mothers - making it the perfect way to get all mothers to relax and rejuvenate. The Spa offers a variety of therapies for de-stressing and pampering all senses from Swedish Massage, Balinese Massage, Sea Salt body scrubs and Facials to choose from.
And to celebrate this special day, Brewbot located at Andheri, Mumbai, is serving a classic brunch with pop ups of baked goodies. Yauatcha Mumbai on Mother's Day Special is themed- actions speak louder than words- by serving their signature Yauatcha dishes such as a Chilean seabass dumpling, Baked Chilean seabass, Baked chicken puff, stir fry udon noodles, and raise a toast to the most amazing woman you know with cocktails such as Lalu, Lam peak Martini or Baron Vert. The restaurant will also make the occasion memorable with a special complementary box of Yauatcha’s handmade chocolates for every mom dining with us.
This Mothers Day, Café Mangii gives its customer a chance to say Thank you to their mom in a very special way! Give her a break from the kitchen this Sunday and head to Café Mangii for a delicious family meal. This specially created 4 course set meal priced at Rs 699 plus taxes per person with Fresh Lime / Ice Tea and Rs 799 plus taxes per person with Sangria. That’s not all! For Moms accompanied with their family, Café Mangii entirely forgoes her meal cost.
Likewise, food tech start-ups like TinyOwl is celebrating Mother’s Day with a twist- TinyOwl HomeMade. Whether you are living alone or simply want to give your mother a break from daily cooking, use TinyOwl HomeMade app to order home-cooked meals freshly cooked. iTraveller.com is celebrating Mother’s day by gifting a Holiday package by completely customising every aspect of their holidays, encourages the idea of doing something special for the lovely mothers. The customers can also get a cash back of Rs 1000, in addition up to 25 per cent discount on screen price for all the bookings done up to Mother's day.
Thus, we can see that to celebrate this beautiful day, food and hotel industry has come up with lots of offers to cherish the everlasting memory with the love of your mother.
 McDonald'sAs competition intensifies and consumer behavior evolves, these industry giants remain powerful examples of how strategic growth, operational…
 CookingThat's where oils come in. Cold-pressed, wood-pressed, and unrefined oils retain more natural nutrients than heavily processed alternatives.…
 Business OperationsAgainst this backdrop, World Sushi Day, celebrated on June 18, has evolved beyond a culinary tribute into a strategic business opportunity for…
 Cafes in IndiaIn a city known for its fast pace, these streets invite visitors to slow down, explore, and appreciate the small details that make urban experiences…
Copyright © 2009 - 2026 Restaurant India.