


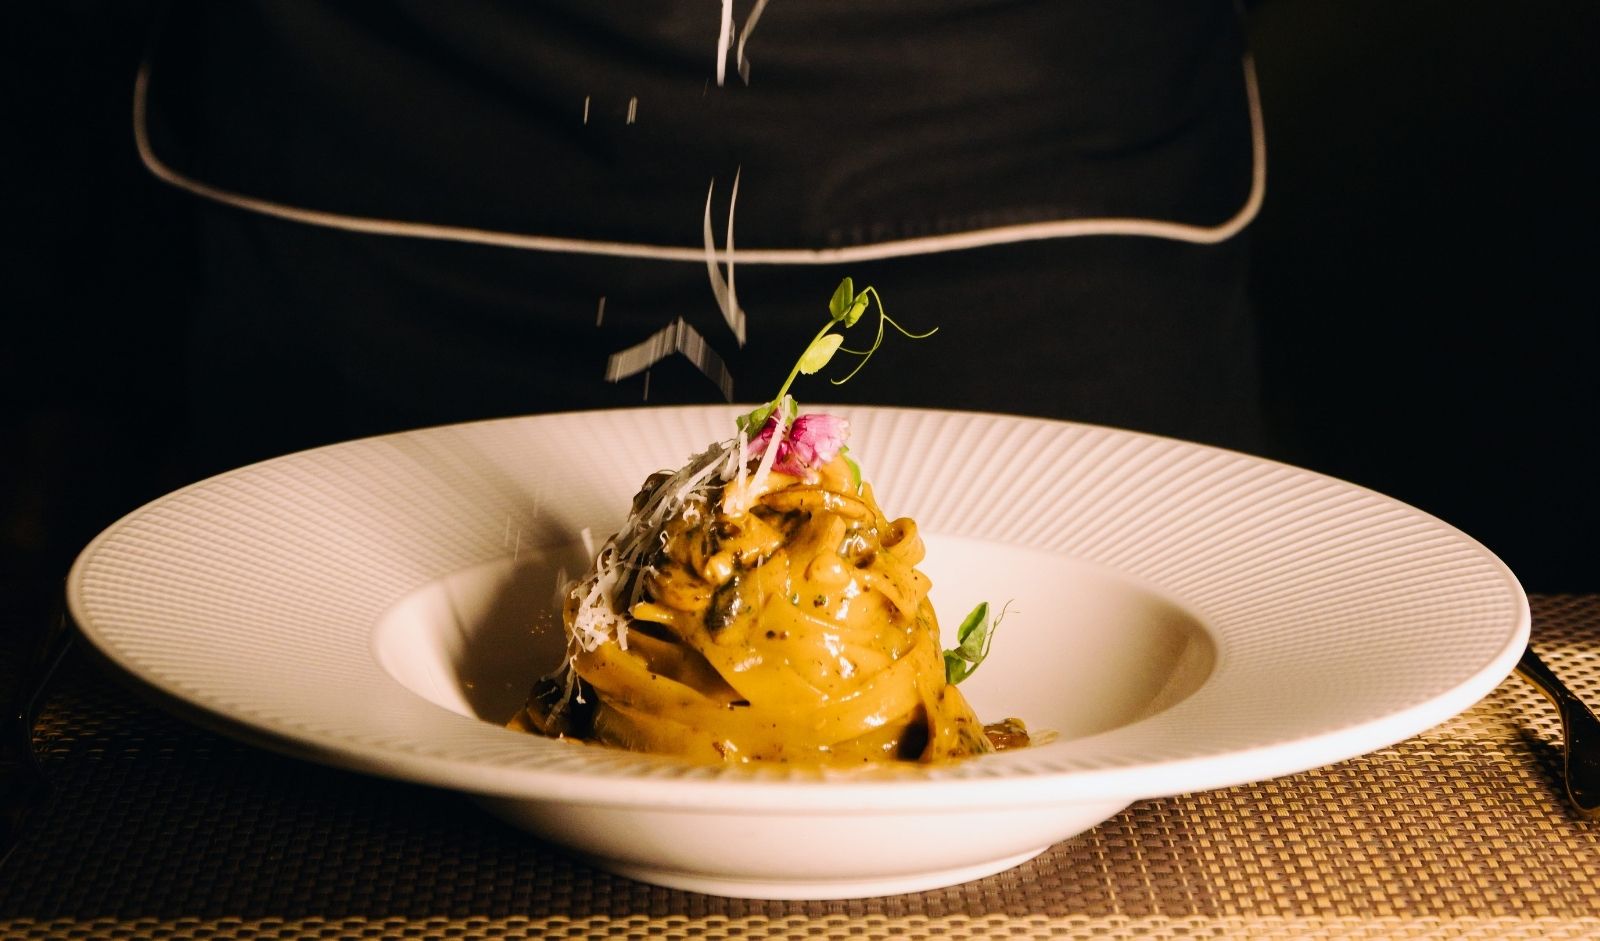
Signature Wild Mushroom Ravioli draws on the rustic pasta traditions of Northern Italy while offering a modern fine-dining take on mushrooms. Mushroom ravioli is a classic on many Italian menus, but this version is built around a complete mushroom experience - multiple preparations, multiple textures, one plate.
The filling combines button and porcini mushrooms slowly cooked down with aromatics, cream cheese, Parmesan and a touch of truffle oil into a rich, concentrated centre. Instead of a conventional cream sauce, the ravioli is finished with a light porcini emulsion enriched with house-made mushroom jus, so the earthy depth comes through without heaviness. A delicate Parmesan foam adds salinity and creaminess, and crisp tempura enoki brings crunch and height.
The dish comes from Chef Tapas Manna, Chef de Cuisine at ALDILA, the Italian fine-dining restaurant at Conrad Pune. What sets it apart is the balance in every bite - soft handmade pasta, velvety filling, airy foam, glossy emulsion and crisp enoki. The secret is the pairing of porcini and truffle oil: the porcini builds the deep earthy base, the truffle oil adds the aromatic finish.
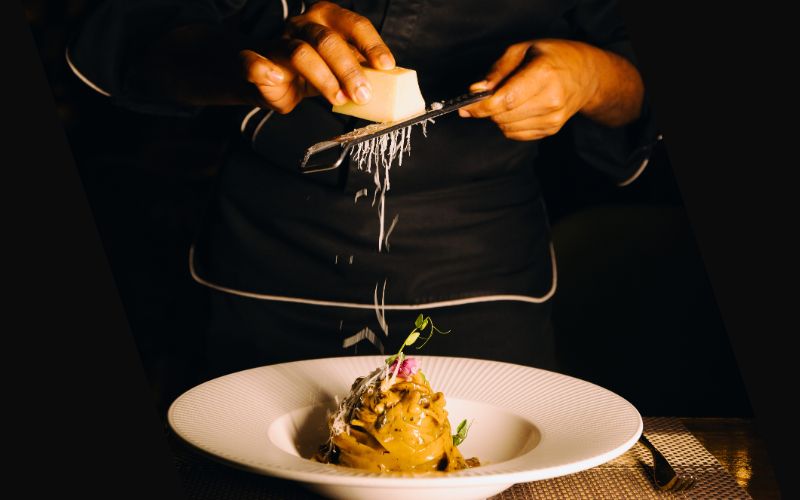
Signature Wild Mushroom Ravioli. Photo: ALDILA, Conrad Pune
Quick facts
- Cuisine: Italian
- Course: Main
- Difficulty: Hard
- Prep time: 2 hours (includes resting the dough and simmering the jus)
- Cook time: 20 minutes
- Total time: approx. 2 hours 20 minutes
- Serves: 1 (5 ravioli)
- Dietary: Vegetarian, contains egg
Ingredients
Pasta dough
- 40 g semola flour
- 40 g refined flour
- 3 egg yolks
- 3 ml olive oil
- 1 g salt
Wild mushroom filling
- 75 g button mushrooms, finely diced
- 8 g porcini mushrooms, finely chopped
- 12 g butter
- 3 ml olive oil
- 1 ml truffle oil
- 2 g garlic, finely chopped
- 4 g onion, finely chopped
- 3 g celery, finely chopped
- 0.5 g thyme
- 5 g Parmesan, finely grated
- 8 g cream cheese
- Salt and black pepper, to taste
Mushroom jus
- 30 g button mushrooms
- 5 g porcini mushrooms
- 5 g onion
- 1 g garlic
- 3 g celery
- 3 g leek
- 0.5 g thyme
- 150 ml water
- 3 g salted butter
- 1 g refined flour
Porcini mushroom sauce
- 5 g dried porcini mushrooms
- 7 g butter
- A small sprig of fresh thyme
- 10 ml porcini soaking liquid, strained
- 25 ml vegetable stock
- 15 ml mushroom jus (from above)
- A few drops of truffle oil, to finish
Parmesan foam
- 30 ml vegetable stock
- 10 ml cream
- 8 g Parmesan, finely grated
- 0.3 g lecithin
Crispy tempura enoki
- Enoki mushrooms
- Refined flour, for dusting
- Chilled tempura batter
- Oil, for deep frying
- Salt, to season
The secret: porcini mushrooms and truffle oil. Porcini gives the dish its deep earthy foundation; a restrained finish of truffle oil lifts the aroma without overpowering it.
How to Make Wild Mushroom Ravioli - Step by Step
- Make the pasta dough: Combine the semola flour, refined flour, egg yolks, olive oil and salt and mix until a shaggy dough forms. Knead for 8–10 minutes until smooth and elastic. Cover and rest for at least 30 minutes. Roll through a pasta machine, reducing the thickness gradually until you have a thin, smooth sheet.
- Make the mushroom filling: Melt the butter in a pan over medium heat and gently sauté the onion, garlic, celery and thyme. Add the button and porcini mushrooms, season with salt and black pepper, and cook until the mushrooms release their moisture. Lower the heat and keep cooking until the mixture is completely dry and concentrated. Cool fully, then mix in the cream cheese, Parmesan and truffle oil. Adjust seasoning and chill.
- Form the ravioli: Place small, even portions of chilled filling on the pasta sheet with enough space between them. Lightly moisten the pasta around each portion with water, lay a second sheet on top and press gently around each mound to push out the air. Cut into individual ravioli, seal the edges neatly, dust with semola and refrigerate until needed.
- Make the mushroom jus: Sauté the onion, garlic, celery and leek until aromatic. Add the button mushrooms, porcini and thyme and cook until well roasted and the moisture has reduced. Add the water and simmer gently for about 2 hours, then strain thoroughly. In a separate pan, melt the salted butter, add the refined flour and cook to a light brown roux. Whisk in the strained mushroom liquid and cook until just lightly thickened - the jus should stay light and fluid, not gravy-like.
- Make the Parmesan foam: Combine the vegetable stock, cream and Parmesan in a small pan, bring gently to a simmer and cook for 2–3 minutes. Strain if needed, transfer to a small bowl and let it cool slightly. Add the lecithin and blend with a hand blender, keeping the head partly above the surface to incorporate air. Skim off the stable foam and reserve for plating.
- Rehydrate the porcini and cook the ravioli: Soak the dried porcini in warm water until rehydrated. Strain the soaking liquid through a fine filter and reserve; the porcini pieces are not used in the final sauce. Cook the ravioli in a large pan of boiling salted water for 2–3 minutes, until tender.
- Make the porcini emulsion: In a sauté pan, melt the butter with the thyme sprig. Add the strained porcini liquid, vegetable stock and mushroom jus. Reduce gently and emulsify until light and glossy. Finish with a few drops of truffle oil, add the cooked ravioli and coat them gently in the sauce.
- Fry the enoki: Trim the root end of the enoki and separate into small clusters. Dust lightly with refined flour, shaking off the excess, then dip into chilled tempura batter and let the excess drain. Deep-fry immediately in hot oil until golden and crisp. Drain on a wire rack and season lightly with salt while hot.
- Plate: Arrange 5 ravioli in a warm pasta bowl. Spoon the porcini sauce around and lightly over them, add the Parmesan foam, and place the crispy enoki over and between the ravioli for height and contrast. Serve immediately.
The finished plate should have a delicate pasta texture and a rich, concentrated filling; a light, glossy, intensely mushroom-forward sauce that coats without being watery or heavy; and enoki that stays light, golden and crunchy.
Chef's Tips
- Cook the mushroom filling until completely dry before adding the cream cheese and Parmesan.
- Push out every air pocket when sealing the ravioli, or they may burst while cooking.
- Do not overcook fresh ravioli - 2–3 minutes is enough.
- Keep the porcini emulsion light and glossy rather than thick and heavy.
- Use truffle oil sparingly so it lifts, rather than overpowers, the mushrooms.
How to Serve
Serve immediately in a warm pasta bowl with the porcini emulsion, Parmesan foam and crispy tempura enoki. Chef Manna pairs it with warm toasted ciabatta and house-made Romesco sauce on the side - the smoky sweetness of the Romesco complements the earthy mushroom notes, and the ciabatta soaks up what's left of the sauce.
Wine pairing: Alto Adige Pinot Grigio (Italy) is the recommended match - its freshness and minerality complement the porcini, truffle aroma, Parmesan richness and delicate handmade pasta. A lightly oaked Burgundy Chardonnay, a Sauvignon Blanc or a Pinot Noir also work.
About the Chef

Chef Tapas Manna is a passionate culinary professional with over 15 years of experience across luxury hospitality, specialty restaurants, all-day dining and multi-cuisine operations. As Chef de Cuisine at ALDILA, Conrad Pune, he specialises in Italian cuisine, menu innovation, culinary leadership and delivering exceptional guest dining experiences.
Visit ALDILA or follow the restaurant on Instagram.
Craving more? Explore other chef recipes from India's top restaurants and hotels.
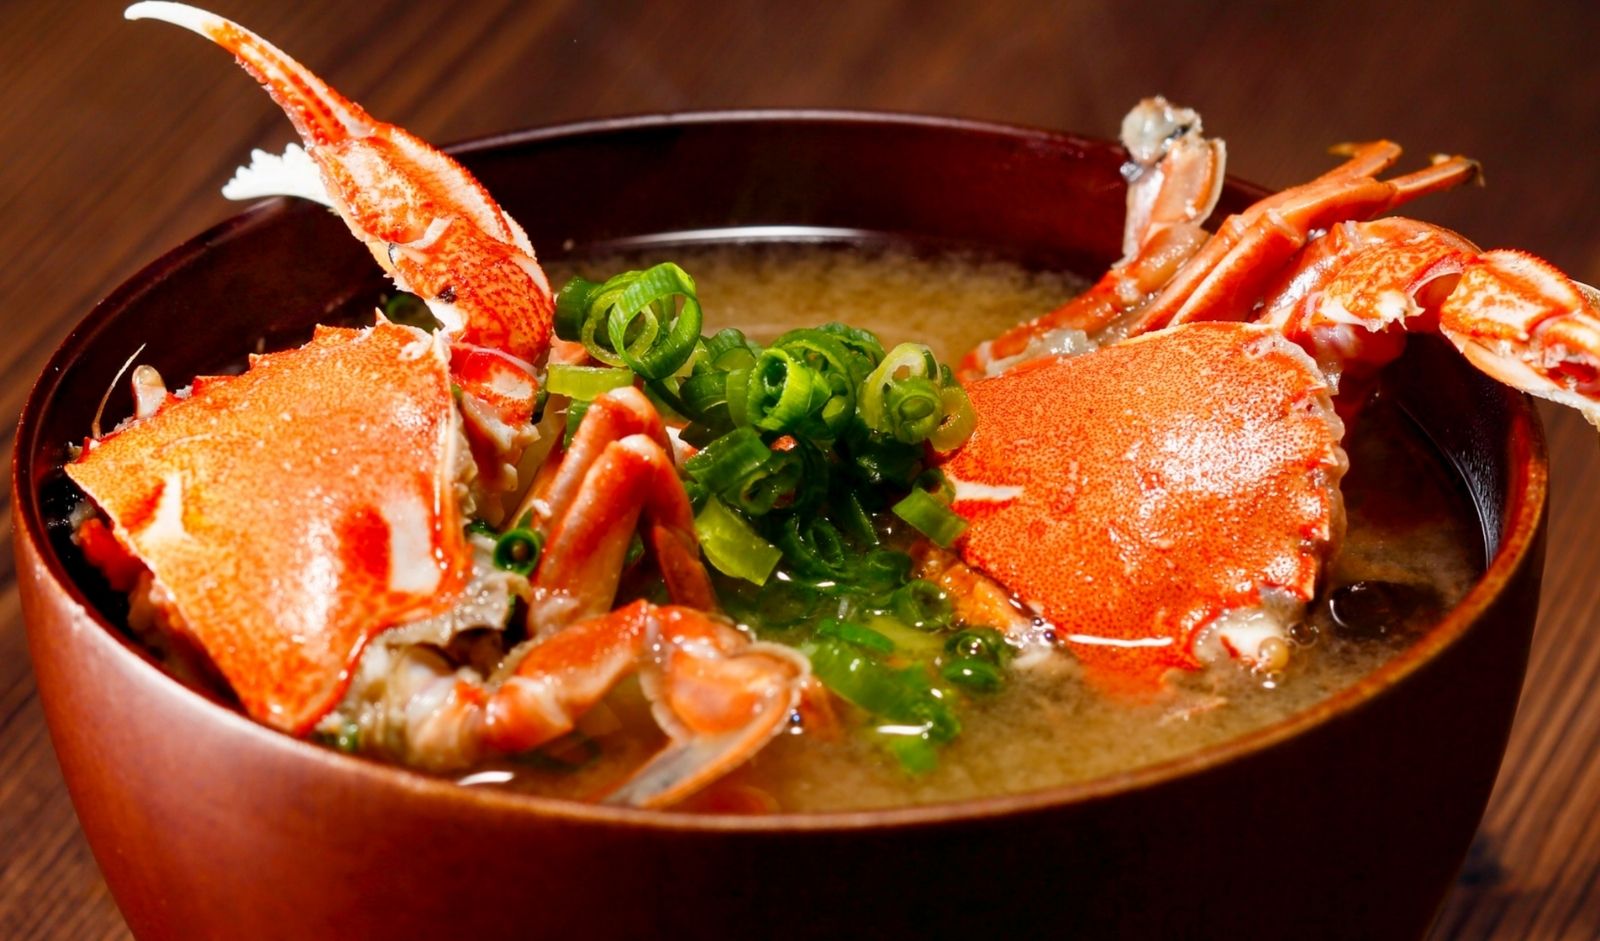
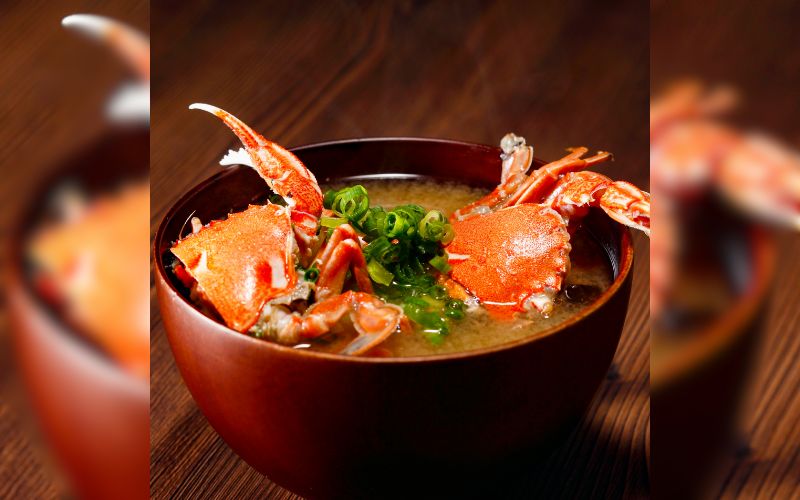
Vayal nandu - literally "field crab" in Tamil - is the mud crab found in the paddy fields and backwaters of the south, and vayal nandu rasam is one of the most loved ways of cooking it. Unlike the everyday tomato or pepper rasam, this is a deeply savoury broth built on a freshly ground masala of roasted whole spices, coconut and aromatics, simmered with the crab so the shells release all their sweetness into the soup.
This version comes from Chef Jai Prasad, Masterchef of South Indian Cuisine at Lush, Renaissance Bengaluru Race Course Hotel, who has spent more than 30 years cooking traditional South Indian food. The secret is the mud crab itself - cook the crab in its own broth first, then bring in the masala, and you get a rasam that is peppery, aromatic and rich with the flavour of the sea.
Quick facts
- Cuisine: South Indian
- Course: Starter / Soup
- Difficulty: Medium
- Prep time: 40 minutes
- Cook time: 25 minutes
- Total time: approx. 1 hour 5 minutes
- Serves: 3
- Dietary: Non-vegetarian, gluten-free
Ingredients
- 500 g mud crabs, cleaned
- 10 cloves garlic, peeled
- 1-inch piece ginger, chopped
- 1 medium onion, chopped
- 1 medium tomato, chopped
- 1 green chilli
- 2 sprigs curry leaves
- 1 dried red chilli
- 3 cloves
- 1-inch stick cinnamon
- 1 star anise
- A small piece of stone flower (kalpasi)
- ½ tbsp black peppercorns
- ½ tbsp fennel seeds
- ½ tbsp cumin powder
- ½ tbsp coriander powder
- ¾ tbsp turmeric powder, plus ¼ tsp for boiling the crab
- ½ tbsp desiccated coconut
- 1 tbsp oil
- Salt, to taste
- About 8 cups water
- To garnish: 1 tbsp lime juice, 2 tbsp chopped mint and coriander
The secret: mud crab. Boil the crab in turmeric water first so the shells build the broth, then add the ground masala - the flavour comes from the crab, not the stock cube.
How to Make Vayal Nandu Rasam - Step by Step
- Fry the masala: Heat a heavy-bottomed pan on medium flame and add the oil. Once it starts to smoke, add the tomato, onion, garlic, ginger, curry leaves, green chilli, dried red chilli, whole spices (cloves, cinnamon, star anise, stone flower, peppercorns, fennel), desiccated coconut and the powdered spices (cumin, coriander, ¾ tbsp turmeric). Fry everything on a low flame.
- Soften: Add 1 cup of water and cook until the onion and tomato soften slightly.
- Grind: Turn the flame to high and let the moisture evaporate. Transfer the masala to a mixer jar, grind to a smooth paste and keep aside.
- Boil the crab: Clean and wash the crabs. In a pan, add the crabs, 4 cups of water and ¼ tsp turmeric powder. Bring to a boil and cook for 10 minutes.
- Add the masala: Add 2 more cups of water and the masala paste. Stir and cook for 5 minutes. Check for salt and adjust.
- Adjust the consistency: You can leave the soup thick and finish it with cream, or dilute it with water. Chef Prasad adds 1 cup of water to thin it to a rasam consistency.
- Finish and serve: Bring to a rapid boil, take off the flame and garnish with the mint, coriander and lime juice. Serve hot.
About the Chef
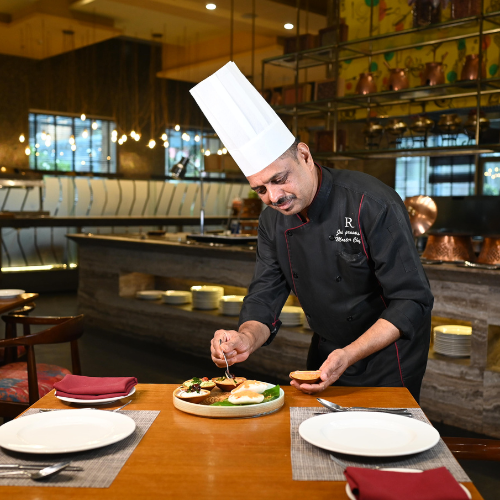
Chef Jai Prasad is a culinary veteran with over 30 years of experience, whose journey began in 1993. Now 56, he brings youthful energy to his craft, serving masterfully prepared dishes infused with passion and authenticity. His deep-rooted love for traditional South Indian cuisine has earned him a loyal following, with many guests returning to Lush specifically for his food.
Chef Jai Prasad, Masterchef of South Indian Cuisine at Lush, Renaissance Bengaluru Race Course Hotel, Bengaluru. Visit Lush or follow the hotel on Instagram.
Craving more? Explore other South Indian recipes from India's top chefs.
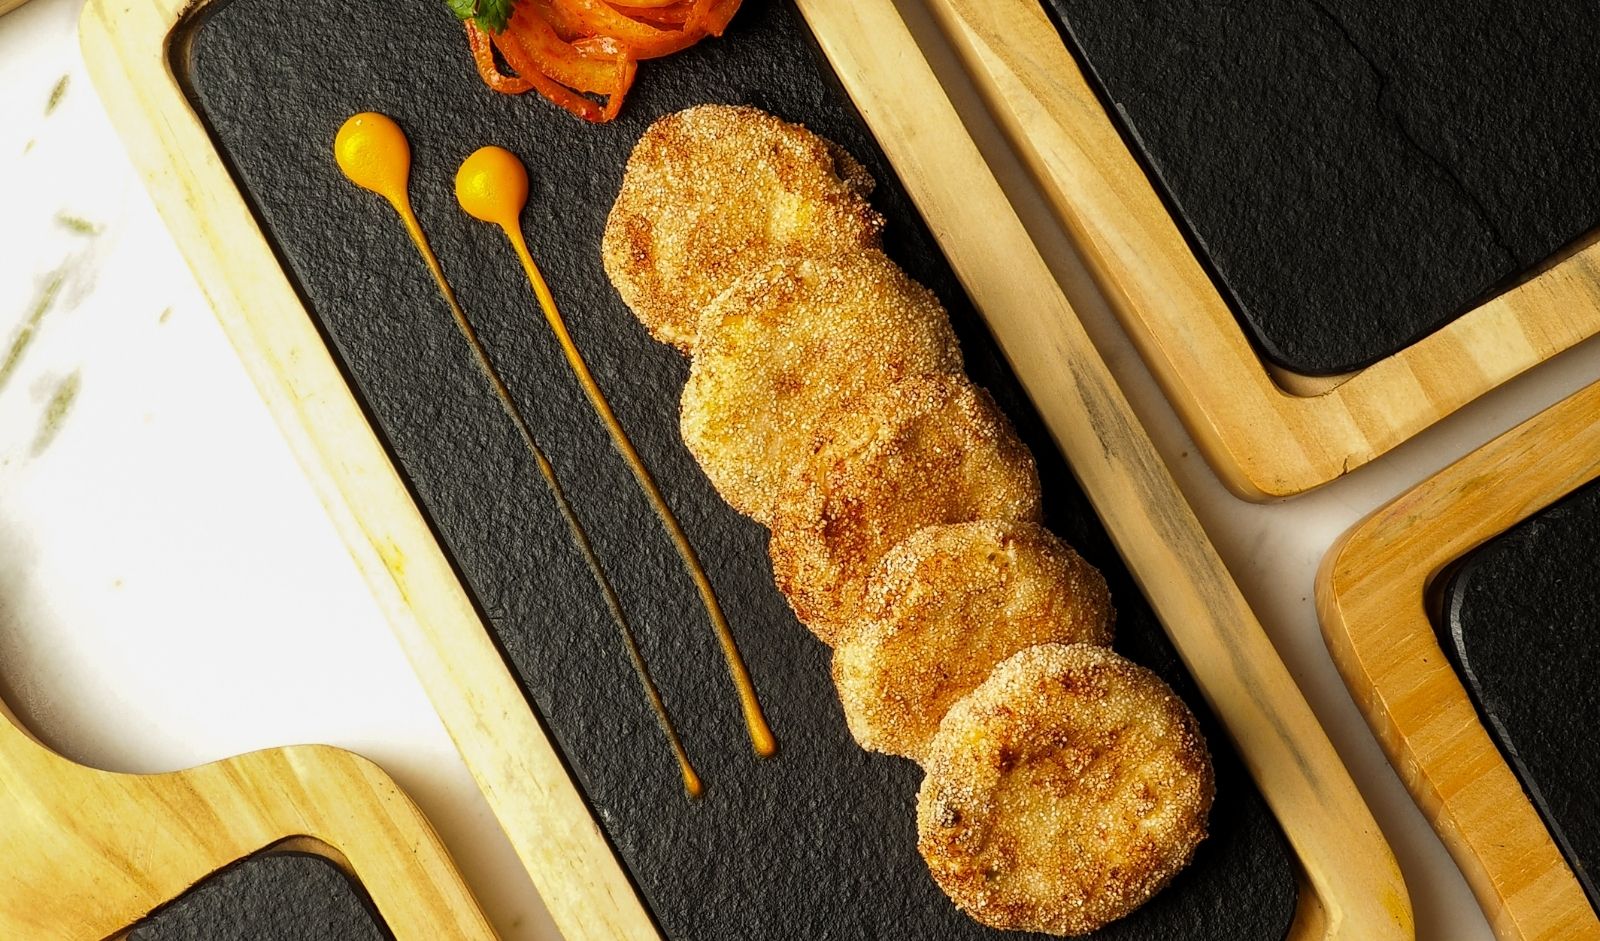
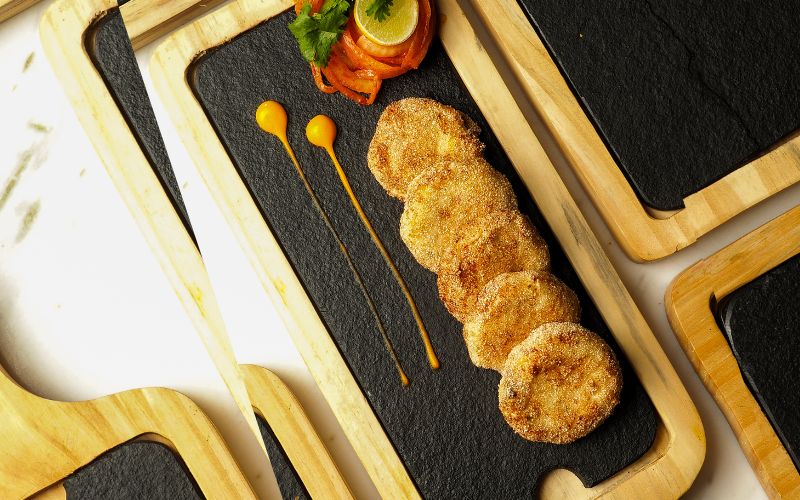
Mango Chunda Dahi Kebab brings together the richness of the traditional North Indian dahi kebab with the sweet-tangy character of Gujarati-style raw mango chunda. Silky hung curd, aromatic spices and fresh herbs form the delicate kebab, while a spoonful of vibrant mango chunda hidden inside adds a burst of sweetness, acidity and spice with every bite.
Created by Chef Gaurav Mawari, Executive Chef at The Square, Novotel Pune Nagar Road, the kebab is fried crisp and golden on the outside and stays creamy within — a playful meeting of North Indian and Gujarati flavours that works as a starter, a side or a party snack. The secret is the mango chunda stuffing, so pick a good one.
Quick facts
- Cuisine: Indian (North Indian–Gujarati fusion)
- Course: Side / Starter
- Difficulty: Easy
- Prep time: 20 minutes (plus 4–5 hours to hang the curd)
- Chill time: 30 minutes
- Cook time: 5 minutes
- Total time: approx. 1 hour active (plus 4–5 hours hanging time)
- Serves: 2
- Dietary: Vegetarian
Ingredients
- 200 g hung curd
- 10 g mango chunda
- 30 g rawa (semolina), for coating
- 20 g onion, finely chopped
- 10 g red bell pepper, finely chopped
- 10 g yellow bell pepper, finely chopped
- 10 g ginger paste
- 5 g green chilli, finely chopped
- 10 g fresh coriander leaves, chopped
- 10 g mint leaves, chopped
- 5 g green cardamom, powdered
- 2 g white pepper powder
- 3 g chaat masala
- 5 g black salt
- 2 g salt
- Oil, for deep frying
The secret: mango chunda — the sweet-sour Gujarati raw mango preserve stuffed into the centre of each kebab.
How to Make Mango Chunda Dahi Kebab — Step by Step
- Hang the curd: Pour fresh yoghurt into a muslin cloth, tie it tightly and hang it inside the refrigerator for 4–5 hours so the whey drains completely. You want a thick, cheese-like consistency.
- Make the kebab mix: In a mixing bowl, combine the hung curd with the onion, ginger paste, green chilli, coriander, mint, red and yellow bell pepper, cardamom, white pepper, chaat masala, black salt and salt.
- Mix evenly: Fold everything together until the herbs and spices are evenly distributed through the curd.
- Shape and stuff: Divide the mixture and shape into round patties, stuffing a little mango chunda into the centre of each and sealing it in.
- Coat and chill: Roll each patty lightly in rawa for a thin, even coating. Refrigerate for 30 minutes to firm up.
- Fry and serve: Deep-fry the patties in hot oil until golden on the outside. Drain the excess oil and serve hot on a platter.
Chef's Tips
Go easy on the rawa — a light coating is enough for a crisp texture. Over-coating makes the kebab absorb moisture and turn soggy. Coat the kebabs only a few minutes before frying, not in advance.
About the Chef

Gaurav Mawari is an experienced hospitality professional and Executive Chef at Novotel Pune Nagar Road. With over 15 years in the hospitality industry, he brings extensive expertise in international cuisines, banqueting, culinary operations and food innovation. In his current role he leads the hotel's culinary team, focusing on menu innovation, quality standards and creating distinctive dining experiences for guests.
Chef Gaurav Mawari, Executive Chef at The Square, Novotel Pune Nagar Road, Pune. Follow the hotel on Instagram.
Craving more? Explore other chef recipes from India's top restaurants and hotels.
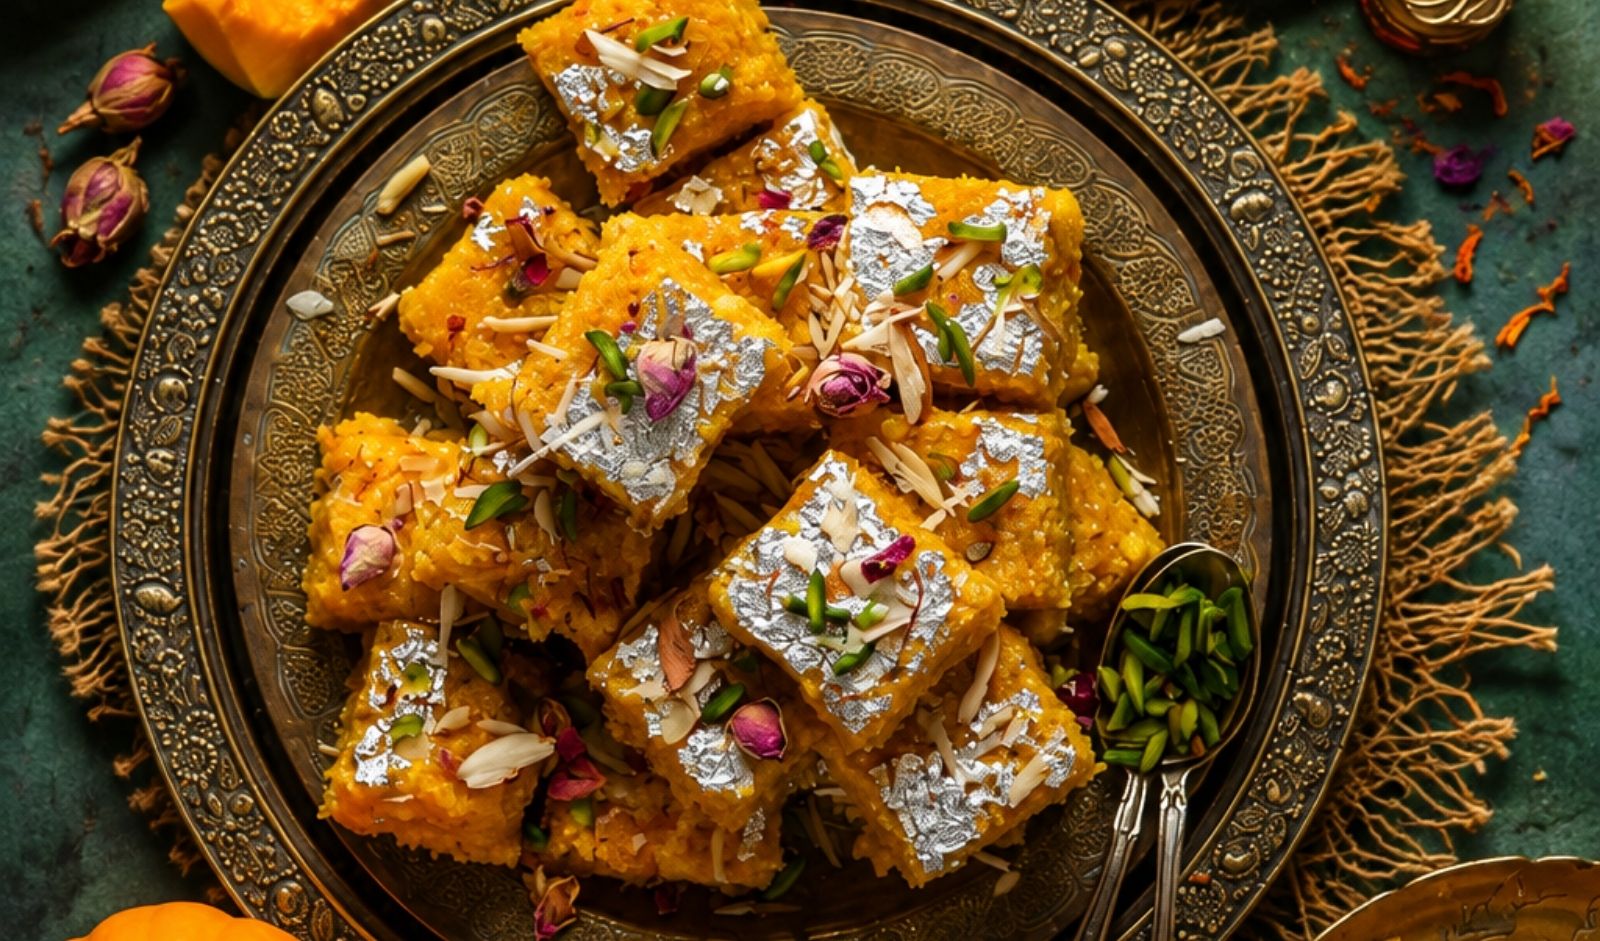
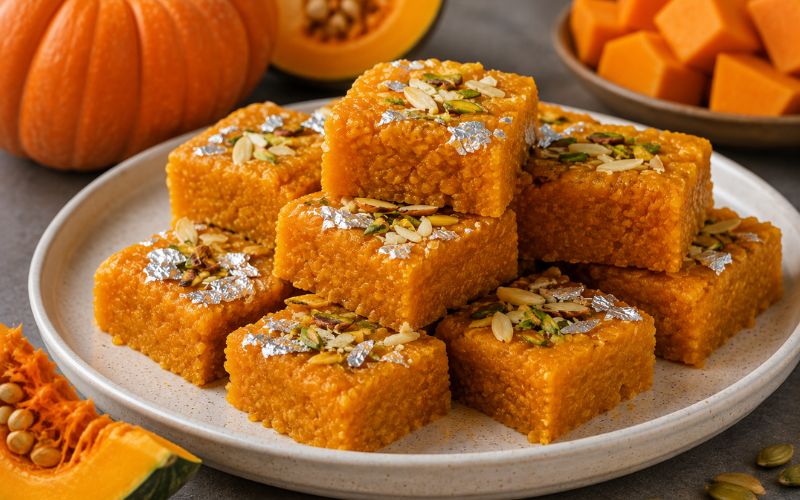
Kalakand is one of India's most loved milk sweets — grainy, soft and rich with the flavour of slow-reduced milk. This version from Chef Vijesh Modi, Executive Chef at The Deltin, Daman, folds in freshly steamed pumpkin purée, adding natural sweetness, a warm golden colour and a lighter texture to the traditional mithai.
The pumpkin is sautéed in ghee until aromatic before the milk and condensed milk go in, so the vegetable disappears into the sweet and only its colour and gentle sweetness remain. Finished with cardamom, saffron and chopped nuts, it is an easy make-ahead dessert for the festive season — and a smart way to use up seasonal pumpkin.
Quick facts
- Cuisine: Indian
- Course: Dessert
- Difficulty: Easy
- Prep time: 15 minutes
- Cook time: 30–35 minutes
- Chill / set time: 1–2 hours
- Total time: approx. 2.5 hours (including setting)
- Serves: 4
- Dietary: Vegetarian, gluten-free
Ingredients
- 1 cup pumpkin, freshly grated, steamed and puréed
- 250 g paneer
- 200 ml condensed milk
- 2 tbsp ghee
- 2–3 tbsp sugar (adjust to taste)
- ½ tsp cardamom powder
- 2 tbsp chopped nuts (almonds, pistachios — optional)
- A few saffron strands (optional, for aroma and colour)
How to Make Pumpkin Kalakand — Step by Step
- Prepare the pumpkin: Grate the pumpkin and boil until soft. Sauté briefly and blend into a thick purée.
- Sauté the purée: Heat 1 tbsp ghee in a pan and sauté the pumpkin purée on a low flame until it turns aromatic and golden, about 10–12 minutes.
- Add milk and cook: Pour in the milk and cook, stirring continuously, until the milk is absorbed and the mixture thickens.
- Sweeten it up: Add the condensed milk and sugar. Mix well and cook until the mixture leaves the sides of the pan.
- Flavour boost: Stir in the cardamom powder and saffron strands. Mix thoroughly.
- Set the kalakand: Grease a tray with the remaining ghee and pour in the mixture. Flatten with a spatula. Sprinkle the chopped nuts on top and press gently.
- Cool and serve: Let it cool completely, then refrigerate for 1–2 hours to set. Cut into squares and serve chilled.
About the Chef
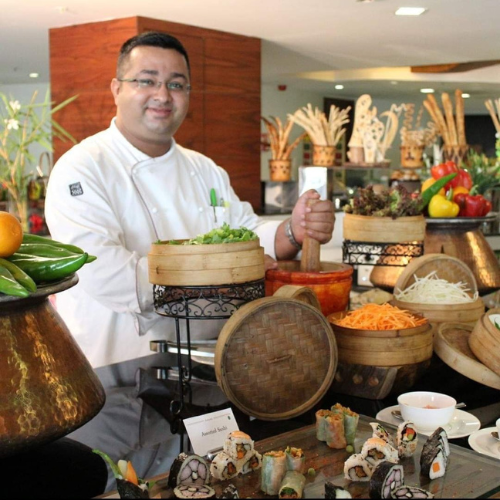
Chef Vijesh Modi is a creative, strategic, and hands-on culinary professional with more than 19 years of distinguished experience across luxury hotels, resorts, and high-volume hospitality operations. His expertise encompasses culinary leadership, menu development, kitchen operations, team building, food cost management, culinary innovation, and creating memorable guest experiences. He also maintains a keen interest in high-end leisure travel and emerging global food and beverage trends.
More from the hotel: The Deltin, Daman — Website · Instagram
Craving more? Explore other festive recipes from India's top chefs on RestaurantIndia Recipes.

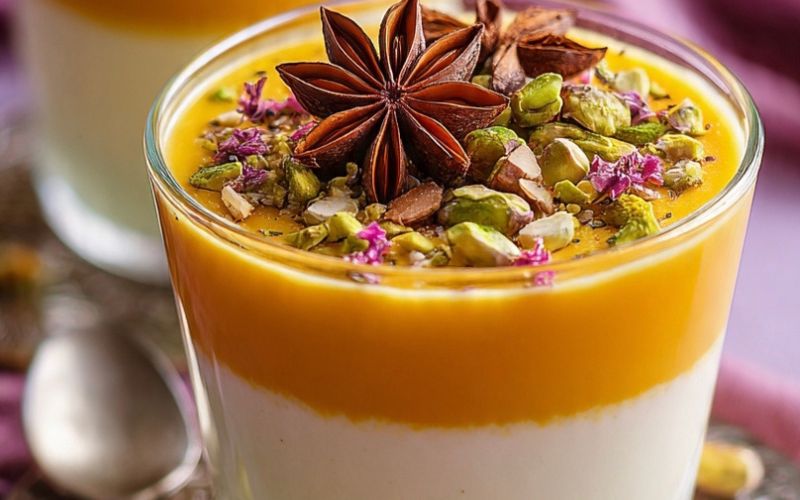
Inspired by the humble sabudana kheer served during Indian fasts, this Tricolour Sago Mousse reimagines comfort food as celebration. Chef Vijay Gupta took a nostalgic Indian ingredient — sago — and gave it a light, airy French mousse treatment instead of the usual heavy, milk-based pudding.
Three distinct layers in saffron, white and green stand in for the Tiranga, each carrying a subtle flavour of its own: saffron-orange with a hint of cardamom, coconut-white, and pistachio-mint green. Unlike dense traditional sago desserts, this one is feather-light and dairy-light, with a clean wobble and a festive finish. Served in clear verrines, it looks celebratory but eats delicate — tradition, plated for today, and a fitting sweet for an Independence Day table.
Quick facts
- Cuisine: Indian Fusion
- Course: Dessert
- Difficulty: Medium
- Prep time: 30 minutes
- Chill / set time: 3–4 hours
- Total time: approx. 3 hours 30 minutes
- Serves: 4–6
- Dietary: Vegetarian
Ingredients
The hero: sago (sabudana) — a fasting-day staple, reimagined into a layered mousse.
Base sago mixture
- ½ cup small sago (sabudana)
- 2 cups milk
- ¼ cup sugar, or to taste
- ½ tsp cardamom powder
- ½ tsp vanilla essence
Orange layer
- ½ cup mango purée
- ¼ tsp saffron, soaked in 1 tbsp warm milk
- 1–2 tbsp sugar, if needed
White layer
- ½ cup whipped cream
- 2 tbsp condensed milk
Green layer
- ½ cup pistachio paste, or finely ground pistachios
- ¼ cup whipped cream
- 1–2 tbsp condensed milk
- Tiny drop of green food colour (optional)
How to Make Tricolour Sago Mousse — Step by Step
- Wash and soak the sago for about 30 minutes, then drain well. Simmer it in the milk over low heat, stirring regularly, until the pearls turn translucent and the mixture thickens.
- Stir in the sugar, cardamom and vanilla. Let the mixture cool completely.
- Divide the cooled sago mixture into three equal portions.
- Orange layer: mix one portion with the mango purée and saffron milk.
- White layer: fold another portion with the whipped cream and condensed milk.
- Green layer: mix the final portion with the pistachio paste, whipped cream and condensed milk.
- Layer the three mixtures in small glasses or verrines, in order — orange, then white, then green.
- Refrigerate for at least 3–4 hours, until well chilled and set.
- Garnish with chopped pistachios, saffron strands and a star anise, and serve.
About the Chef

Vijay Gupta is the F&B Manager at Boulevard, The Orchid Hotel, Pune. A hospitality professional with 12+ years of expertise in food & beverage operations, team management and guest satisfaction, he is passionate about operational excellence and exceptional service.
More from the restaurant: The Orchid, Pune — Dining · Instagram
Craving more? Explore other festive and fusion recipes from India's top chefs on RestaurantIndia Recipes.

Hyderabad is widely recognised for its rich and layered food culture, shaped by centuries of royal influence. At the centre of this legacy sits the iconic Hyderabadi biryani. It is more than a rice dish. It reflects the precision of royal kitchens, where technique mattered as much as taste. Developed during the Nizam era, this biryani follows a structured cooking process that focuses on balance, heat control, and flavour infusion. The defining method is dum cooking, where the pot is sealed to trap steam. This creates a controlled heat environment, allowing rice and meat to cook together while retaining moisture and aroma. Another key element is layering. Raw or semi-cooked ingredients are arranged in a specific order to ensure even heat distribution and consistent taste in every bite.
For home cooks and food enthusiasts, the difference between average and restaurant-style biryani often comes down to these technical details. Proper marination helps tenderise the protein and improves flavour absorption. Correct rice parboiling ensures the grains remain separate after dum cooking. Each step has a purpose and adds value to the final dish. When followed carefully, this method allows anyone to recreate an authentic, flavour-rich Hyderabadi biryani at home with confidence and consistency.
Why Hyderabad Special Biryani Unique?
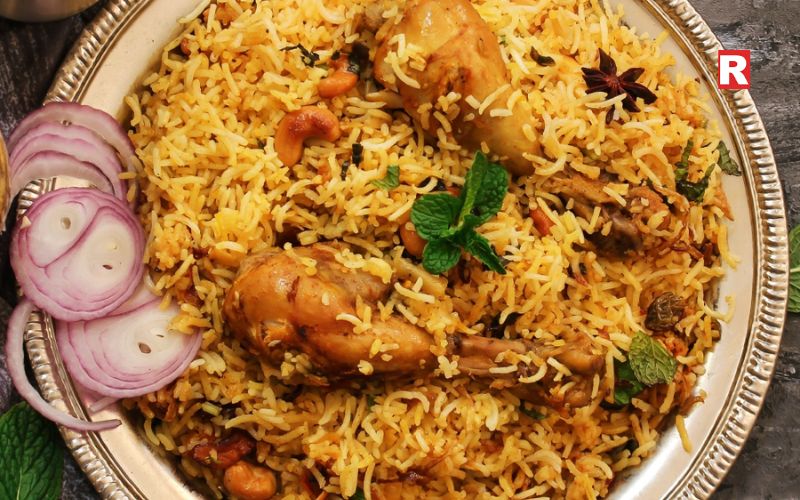
Hyderabadi biryani is very different from regular rice dishes. It is not just about mixing rice and curry. It is about layering and slow cooking. The most important factor is the dum cooking technique. In this method, the pot is sealed and cooked on low heat. This traps steam inside and allows the flavors to blend naturally.
Another key feature is the kacchi style. Here, raw marinated meat is placed at the bottom and partially cooked rice is layered on top. Both cook together in sealed heat. This gives a deep and rich taste. The use of saffron, fried onions, mint, and ghee adds aroma and balance. The spices are strong but never overpowering.
Read more: Kootu Curry Recipe: Traditional Kerala-Style Curry for Your Festive Menu
Top 5 Poppy Seed Recipes To Try: Nutty, Aromatic Dishes Worth Trying
Ingredients Required for Authentic Taste
Using the right ingredients is very important. Quality directly affects the final taste.
Core Ingredients
- 2 cups long-grain basmati rice (aged preferred)
- 500g chicken or mutton
- 1 cup thick yogurt
- 2 large onions (fried to make birista)
- 2 tbsp ginger-garlic paste
- 3–4 green chillies
Whole Spices
- 2 bay leaves
- 4 cloves
- 3 cardamom pods
- 1-inch cinnamon stick
Flavor Enhancers
- Saffron soaked in warm milk
- 1 tsp rose water or kewra water
- Fresh mint and coriander leaves
- 2–3 tbsp ghee
Technical note: Maintain a balanced rice-to-meat ratio. Aged basmati rice is preferred because it stays long and separate after cooking.
Step-by-Step Cooking Process
1. Step 1: Marination – Building the Base Flavor
Marination is where the real flavor starts. In a bowl, mix chicken or mutton with yogurt, ginger-garlic paste, salt, spices, fried onions, mint, and coriander. Let it rest for at least 4–6 hours. Overnight marination gives the best result. This step is important because yogurt helps break down the protein. This makes the meat soft and allows spices to go deep inside.
2. Step 2: Rice Preparation – Getting the Texture Right
Wash the basmati rice and soak it for 30 minutes. Boil water with salt and whole spices. Add rice and cook until it is about 70% done. The grains should still have a slight bite. Drain the rice immediately. Overcooking at this stage can ruin the final texture.
3. Step 3: Layering – The Signature Technique
Take a heavy-bottom pot. Spread the marinated meat at the bottom. Add a layer of rice on top. Then add saffron milk, ghee, fried onions, mint, and coriander. Repeat layering if needed. Make sure the top layer is rice. Even layering ensures that heat spreads properly. It also helps every bite have balanced flavor.
4. Step 4: Dum Cooking – The Game Changer
Seal the pot with a tight lid. You can use dough to seal the edges. Cook on low heat for 25–40 minutes. You can place a tawa under the pot to prevent burning. Inside the pot, steam builds pressure. This cooks the meat and rice together. The flavors mix slowly and naturally. This method is what gives Hyderabadi biryani its signature aroma and richness.
Know more: Sattu Paratha Recipe: A Nutritious Bihari Special Loved Across India
Common Mistakes to Avoid
Even a small mistake can affect the dish.
- Overcooked rice can turn mushy
- Too much liquid in marination can spoil texture
- Skipping dum sealing will reduce flavor depth
- Low-quality rice will not give the right aroma
- Too many spices can overpower the dish
Focus on balance. Hyderabadi biryani is about harmony, not excess.
Variations of Hyderabadi Biryani
There are different styles you can explore.
- Kacchi Biryani: Raw meat is cooked with rice together. This is more authentic and flavorful.
- Pakki Biryani: Meat is cooked separately and then layered with rice. Easier for beginners.
- Chicken vs Mutton: Chicken cooks faster and is lighter. Mutton gives a richer and deeper taste.
- Vegetarian Versions: Paneer or vegetable biryani is popular today. However, the cooking technique remains the same.
Also check: Metkut Recipe: Traditional Maharashtrian Comfort Food
Tandoori Raan: The Royal Leg of Lamb That Is Taking Over Modern Menus
Mutton Chukka (Sukka) Recipe – A Spicy South Indian Delight
Why This Recipe Works
This method focuses on technique, not shortcuts.
- Marination ensures deep flavor
- Controlled rice cooking maintains texture
- Layering creates balance
- Dum cooking locks aroma and moisture
When done right, you get restaurant-style biryani at home. The rice stays separate, the meat turns soft, and every bite feels rich.
Happy Eating!
Making Hyderabadi biryani at home may feel difficult in the beginning. Many home cooks find the steps long and detailed. However, once the process is understood, it becomes much easier to follow. This dish is not about speed. It depends on patience and careful execution. Each stage has a clear role. Marination helps soften the meat and build base flavour. Controlled rice boiling ensures the grains stay firm and separate. Proper layering allows even heat flow inside the pot. The dum method, where the vessel is sealed, creates internal steam pressure. This helps cook everything evenly without losing moisture. For beginners and food enthusiasts, focusing on these technical points can improve results significantly. Small details make a big difference in taste and texture. There is also a sense of satisfaction in getting it right. When the lid is opened, the aroma is rich and inviting. It reflects effort, skill, and attention. That moment makes the entire cooking process worthwhile.

Rice paper is more than just an ingredient—it is a culinary tradition that has traveled across countries and centuries. Originating in Vietnam, rice paper is made from rice flour, water, and sometimes tapioca. Thin and delicate, it is usually used for fresh spring rolls or fried snacks. Over time, chefs and home cooks worldwide have adapted rice paper in creative ways, making it a versatile and healthy option for meals.
Whether you want a quick lunch, a light snack, or a fresh appetizer, rice paper is an excellent choice. It is gluten-free, low in calories, and encourages using fresh vegetables, herbs, and lean proteins. In this article, we explore seven easy rice paper recipes that are quick, healthy, and perfect for home cooking.
Read more: 5 Cities That Serve the Best Non-Vegetarian Street Food
Pani Puri Has Different Names in Different Indian States—Know Them All
A Quick History of Rice Paper
Rice paper has a long history in Vietnam, dating back centuries. Traditional Vietnamese cuisine used it to make fresh rolls, known as gỏi cuốn, filled with herbs, rice noodles, and shrimp or pork. These rolls were often served with dipping sauces, such as peanut sauce or fish sauce-based dips.
Over time, rice paper became popular beyond Vietnam. It reached other Asian countries and, eventually, Western kitchens. Today, rice paper is used in many creative ways, from snacks to desserts. Its appeal lies in its simplicity and versatility, allowing cooks to experiment with fillings, textures, and flavors.
Tips for Working with Rice Paper
Cooking with rice paper may seem tricky at first, but it is easy once you know a few tips.
- Soften without tearing: Dip each sheet in warm water for a few seconds. Lay it flat on a damp surface to make rolling easier. Avoid over-soaking, as it can tear easily.
- Choose the right fillings: Use fresh vegetables, cooked proteins, or even fruits. Balance flavors with herbs, spices, and sauces.
- Rolling technique: Place ingredients closer to one edge, fold the sides, and roll tightly. Practice makes perfect.
- Storage tips: Keep unused sheets in a sealed plastic bag. Store in a cool, dry place. Rolls are best eaten fresh but can last a few hours in the refrigerator.
7 Easy Rice Paper Recipes
1. Fresh Veggie Spring Rolls
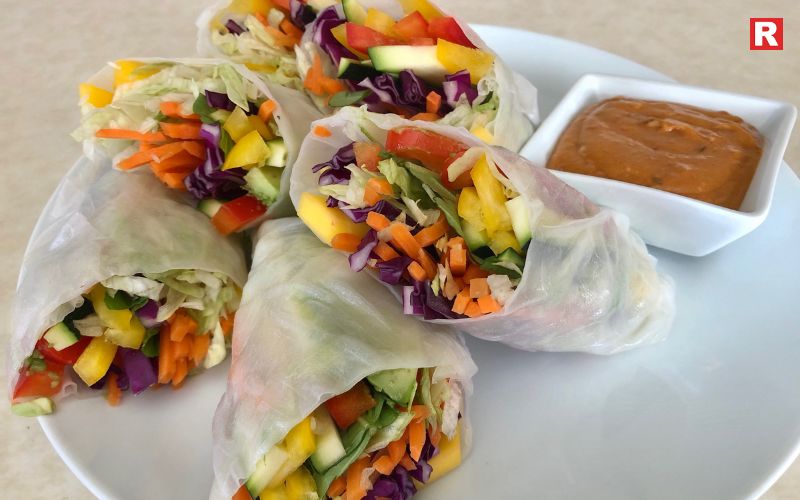
Fresh veggie rolls are light, colorful, and quick to make. Use carrots, cucumber, bell peppers, and lettuce. Add fresh herbs like mint or cilantro. Optional extras include rice noodles or avocado slices. Serve with peanut sauce or soy sauce for dipping. Prep time is around 15 minutes, making it ideal for a quick lunch.
2. Shrimp and Avocado Rolls

This recipe adds protein and creaminess. Use cooked shrimp, sliced avocado, and crisp vegetables. Add a squeeze of lime juice for a fresh flavor. Serve with a sweet chili dipping sauce. These rolls are filling yet light, perfect for a healthy meal.
Know more: 10 Awadhi Cuisine Classics You Must Try at Least Once
3. Rice Paper Summer Wraps with Hummus
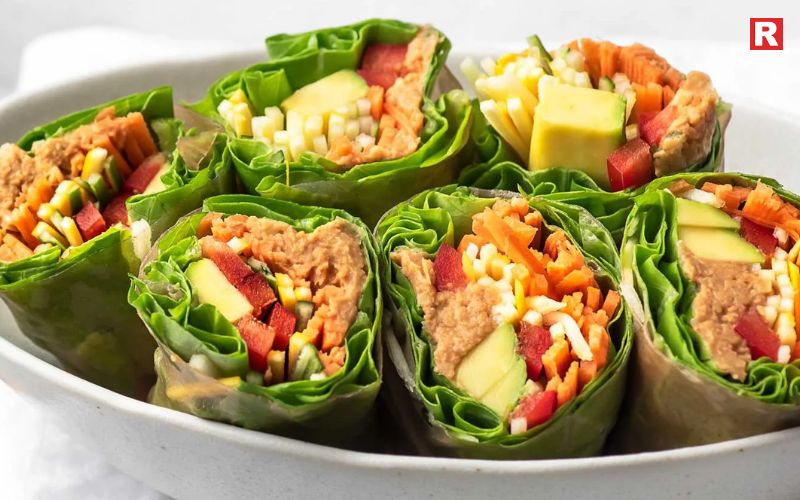
Give rice paper an international twist by spreading a thin layer of hummus on the sheet. Add shredded lettuce, carrots, cucumber, and roasted red peppers. Roll tightly and slice. These wraps are ideal for a vegetarian snack or lunch and take less than 10 minutes to make.
4. Crispy Baked Rice Paper Chips
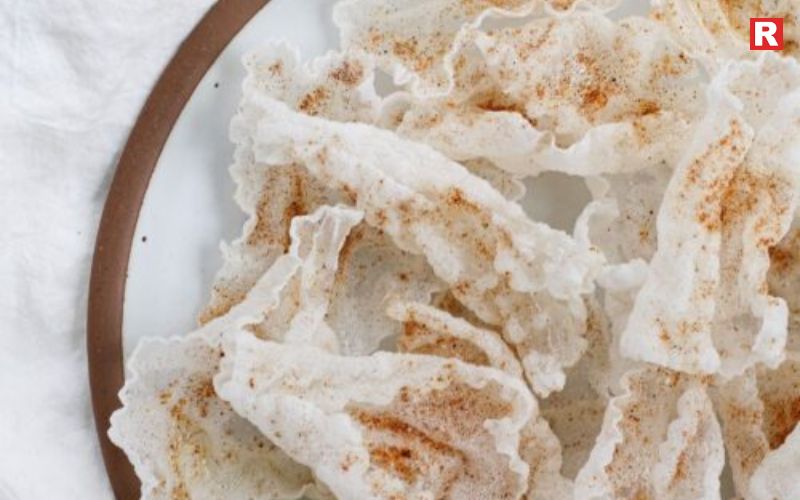
Rice paper is not just for rolls. Cut sheets into triangles, brush lightly with olive oil, and bake until crispy. Sprinkle with salt, paprika, or other spices. These chips are a healthy alternative to fried snacks. Serve with guacamole or salsa for a quick appetizer.
5. Tofu and Veggie Rice Paper Rolls
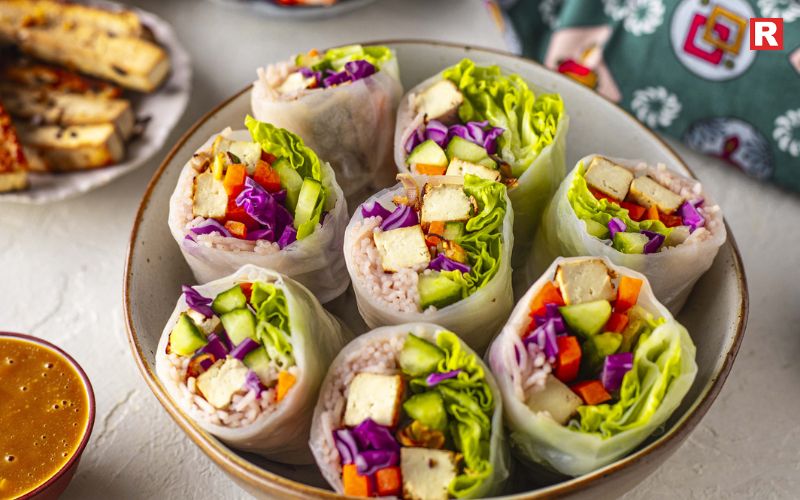
For a plant-based protein option, use firm tofu, marinated in soy sauce or sesame oil. Combine with bell peppers, cucumber, carrots, and fresh herbs. Serve with a peanut or hoisin dipping sauce. These rolls are great for lunch or a light dinner. They are easy to make and store well for a few hours.
Also check: 5 Foods to Avoid for Better Cholesterol
6. Fruit and Nut Dessert Rolls

Rice paper can also be used for desserts. Spread a thin layer of cream cheese or yogurt, then add slices of strawberries, mango, or banana. Sprinkle with chopped nuts or seeds. Roll gently and serve immediately. These dessert rolls are a fun way to enjoy a healthy, sweet treat without added sugar.
7. Asian-Style Chicken Lettuce Wraps in Rice Paper
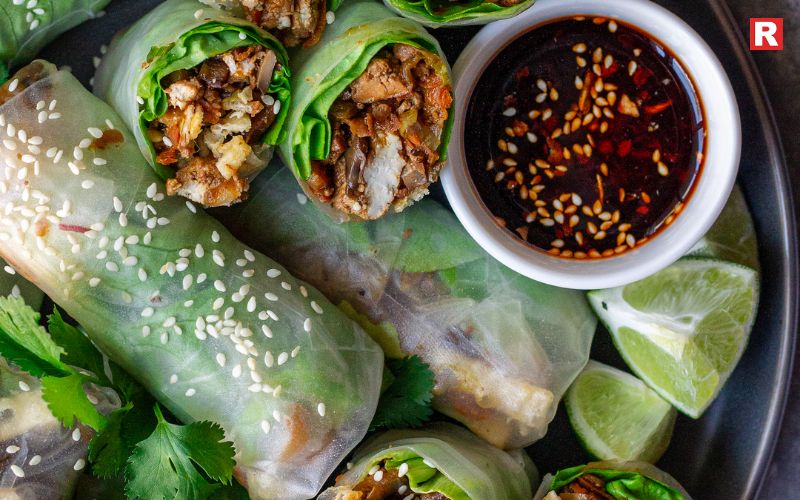
Cook shredded chicken with soy sauce, ginger, and garlic. Add shredded lettuce, carrots, and cucumber. Place the mixture in softened rice paper and roll tightly. Serve with hoisin or plum sauce. These rolls are savory, satisfying, and perfect for dinner or a party appetizer.
Serving and Dipping Ideas
Dipping sauces can make rice paper rolls more exciting. Some popular options include:
- Classic peanut sauce: Made with peanut butter, soy sauce, lime juice, and a touch of honey.
- Sweet chili sauce: Adds a tangy and slightly spicy flavor.
- Yogurt-mint dip: Light and refreshing, ideal for vegetable rolls.
Experimenting with sauces allows you to create flavors that suit your taste and make rice paper meals more enjoyable.
Why Rice Paper is Perfect for Healthy Meals
Rice paper is naturally low in calories and carbs, making it suitable for light meals and snacks. It encourages using fresh ingredients, including vegetables, lean proteins, and herbs, which makes meals colorful and nutritious. Its gluten-free nature also makes it accessible for people with dietary restrictions.
Using rice paper helps home cooks get creative. You can make vegetarian, vegan, or protein-packed options with ease. It is versatile, quick to prepare, and suitable for breakfast, lunch, dinner, or snacks.
Check more: 6 Unexpected Benefits of Eating Jackfruit (Kathal) – Nature’s Spiky Surprise!
Slurping Through India: 6 Iconic Noodles You Can’t Miss
India’s Top 5 Vegetarian Restaurant Brands You Can’t Miss
The Bottom Line!
Rice paper is a simple and versatile ingredient with a long history. It was first used in Vietnam for making fresh spring rolls. Over time, cooks have used it in many different ways. It can be baked into crispy chips, wrapped around fruits, or filled with vegetables, tofu, or shrimp. Rice paper adapts easily to different flavors and styles.
The seven recipes featured here show how easy and quick it is to use rice paper. Each recipe is healthy and full of fresh ingredients. They are suitable for light lunches, snacks, or party appetizers. Rice paper rolls are easy to make for beginners, yet still fun for experienced cooks. They are colorful, light, and satisfying. Each bite carries a hint of history and tradition. With rice paper, anyone can prepare meals that are fresh, creative, and nutritious, while enjoying flavors from around the world.
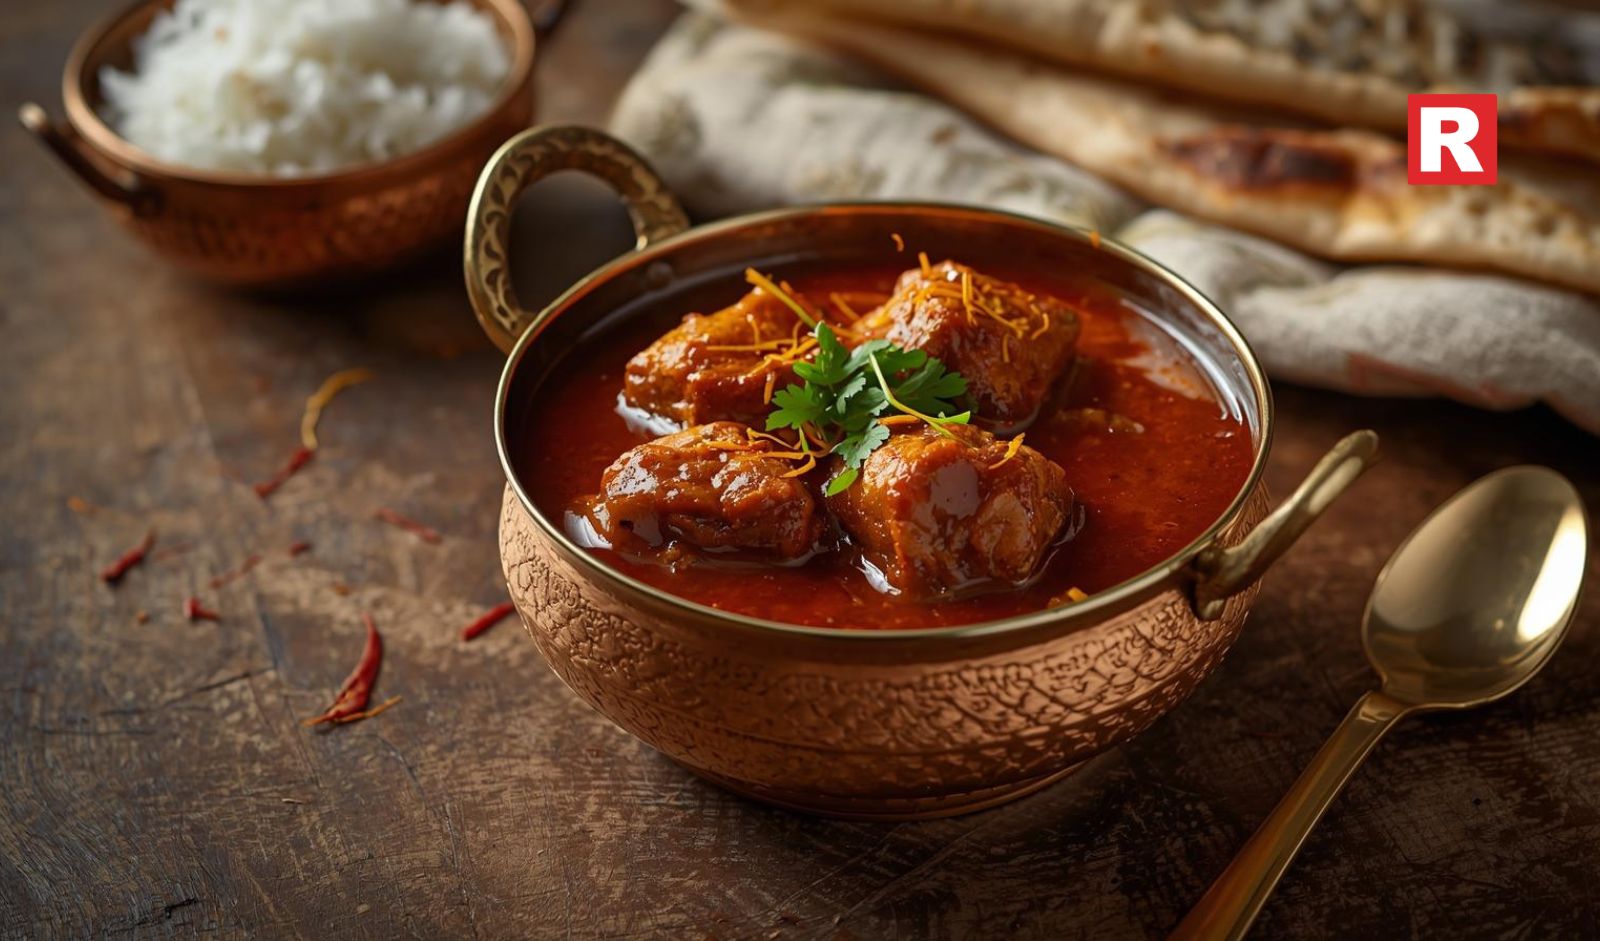
The smell of slow-cooked lamb and simmering spices fills restaurants and homes on a cold winter evening in Kashmir. Kashmir's rich spice traditions and imperial Mughal influence are reflected in this classic cuisine, rogan josh, which is more than just food.
Its vivid crimson hue, melt-in-your-mouth meat, and layered flavors of Kashmiri red chilies, yogurt, and whole spices have made it one of the most well-liked restaurant meals in India.
Here’s how to recreate this restaurant-style dish at home.
About Rogan Josh
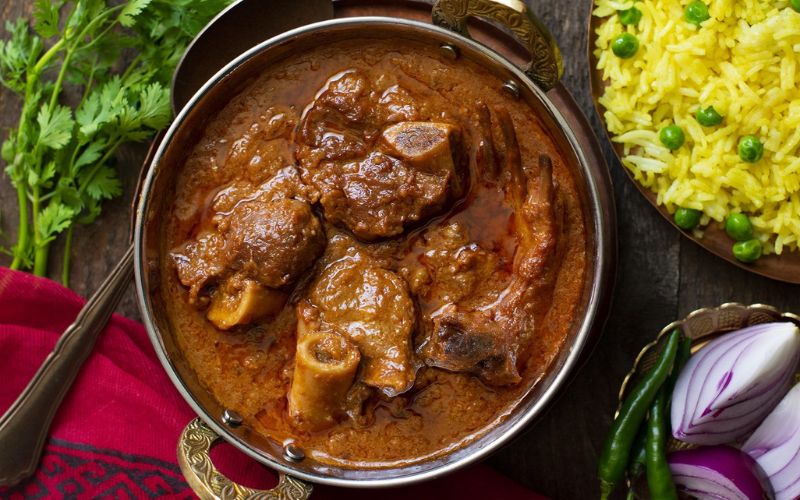
Origin & History: Before becoming the centerpiece of Kashmiri Wazwan, the traditional multi-course Kashmiri feast, rogan josh originated in Persian and Mughal kitchens. "Josh" denotes strong fire or passion, while "Rogan" means oil.
What Sets It Apart: Unlike many Indian curries, Rogan Josh has a unique flavor and a bright red color without being overly spicy because it employs yogurt, Kashmiri red chile, and aromatic spices rather than heavy cream or tomatoes.
Where It's Served: Rogan Josh is now a staple of upscale banquets, casual North Indian restaurants, fine-dining Indian restaurants, and even contemporary QSRs that honor regional Indian cuisine.
Rogan Josh Ingredients
Main Ingredients
- 500g lamb or mutton (bone-in, cut into medium pieces)
- 1 cup yogurt (whisked)
- 2 medium onions (thinly sliced)
- 3–4 tbsp mustard oil (or ghee)
- 2–3 Kashmiri red chilies (whole or powdered)
- 1 tbsp ginger powder
- 1 tbsp fennel powder
- 2–3 green cardamoms
- 2 black cardamoms
- 1-inch cinnamon stick
- 2–3 cloves
- 1 bay leaf
- Salt to taste
Optional / Garnishes (Restaurant-Style Extras)
- Fresh coriander leaves (for garnish)
- Saffron strands soaked in warm milk (for royal touch)
- A dash of cream (used by some restaurants for silkiness)
Restaurant Replacements
For authenticity, restaurants frequently use mustard oil, but for a deeper flavor, you can use ghee instead.
Some casual eateries utilize chicken instead of lamb because it cooks more quickly.
Rogan Josh: Step by Step Method
- Warm mustard oil until it begins to softly smoke. Add the whole spices (bay leaf, cloves, cinnamon, and cardamom) and cook until fragrant.
- Restaurant Tip: To eliminate bitterness, always smoke the mustard oil first.
- Sliced onions should be added and cooked until golden brown. Keep half in the pan and remove the other half for garnish.
- Add the Kashmiri chili powder, fennel powder, and ginger powder. To prevent the spices from burning, stir them quickly.
- Restaurant Tip: To avoid bitterness and to improve color, mix chili powder with a little water before adding.
- After adding the meat pieces, sauté them until they are browned on all sides.
- Reduce the heat, gradually add the whipped yogurt, and stir constantly to prevent curdling.
- Cover, add 2 cups of warm water, and simmer the curry over low heat for 45 to 60 minutes, or until the meat is cooked.
- Serve hot after adjusting the flavor and adding saffron or coriander as a garnish.
Serving & Pairing Ideas
Restaurant plating: Saffron milk or a coriander sprig are frequently placed on top of rogan josh, which is typically served in handi bowls made of copper or brass.
Best Sides: Traditionally served with Kashmiri rice, but it also goes well with jeera rice, naan, or lachha paratha.
Drink Matches: Its spice goes well with a glass of sweet lassi, a strong red wine, or even mild cocktails with citrus undertones.
Nutritional Value (per serving, approx.)
| Nutrient | Value |
|---|---|
| Calories | 380–420 kcal |
| Protein | 25g |
| Carbs | 12g |
| Fat | 28g |
Healthy Swap: Use Greek yogurt instead of cream or trim extra fat from lamb for a lighter version.
Popular Variations
Awadhi Rogan Josh: Makes a richer base by using extra ghee and onions.
Modern Fusion: For modern menus, several restaurants make rogan josh tacos or biryani.
A speedier and lighter version of chicken rogan josh for daily dinners.
Pro Tips for Restaurant-Style Taste
- Use Kashmiri red chili powder at all times; it adds color without being overly spicy.
- Pressure cooking reduces time but compromises flavor depth; slow cooking is essential.
- The two main ingredients of Kashmiri spice mixes are fennel and ginger powders, so don't exclude these.
- Before serving, let the curry rest for at least 15 minutes to enhance its flavor.
FAQs
What is Rogan Josh and where did it originate?
Rogan Josh is a traditional Kashmiri curry made with slow-cooked lamb or mutton in a rich gravy of yogurt, onions, and aromatic spices. It originated in Kashmir and was introduced to India by the Mughals.
Why is Rogan Josh considered a signature Kashmiri dish?
Rogan Josh is considered a Kashmiri signature dish because of its deep red color from Kashmiri chilies, use of warming spices, and slow-cooking method that reflects Kashmiri Wazwan cuisine.
What makes Rogan Josh different from other Indian curries?
Unlike many Indian curries, Rogan Josh uses no cream or heavy tomatoes. Its flavor comes from yogurt, Kashmiri red chilies, and ground spices, giving it a rich yet balanced taste without being overly spicy.
What does “Rogan Josh” mean in English?
“Rogan” means “oil” or “clarified butter” and “Josh” means “intensity” or “heat” in Persian. Together, Rogan Josh translates to “red-hot oil curry” or “spicy, fragrant stew.”
Is Rogan Josh traditionally made with lamb or mutton?
Traditionally, Rogan Josh is prepared with goat meat (mutton in India) or lamb. The slow cooking helps tenderize the meat while infusing it with the rich spices.
What are the key spices used in Rogan Josh?
The main spices in Rogan Josh are Kashmiri red chilies, fennel powder, ginger, cloves, cardamom, cinnamon, and bay leaves. Yogurt is also essential for the creamy texture.
How is restaurant-style Rogan Josh different from homemade versions?
Restaurant-style Rogan Josh often uses clarified butter (ghee) and stock for extra richness, while homemade versions may use less oil and simpler spices.
What can Rogan Josh be served with—rice or bread?
Rogan Josh pairs best with steamed basmati rice, jeera rice, or Kashmiri saffron rice. It also goes well with Indian breads like naan, roti, or paratha.
Is Rogan Josh spicy or mild in flavor?
Rogan Josh is aromatic and flavorful but not overly spicy. Kashmiri chilies give it a bright red color and mild heat rather than intense spiciness.
Can Rogan Josh be made vegetarian or with chicken instead of lamb?
Yes, Rogan Josh can be adapted with chicken, paneer, or vegetables. While the traditional recipe uses lamb or mutton, these variations still carry the same Kashmiri spice base.
Rogan Josh is more than just a curry—it’s a plate of history, culture, and indulgence. Recreate this restaurant-style delicacy at home and bring a piece of Kashmir to your dining table.
Explore more recipes from Kashmiri Cuisine and discover India’s regional food treasures.
-
Chef Jai Prasad of Lush, Renaissance Bengaluru shares his Vayal Nandu Rasam recipe — a peppery South Indian mud crab soup with freshly ground spice…
-
Chef Tapas Manna of ALDILA, Conrad Pune shares his Signature Wild Mushroom Ravioli recipe - handmade pasta, porcini emulsion, Parmesan foam and…
-
Chef Gaurav Mawari of The Square, Novotel Pune shares his Mango Chunda Dahi Kebab recipe — hung curd kebabs stuffed with sweet-tangy mango chunda.
 Alcohol industryThe smartest limited editions will therefore be the ones where the reason for the limitation is as compelling as the bottle itself.
Copyright © 2009 - 2026 Restaurant India.